
Ready to turn everyday scraps into something truly special?
Junk journaling is the perfect way to repurpose old papers, cards, and trinkets into a beautiful keepsake.
In this guide, we’ll walk you through the process of creating a one-of-a-kind journal, from gathering materials to personalizing your pages.
If you’re looking to preserve memories or simply enjoy a creative project, junk journaling offers endless possibilities to express your style.
What is Junk Journaling?
Junk journaling combines recycled materials, such as old papers, books, and fabric, to create handmade books. This craft lets you repurpose items you already have, giving them new life through your personal touch.
These homemade books differ from regular notebooks in that they have no strict rules. You can mix different materials, add photos, write notes, and include mementos to tell your story in a way that shows your style.
This eco-friendly craft serves as both an artistic outlet and a calming hobby. Whether you use your junk journal to record thoughts, preserve memories, or plan, it offers a creative way to express yourself while being kind to the environment.
Materials Required
To create your junk journal, you’ll need to gather a few basic supplies. Most of these items can be found around your home or purchased at craft stores:
| Material | Description |
|---|---|
| Scrapbook Paper (12×12) | Used for the journal cover, with a pattern of your choice. |
| Glue Stick or Liquid Glue | To attach the inside paper to the cover. |
| Embroidery Thread | For binding the journal with the figure-of-eight stitch. |
| Tearable Paper | For adding to the inside or for extra texture (e.g., packaging paper, brown paper). |
| Paper Clips | To secure pages in place while binding. |
| Vellum or Translucent Paper (Optional) | For added texture and layers in the journal. |
| Decorative Elements (Optional) | Such as stamps, washi tape, or stickers to personalize the cover. |
| Corner Rounder (Optional) | For rounding the corners of the journal for a polished look. |
Tools Required
- Needle: Used for sewing the journal together.
- Scissors: For cutting the paper and trimming the pages.
- Ruler (Optional): For measuring and ensuring neat, straight cuts.
Step-by-Step Guide to Making Your Junk Journal
Creating a junk journal transforms everyday items into a personal keepsake, giving new life to materials you already have at home.
Step 1: Prepare the Cover
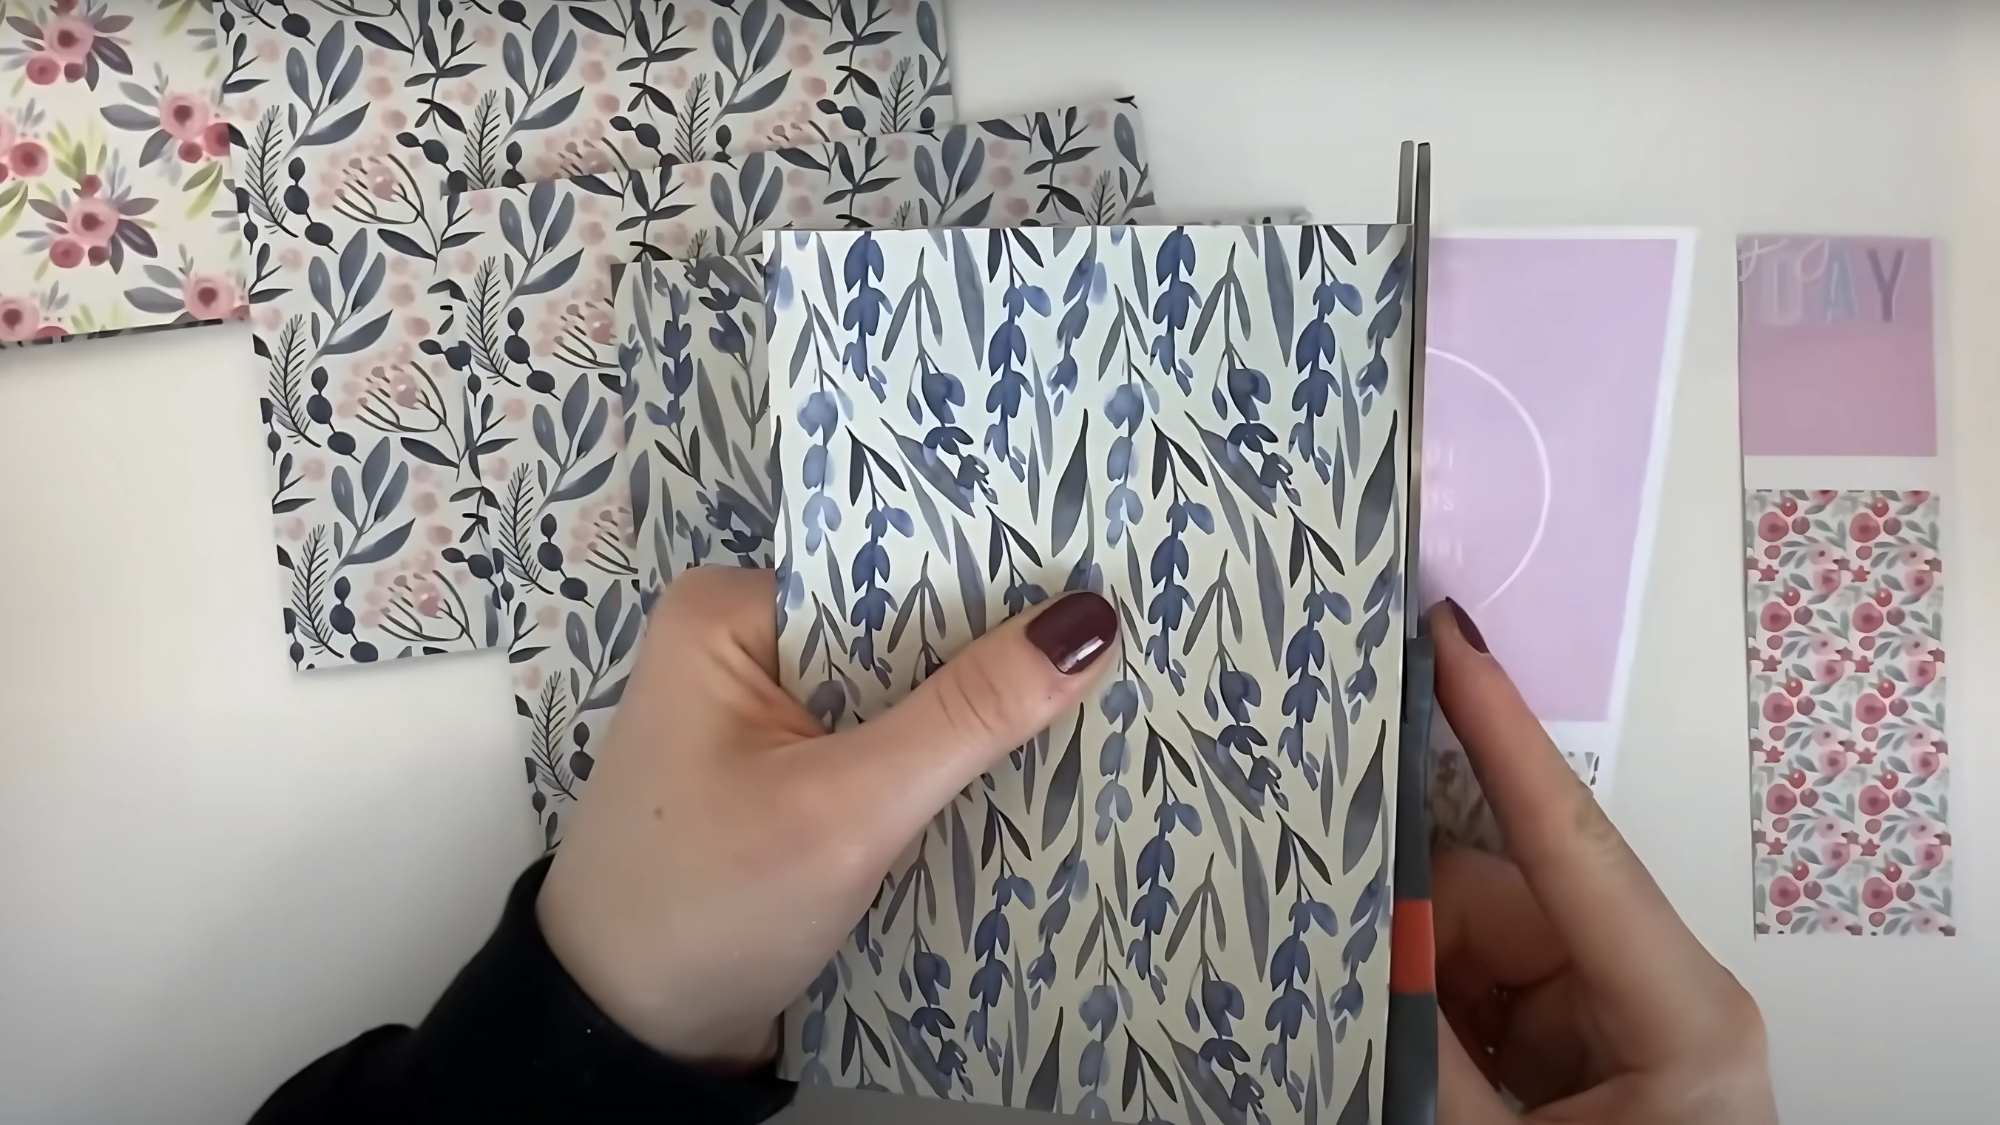
Choose your cover material – cardstock, cereal box, or book cover – and cut to size (5×7 or 6×8 inches works well). For cardboard, cut two equal pieces.
Cover with decorative paper or fabric using glue. After drying, score a line half an inch from the spine to help your journal open properly.
Step 2: Gather Your Pages

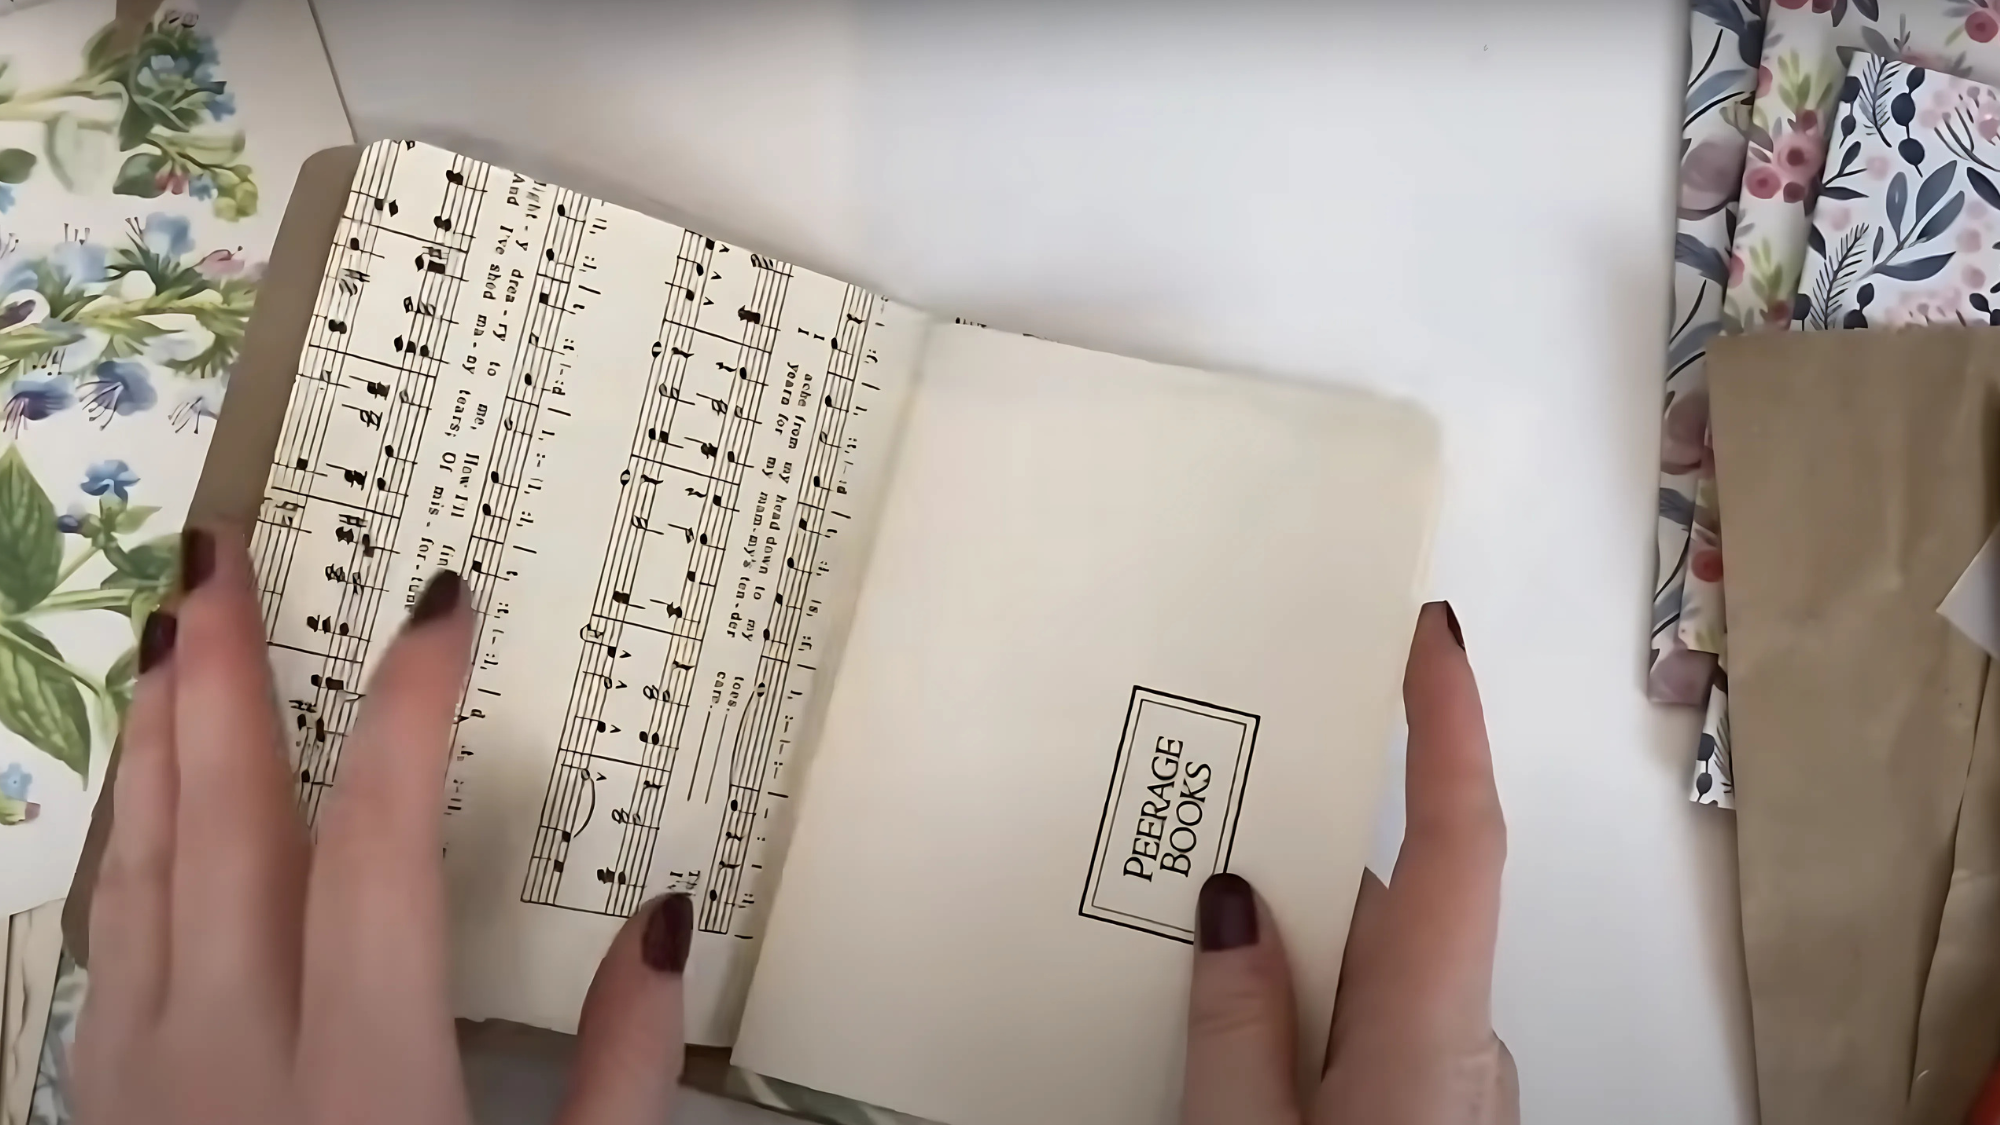
Gather various materials for your journal’s interior, including book pages, scrapbook paper, grocery bags, sheet music, envelopes, and maps.
Fold each in half to make pages, then trim slightly smaller than your cover. Arrange papers in a pleasing order, mixing textures and colors for visual interest, or group similar papers together.
Step 3: Attach the Inside Paper to the Cover
Cut decorative paper slightly smaller than your cover. Apply glue to the inside of the cover and press the paper in place, smoothing out any wrinkles. This step completes the look and strengthens the cover.
Add pockets using glued envelopes or folded paper on the inside covers. Let the pages dry fully before continuing to prevent them from sticking.
Step 4: Bind the Journal
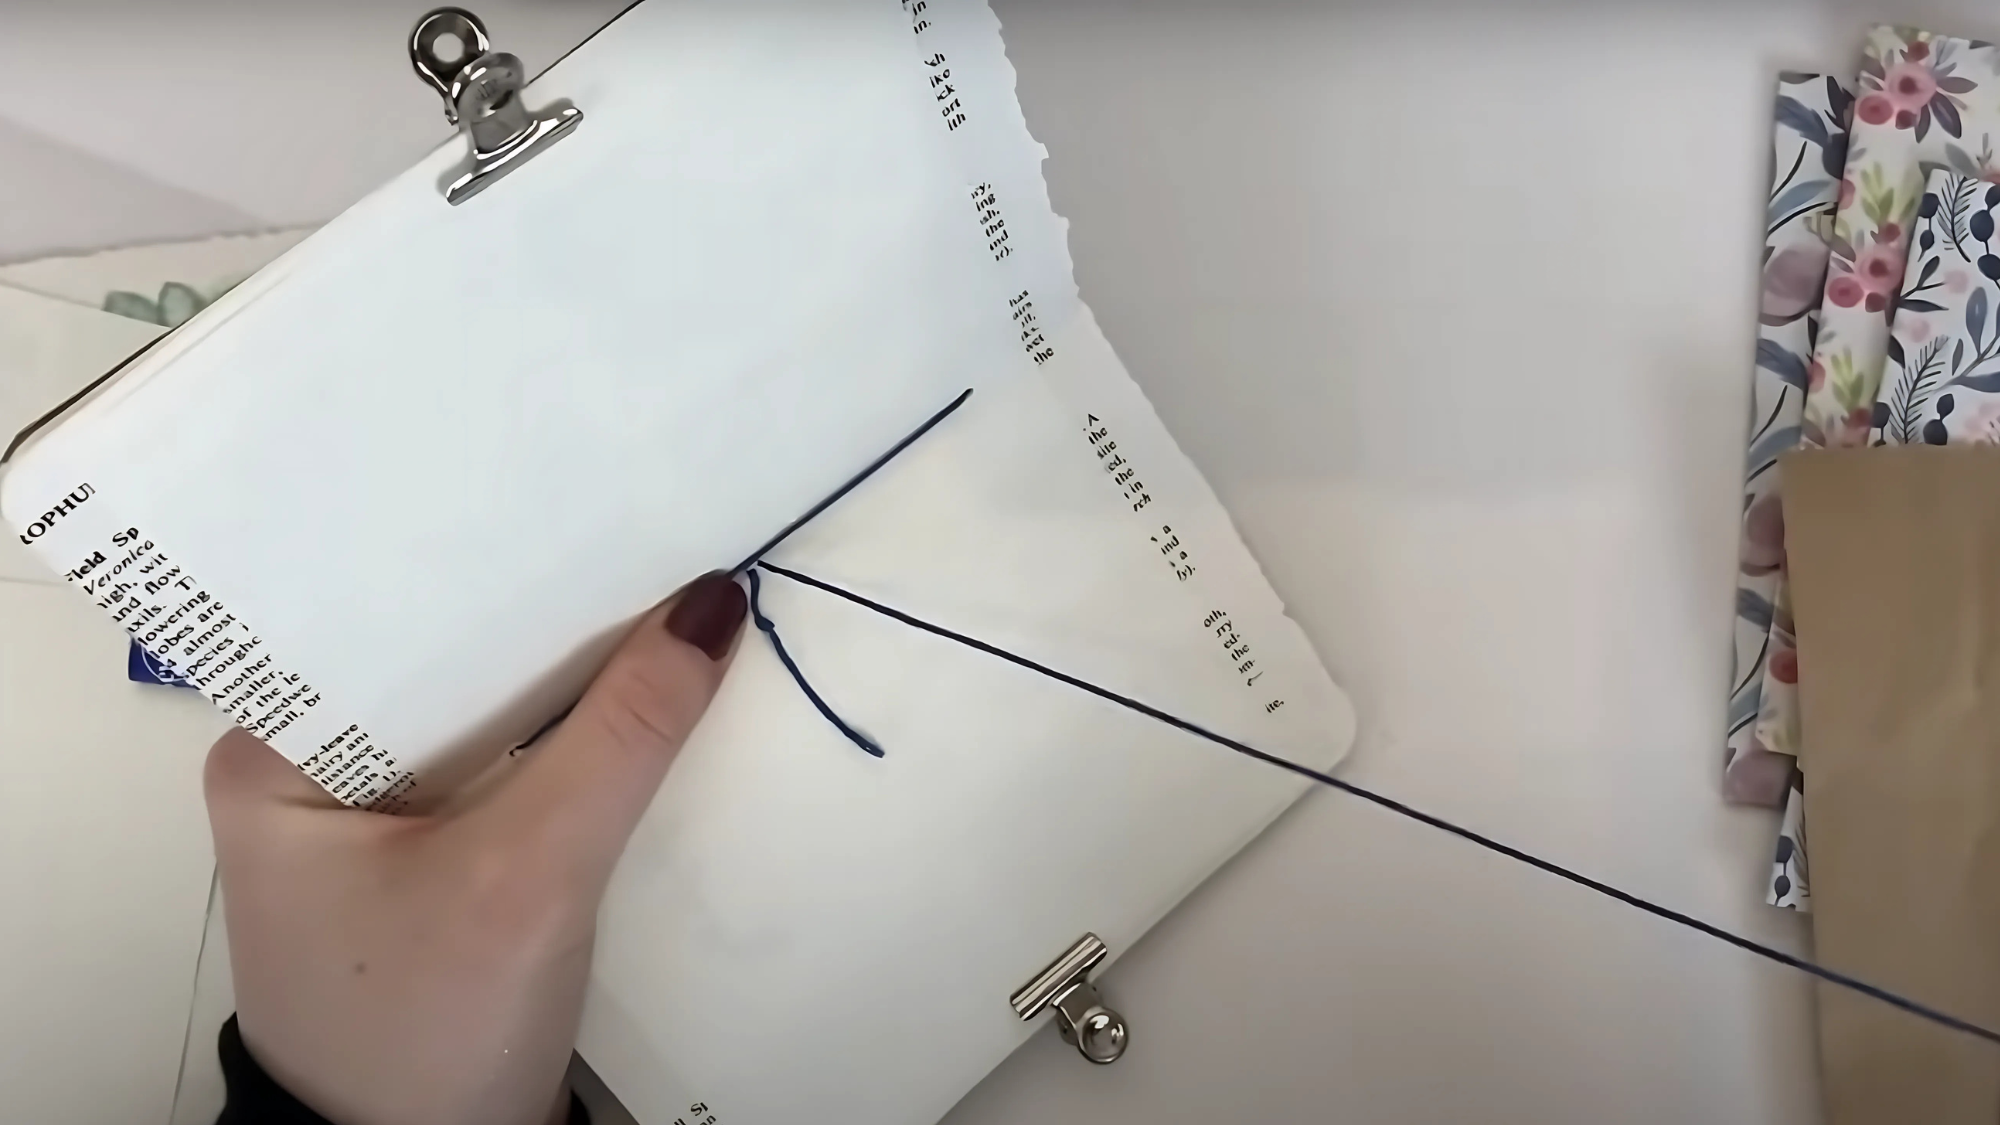
Stack covers and pages with edges aligned. Secure with binder clips or clothespins. Mark 3-5 evenly spaced holes along the spine and punch them with an awl, needle, or hole punch.
Thread your needle with embroidery thread or waxed string. Begin at the center hole from the outside, leaving a tail. Sew through all holes in a figure-8 pattern. Finish by tying a secure knot.
Step 5: Personalize the Journal
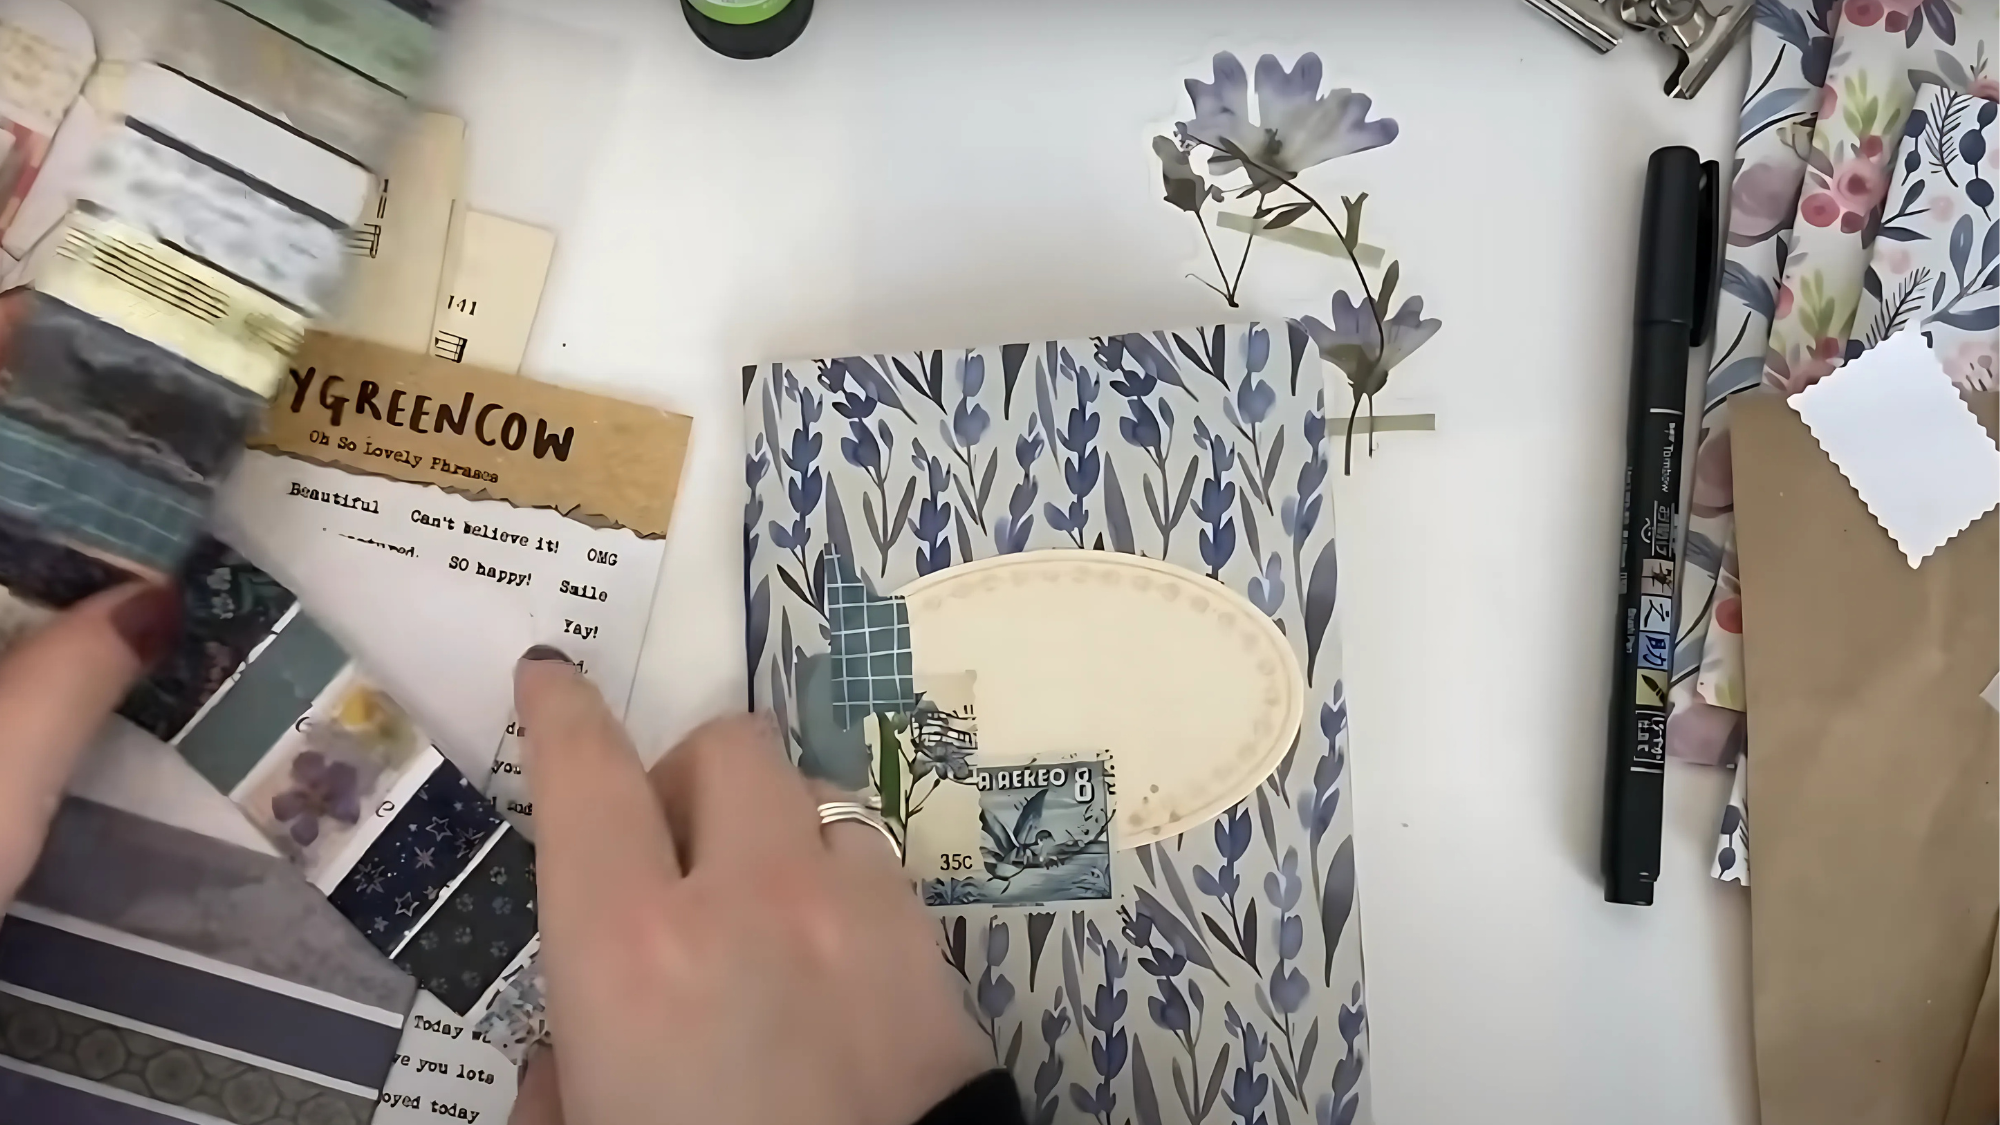
Personalize your journal with stamps, stickers, drawings, or collage materials on the cover. Inside, create themed pages using photos, quotes, and mementos to tell your story.
Use washi tape to secure items or add color to edges. Make tabs with folded decorative paper. Create storage pockets from envelopes or folded paper.
Remember, this is your creation. Decorate with elements that bring you joy.
Video Tutorial
For more information, check out this video tutorial by Megjournals.
4 Different Ideas to Create a Different Junk Journal
Make your junk journal truly special by incorporating materials with personal significance and combining various textures, colors, and formats.
1. Vintage-Themed Junk Journal
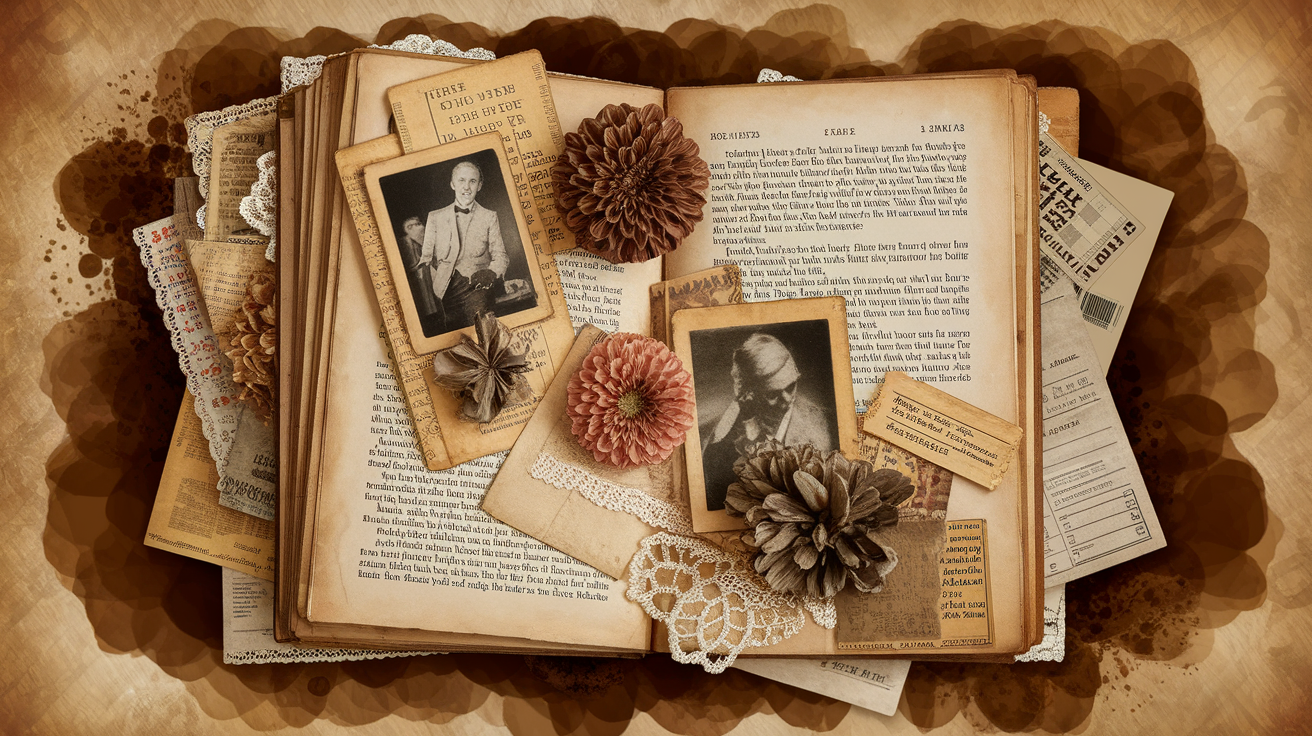
Create an old-time feel with yellowed book pages, postage stamps, and sepia-toned photos. Add lace trim, dried flowers, and tea-stained paper for texture.
Include reproductions of old letters, tickets, or advertisements to complete the historical mood. Brown ink stamps and coffee-dipped paper edges add to the aged effect.
2. Nature-Inspired Junk Journal

Collect and press leaves, flowers, and ferns to include between pages. Use earth-tone papers and plant-based dyes for backgrounds.
Add sketches of wildlife or pressed petals. Include seed packets, garden tags, or nature quotes throughout. Twine or hemp cord works well for binding this style of journal.
3. Travel Junk Journal
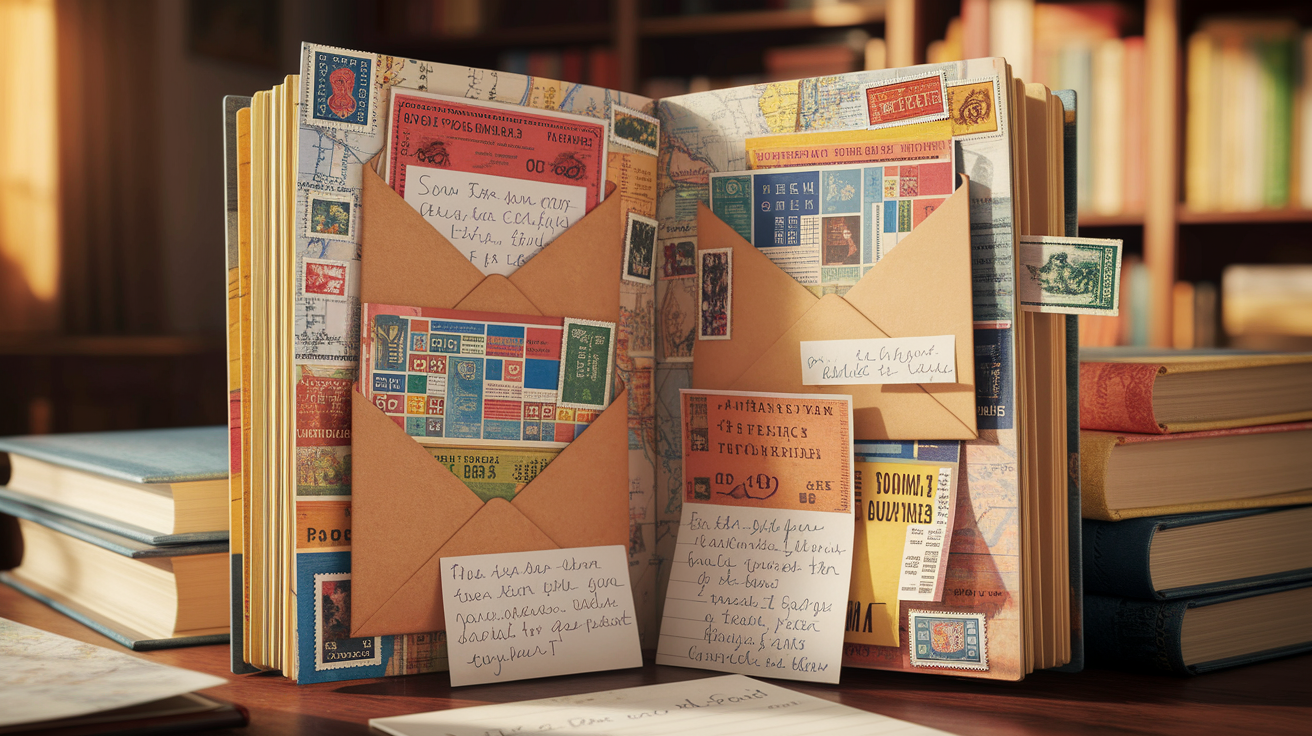
Incorporate maps, ticket stubs, and postcards from your trips. Add small envelopes to hold currency or metro tickets.
Use stamps from different countries as decorative elements. Include short notes about special moments or favorite meals. Add hotel stationery or brochures cut into decorative shapes.
4. Memory Journal
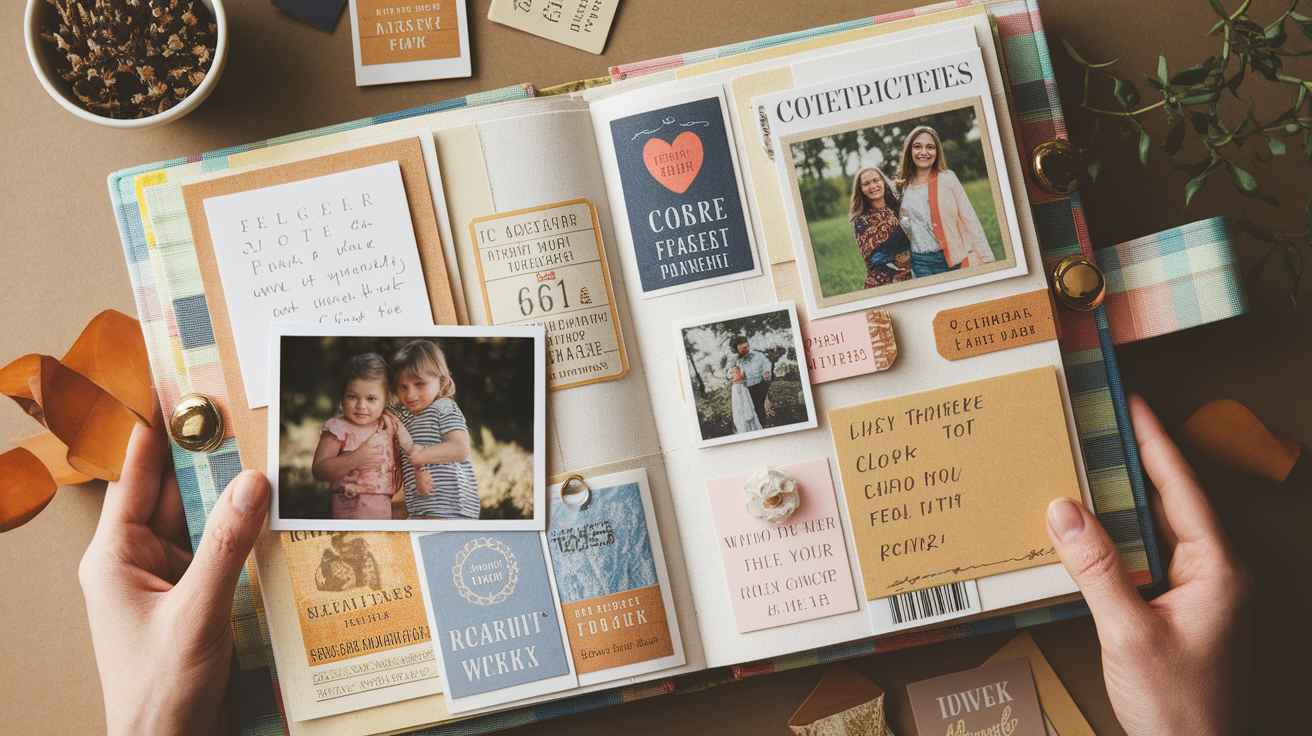
Fill with family photos, handwritten notes, and small keepsakes. Include birthday cards, concert tickets, or other mementos from important events.
Use fabrics from meaningful clothing items as page backgrounds. Add pockets for storing letters or other flat items you want to preserve.
Conclusion
Junk journaling is more than just a craft; it’s an opportunity to turn ordinary items into meaningful, personalized art.
By following the simple steps outlined in this guide, you’ve learned how to make your custom journal that creatively tells your story.
Don’t worry about perfection; let your imagination lead the way. Ready to start your junk journaling project?
Gather your materials and get crafting today! And for more fun DIY ideas, explore our other guides to keep the creativity flowing.
Looking for more ideas? Check out our other DIY Project guides to create a space that’s uniquely yours.
Frequently Asked Questions About Junk Journaling
Can I Make a Junk Journal without Using a Sewing Machine?
Yes! Use rings, binder clips, staples, or accordion-folding instead. Ribbon weaving through punched holes works well, too.
How Many Pages Should I Include in My Junk Journal?
Start with 20-40 sheets for sewn journals. Choose based on your binding method and material thickness.
What Types of Glue Work Best for Junk Journals?
Glue sticks work for basic paper. Liquid craft glue for heavier items. PVA glue for covers.
