Tired of costly store-bought cushion covers that don’t quite match your space? Making your own cushion covers is simpler than you might think.
With just basic sewing skills, you can create custom covers that fit perfectly and complement your style. The secret?
An invisible zipper that gives a clean, professional finish. No more settling for generic options or paying premium prices for custom work.
By following a few straightforward steps, you’ll create cushion covers so polished that friends will ask where you bought them.
Ready to change your living space with a touch of handmade charm? Let’s get started.
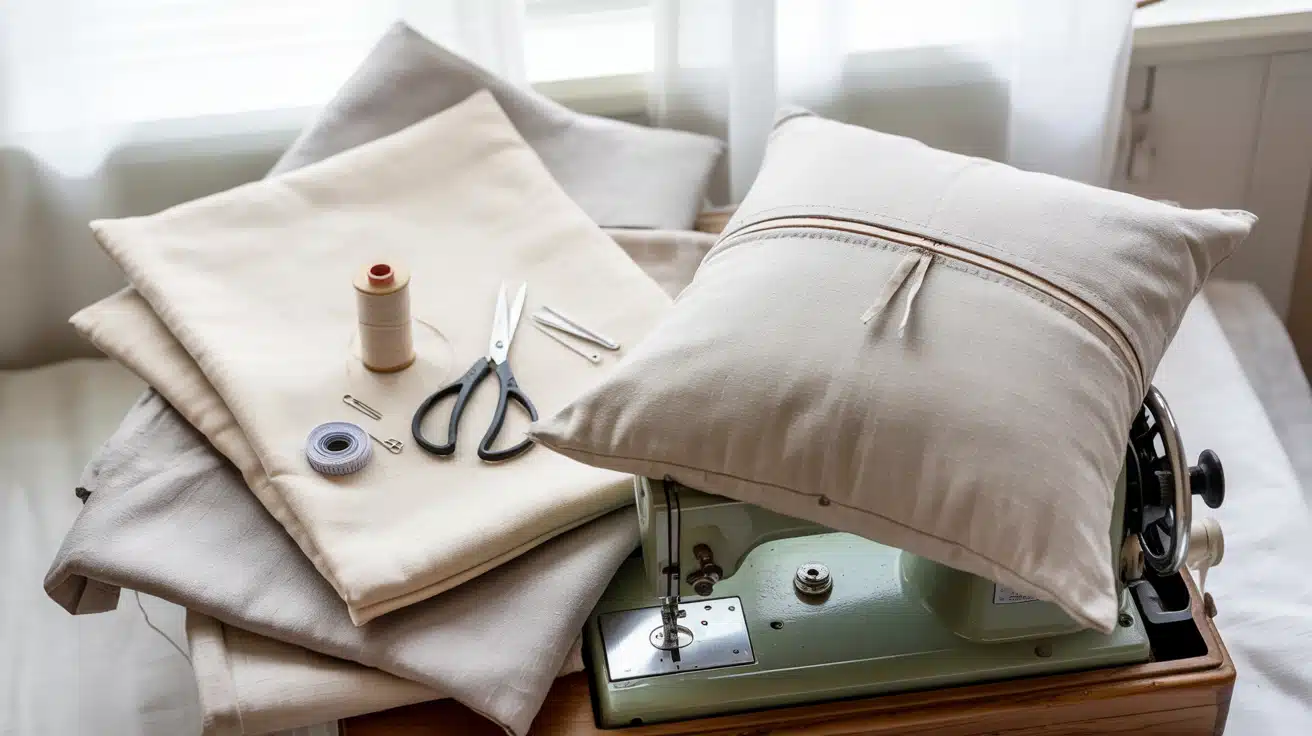
Materials and Tools Required
Before starting your cushion cover project, gather all necessary supplies.
Being prepared makes sewing smoother and more enjoyable, letting you focus on crafting beautiful, custom home covers.
Materials Required
The right materials form the foundation of your cushion cover project. Quality fabric and proper-sized zippers ensure your covers will look great and last for years to come.
Here’s what you’ll need:
| Materials | Dimensions/Specifications |
|---|---|
| Fabric | 1.5 yards for two 20-inch cushions |
| Invisible zipper | Same length as cushion size (20 inches) |
| Pillow forms | Your desired size (example: 20 inches) |
| Thread | Matching color to your fabric |
Tools Required
The right tools make all the difference in achieving professional results. A basic sewing machine is essential, but specialized items help create clean cushion covers with nearly invisible zippers.
Here’s what you’ll need:
| Tools | Purpose |
|---|---|
| Sewing machine | For stitching the cushion covers |
| Invisible zipper foot | For clean zipper installation (preferred) |
| Regular zipper foot | Alternative if invisible zipper foot is unavailable |
| Scissors | For cutting fabric and trimming corners |
| Pins | To secure fabric while sewing |
| Iron and ironing board | For pressing seams and preparing zipper |
| Measuring tape or ruler | For accurate measurements |
| Chopstick | For pushing out corners after turning |
| Serger or zigzag stitch | For finishing raw edges |
Step by Step Guide
Follow these instructions to create professional cushion covers with invisible zippers. This method yields clean, tailored results that make your cushions look store-bought.
Take your time with each step, and soon you’ll have beautiful covers to refresh your living space.
Step 1: Cut Your Fabric
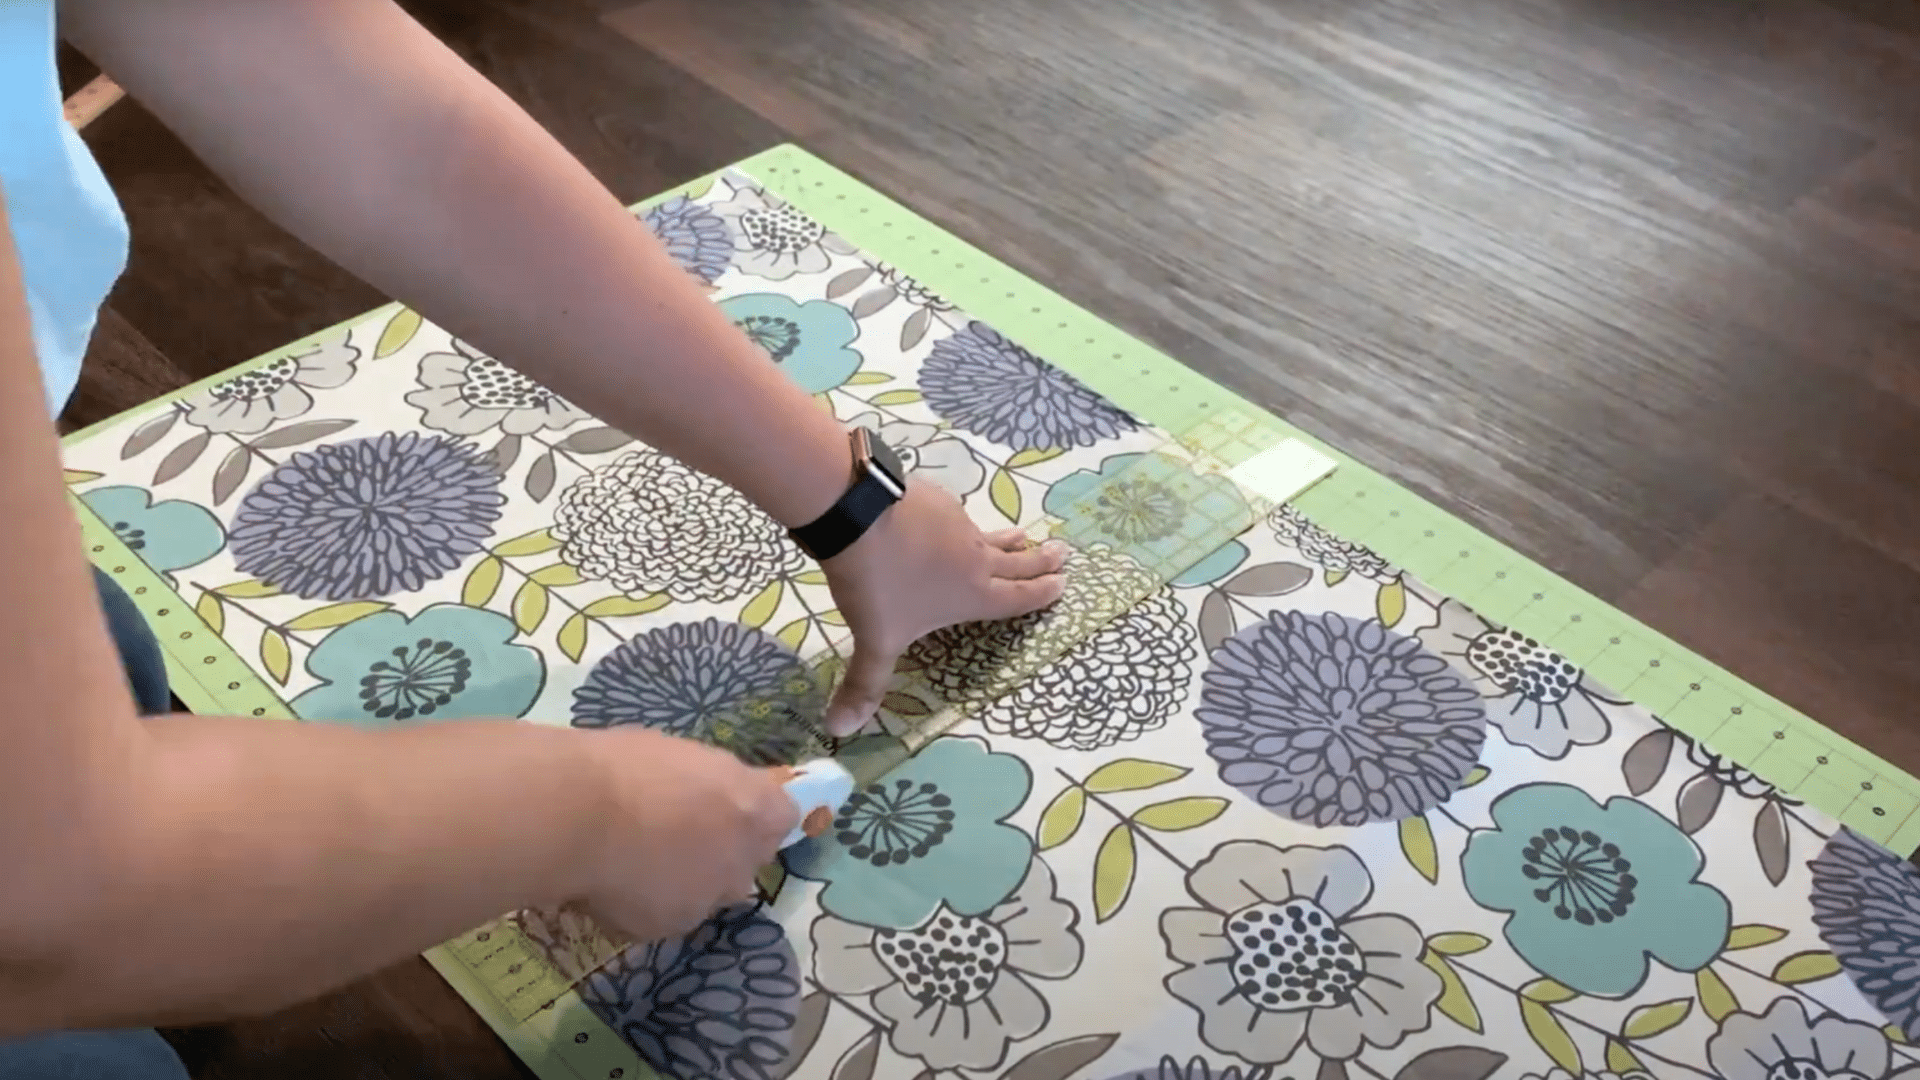
Cut squares that match the exact size of your pillow form (for example, 20 inches x 20 inches).
If using patterned fabric, center the pattern on each square for a more professional look. For two cushion covers, cut four squares total.
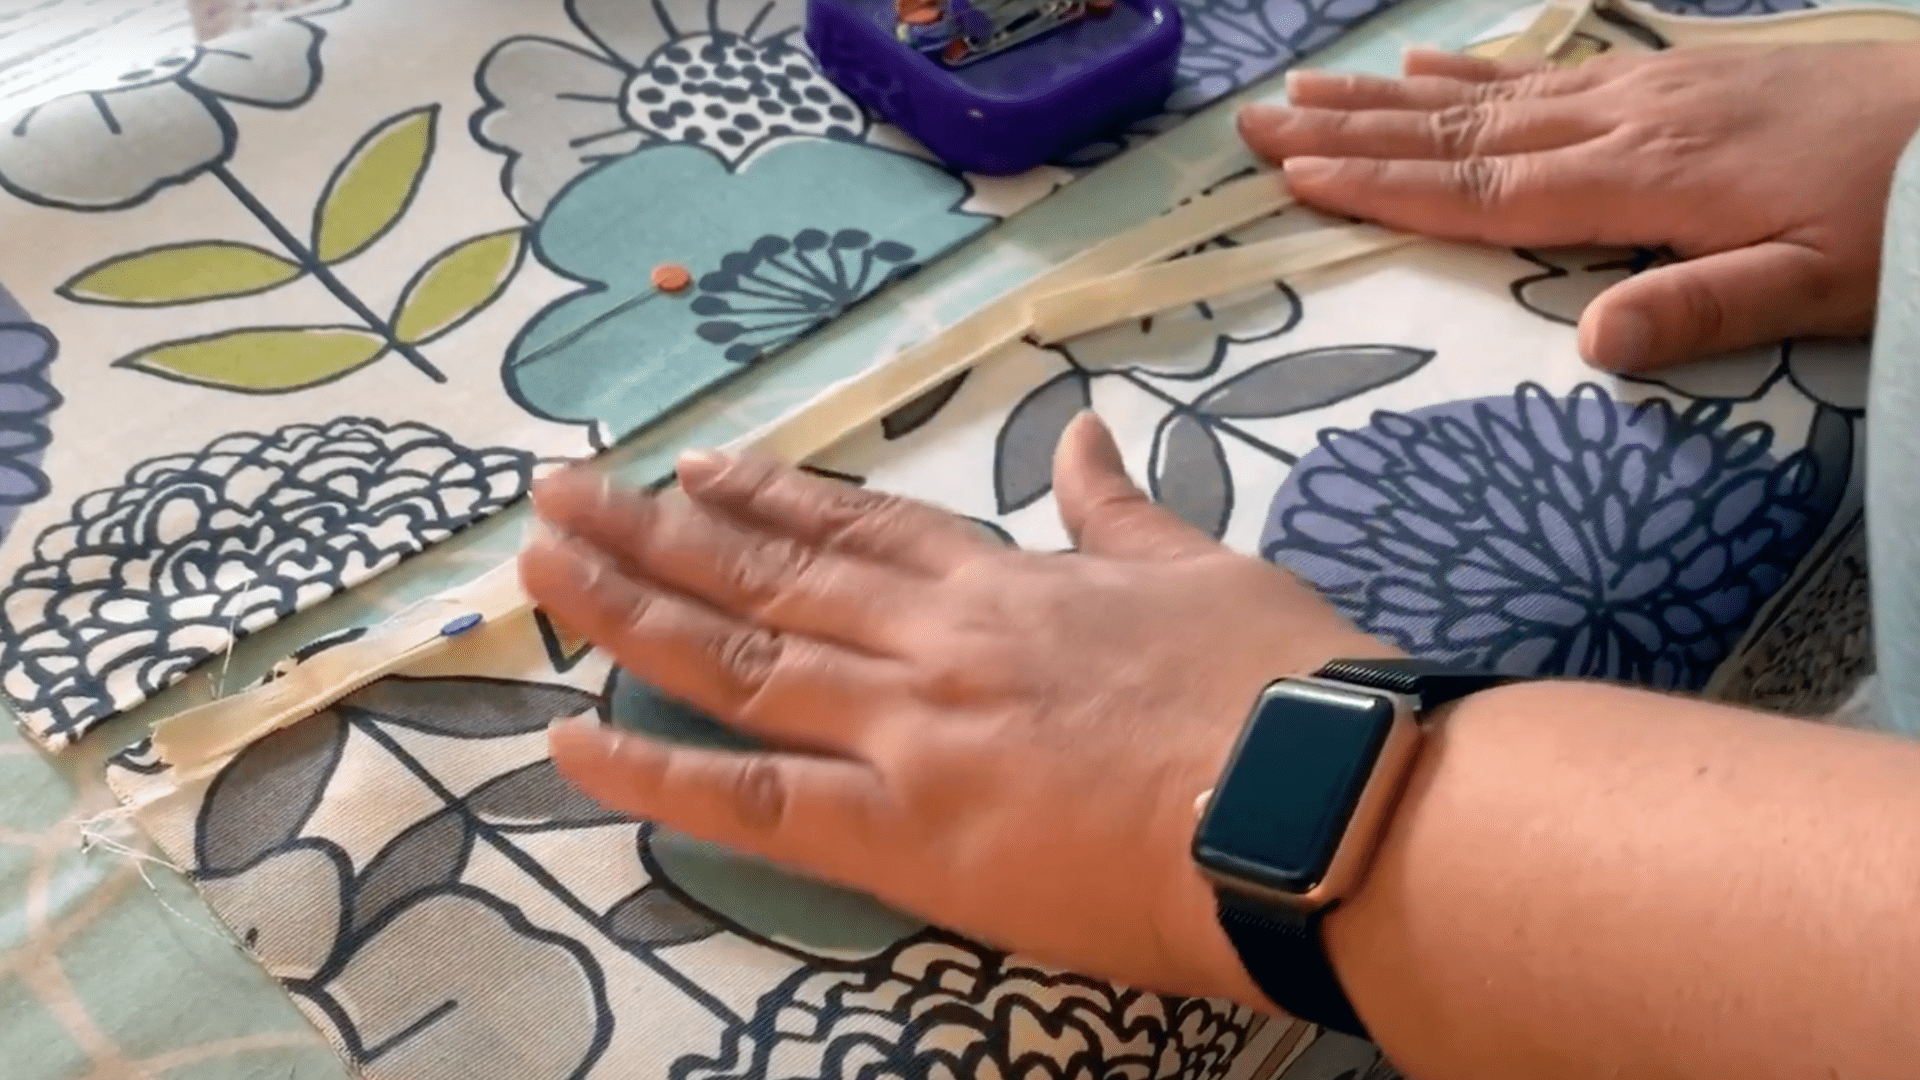
Step 2: Prepare for the Zipper
Finish one edge of each fabric square using a serger or zigzag stitch. This edge is where you’ll attach the zipper.
Finishing this edge prevents loose threads from getting caught in the zipper teeth over time, which would cause jamming and an untidy appearance. The other three edges don’t need finishing yet.
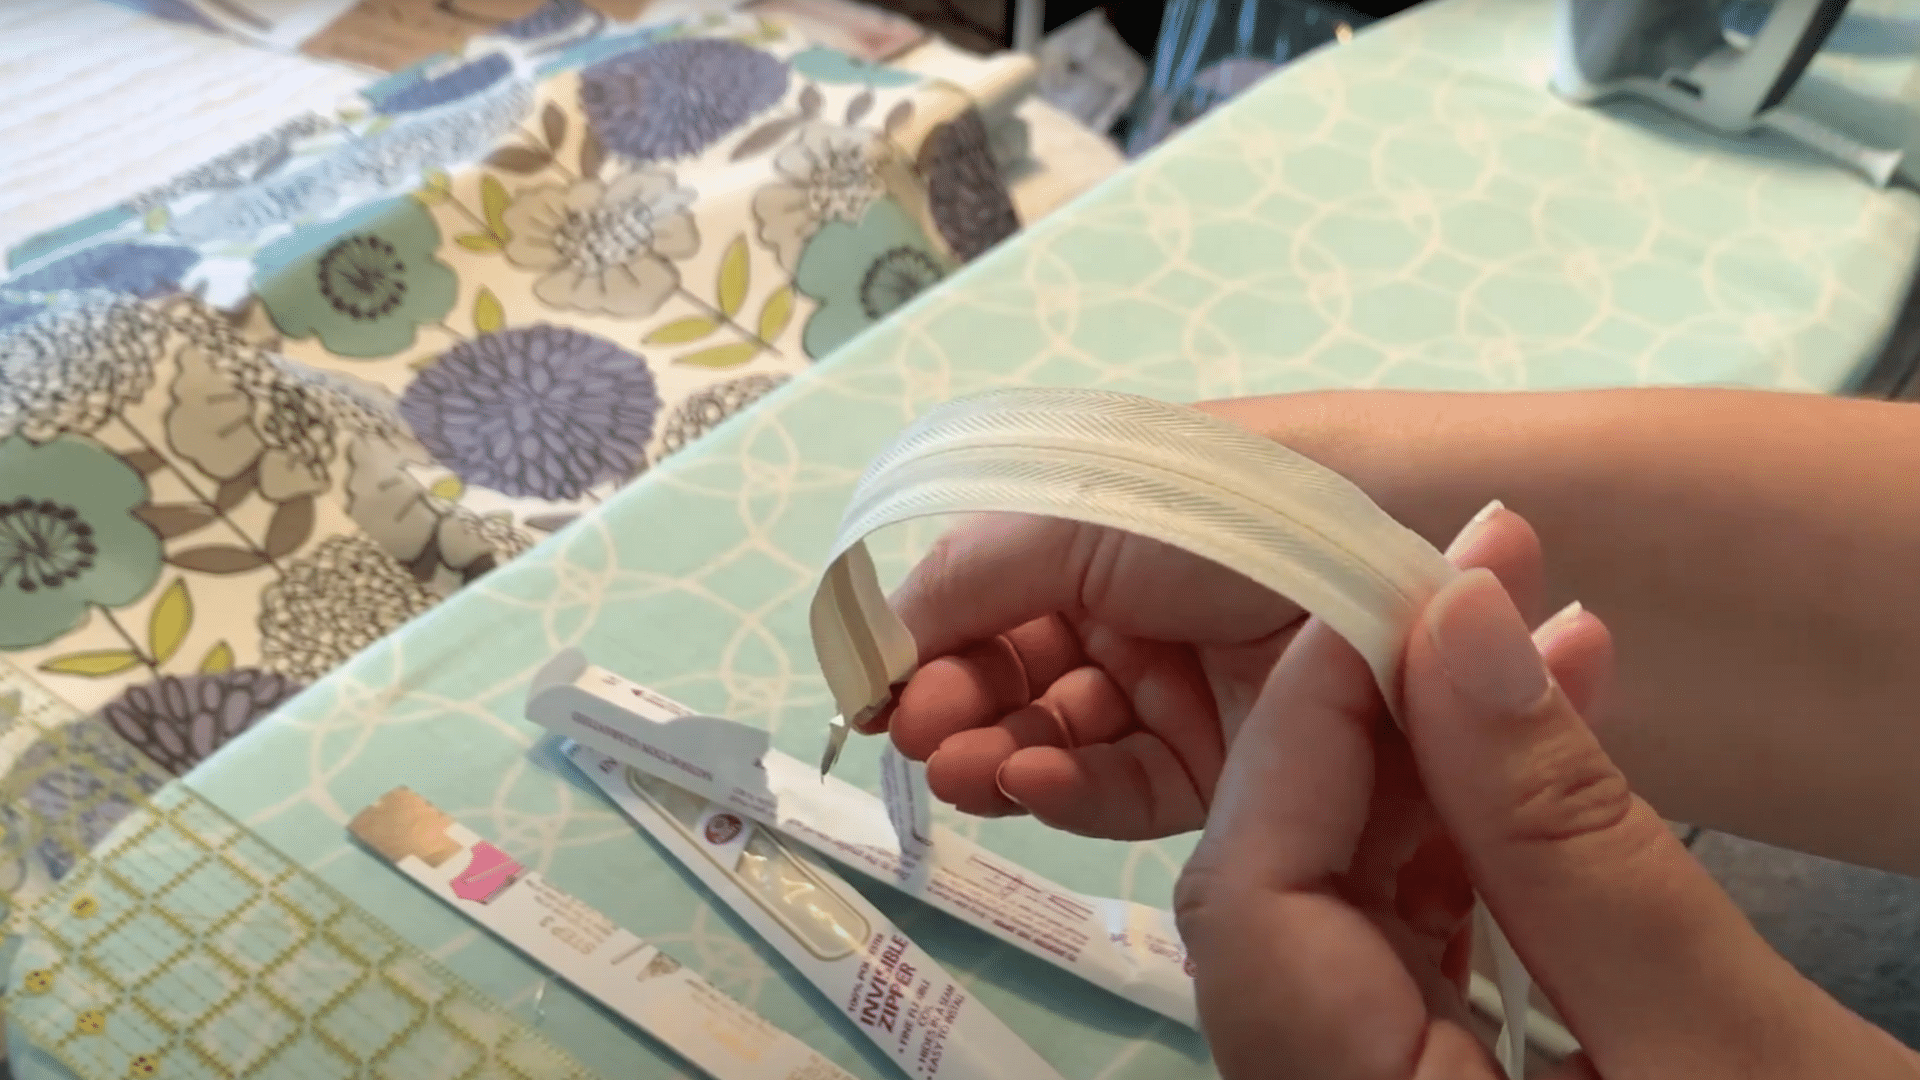
Step 3: Prepare the Invisible Zipper
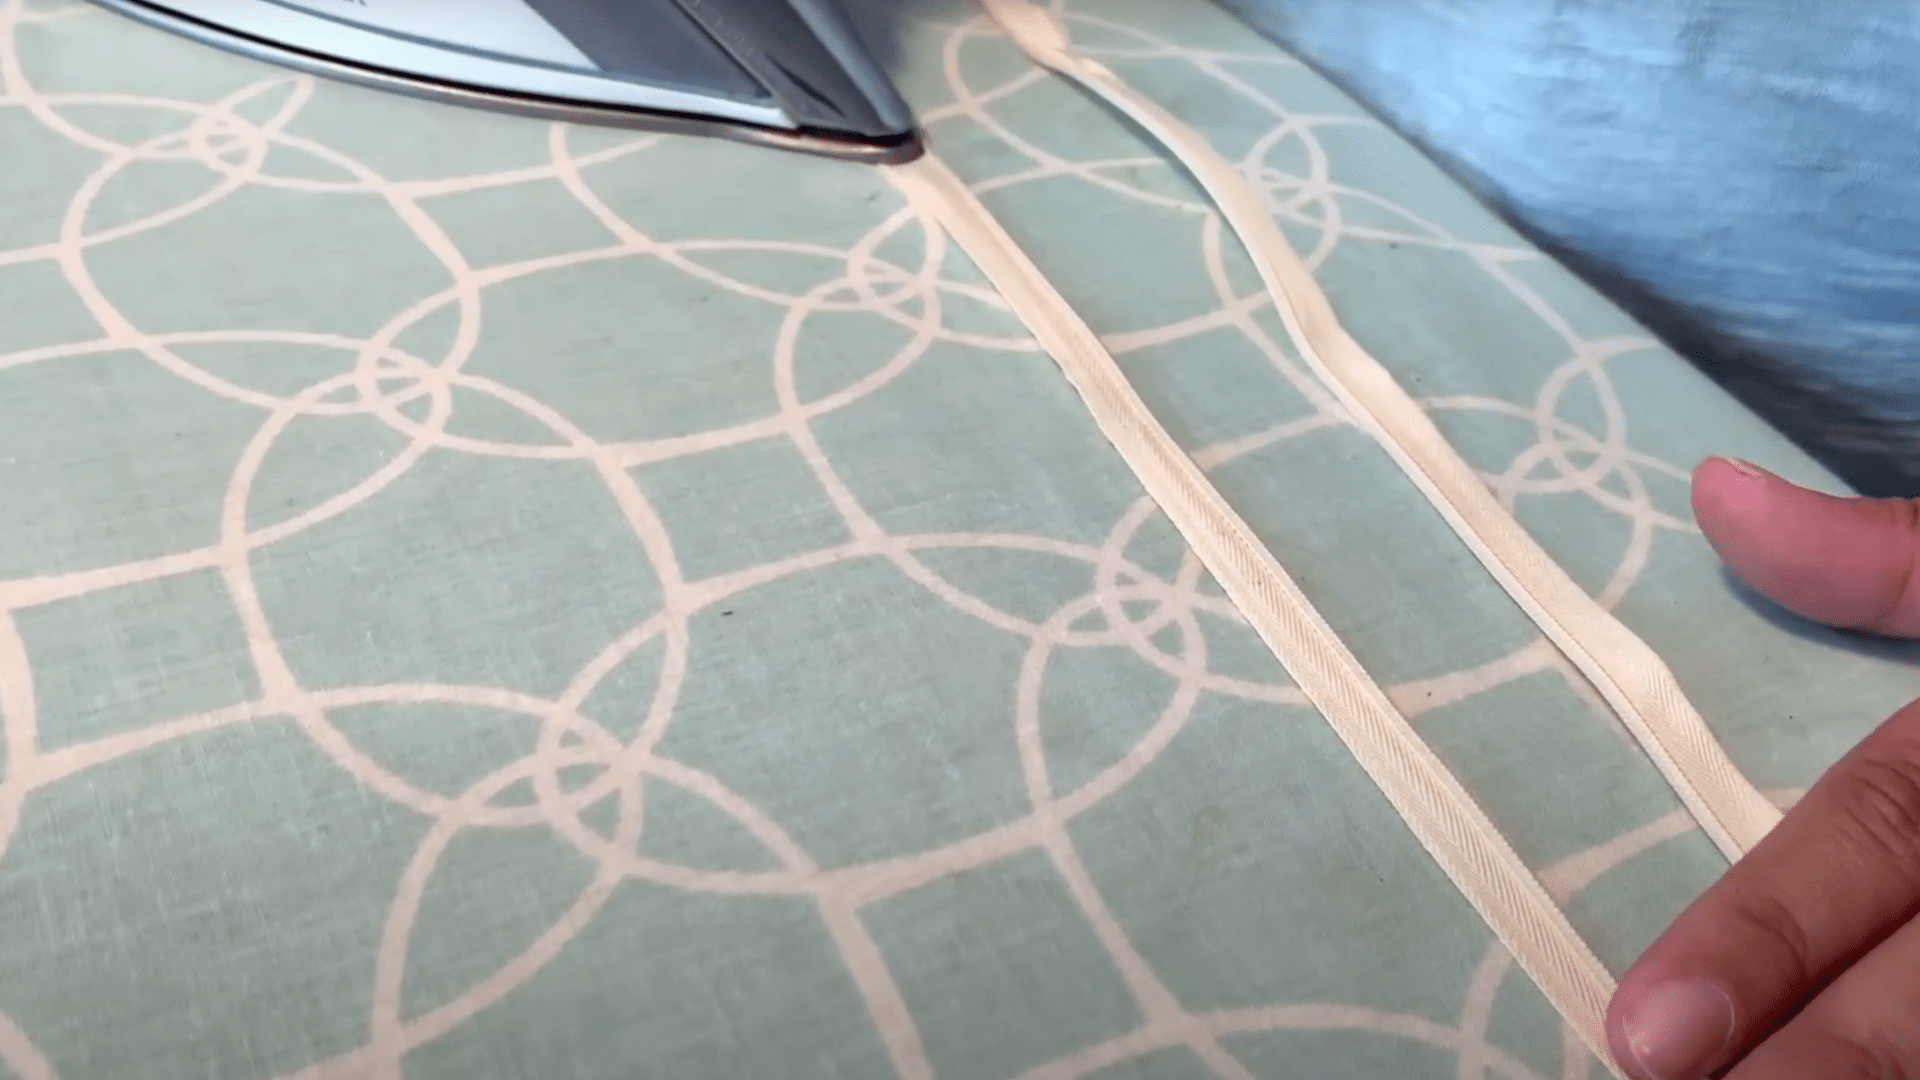
Unroll the teeth of the invisible zipper by gently pressing them with an iron set to medium heat. Use quick, light pressure along the zipper’s length to flatten the coiled teeth.
Be careful not to hold the iron in one spot for too long to avoid melting the plastic. This step helps you stitch closer to the teeth for a truly invisible finish.
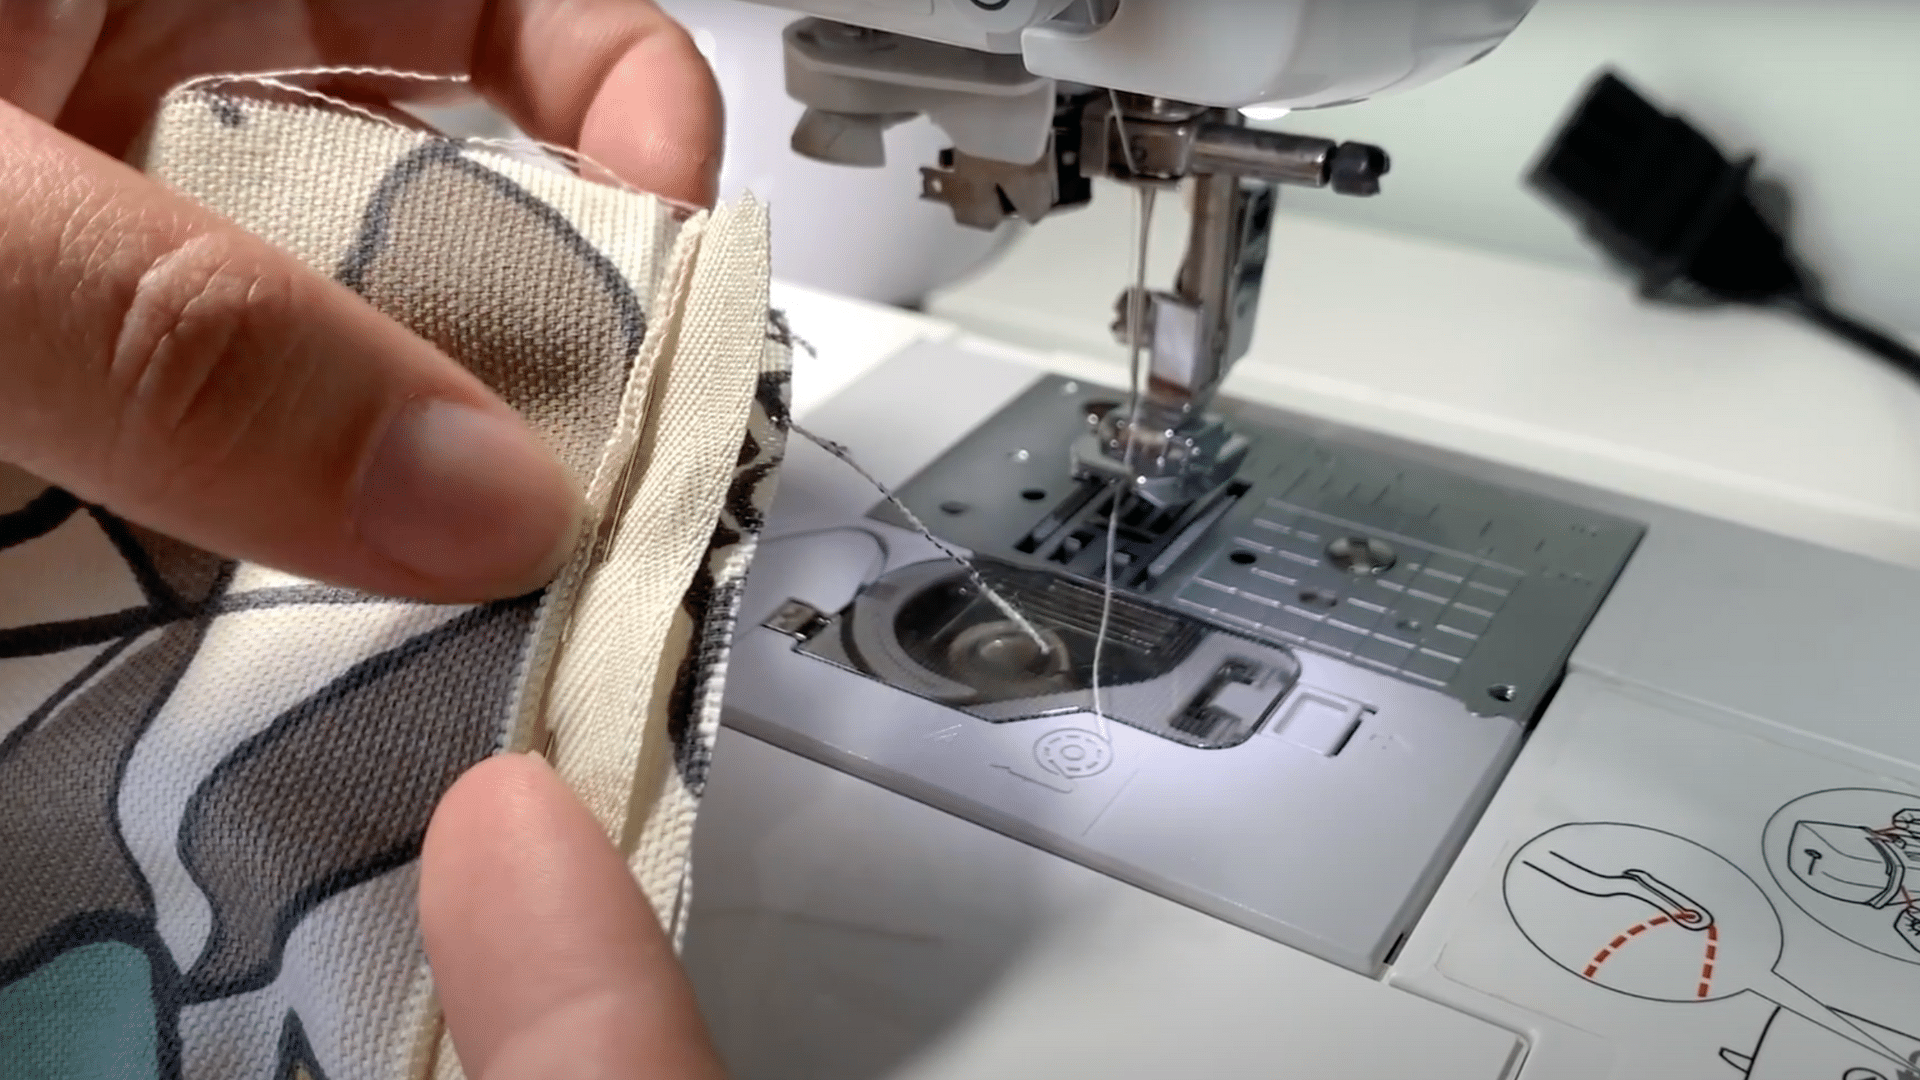
Step 4: Attach the First Side of the Zipper
Place the zipper right side down on the right side of one fabric square.
Line up the zipper tape with the finished edge of the fabric. Position the zipper stop about a finger-width from the top edge.
If using an invisible zipper foot:
-
- Place the unrolled teeth in the left channel of the foot.
- Stitch close to the teeth.
If using a regular zipper foot:
-
- Move your needle to the left position.
- Stitch as close to the teeth as possible.
Step 5: Attach the Second Side of the Zipper
Close the zipper to check alignment, then open completely. Place the second fabric square right side against the free zipper side, ensuring both squares align at the top.
Pin in place with pins pointing toward your sewing direction. Start from the opposite end this time, maintaining the same fabric orientation with the edge on your right.
Step 6: Check Your Zipper and Sew Remaining Sides
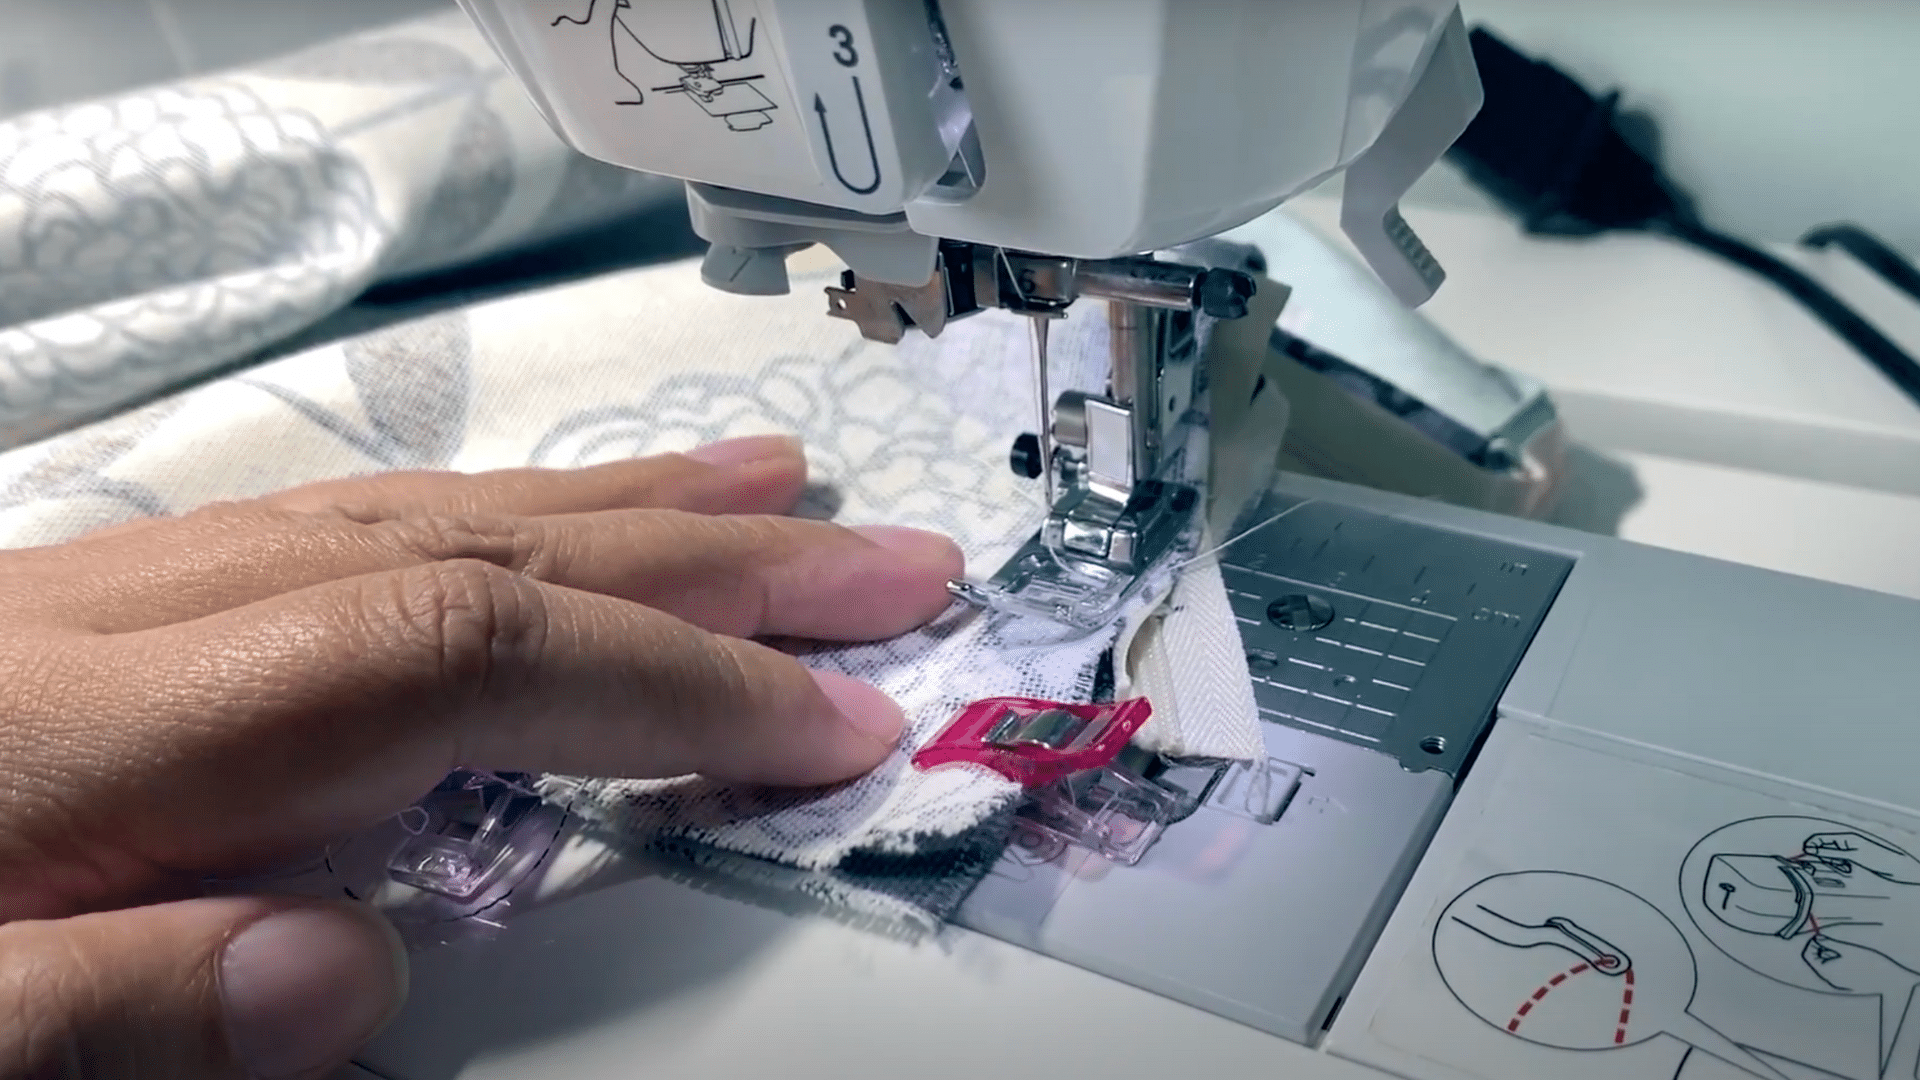
After attaching both sides, zip closed to ensure only the slider is visible. Open the zipper at least a hand-width, then switch to your regular presser foot.
Fold fabric right sides together with the zipper inside, positioning zipper tape upward for cleaner corners. Sew around the three remaining sides, stopping with the needle down at corners to pivot 90 degrees cleanly.
Step 7: Finish Your Cushion Cover
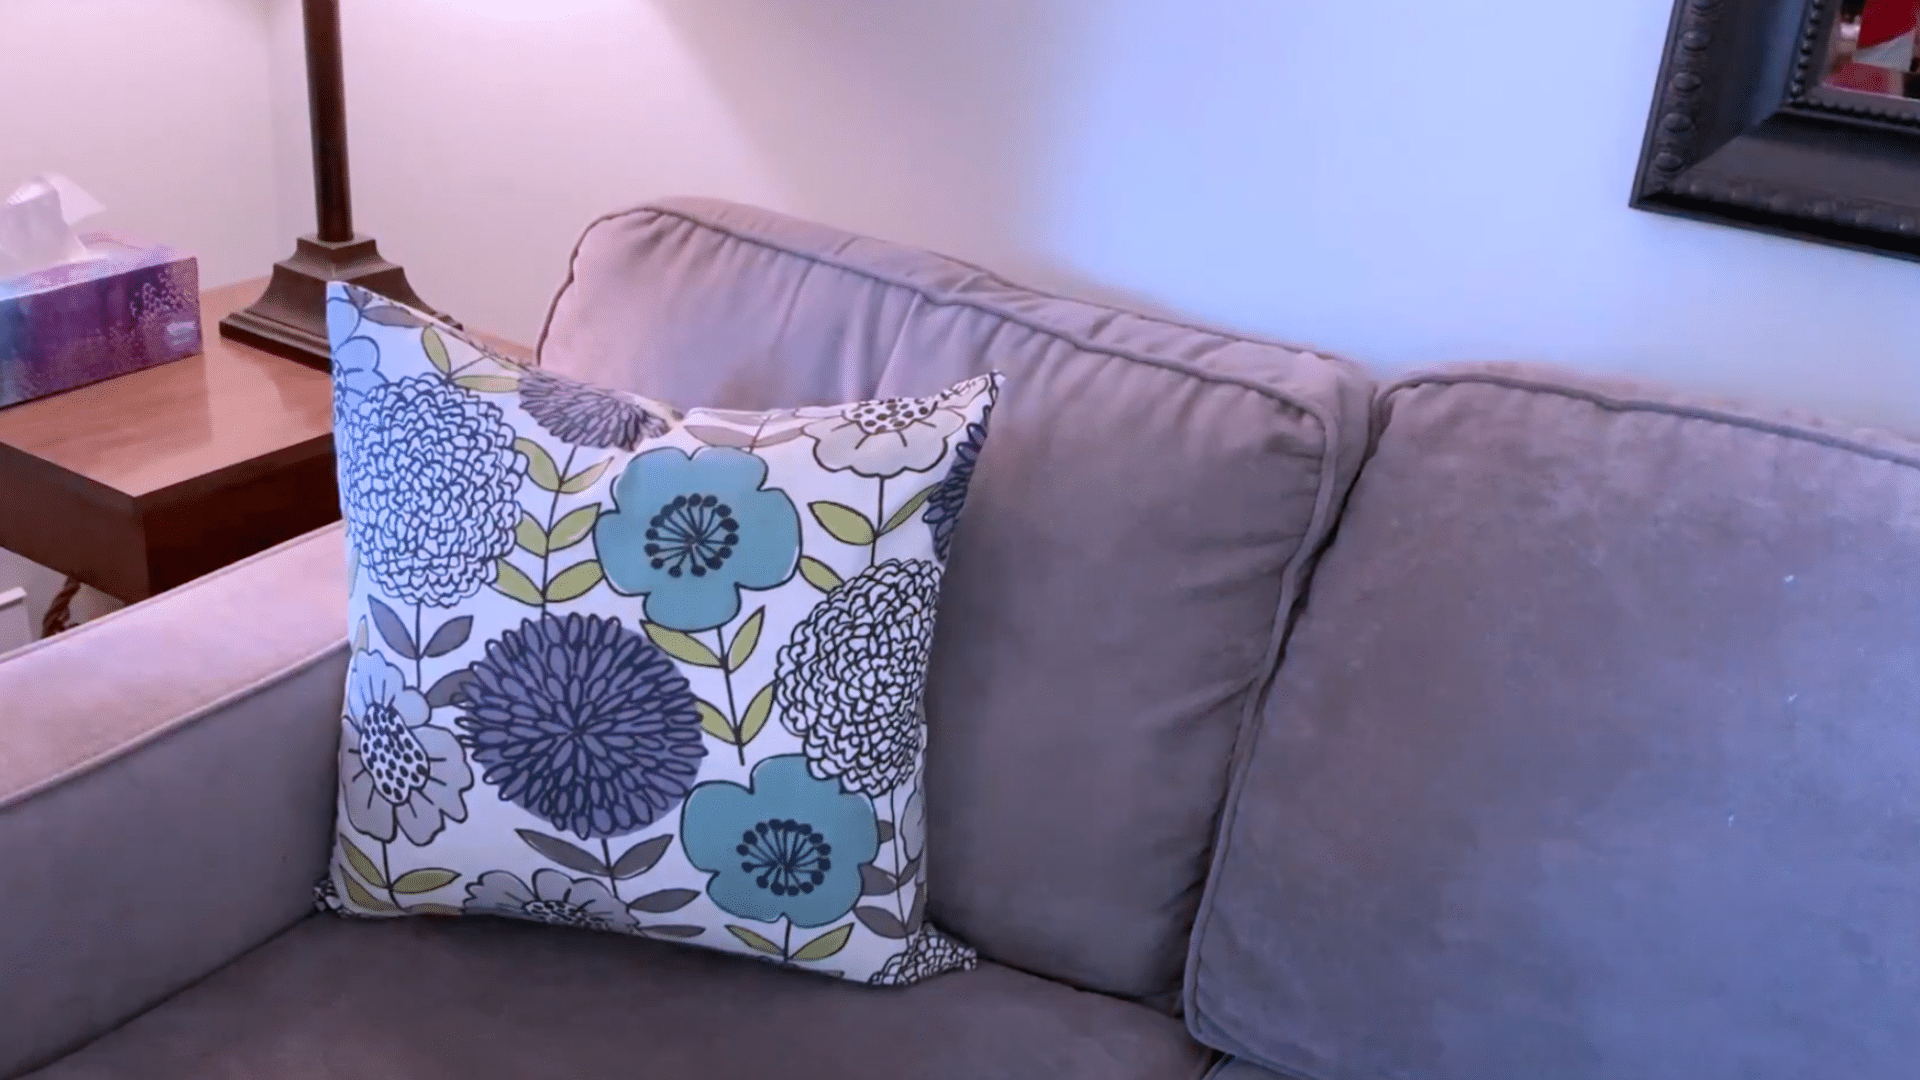
Trim excess fabric at each corner at a 45-degree angle. Turn the cover right side out through the zipper, using a chopstick to push out the corners.
Press edges with an iron, pulling seams outward to avoid dents. Open the zipper, insert the pillow form, then close the zipper for a finished cushion with an invisible closure.
Video Tutorial
If you need further guidance and steps, please feel free to watch the video below by She Makes 31 for some helpful support.
Quick Tips
|
Customization Ideas
After mastering the basic cushion cover with an invisible zipper, add personal touches to create unique designs. Simple additions can turn basic covers into statement pieces for your home.
Fabric Combinations: Mix different fabrics to create visual interest. Try using:
- Contrasting fabrics for the front and back panels
- Fabric panels with complementary colors
- Different textures that work well together, like cotton with linen
Decorative Touches: Add simple decorations to enhance your cushion covers:
- Hand-stitched details along the edges
- Simple appliqué shapes in contrasting fabrics
- Fabric paint for custom patterns or monograms
PracticalAdditions: Some additions can make your cushion covers more useful:
- Inner flaps that hide the zipper completely
- Double-sided designs for two looks in one cushion
- Removable covers for cushions that get heavy use
Small changes require little effort yet make your handmade cushion covers stand out.
The beauty of making your own covers allows control over everything, from the fabric to the final details. Use these ideas to create cushion covers that reflect your style and needs.
Looking for more inspiration or help with your DIY projects? Please dig our site for creative tips to change your home with ease and style!
Fresh Covers, Fresh Space
Creating cushion covers with invisible zippers might seem intimidating at first, but as you’ve seen, it’s quite manageable with the right approach.
By cutting fabric to match your pillow size exactly, preparing your zipper properly, and taking care with each step, you’ll create professional-looking cushion covers that fit snugly and look amazing.
The nearly invisible zipper gives your work that polished, store-bought appearance while allowing easy removal for cleaning.
Press seams carefully and take time with corners for best results.
Why not grab some fabric and dive in today? We’d love to hear about your favorite step in the comments below, so feel free to share your thoughts!
