HelpWithDIY HelpWithDIY HelpWithDIY
Font ResizerAa
  • Interior Design
    Interior Design
    Show More
    Top News
    Behr Polar Bear 75 – The True Behr White Paint Color
    Behr Polar Bear 75 Review – The Best True Behr White Paint Color
    December 11, 2023
    Sherwin Williams Popular Gray SW 6071 – Is It a True Gray?
    Sherwin Williams Popular Gray SW 6071 Paint Color Review
    December 11, 2023
    charcoal blue sherwin williams
    Charcoal Blue Sherwin Williams Color Review
    April 29, 2025
    Latest News
    Modern vs Traditional Design: Finding Your Unique Style
    May 7, 2025
    Mix, Match, and Wow: Guide to Patterns in Interior Design
    May 7, 2025
    Understanding Line in Interior Design: Types & Tips
    May 7, 2025
    Mastering Form in Interior Design: Key Principles and Tips
    May 7, 2025
  • Home Decor
    Home Decor
    Show More
    Top News
    Sherwin Williams Light French Gray Review
    Reviewing Sherwin Williams Light French Gray: The Ultimate Shade
    December 11, 2023
    cabinet stain colors
    Best Cabinet Stain Colors for a Timeless Look
    March 28, 2025
    Benjamin Moore Navajo White Review – A Warm and off white beauty
    Benjamin Moore Navajo White Paint Color Review
    December 11, 2023
    Latest News
    41 Christmas Chandelier Ideas for Every Home Style
    May 7, 2025
    Skillion Roofs: Modern Style Meets Practical Function
    May 6, 2025
    Matte vs Satin Finish Hardwood Floors: Which One is Right for You?
    May 2, 2025
    How to Create DIY Garden Stepping Stones
    April 30, 2025
  • DIY Projects
    DIY Projects
    Show More
    Top News
    Creative Dollar Tree Crafts for Low Budgets
    42 Creative Dollar Tree DIYs Under Budget for Your Home Decor
    December 11, 2023
    Wedding Card Box Ideas You Can DIY
    19 DIY Card Box Ideas to Elevate Your Wedding Decor Theme
    December 11, 2023
    terraced garden beds on a slope
    How to Create Terraced Garden Beds on a Slope?
    April 24, 2025
    Latest News
    How to Make an Origami Gift Bag in Simple and Easy Steps
    May 27, 2025
    DIY Plywood Flooring: Easy, Affordable, and Durable
    May 22, 2025
    How to Sew Perfect Cushion Covers with Invisible Zippers
    May 21, 2025
    How to Achieve Stunning Water-Popping Wood Finishes
    May 19, 2025
  • Fashion
    Fashion
    Show More
    Top News
    Nail Designs 2023 (24 Art, Color & Shape Ideas)
    24 Hottest Nail Style Trends That Are Must to Try This Season
    December 11, 2023
    Spring Nails (Ideas Trending
    Latest Spring Nail Ideas
    April 9, 2024
    The Hottest Fall Nails
    Hottest Fall Nails Style
    April 9, 2024
    Latest News
    Craft the Perfect Standing Tote Bag with Box Corners
    May 6, 2025
    30 Playful Christmas Nail Styles to Inspire Your Festivities
    April 9, 2024
    Hottest Fall Nails Style
    April 9, 2024
    Latest Spring Nail Ideas
    April 9, 2024
  • Art & Craft
    Art & Craft
    Show More
    Top News
    Fun Crafts for 3-Year-Olds
    24 Must-Try Amusing Crafts for Your 3 Years Old
    December 11, 2023
    The Joy of Slow Stitching: Beginner's Guide with Ideas
    The Joy of Slow Stitching: Beginner’s Guide with Ideas
    May 7, 2025
    Stash-Busting Tissue Paper Crafts
    28 Must Try Tissue Paper Crafts Idea to Unlock Your Creativity
    December 11, 2023
    Latest News
    How to Make an Easy Origami Pouch Kids Will Love
    May 21, 2025
    Cross Stitch vs Embroidery: A Complete Guide
    May 8, 2025
    Biophilic Art: Nature-Inspired Design for Well-Being
    May 7, 2025
    Easy Steps to Crochet Small Heart for Beginners
    May 7, 2025
Font ResizerAa
HelpWithDIY HelpWithDIY
  • Interior Design
  • Home Decor
  • DIY Projects
  • Fashion
  • Art & Craft
Search
  • Interior Design
  • Home Decor
  • DIY Projects
  • Fashion
  • Art & Craft
Follow US
© 2025 HelpWithDIY
HelpWithDIY > DIY Projects > How to Make an Origami Gift Bag in Simple and Easy Steps
DIY Projects

How to Make an Origami Gift Bag in Simple and Easy Steps

Last updated: May 27, 2025 3:16 pm
By Ava Rodriguez
Share
7 Min Read
How to Make an Origami Gift Bag in Simple and Easy Steps
Contents
Materials RequiredStep-by-Step Guide on How to Make an Origami Gift BagStep 1: Choose and Prepare Your PaperStep 2: Fold and Shape the Origami Gift BagStep 3: Secure and Punch the TopStep 4: Add the RibbonFinal OutputWatch How It’s Done: DIY Origami Gift Bag Video TutorialCommon Origami Gift Bag Mistakes That Ruin Your ResultsConclusion

Imagine turning a simple sheet of paper into something magical. One moment it’s flat on the table — the next, it’s a charming gift bag ready to surprise someone special.

No expensive materials. No complicated steps. Just a little folding magic and a touch of creativity.

Origami gift bags are perfect for birthdays, holidays, party favors, or just adding that extra sparkle to a small gift. They’re eco-friendly, personal, and fun to make for all ages.

This easy guide will walk you through every step. No matter if you are new to origami or just looking for a quick, fun project, this is the perfect place to start.

Ready to fold some joy into your day? Curious how paper can turn into a masterpiece? Let’s dive in and create something truly unforgettable!

Materials Required

Before starting, it’s important to gather the right materials. Using the proper paper and tools will make folding much easier and give your gift bag a neat, professional look.

Material Details and Recommendations
Paper Size 29×35 cm (11.4”×13.7”); A4 or A3 also usable
Paperweight 90–120 gsm (heavier paper for stronger bags, but harder to fold)
Hole Puncher For clean, even holes to insert ribbon
Ribbon 0.7 mm (0.2”) width; nylon ribbon recommended
Ribbon Preparation Nylon ribbon needs to be straightened before use
Paper Size Tip For the best finish, the difference between height and width should be 6–15 cm (2.3”–5.9”)

Step-by-Step Guide on How to Make an Origami Gift Bag

Follow these simple folding steps to create your DIY origami gift bag:

Step 1: Choose and Prepare Your Paper

Choose and Prepare Your Paper

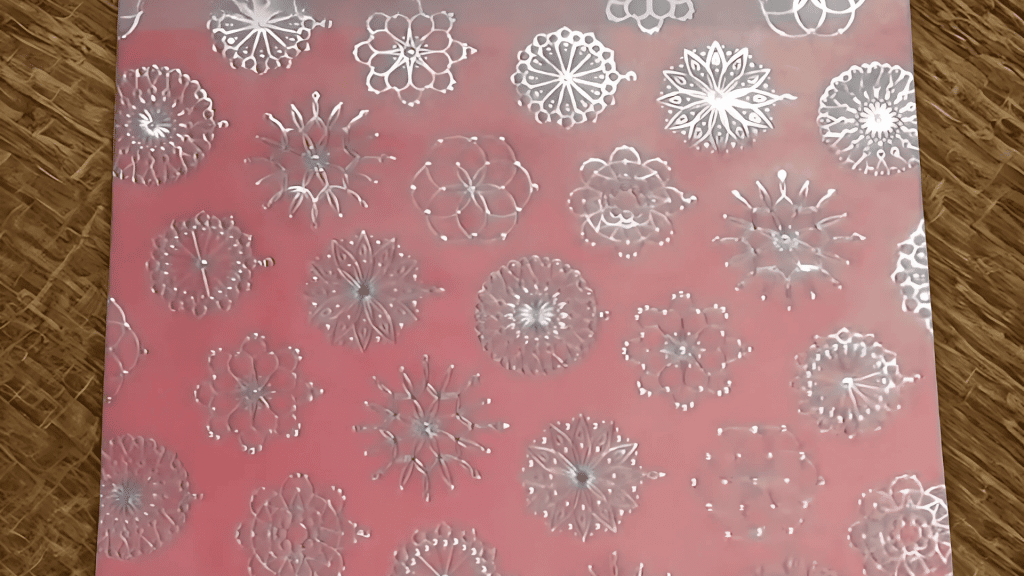
Begin by choosing clean, smooth paper sized around 29×35 cm (11.4”×13.7”).

A4 or A3 paper works too, as long as the folds are adjusted carefully. Aim for a height and width difference of 6–15 cm (2.3”–5.9”) to maintain a well-balanced and polished appearance.

If you’re using heavier paper (90–120 gsm), fold slowly and firmly. While it adds strength to the bag, it also takes more effort to crease neatly and shape accurately.

Pro Tip: Smooth out any curls or bends in the paper before starting.

Step 2: Fold and Shape the Origami Gift Bag

Fold and Shape the Origami Gift Bag

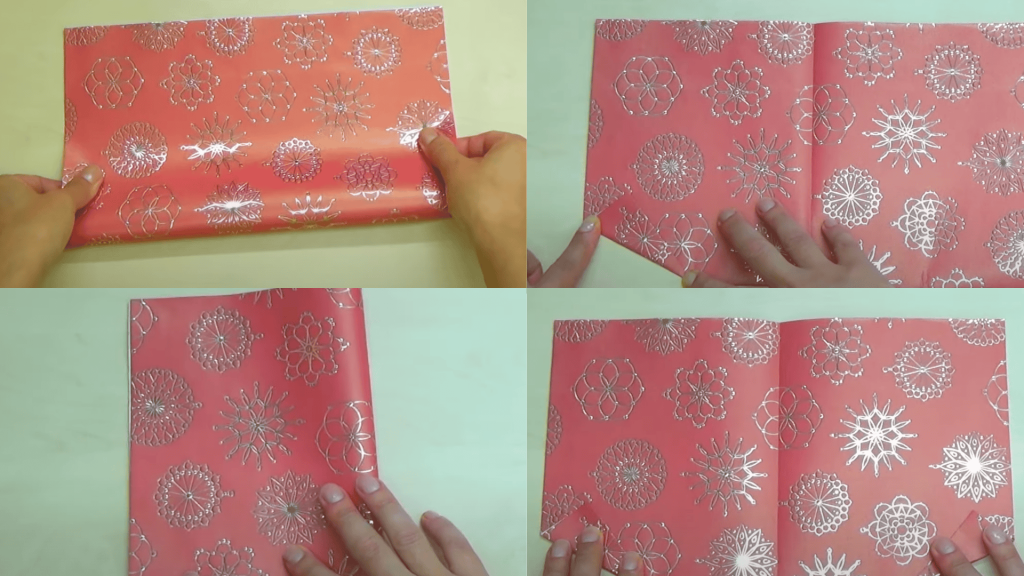
Lay your paper flat on a clean, hard surface to ensure stable and crisp folds. Start by folding the long edges inward toward the center, making sure they meet neatly without overlapping. Press each fold firmly to form sharp creases.

Fold the sides next to shape the body of the bag. Align corners and edges carefully to maintain balance and a polished finish. Clean folds help the bag stand upright and look more professional.

Lastly, fold up the bottom section to form the base. Gently smooth any uneven edges, then reinforce all folds with steady, firm pressure.

Pro Tip: Always crease folds sharply to create a strong, finished bag that holds its shape beautifully.

Step 3: Secure and Punch the Top

Secure and Punch the Top

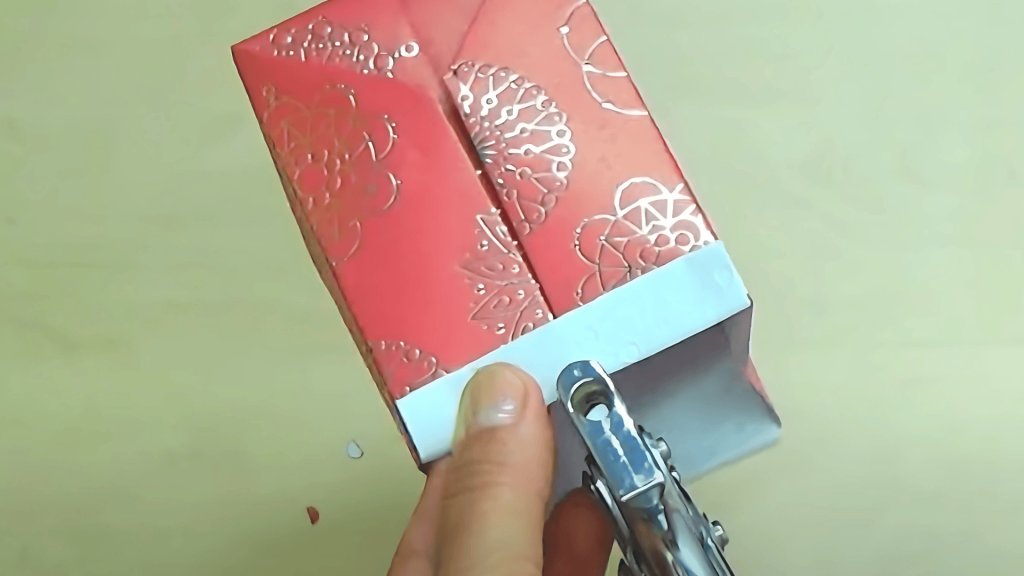
After shaping the bag, press along all edges to sharpen the folds and help the bag maintain its upright position. This ensures a clean, sturdy look before adding finishing details.

Use a hole puncher to make two evenly spaced holes near the top. For thick paper, press firmly and mark the spots with a pencil first to avoid misalignment or tearing.

Pro Tip: Punch the holes at the same height to keep the ribbon line straight and the bag looking neat.

Step 4: Add the Ribbon

Add the Ribbon

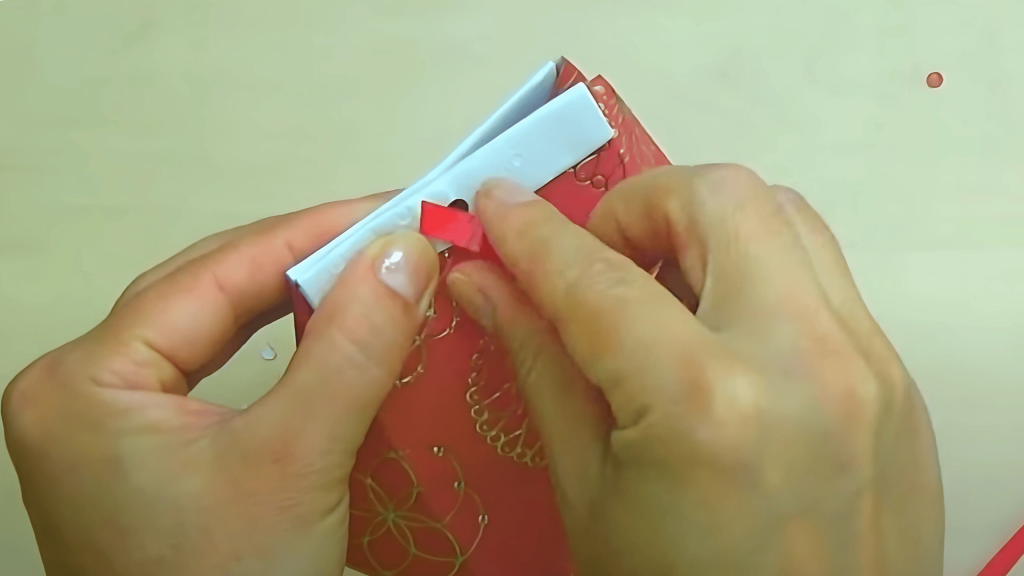
Cut a 0.7 mm (0.2”) nylon ribbon long enough to thread through both holes and tie a neat bow. Straighten the ribbon by gently pulling it taut to ensure a smooth, polished finish.

Thread the ribbon evenly through the holes, then tie a secure bow or double knot. Keep it tight enough to hold the bag closed without wrinkling or damaging the paper.

Pro Tips: Always cut the ribbon slightly longer than needed to make tying easier and more flexible.
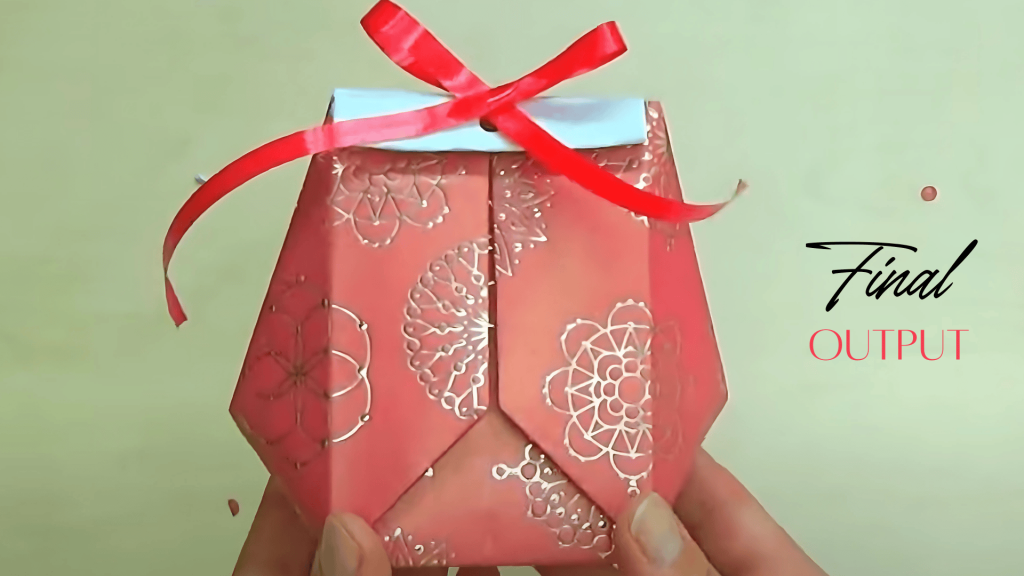
Final Output

Final Output

Watch How It’s Done: DIY Origami Gift Bag Video Tutorial

Check out the video below by I. Sasaki for a step-by-step guide on how to make a DIY origami gift bag.

Common Origami Gift Bag Mistakes That Ruin Your Results

Even small folding mistakes can significantly impact how your origami gift bag looks, holds its shape, or stays together.

  • Using paper that’s too thick or too thin can cause cracking, tearing, or difficulty folding cleanly.
  • Skipping accurate measurements results in crooked edges and a lopsided, unbalanced bag.
  • Folding on a soft surface makes it more difficult to create sharp, clean creases, which are necessary for maintaining structure.
  • Not pressing the folds firmly can cause the bag to pop open or lose its shape after assembly.
  • Punching holes without marking can result in uneven or off-center placement of the ribbon.

Conclusion

Making origami gift bags is easier than you might think.

With just a sheet of paper, some ribbon, and a few simple folds, you can create something special for any occasion. These handmade bags show you care while being kind to the environment.

The key is using the right materials and taking your time with each fold.

Remember to work on a hard surface, press your creases firmly, and mark your holes before punching. These small details make a big difference in how your finished bag looks and holds together.

Now it’s time to put your new skills to work. Grab some paper and start folding your first origami gift bag today. Share your creations with friends and family – they’ll be impressed by what you can make with your own hands!

Share This Article
Facebook Email Print
ByAva Rodriguez
Follow:
Ava Rodriguez is the down-to-earth and resourceful creator of HelpWithDIY.com, a blog that is a treasure trove for DIY novices and experts alike. With a practical background in home improvement and a degree in Education, Ava brings a unique combination of skills to demystify the world of do-it-yourself projects.
Leave a Comment Leave a Comment

Leave a Reply Cancel reply

Your email address will not be published. Required fields are marked *

Recent Posts

  • Sherwin Williams Eider White(SW 7014): Complete Review
  • Jigsaw vs Circular Saw: Know Which One Should You Buy
  • How to Make an Origami Gift Bag in Simple and Easy Steps
  • Plain Sawn vs Quarter Sawn: A Clear Guide for Beginners
  • Cabinet Wood Types and Costs: Find Your Perfect Match
  • How Much Weight Can a Roof Hold? Know Before It Fails
  • How to Adjust Cabinet Doors for a Perfect Fit
  • Sherwin Williams Laurel Woods – The Green That Grounds You
  • Top 7 Best Paints for Trim and Baseboards Worth Buying
  • DIY Plywood Flooring: Easy, Affordable, and Durable
Pages
  • Home
  • About Us
  • Contact Us
  • Privacy Policy
  • Write For Us
Most Viewed
Sherwin Williams Eider White(SW 7014): Complete Review
Education Uncategorized
Jigsaw vs Circular Saw: Know Which One Should You Buy
Education

Follow Us on Social Media!

Facebook Instagram
© 2025 HelpWithDIY.
Welcome Back!

Sign in to your account

Username or Email Address
Password

Lost your password?