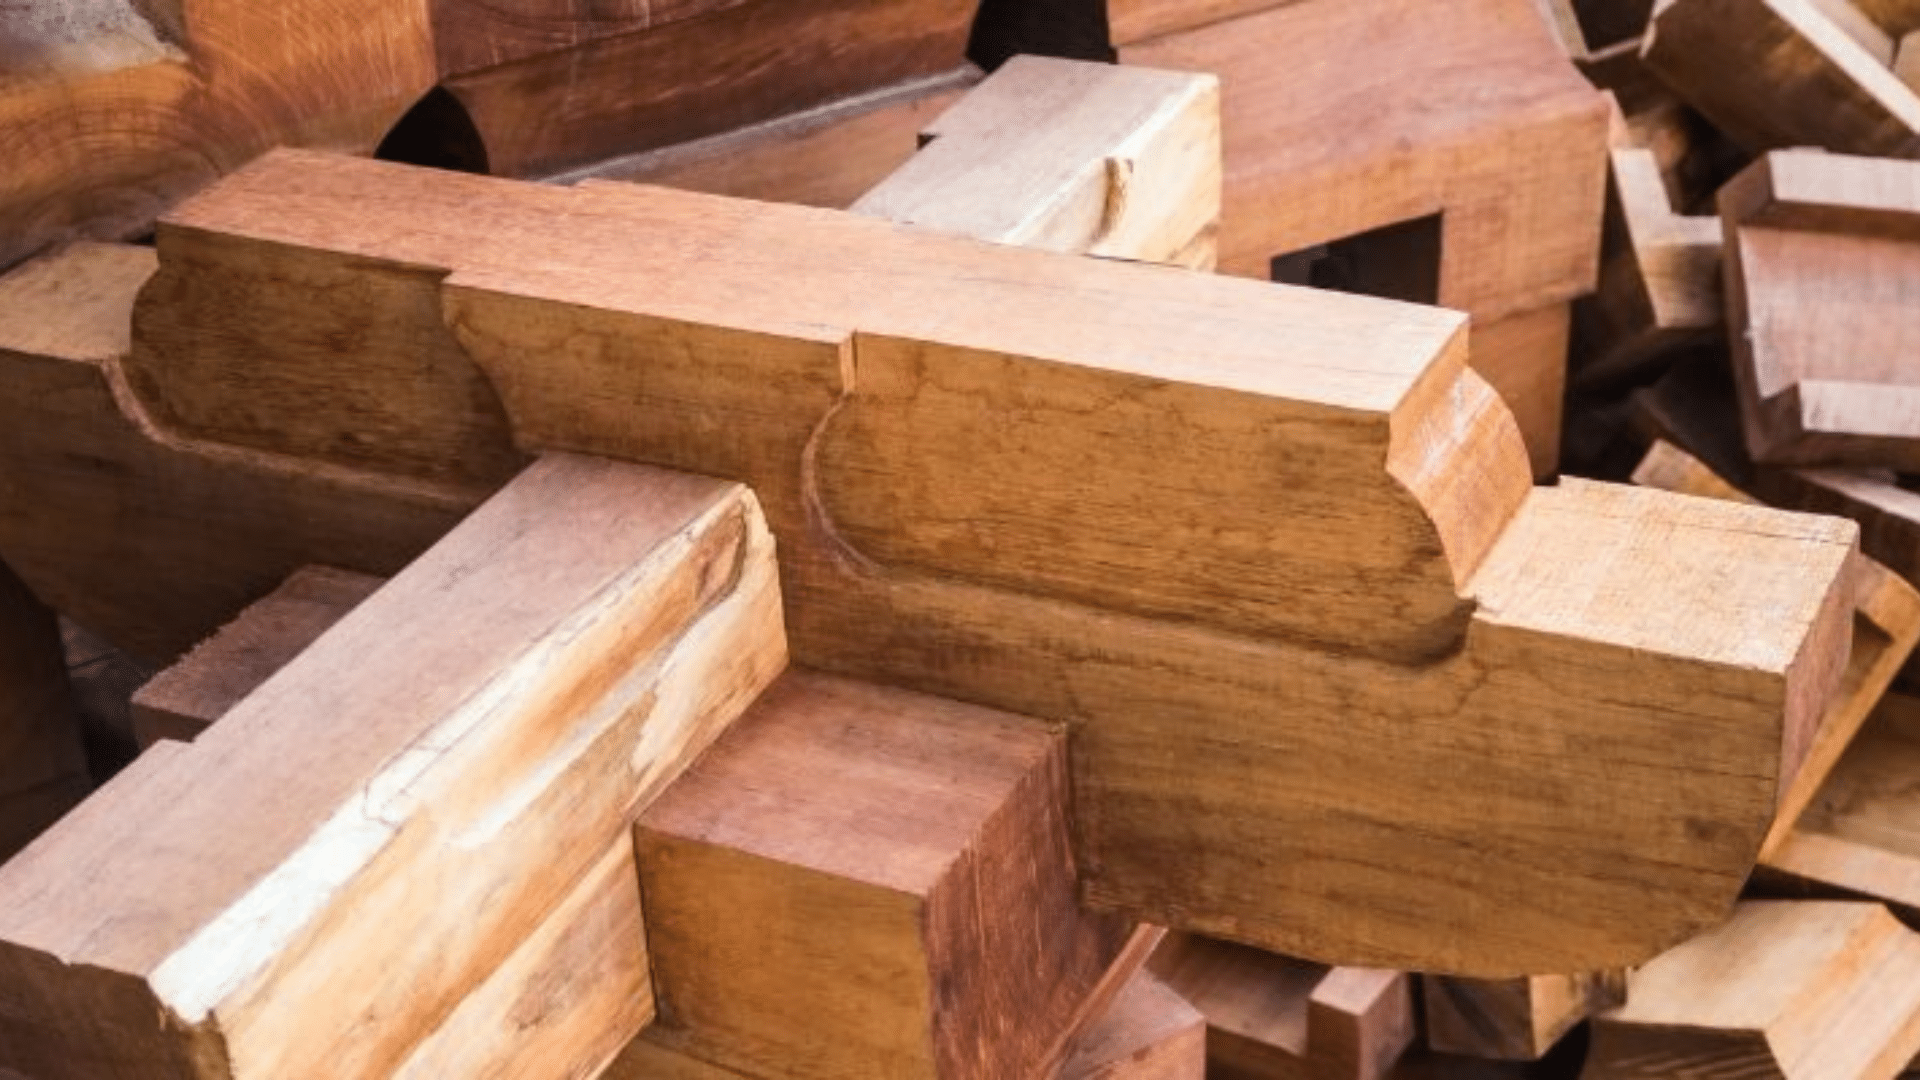
Timber framing is one of the oldest and most dependable methods of building with wood. It is recognized for its visual appeal, durability, and structural integrity.
If you’re planning to construct a garden shed, a pergola, or your initial piece of furniture, learning about timber joints is key to achieving both strength and style.
This guide focuses on basic timber frame joints, which are approachable for beginners yet sturdy enough to support a variety of small to medium-sized woodworking projects.
If you’re a hands-on hobbyist or taking your first steps into woodworking, getting comfortable with these essential joints can open up a wide range of creative woodworking projects.
What are Timber Frame Joints and Why are they Important?
Timber frame joints are the carefully crafted connections where two or more wooden beams or members meet in a timber-framed structure.
These joints form the backbone of traditional wood construction, ensuring that the entire frame holds together without relying heavily on metal fasteners.
Here’s why Timber Frame Joints Matter:
-
Structural Strength
Properly made joints distribute loads evenly across the frame, preventing collapse or weak points in the structure. -
Long-Term Durability
Well-constructed joints resist shifting, shrinking, and seasonal changes in wood, enabling structures to withstand the test of time. -
Visual Appeal
Timber joints add a handmade, authentic look to any build. Exposed joinery can be both functional and decorative. -
Efficient Use of Materials
By interlocking pieces without relying heavily on hardware, joints maximize the use of available wood and minimize material waste. -
Craftsmanship and Tradition
Timber joints are a nod to centuries-old woodworking techniques, blending form and function in every project.
Advantages of Using Simple Timber Frame Joints
These basic joints lay the groundwork for stronger structures and better craftsmanship without overwhelming you.
Easy to Learn and Apply- Simple joints like the lap or butt joint require minimal tools and can be learned quickly. With just a saw, a chisel, and a measuring tape, you can begin building with confidence.
Time-Saving for Small Projects- Basic joints are ideal for quick builds because they require fewer steps. Whether you’re making a garden bench or a wooden box, you’ll finish faster without sacrificing quality.
Ideal for Practicing Precision- Even the simplest joints require precise measurements and cuts. Practicing them helps sharpen your eye and hand for future complex work.
Versatile and Adaptable- From rustic furniture to home repair projects, simple joints are versatile and work in a variety of settings. They’re a go-to solution for many real-world applications.
Budget-Friendly- Fewer tools and less wood waste result in greater savings. That’s especially helpful if you’re just getting started and building your toolkit slowly.
Simple Timber Frame Joints Every Beginner Should Know
Mastering just a few of these will give you the confidence to take on a wide range of DIY timber framing projects.
Mortise and Tenon Joint
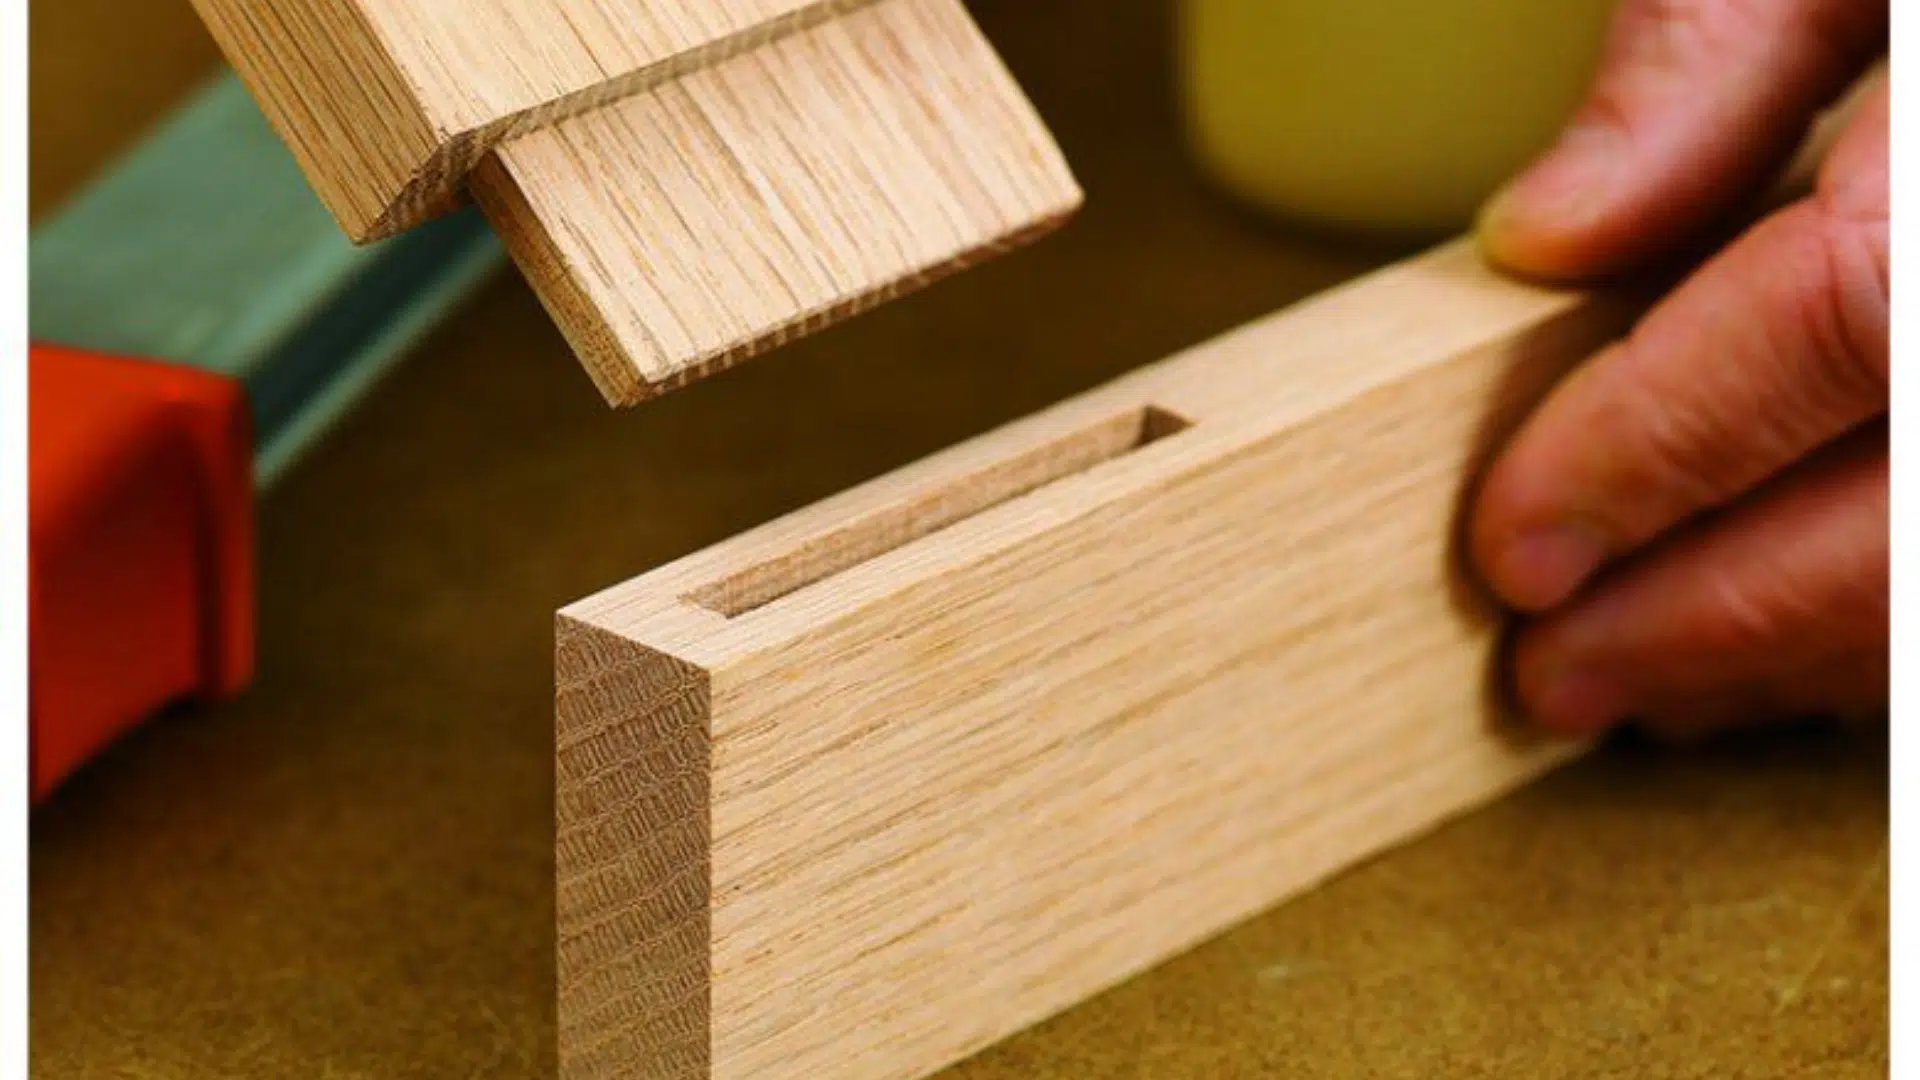
The mortise and tenon joint is one of the oldest and most trusted timber connections in woodworking.
It involves inserting a protruding tenon (a rectangular peg) at the end of one timber into a corresponding mortise (a hole or cavity) in another.
This joint creates a snug fit that resists pulling apart and adds incredible strength to the frame. Often secured with a wooden peg, it’s ideal for load-bearing structures and is a great foundational joint for new woodworkers to master.
Great for: strong, long-lasting structural frames.
Lap Joint
A lap joint is created by overlapping two timber pieces at their ends or edges, typically after cutting away half the thickness from each board to ensure they sit flush.
It’s simple to make and works well in frames or corner assemblies. While it’s not as strong as interlocking joints, it’s perfect for non-structural elements and can be reinforced with glue or screws.
Great for: framing and basic box shapes.
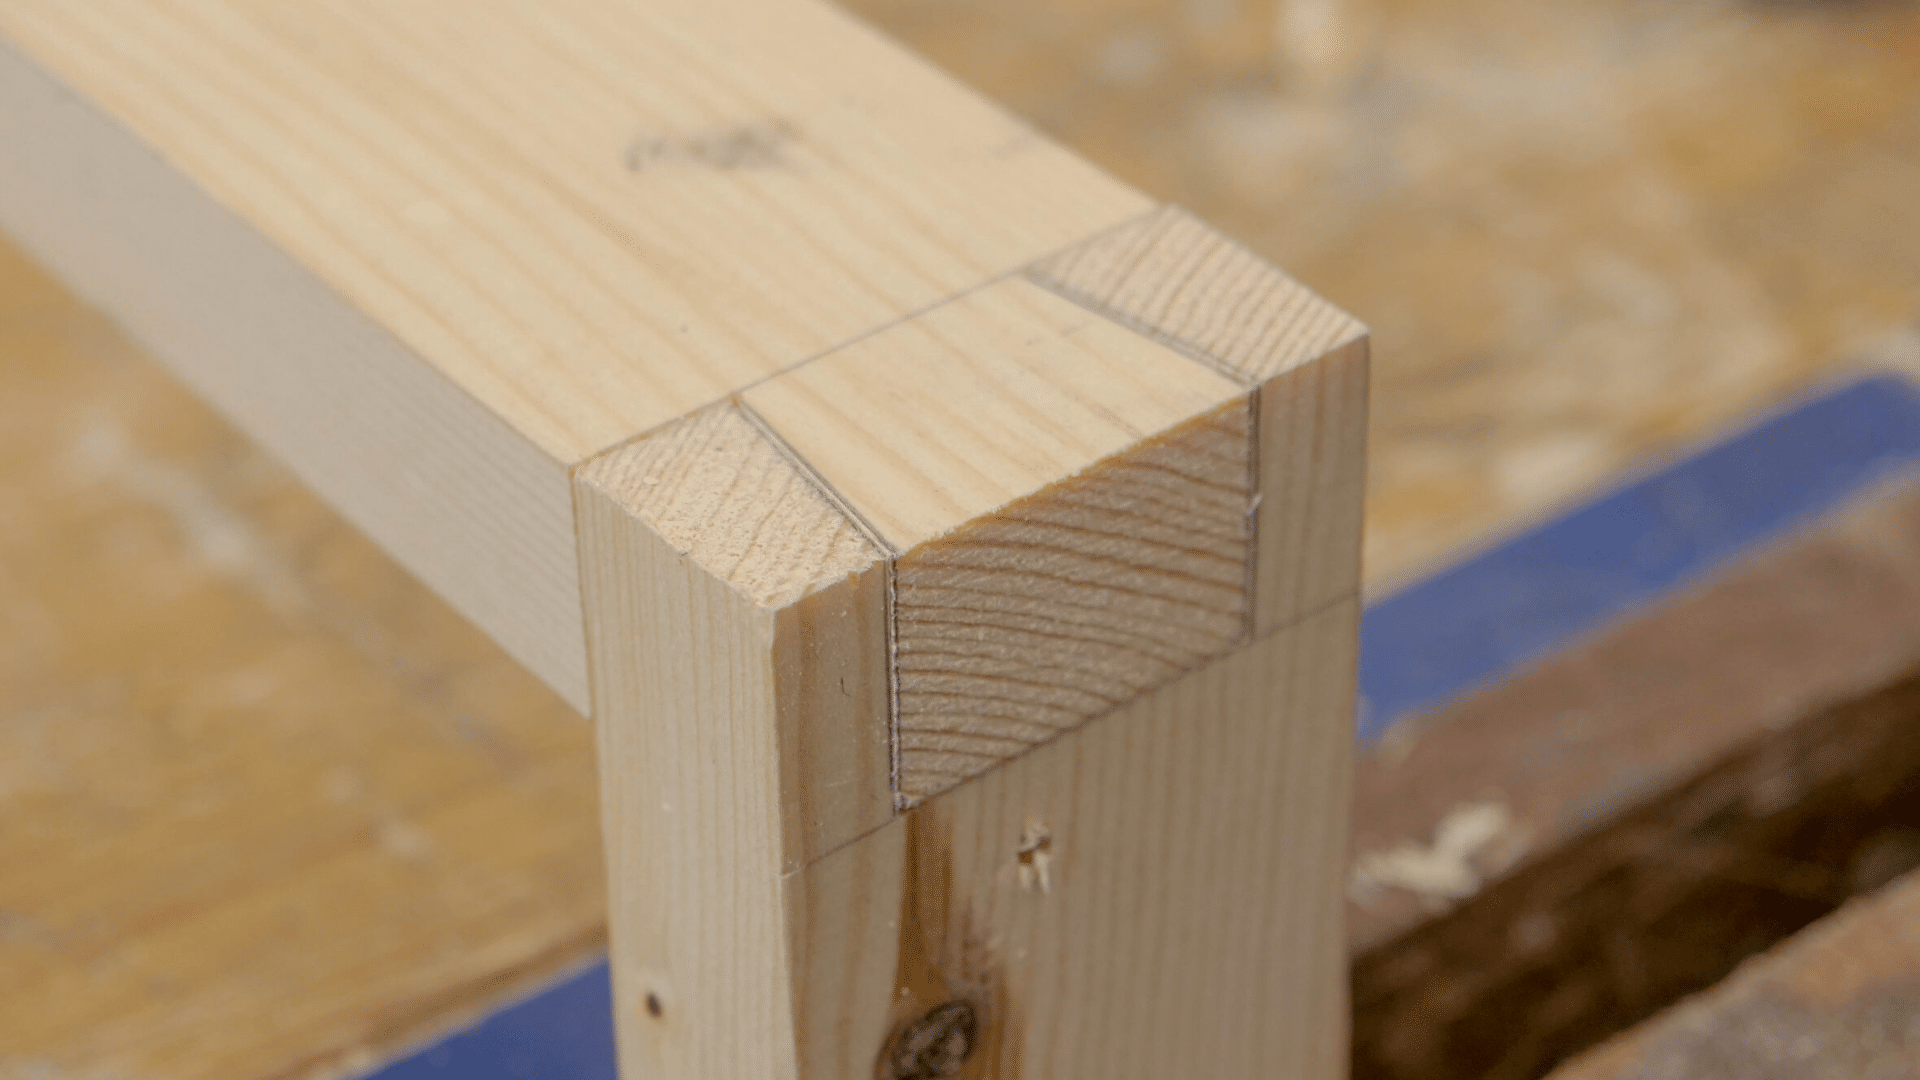
Butt Joint
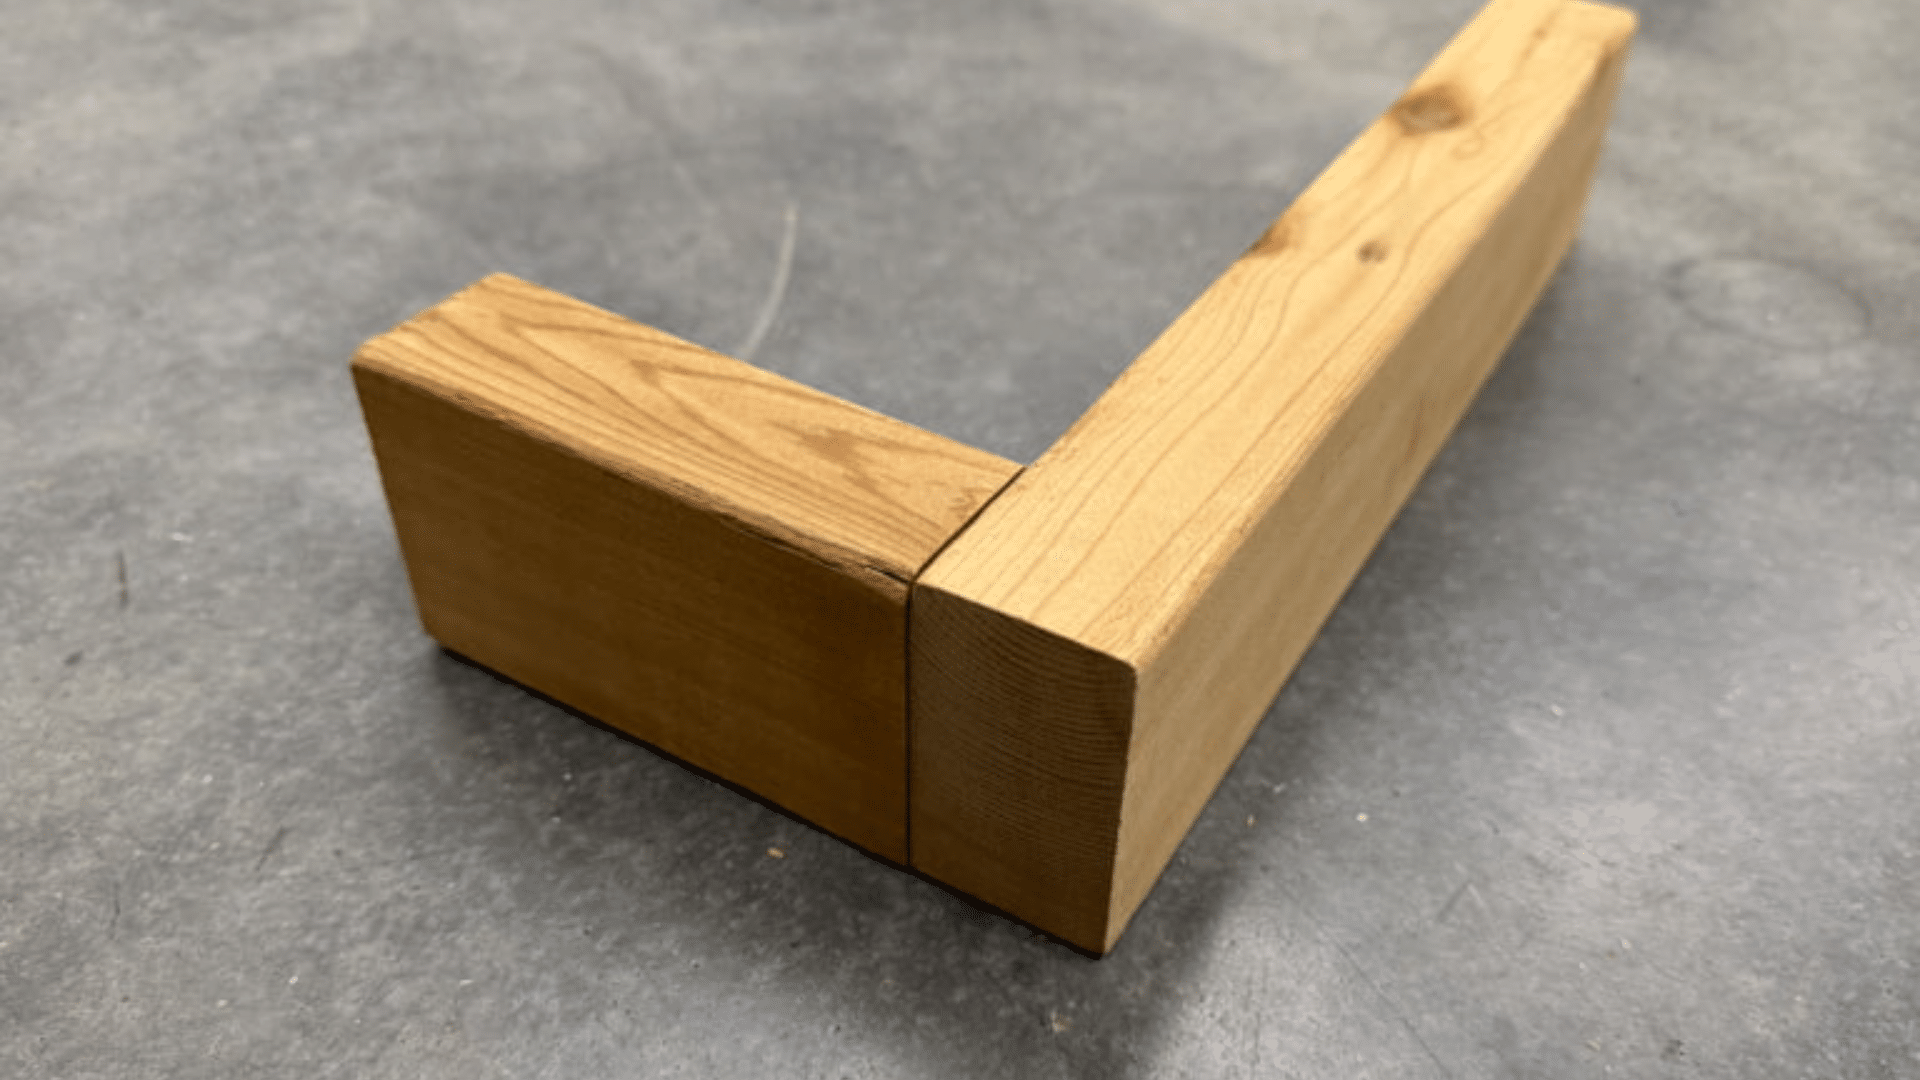
The butt joint is the most basic timber connection where the end of one timber is butted against the face or edge of another.
While it’s not very strong on its own, it’s commonly used in framing and box structures when paired with screws, nails, or glue.
Beginners often start here to understand how joints work and to practice measurement and alignment before moving on to more complex types.
Great for: quick frames, mockups, or beginner projects.
Dowel Joint
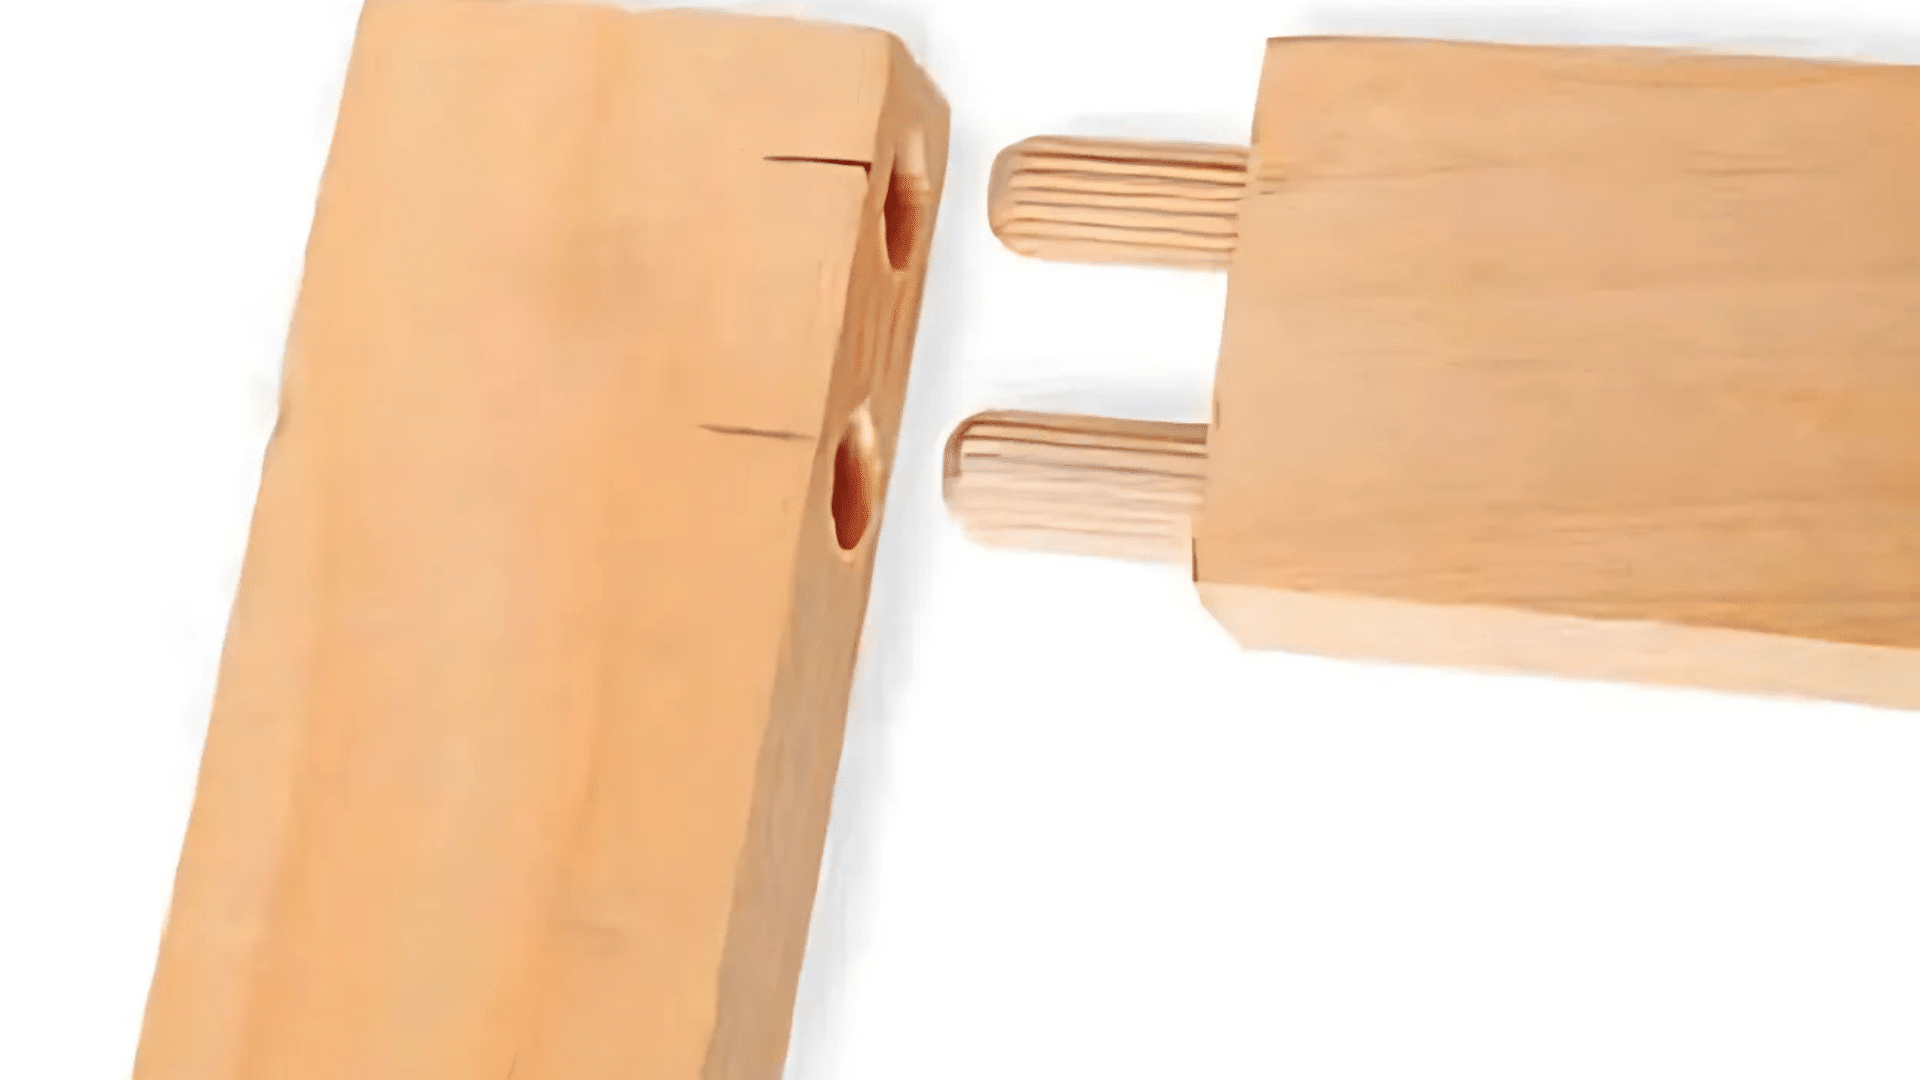
A dowel joint utilizes small wooden rods, known as dowels, to align and strengthen the connection between two pieces of timber.
Holes are drilled into both joining pieces, and the dowels are inserted with glue to hold everything tightly in place. This joint provides a cleaner appearance with hidden reinforcements and is commonly used in furniture and cabinetry.
It’s a great choice for beginners who want to try a slightly more precise technique without the need for complex tools.
Great for: furniture and clean, modern builds.
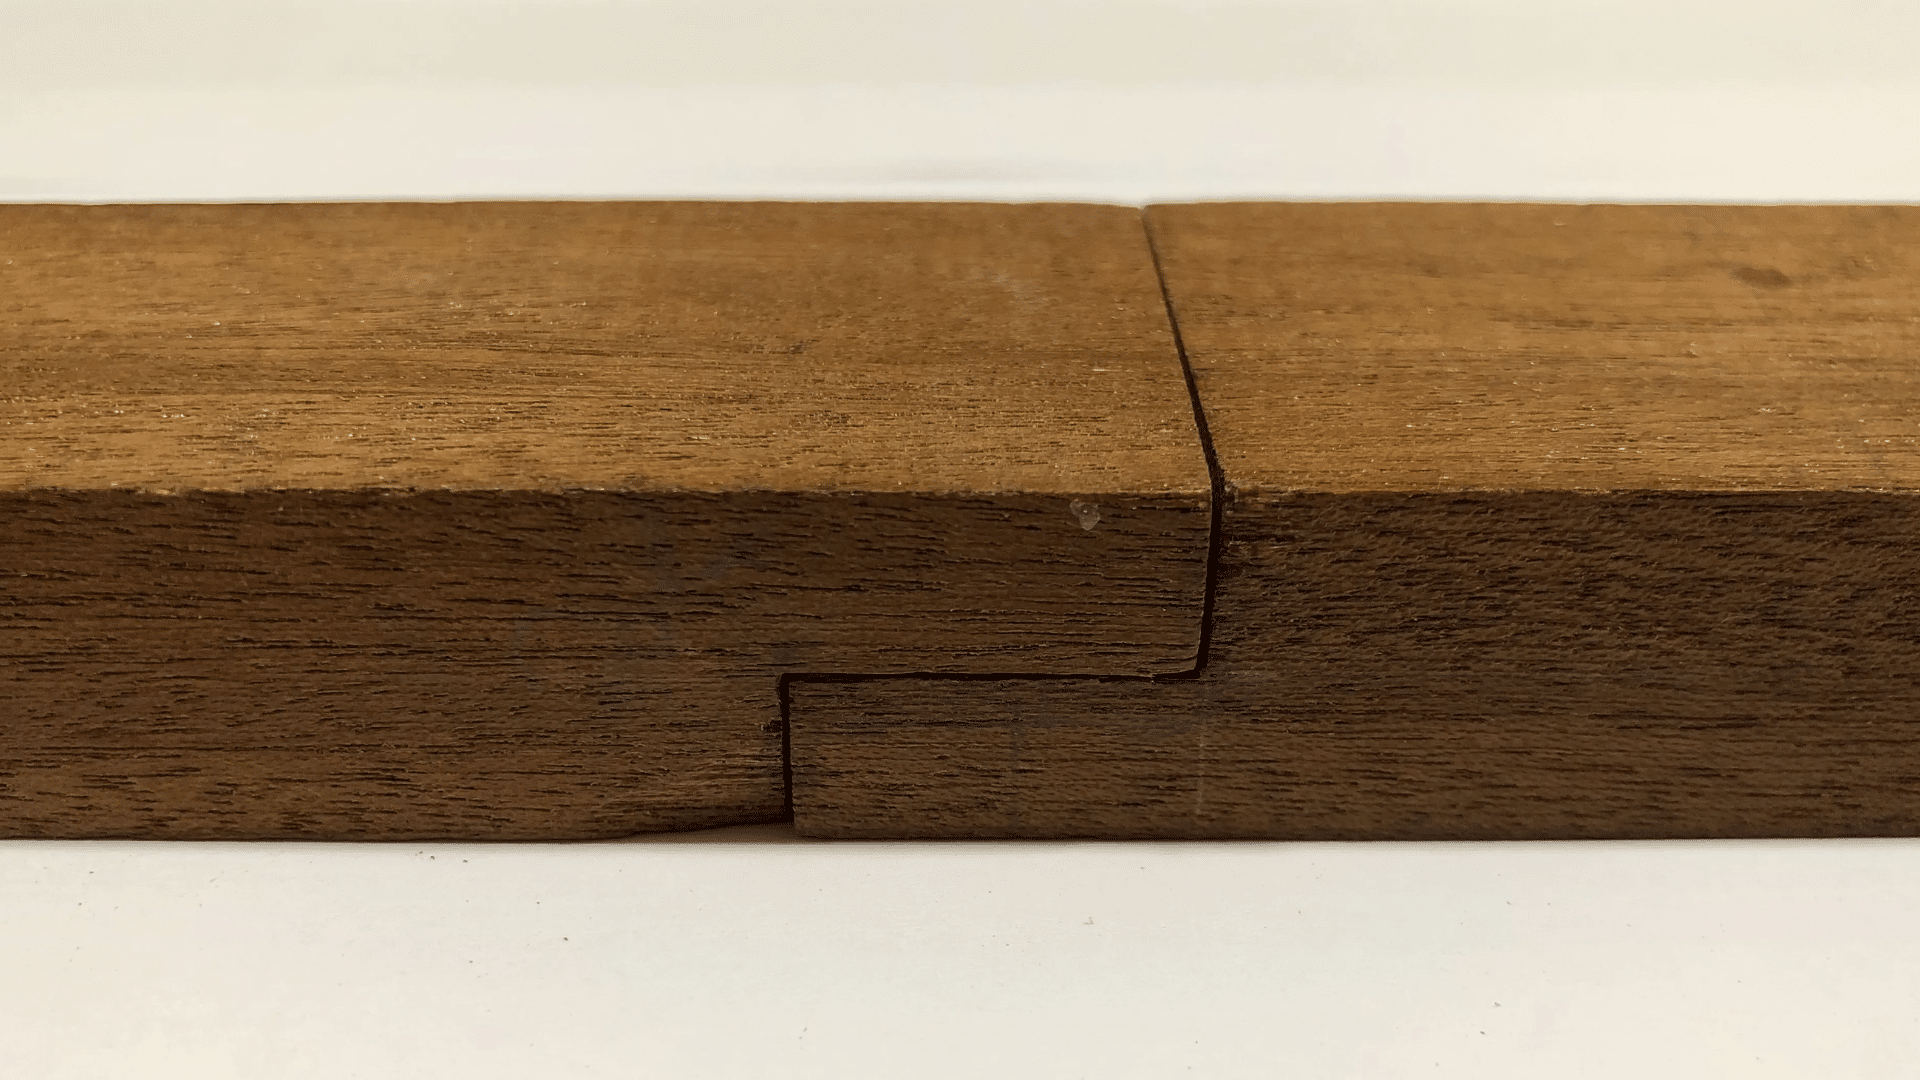
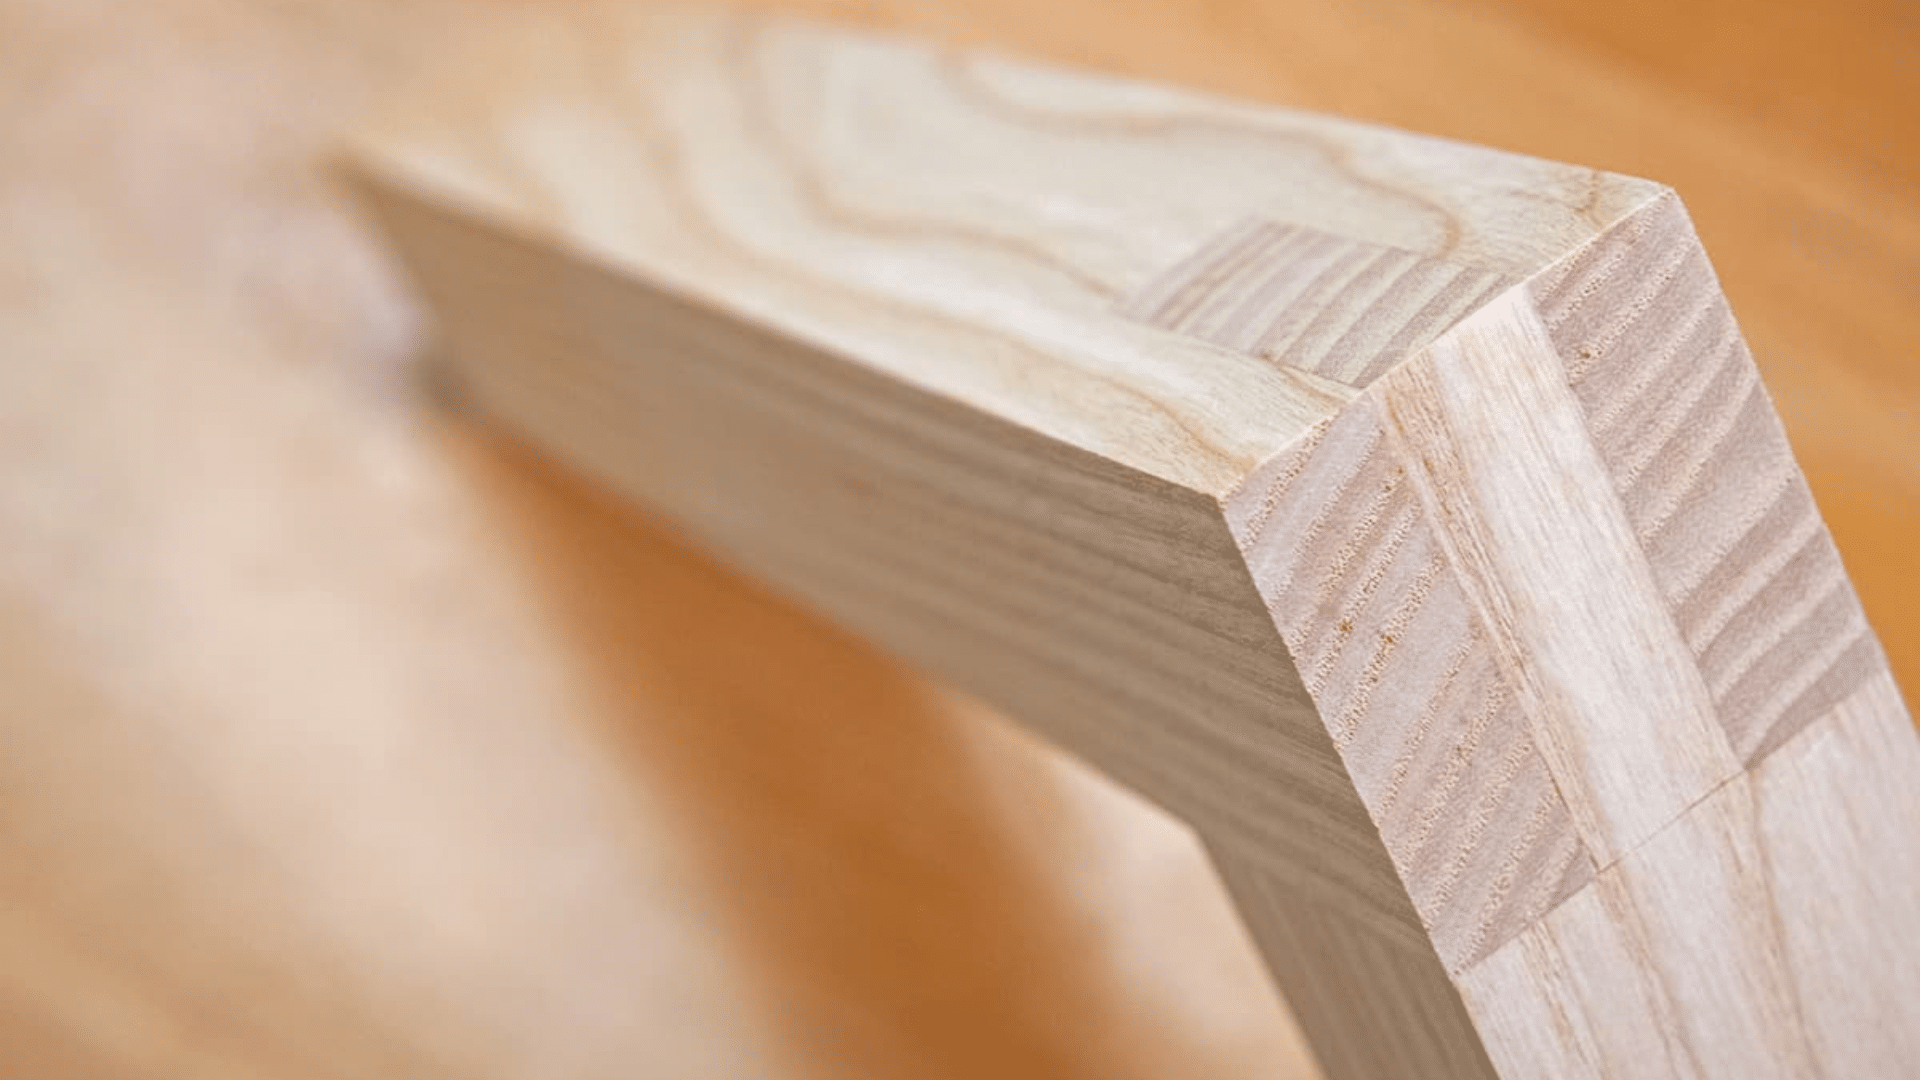
Half-Lap Joint
The half-lap joint is similar to a lap joint, but it involves removing half the thickness from both joining pieces at the intersection, allowing them to nest together as a single layer.
It provides a larger surface area for bonding, making it stronger than a simple lap joint. It’s frequently used in frames, cross-bracing, and decorative structures. This joint teaches accuracy and encourages neat chiseling and measuring skills.
Great for: frames and corner joins.
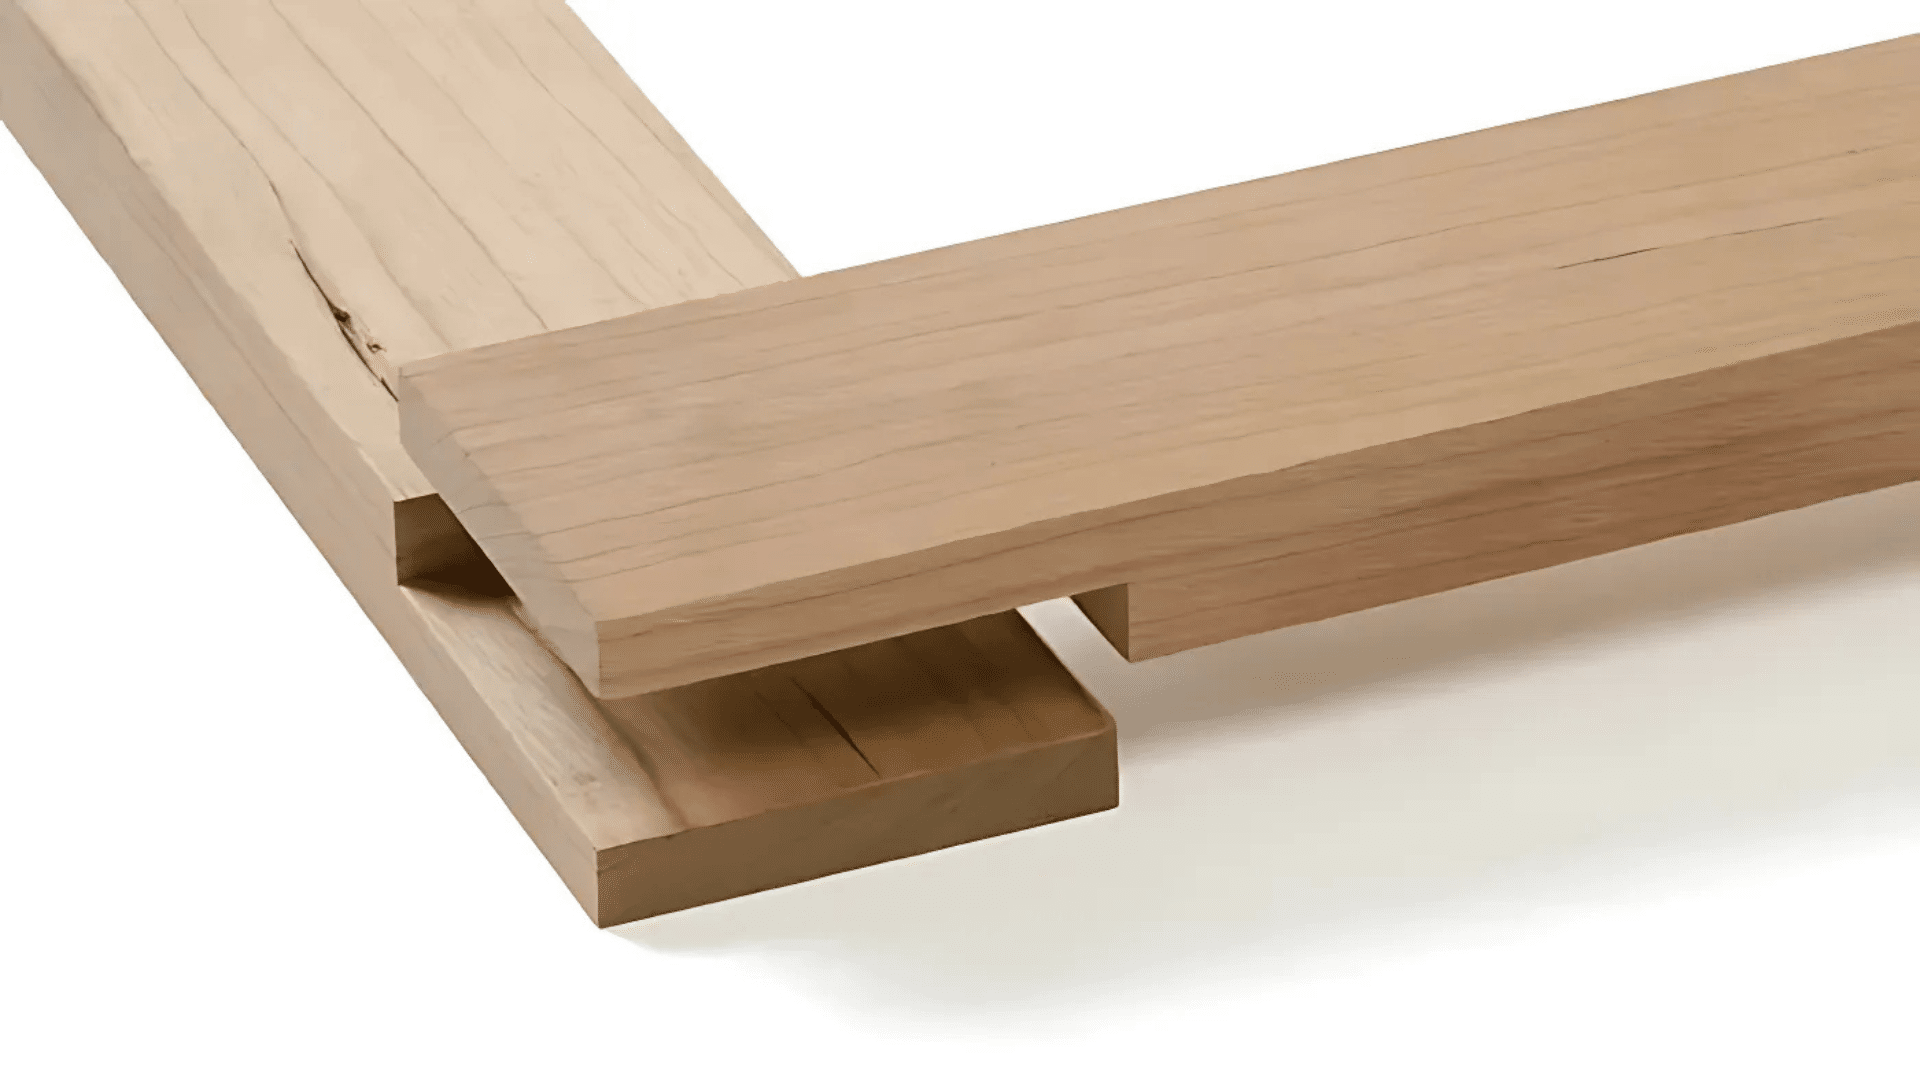
Bridle Joint
In a bridle joint, a slot (similar to an open mortise) is cut into one piece, while the matching piece is cut to fit exactly into the slot, forming a tight, face-to-face connection.
It’s especially suitable for corners and posts. Unlike the mortise and tenon, it exposes more of the joint, which can serve as a visual highlight.
For beginners, it offers a great opportunity to learn about fitting joinery without the full complexity of mortising.
Great for: use in corners and upright posts.
Dovetail Joint (Simple Version)
The dovetail joint features interlocking wedge-shaped cuts that resist being pulled apart. Although traditional dovetails can be intricate, a simplified version can be created with wider tails and fewer pins, making it perfect for beginners learning the basics of angled joinery.
This joint is both decorative and functional, often seen in drawers and frames. It helps new woodworkers develop cutting precision and a strong understanding of the direction of wood grain.
Great for: drawer corners and decorative joints.
Watch: Simple Timber Frame Joints in Action
Want to see how these joints come together step by step? Sometimes, a visual guide can make all the difference, especially when you’re just starting.
This video by @picklestimberframes guides you through the most common, beginner-friendly timber frame joints, featuring real-time examples and practical tips.
Common Mistakes to Avoid when Making Timber Frame Joints
Even the simplest joints can go wrong without the right approach. As a beginner, avoiding these common pitfalls can save you time, materials, and frustration.
Using the Wrong Type of Wood or Tools
Softwoods are easier to cut and chisel, making them more suitable for learning. Hardwoods may look appealing, but they require sharper tools and more precision.
Incorrect Measurements and Alignment
Timber framing depends heavily on accuracy. Even a few millimeters off can lead to loose, uneven joints. Always measure twice, mark clearly, and use a square to ensure perfect alignment.
Overcomplicating Joints Unnecessarily
When starting, stick to simple joints. Trying complex joinery too soon can lead to frustration and weakened structures. Focus on mastering the basics first.
Skipping Dry Fitting Before Final Assembly
Dry fitting refers to assembling your joint without glue or fasteners to verify the fit. Skipping this step often results in misaligned or gapped joints that are difficult to correct once they are glued.
Conclusion
Learning a few straightforward timber frame joints is a powerful first step in woodworking.
These essential connections, such as the mortise and tenon, lap joint, and half-lap, might appear basic, but they serve as the structural heart of many builds, from furniture to small sheds.
By measuring, cutting, and joining wood accurately, you’ll develop practical skills and confidence in your ability to construct reliable and attractive pieces.
Eager to start? Begin with the Mortise and Tenon. It’s a time-tested classic and an excellent introduction to building with strength and accuracy.
Looking for more ideas? Check out our other DIY Project guides to create a uniquely yours space.
