
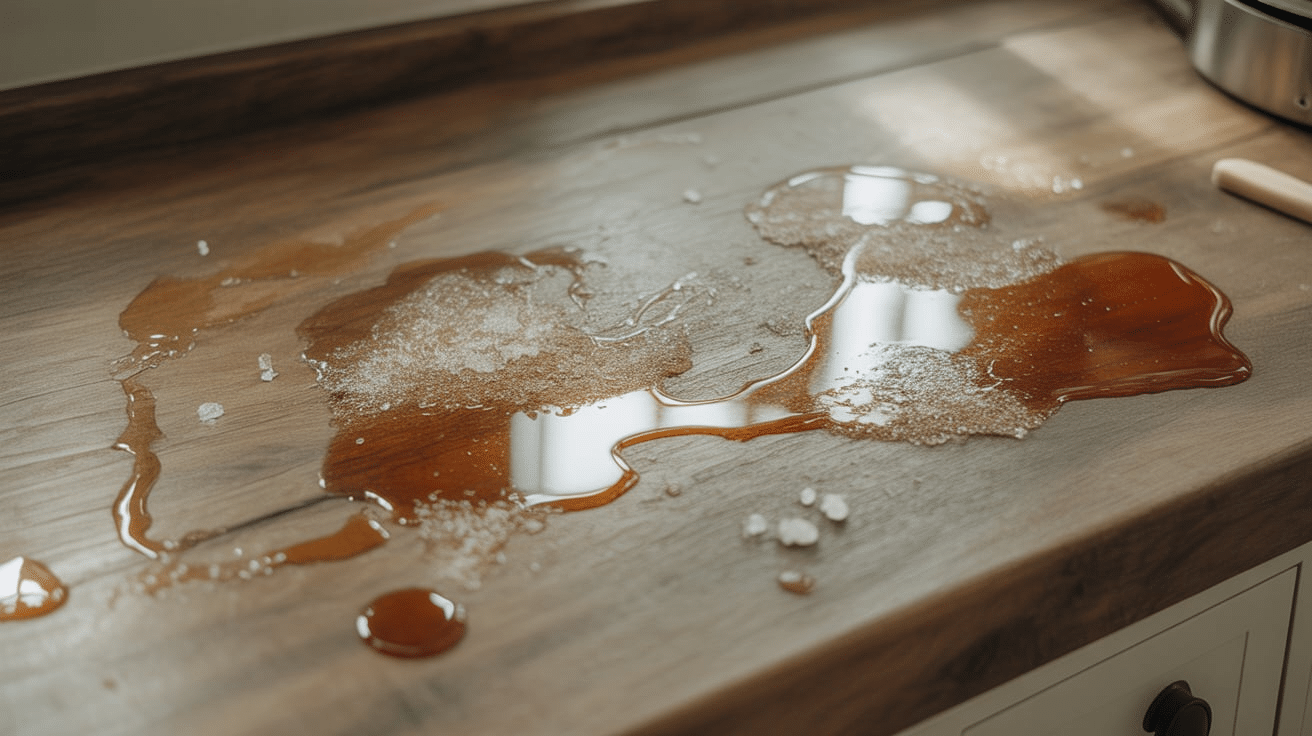
Ever notice how your beautiful wooden table suddenly feels like flypaper? You spend time cleaning it thoroughly, but your forearm still gets stuck like you’ve landed on nature’s version of double-sided tape.
If you’re wondering “why is my wood table sticky after cleaning,” you’re not alone. This frustrating problem happens to everyone.
You scrub that kitchen table and wipe it down completely, yet it still catches your fingers. The dining room surface makes that weird peeling sound when you lift your hand, even right after cleaning.
The coffee table grabs onto mail like it’s desperate for a pen pal, despite your best efforts.
The good news is that understanding why your wood table stays sticky after cleaning doesn’t require fancy products or special skills. With a few simple steps, you can restore your wooden furniture to its smooth, touchable state.
Let’s get those surfaces back to normal and end these sticky situations for good.
What Causes Sticky Wood Surfaces?
Wood surfaces can become sticky due to various factors, including spills, improper cleaning, and environmental conditions.
Understanding these causes can help you prevent and treat sticky residues effectively.
1. Food and Drink Spills: When sugars, oils, and other substances from food or drink spill onto wood, they leave behind sticky residues. These residues cling to the surface, making the wood feel tacky and difficult to clean.
2. Improper Cleaning Products: Harsh chemicals or incorrect cleaning products can leave behind a sticky residue on wood surfaces. These products can break down the wood’s finish, making it more susceptible to buildup.
3. Humidity and Weather Conditions: Excess moisture from high humidity or weather conditions can cause wood to absorb liquids. This absorbed moisture can make the surface feel sticky as it interacts with the wood’s finish.
Why is My Wood Table Sticky after Cleaning?
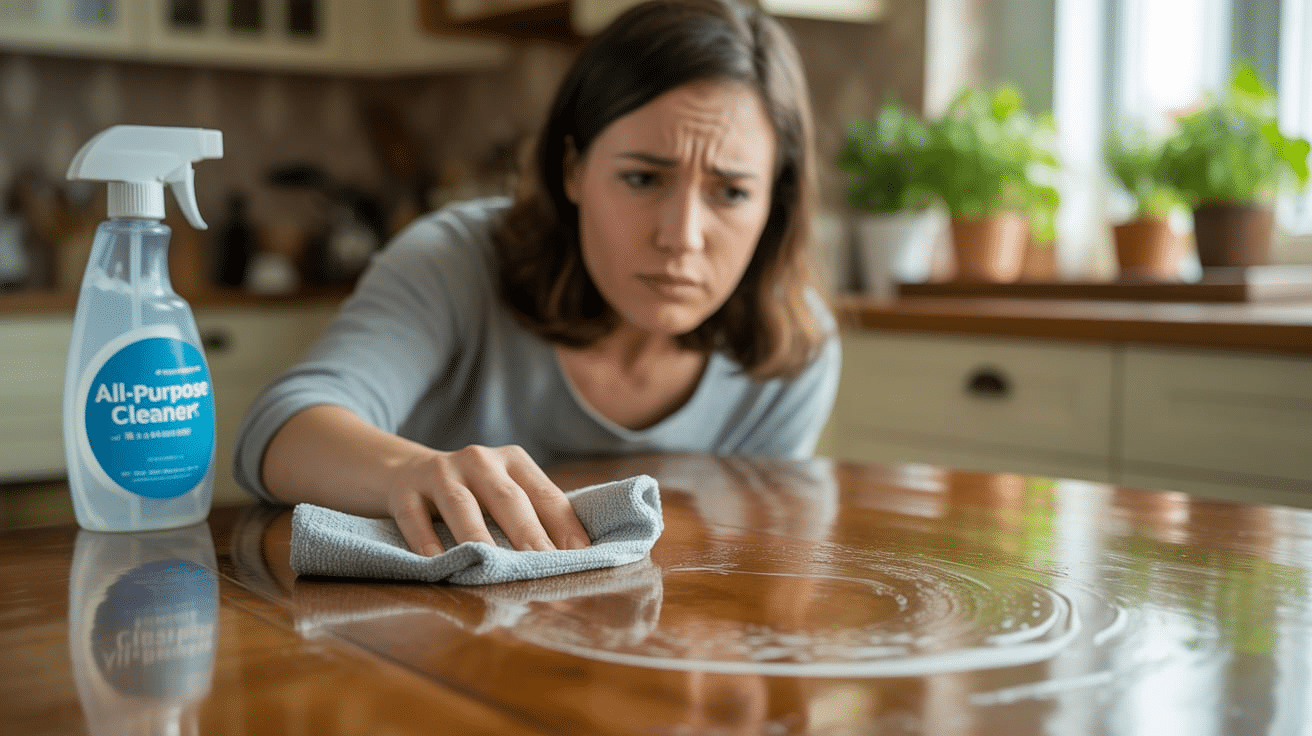
Sticky surfaces on wood tables can be caused by leftover cleaning product residue, excess water, or buildup from previous cleaners. Ensuring proper cleaning and drying can help restore the surface.
- Residue from Cleaning Products: Some cleaning products leave behind a sticky residue, especially if they are oil-based or contain wax. Even after wiping, the residue can remain, making the surface feel sticky.
- Too Much Cleaner Used: If too much cleaner was applied during the cleaning process, it can leave a layer that doesn’t fully evaporate, resulting in stickiness.
- Water Damage: If excess water was used during cleaning, it can seep into the wood, causing it to become sticky as it reacts with the wood’s finish or the protective coating.
- Build-up of Old Cleaning Products: Over time, previous cleaning products, waxes, or polishes can build up on the table, creating a sticky surface.
- Improper Drying: If the table wasn’t properly dried after cleaning, moisture could remain, causing a sticky feeling.>
Best Materials for Cleaning Sticky Wood Surfaces
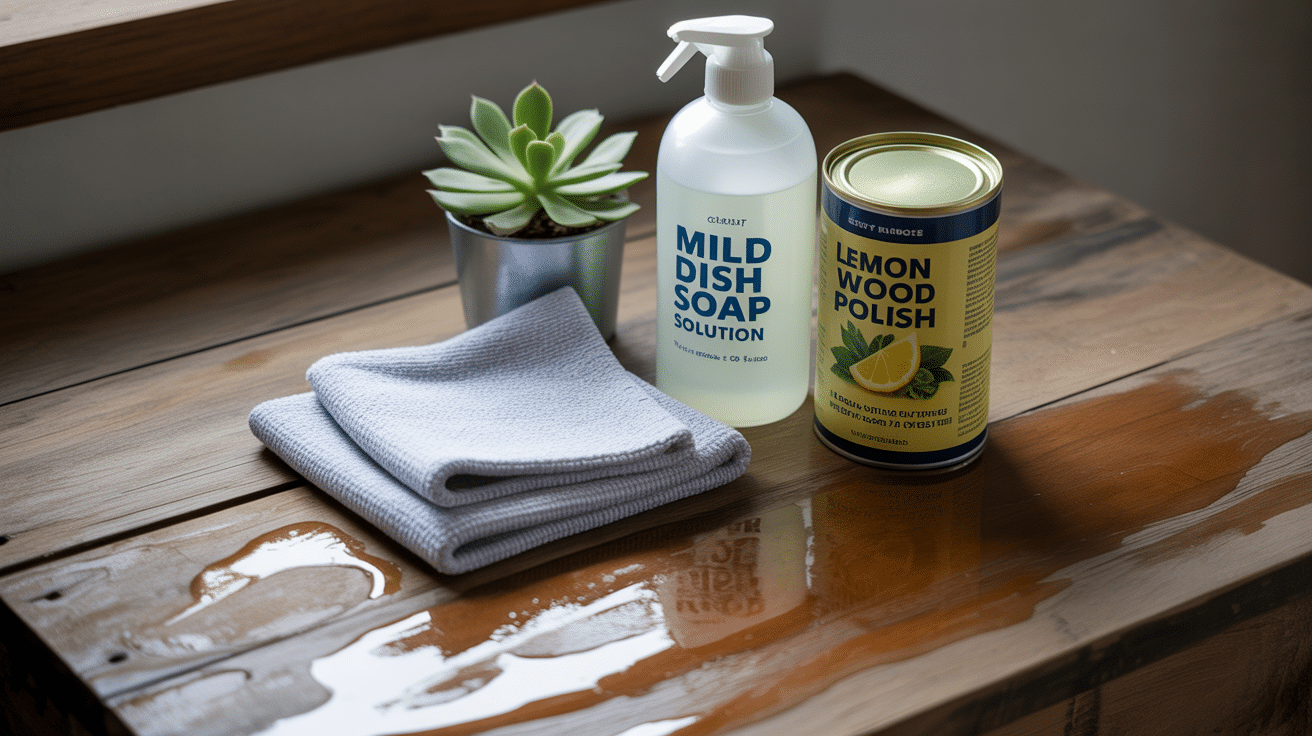
To properly clean sticky wood surfaces, it’s essential to use materials that protect the wood while effectively removing residue. The right tools and cleaners will help maintain the wood’s integrity and appearance.
1. Microfiber Cloths: Microfiber cloths are ideal for cleaning wood surfaces because they trap dirt and residue without scratching the finish. Their soft fibers gently lift sticky substances without causing damage.
2. Gentle Cleaners: Wood-friendly cleaning agents like mild dish soap or vinegar solutions are effective at removing stickiness. These cleaners are gentle on wood finishes and won’t leave behind harmful residues.
3. Wood Polishes and Oils: Using suitable wood polishes and oils after cleaning helps restore shine and protect the surface. These products nourish the wood, maintaining its luster while preventing future damage.
Step-by-Step Guide on How to Clean Sticky Wood Surfaces
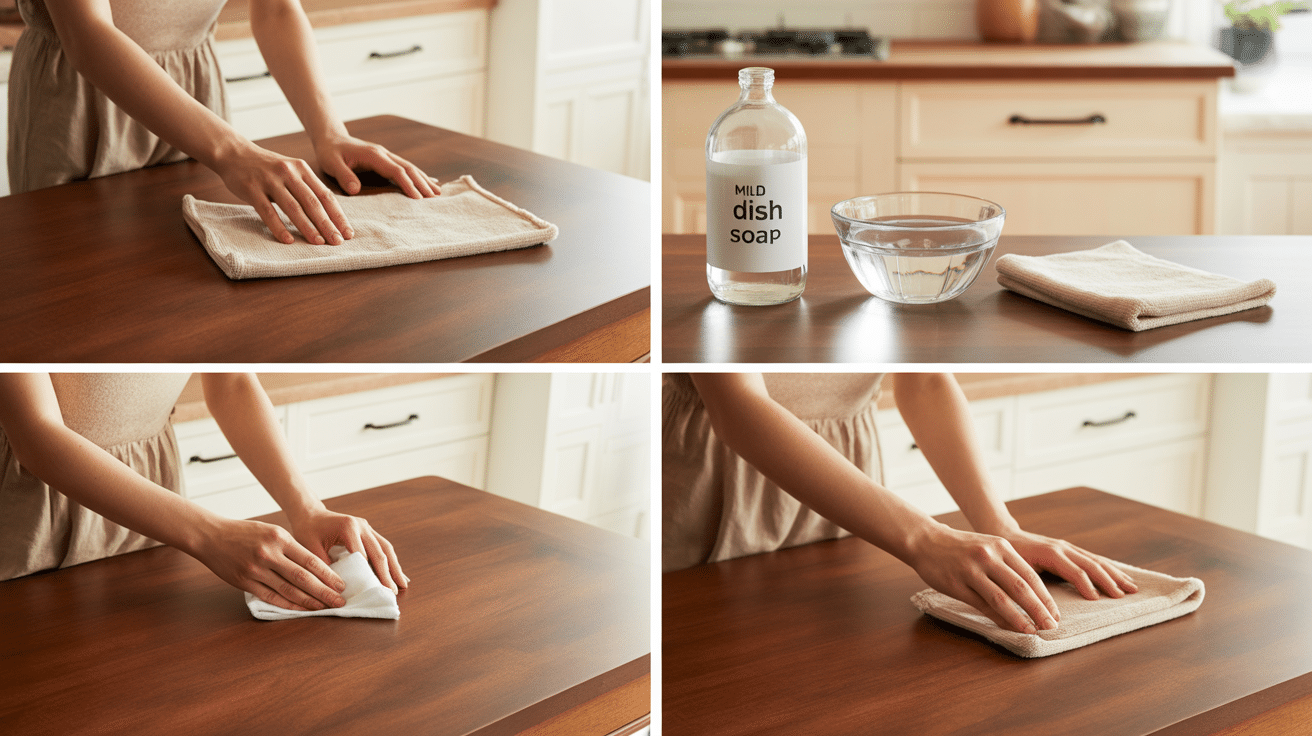
Cleaning sticky wood surfaces requires careful steps to protect the wood and maintain its beauty. Follow this guide to ensure a safe and effective cleaning process without damaging your wood surfaces.
Step 1: Dusting the Wood Surface
Before cleaning, it’s essential to remove any loose dirt or debris from the wood surface. Dusting prevents grit from scratching the wood when cleaning.
- What You Need: Microfiber cloth or a soft brush.
- How to Do It: First, dust the wood surface to remove loose dirt or debris. Then, gently wipe the surface with a microfiber cloth or brush.
Step 2: Choose the Right Cleaner
Choosing the right cleaning solution is crucial for safely removing sticky residues. Using mild and wood-friendly cleaners ensures you don’t damage the wood’s finish.
- What You Need: A mild dish soap and warm water mixture or a vinegar and water mixture.
- How to Do It: Mix your chosen cleaner and dampen your cloth lightly, avoiding excess liquid. Wring out the fabric to prevent water damage while cleaning.
Step 3: Gently Wipe Down the Sticky Area
Once the cleaner is ready, use a damp cloth to wipe the sticky spots gently. This step helps break down the residue without soaking the wood or damaging its surface.
- What You Need: Damp microfiber cloth.
- How to Do It: Lightly wipe the sticky surface, focusing on the areas where residue is visible. To protect the wood, avoid overwetting the cloth.
Step 4: Rinse and Dry the Area
After cleaning, it’s important to remove any remaining cleaning solution. Rinsing with clean water and drying properly prevents moisture damage to the wood.
- What You Need: Clean water and a dry microfiber cloth.
- How to Do It: Rinse the wood with clean water to remove any leftover cleaning solution. Then, dry the surface thoroughly with a dry microfiber cloth.
Tips for Preventing Sticky Residue on Wood Surfaces
Taking proactive measures to prevent sticky residue on wood surfaces can help maintain their beauty and longevity. Follow these tips to keep your wood surfaces looking their best.
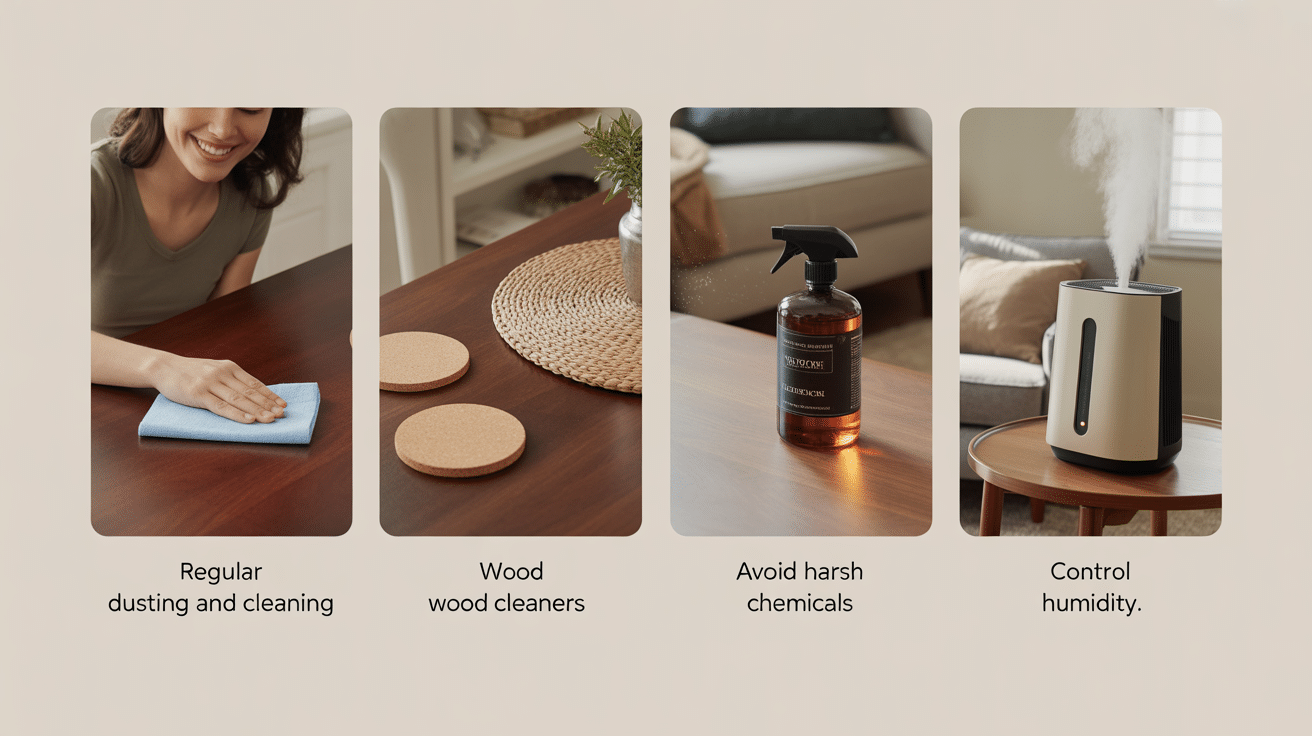
1. Regular Dusting and Cleaning: Maintaining a regular cleaning routine helps prevent the buildup of sticky substances and dust. Dusting and cleaning frequently ensure that residues don’t have a chance to accumulate.
2. Use Coasters and Table Mats: Coasters and table mats protect wood surfaces from spills and sticky substances. These simple additions help avoid direct contact with liquids and food, reducing the chance of buildup.
3. Avoid Harsh Chemicals: Harsh chemicals can damage wood surfaces and leave sticky residues. Stick to mild, wood-friendly cleaners to ensure the wood stays protected and free from unwanted buildup.
4. Control Humidity: Maintaining proper humidity levels in your home prevents moisture from affecting the wood. Use a dehumidifier or humidifier as needed to keep your wood surfaces safe from sticky moisture damage.
Common Mistakes to Avoid When Cleaning Sticky Wood Surfaces
Avoiding common cleaning mistakes is key to maintaining your wood surfaces in top condition. Here are some things to watch out for when cleaning sticky wood surfaces.
- Using Too Much Water: Excessive water can seep into the wood, causing swelling or warping. To prevent moisture damage, always use a damp cloth rather than soaking the wood.
- Using Harsh Chemicals: Harsh chemicals can break down the wood’s finish and leave sticky residues behind. Stick to gentle, wood-friendly cleaners to avoid long-term buildup and damage.
- Skipping the Drying Step: Failing to dry the wood properly can cause moisture to penetrate, leading to long-term damage like warping or staining. Always ensure the surface is thoroughly dried after cleaning.
Conclusion
Sticky wood surfaces can be a real headache, but now you have the tools to tackle them with confidence! Remember, regular cleaning prevents buildup, and matching the right cleaning method to your wood type makes all the difference.
Start with the gentlest solution first; often, warm water and mild soap will do the trick. For tougher sticky spots, vinegar or alcohol solutions work wonders without damaging your precious wood.
The best part? Most of these cleaners are already in your kitchen cabinets, saving you time and money.
So go ahead and give those sticky tables, shelves, and cabinets the care they deserve. Your wood will thank you with years of beautiful service.
