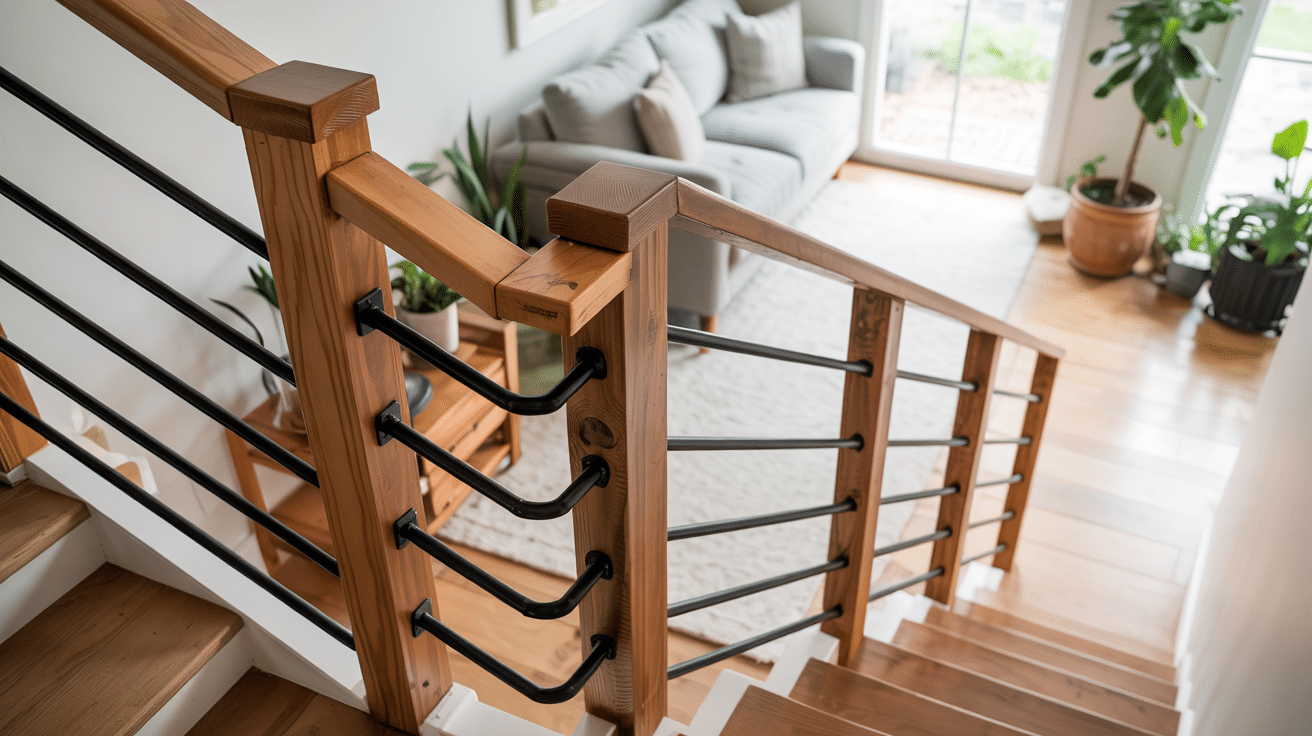

A stair railing does more than keep you safe, and it shapes the whole look of your home. Are you thinking about building one yourself?
You’re not alone. Many homeowners want a railing that’s both strong and stylish without the hefty price tag. Here’s the good news: it’s easier than it seems.
With the right tools, clear steps, and a little time, anyone can build a stair railing that looks amazing and lasts for years to come.
This guide walks through every part of the process from your first design idea to the final screw. No fancy talk. No confusing steps. Just honest, helpful advice.
Ready to roll up your sleeves and create something you’ll be proud of every time you walk up the stairs? Let’s get started.
Why Make a DIY Stair Railing?
Creating a DIY stair railing saves money and allows you to customize the look to suit your home. It’s a rewarding project that adds both style and strength to your space.
- Cost-effective: DIY railing projects eliminate costly labor fees and markups on materials, allowing you to stick to a budget.
- Create the Vibe You Love: Choose the look, colour, and layout that match your space.
- Skill building: Building a railing teaches you hands-on skills that can be applied to other home projects.
- Control the Quality: You get to pick every piece, no shortcuts or cheap materials.
- Add Value to Your Home: A well-done railing can increase your home’s safety and appeal.
- Enjoy a creative outlet: DIY projects bring out creativity and allow you to try fresh ideas.
- Feel Proud Every Day: You’ll see something you built every time you walk up those stairs.
Materials Required
These are the necessary materials for this DIY project, with an expected cost.
| Material | Purpose | Estimated Quantity | Expected Cost (USD) |
|---|---|---|---|
| Kiln-dried 2×4 lumber | Mainframe structure | ~16-20 ft (depends on stair length) | $25-40 |
| Flat metal bars (1/8″ thick) | Horizontal rails | 2-3 bars of 20ft length | $20-30 per bar |
| 3-inch construction screws | Connecting wood pieces | 1 box (50-100 count) | $8-12 |
| Metal screws | Securing metal to wood | 1 box (50 count) | $5-8 |
| Lag bolts | Securing the railing to the floor/wall | 4-8 bolts | $10-15 |
| Wood stain/finish | Finishing wood | 1 quart | $15-25 |
| Spray paint for metal | Finishing metal bars | 2-3 cans | $5-7 per can |
| Sandpaper | Smoothing wood | Various grits | $5-10 |
These are the necessary tools for this DIY project, with an expected cost.
| Tool | Expected Cost |
|---|---|
| Jigsaw or Band Saw with metal blade | $60–$150 |
| Power Drill | $40–$100 |
| Router with Edge Bit | $50–$120 |
| Measuring Tape | $5–$15 |
| Carpenter’s Level | $10–$30 |
| Screwdriver or Impact Driver | $30–$80 |
| Clamps | $10–$25 (per pair) |
| Sanding Block or Electric Sander | $5–$10 (manual) / $25–$60 (electric) |
DIY Stair Railing Step-by-Step Guide
Follow these simple steps to make your DIY stair railing. You’ll quickly create a comfy, stylish piece.
Step 1: Prepare your wood
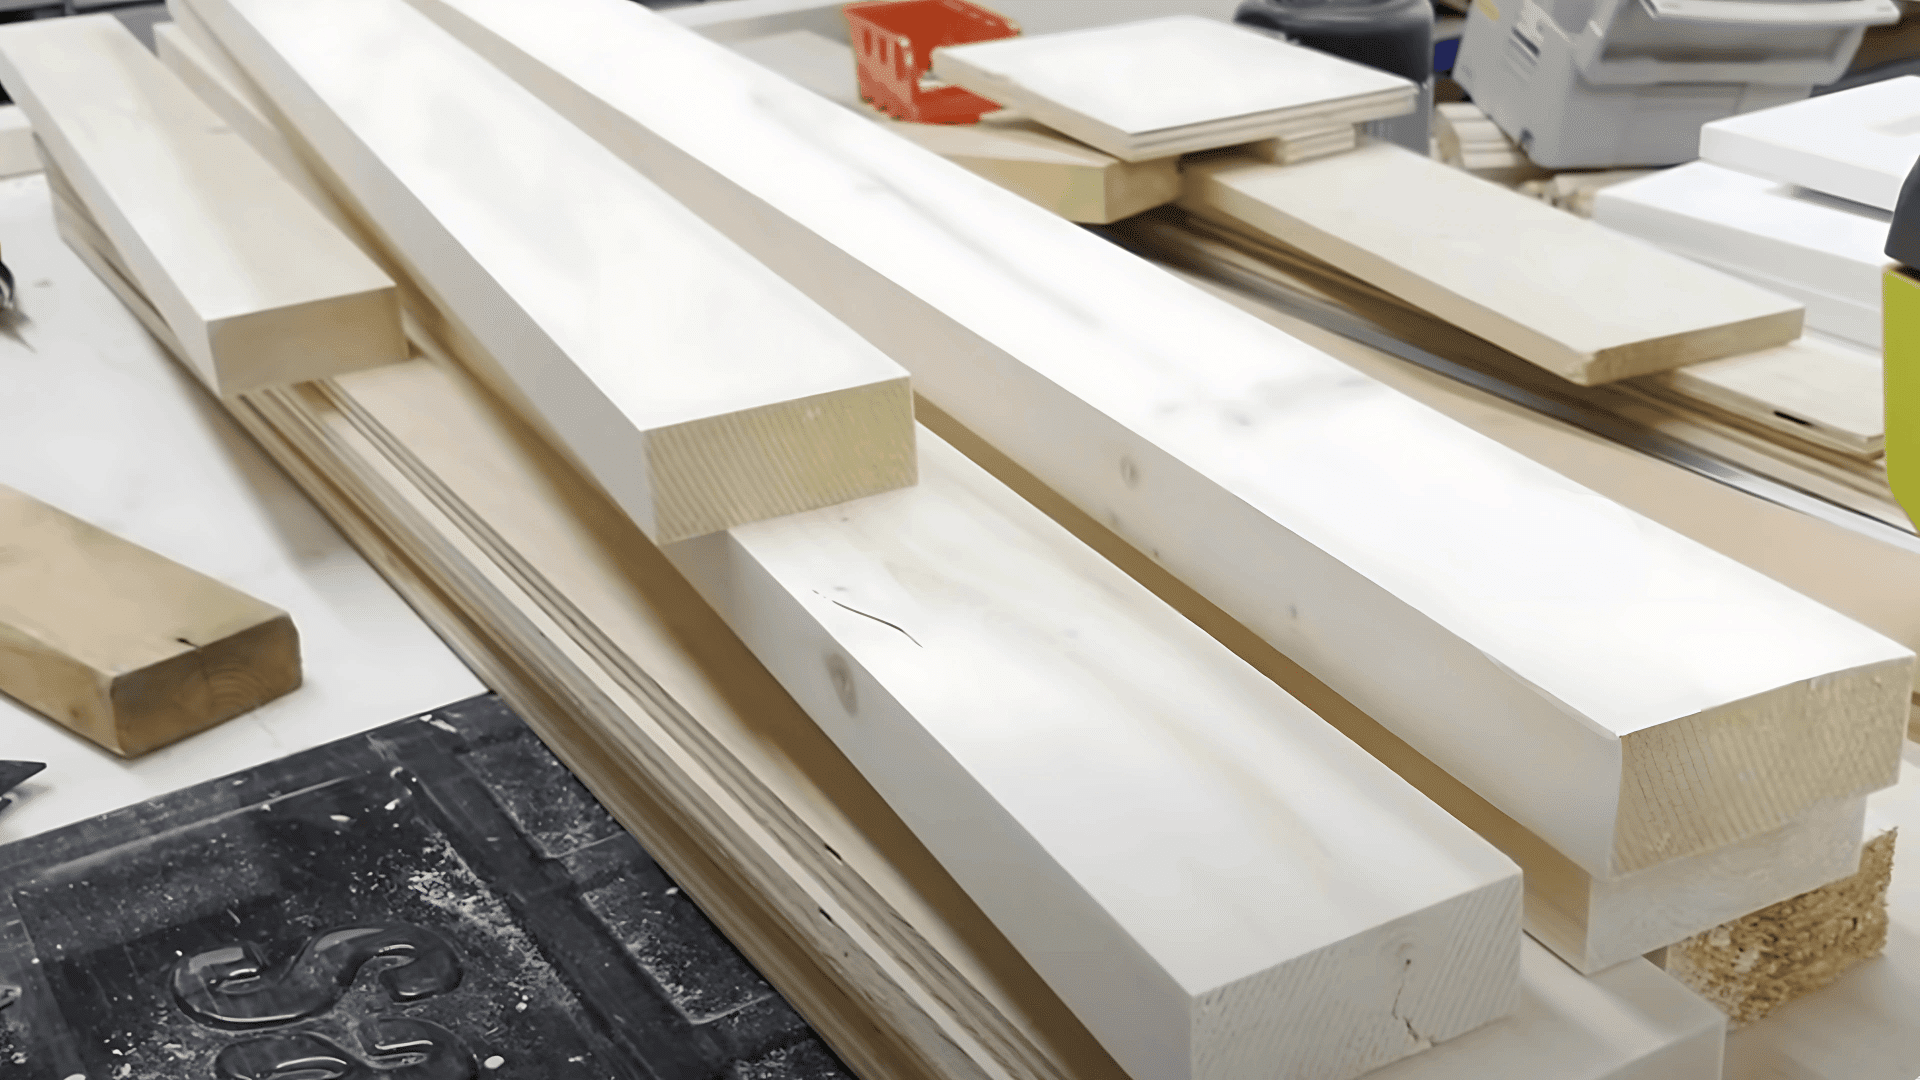
- Square the edges: If your 2×4s are rough, trim them to get a clean, professional look that fits together neatly.
- Smooth the corners: Use a router to round off the outside edges and help prevent splinters when someone grabs the handrail.
- Improve comfort: This small detail makes the railing feel more polished and pleasant to the touch.
- Stain before assembly: Apply your wood stain or finish before putting the pieces together—it’s much easier and cleaner this way.
- Pick your finish: In the video, they used Varathane Aged Wood Accelerator in brown, but you can choose any stain that suits your home’s style.
Pro Tip: Test your stain on a scrap piece first. Colours often appear differently on actual wood than they do on sample cards at the store.
Step 2: Build the Basic Wood Frame
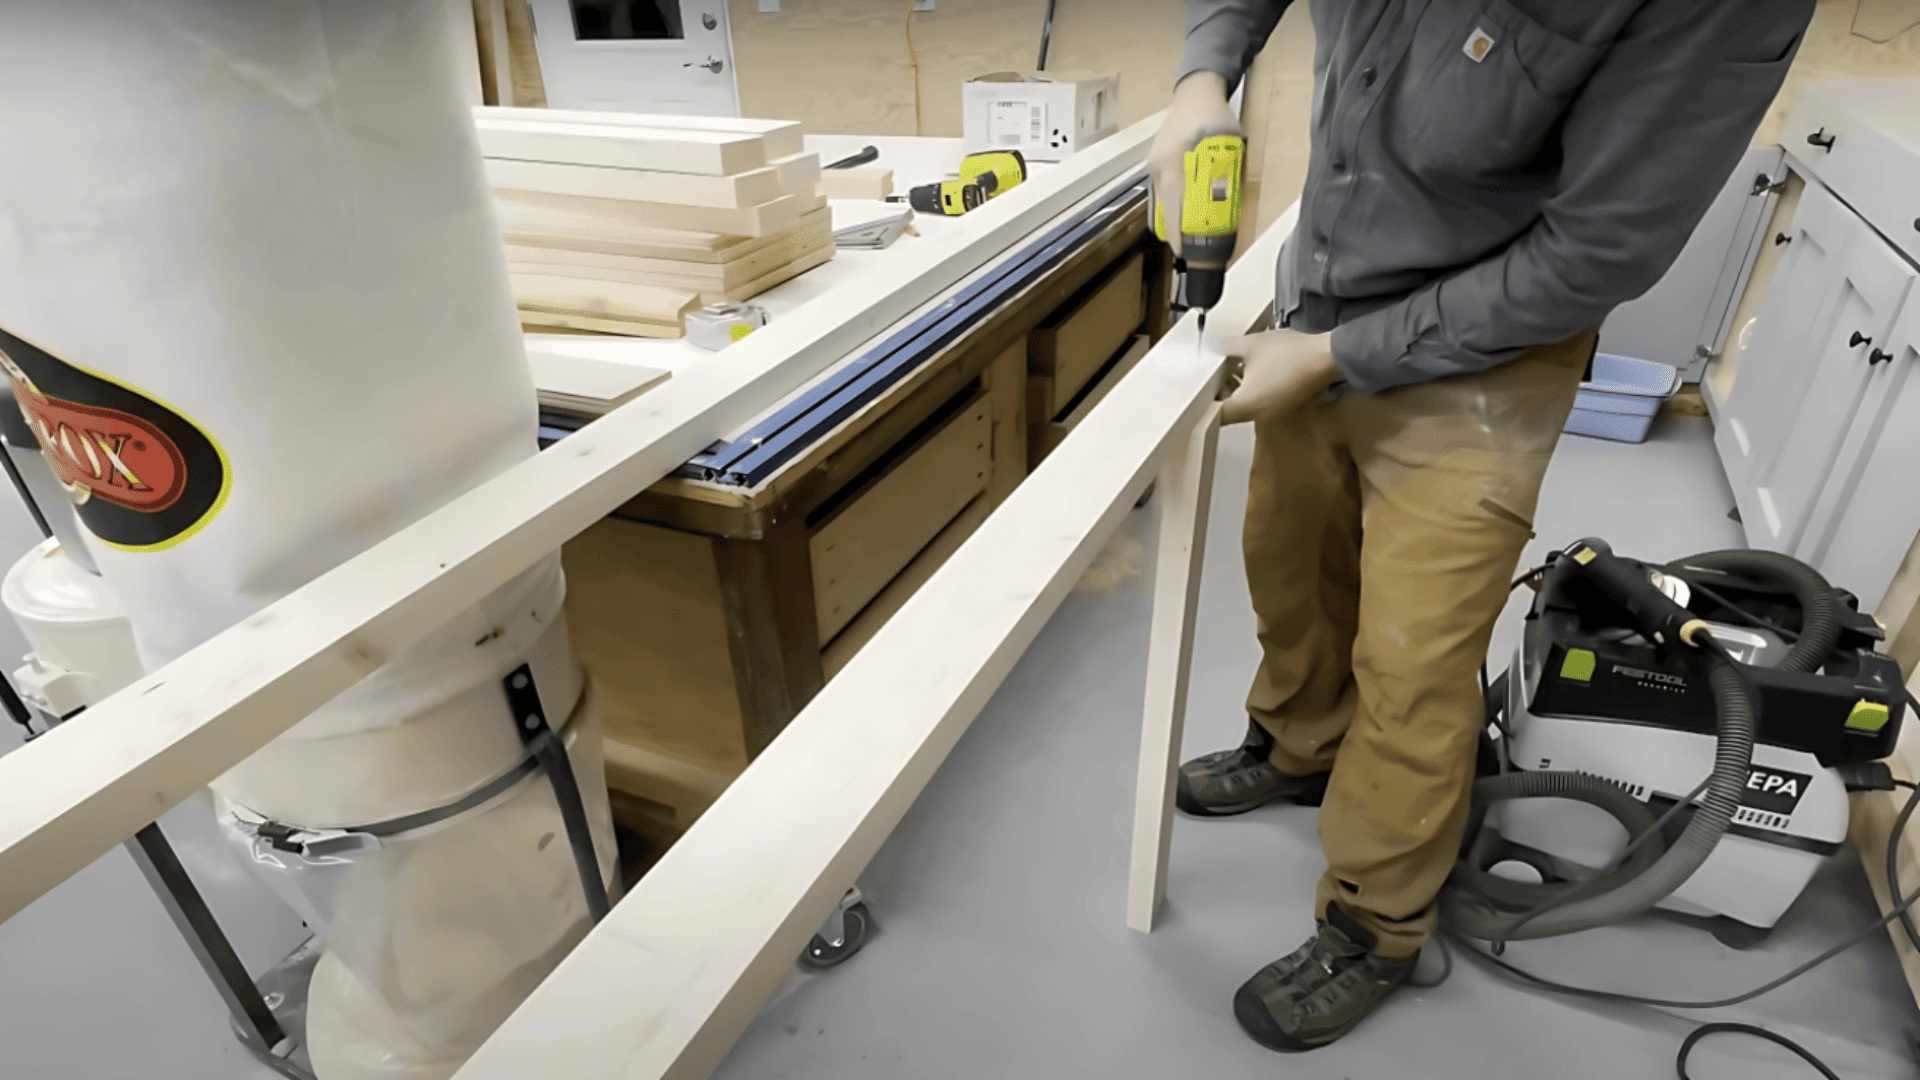
- Create a basic frame: Begin just like you would with a simple deck railing to form the structure.
- Line up your 2×4s: Arrange them to shape the railing frame clearly and evenly.
- Secure the boards: Use 3-inch construction screws to fasten the wood and keep it sturdy tightly.
- Keep it simple: Don’t overthink this part—it’s the foundation of your railing.
- Check for square and level: Make sure everything lines up straight to avoid issues later.
- Take your time: A little extra care now means a faster, easier installation in the end.
Pro Tip: Pre-drill your screw holes to prevent the wood from splitting, especially when working near the ends of boards.
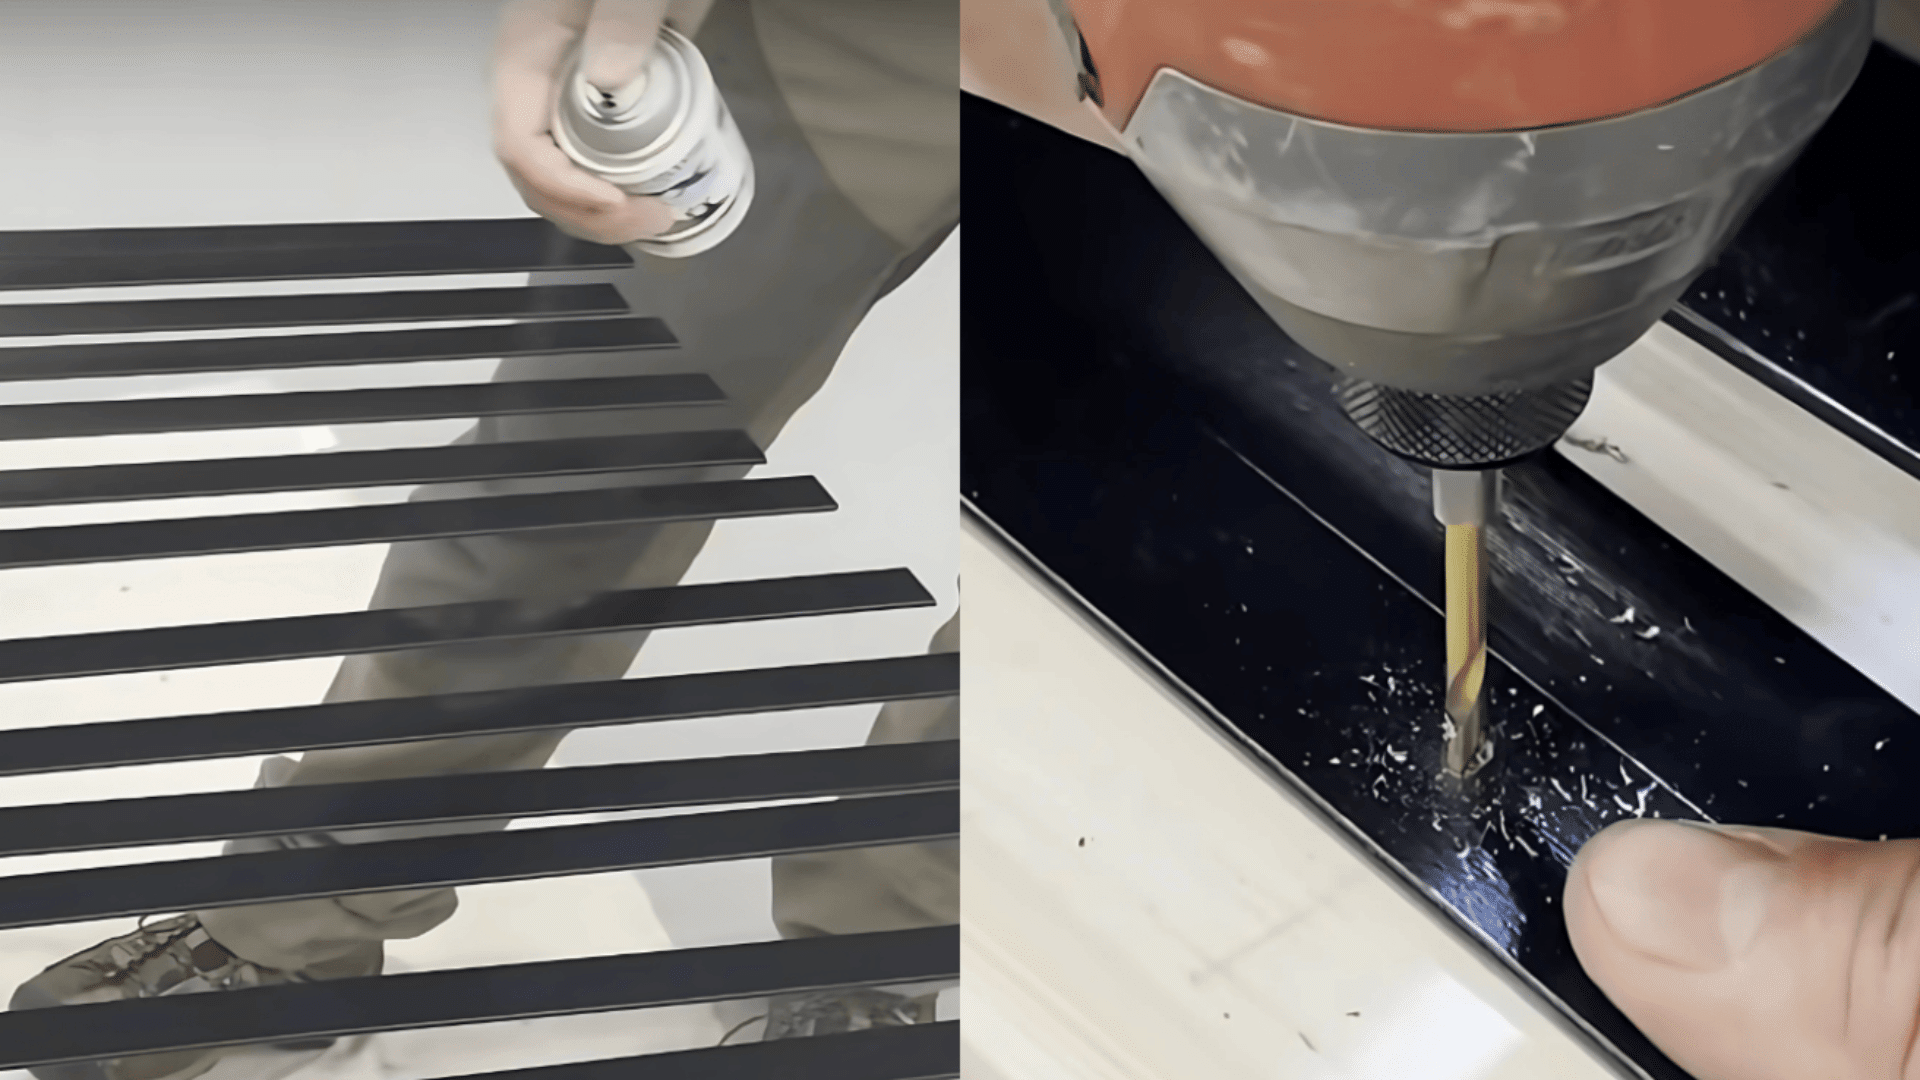
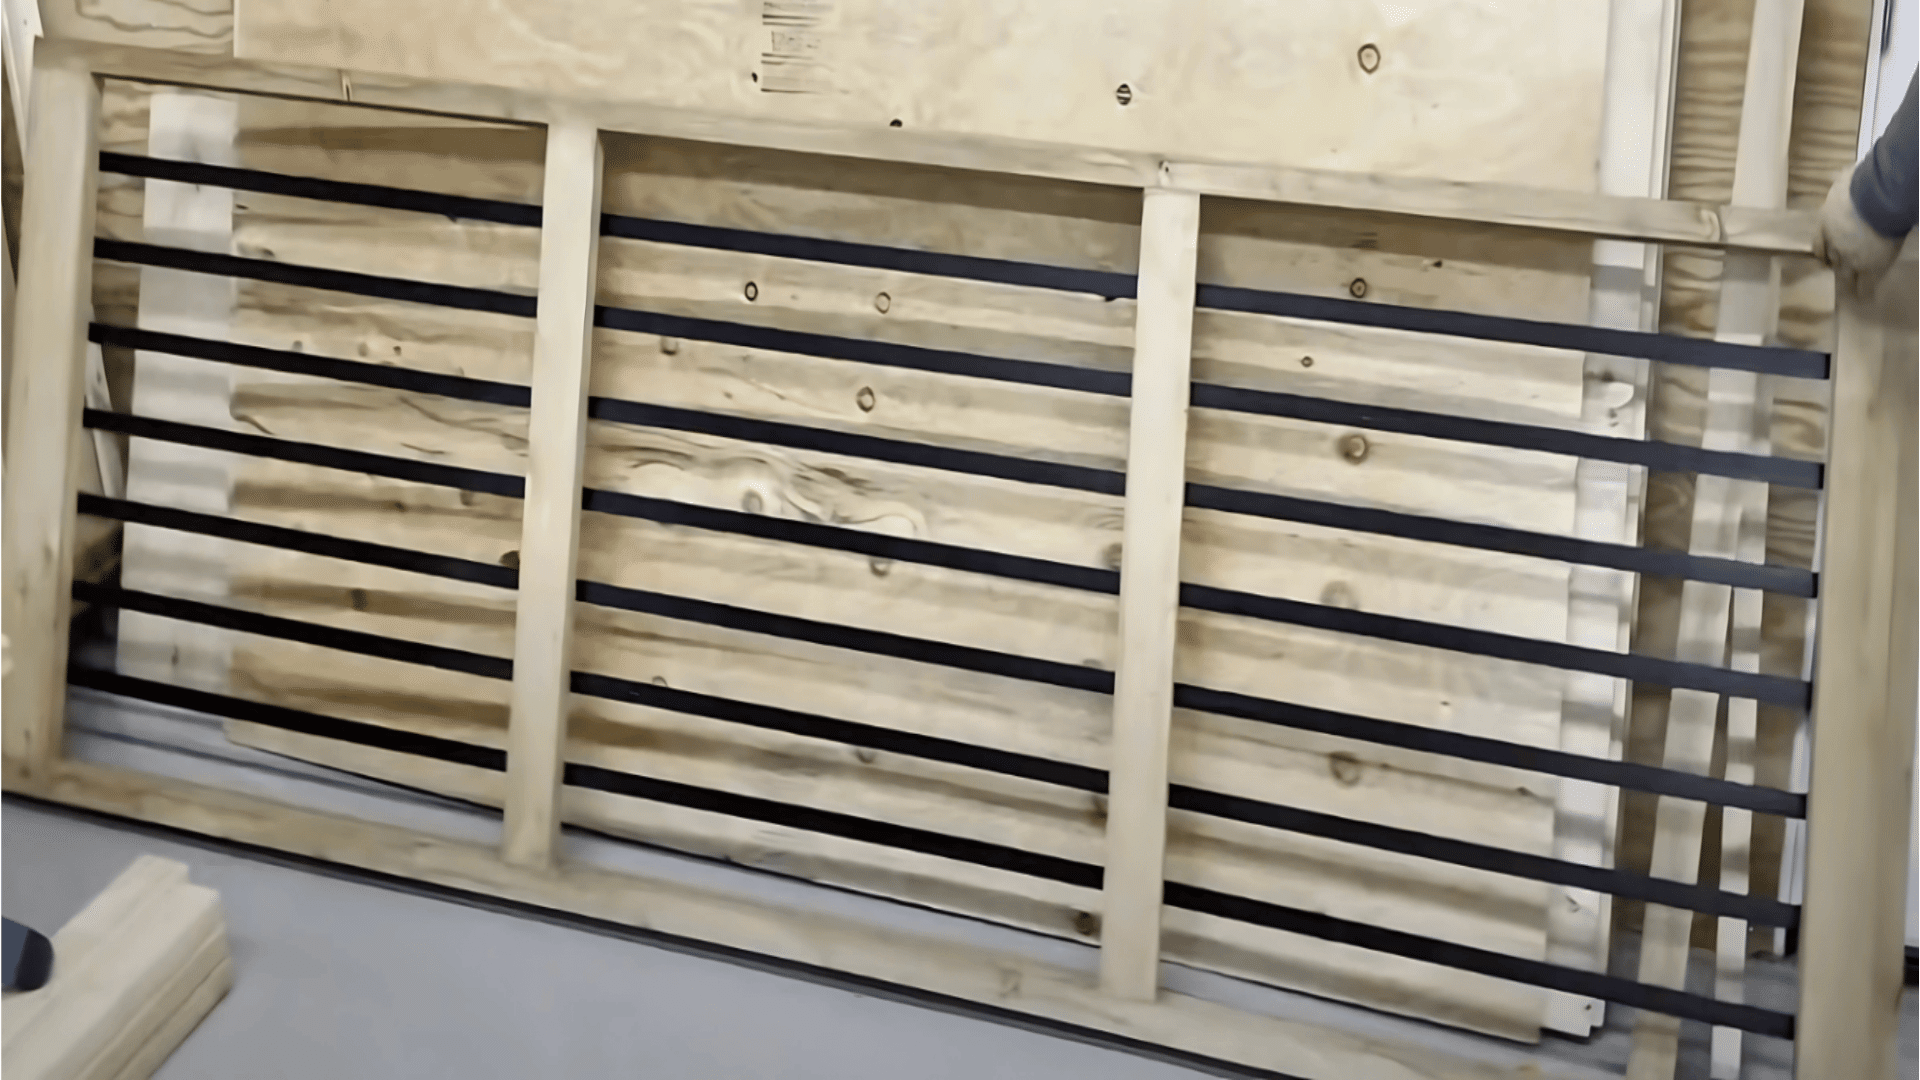
These metal bars give your railing a strong and modern look without costing a lot.
- Cut the metal bars: Trim the flat steel bars to the correct length using a saw with a metal-cutting blade.
- Clean and paint: Wipe each bar with a cloth, then spray paint them in your chosen color—matte black adds a bold, modern look.
- Drill connection holes: Make holes where the metal bars will attach to the wooden posts so everything fits and fastens easily.
Pro Tip: Space the bars evenly for a cleaner, more professional look.
Step 4: Assemble the Railing
Now bring it all together!
- Insert the metal bars. Position each bar neatly inside the wooden frame for a clean layout.
- Fasten with screws: Secure the bars into the posts using the pre-drilled holes to hold them firmly in place.
- Check alignment: Make sure each bar stays straight and evenly spaced as you work for a polished finish.
Pro Tip: A little patience here goes a long way toward a strong, beautiful finish.
Step 5: Install the Railing on the Stairs

This is where your railing comes to life.
- Attach the posts: Screw the posts into the stair skirt or side board along the outside of the staircase for a sturdy base.
- Match the angle: Hold a board along the stair slope to find the correct angle, then cut the tops of the posts to align perfectly.
- Secure the frame: Fasten the wooden railing frame to the tops of the posts using strong, reliable screws.
- Install the metal bars: Place the pre-cut and painted metal bars inside the frame, just as you did with the upper railing.
Pro Tip: Lag bolts can help anchor the frame securely to the floor and wall, providing extra strength.
Step 7: Final Touches
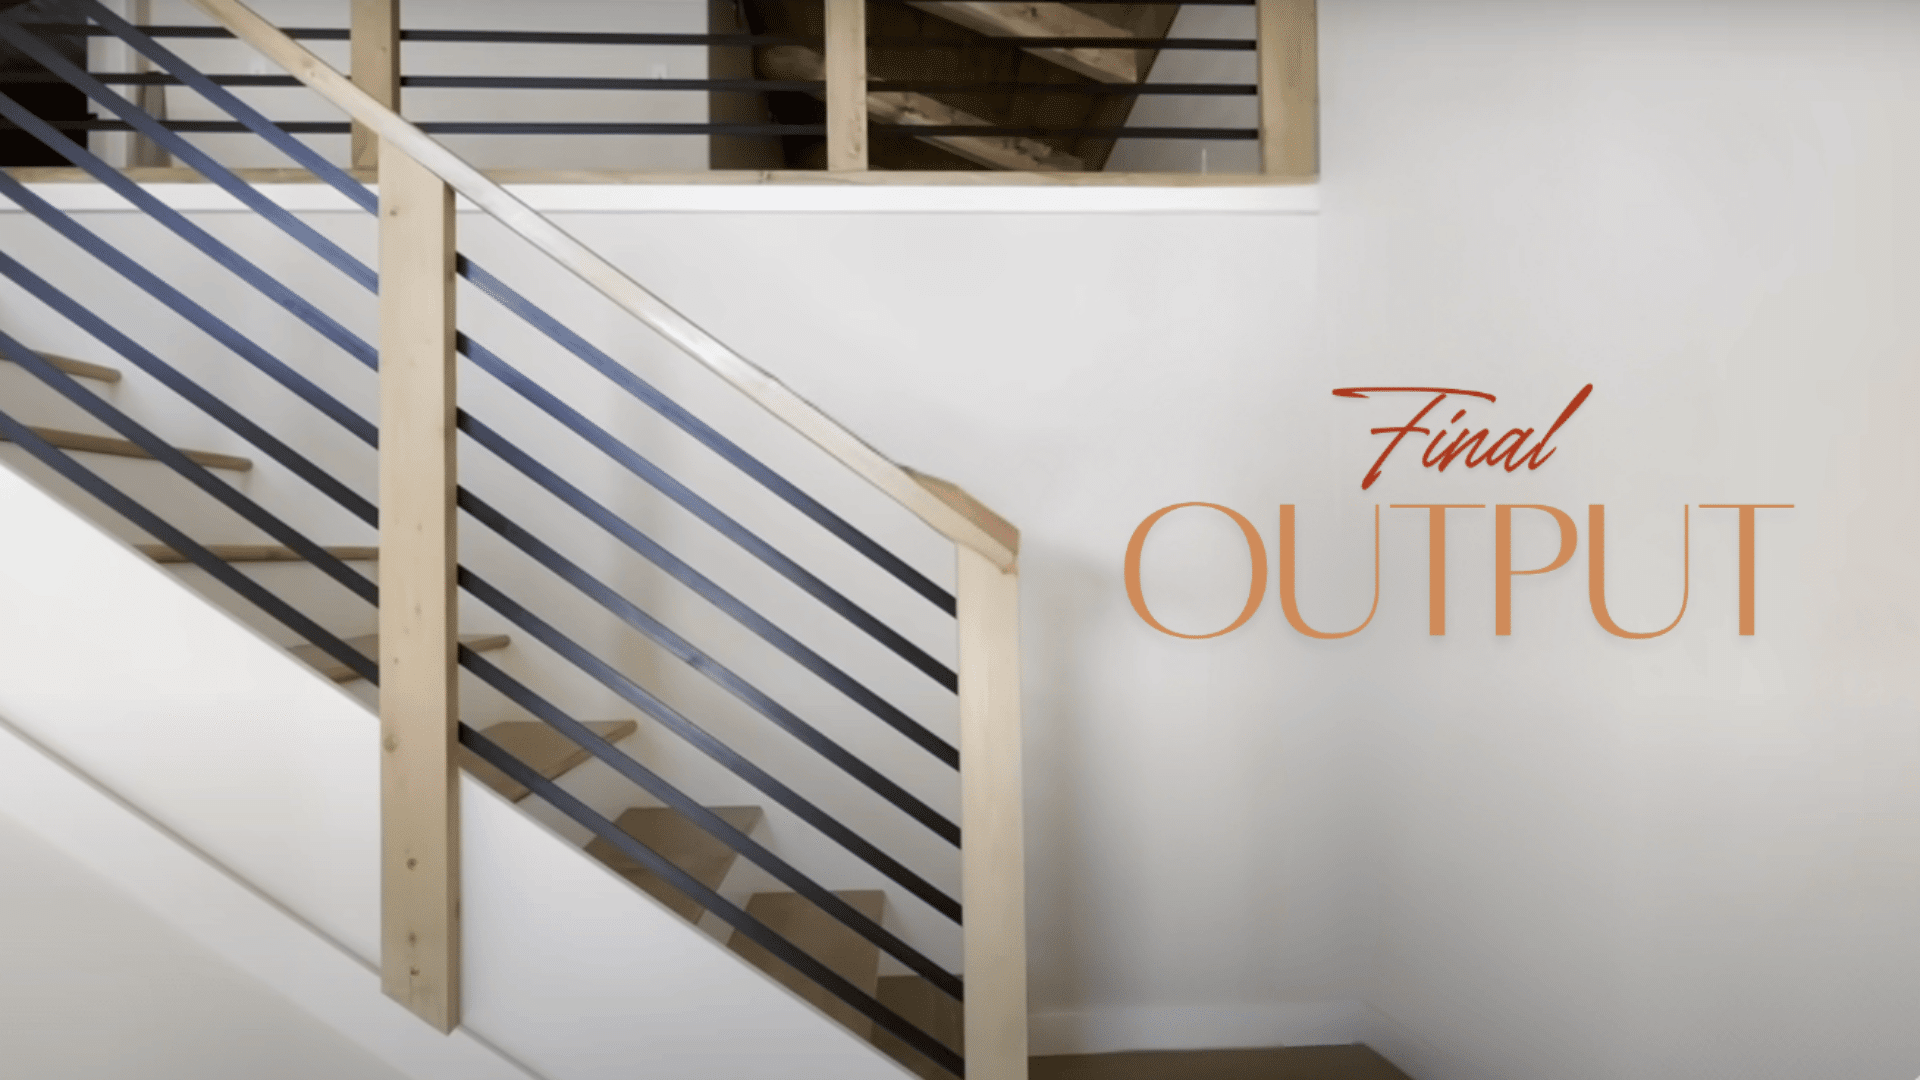
Almost done! Let’s make sure everything is perfect.
Check all your screws and tighten any loose ones. Touch up any scratches in the paint or stain that might have happened during installation.
Want to make it even fancier? Add a finished board on top to cover the screw holes. Stand back and admire your work – you just built a custom stair railing that looks amazing and will last for years!
Pro Tip: Take photos of your finished project from multiple angles. Not only can you show off your work, but these photos are helpful if you ever need to repair or match this project.
Video Tutorial
Check out this video by @AnaWhite for a step-by-step guide on a DIY stair railing.
Things to Keep in Mind While Making Your DIY Stair Railing
When creating your DIY stair railing, consider these important points to ensure a successful project:
- Use kiln-dried lumber: Choose dimensionally stable wood to avoid warping over time, especially if the railing isn’t secured in multiple places.
- Smooth and sharp edges: Run a router along the outer edges to prevent scratches or splinters and make the railing safer to touch.
- Pre-finish the wood: Stain or paint your wooden pieces before adding any metal parts—it’s much easier and cleaner this way.
- Try flat metal bars. They are affordable and easy to find at most hardware stores, and they give your railing a clean, modern design.
- Cut and drill with ease: Flat metal bars can be cut using a band saw or jigsaw with a metal blade, and drilled using standard metal drill bits.
- Paint before installing: Clean and spray paint all metal parts before assembly to speed up the build and improve the finish.
- Secure to structure: Use lag bolts to fasten the railing to the floor and wall for added strength and long-term stability.
- Fit angled stair rails: When working on angled staircases, attach the posts first, then measure and cut the top rail to match the slope.
- Hide screw holes: For a clean, finished look, consider adding a decorative board on top to conceal any visible hardware.
- Balance cost and quality: While higher-grade wood improves appearance, it also raises the price—find the right balance for your budget.
Final Conclusion
Building your own stair railing is easier than you might think. With basic tools, quality materials, and patience, you can create something both safe and stylish for your home.
This project saves money while giving you complete control over the design and quality.
Remember to take your time with each step, especially when measuring and cutting.
The combination of wood and metal creates a modern look that fits most home styles. Plus, you’ll feel great every time you see your finished work.
Ready to start your project? Gather your materials, set aside a weekend, and begin building.
Share your finished railing photos in the comments below – we’d love to see your results!