

Ever stared at your garage ceiling and thought about all that wasted space up there? I did too. My garage floor was cluttered with seasonal decorations, camping gear, and boxes I rarely used. Sound familiar?
That’s when I realized overhead storage could solve my space problem without breaking the bank.
Building overhead garage storage with 2x4s isn’t just cost-effective – it’s surprisingly simple when you know the right approach.
I’m going to show you exactly how I built my own overhead storage system using basic 2×4 lumber.
This step-by-step guide will help you reclaim your garage floor and create organized storage that actually works. No fancy tools required, just some weekend time and the willingness to get your hands dirty.
Ready to convert that ceiling space into valuable storage?
Why Overhead Garage Storage Is a Smart Solution?
Garage ceilings hold incredible potential that most homeowners ignore. Many people spend years stepping around boxes and tripping over stored items on garage floors. The space above represents valuable real estate that costs nothing to access.
Most garages waste 8-10 feet of vertical space while the floor stays cramped and unusable. Building overhead storage immediately regains enough floor space to park both cars comfortably. The difference feels like getting a garage expansion without the construction costs.
Key Benefits:
- Instant floor space – Park vehicles and move freely without obstacles.
- Budget-friendly solution – 2×4 lumber costs under $100 versus $500+ for commercial systems.
- Perfect for seasonal items – Christmas decorations, camping gear, and winter equipment belong overhead.
- Improved safety – Clear walkways reduce tripping hazards and emergency exit blockages.
- Custom sizing – Build exactly what fits your ceiling height and storage needs.
- Added home value – Organized garages appeal to potential buyers and create better impressions.
Laying the Groundwork
Proper preparation makes the difference between a storage system that lasts decades and one that fails within months. Many DIY projects fail because builders skip the essential planning phase and jump straight into construction.
Understanding your garage’s structure and limitations comes first. The key is identifying where ceiling joists run and how they can support your storage load. Getting close to these structural supports during installation creates the strongest foundation for overhead storage systems.
Essential Preparation Steps:
- Locate ceiling joists – Use a stud finder to mark support points where you’ll mount primary brackets
- Plan your mounting strategy – Decide between ceiling-only mounts or wall-to-ceiling combinations based on your garage layout.
- Consider concrete anchoring – Wall mounting often requires masonry bits and concrete anchors for solid connections.
- Measure for material efficiency – Plan dimensions that maximize full-length lumber usage without waste
- Check clearance requirements – Ensure adequate space for garage doors, vehicles, and safe access to stored items.
- Assess structural integrity – Verify your ceiling can handle the planned storage weight plus safety margins.
Thoughtful preparation prevents the frustration of discovering structural problems halfway through construction. Taking time to plan your approach before making the first cut saves both time and materials.
Materials and Tools You’ll Need
Building overhead garage storage requires specific lumber, hardware, and tools to create a safe and sturdy system. Having everything ready before starting prevents mid-project trips to the hardware store.
| Materials | Tools |
|---|---|
| 2×4 studs (5 pieces) | Drill |
| 2×3 stud (1 piece) | Miter saw |
| 15/32″ 4×8 plywood (1 sheet) | Table saw |
| 2″ strong tie angles (10 pieces) | Level |
| Tapcon 2-3/4″ concrete anchors (10 pieces) | Kreg pocket hole jig kit |
| 4″ lag screws (8 pieces) | Clamp |
| 2-1/2″ construction screws (20 pieces) | Ladder |
| 1-1/4″ construction screws (23 pieces) | Stud finder |
| 2-1/2″ pocket screws (10 pieces) | Pencil |
| 1-1/4″ strong tie wood screws (40 pieces) | Tape measure |
| T25 drive bit | |
| T30 drive bit | |
| 5/16″ nut driver | |
| Tapcon 3/16″ x 4-1/2″ masonry drill bit |
6-Step Process to Build Overhead Garage Storage
This process creates a strong overhead storage platform through six main construction phases. Each step builds the framework systematically for maximum safety and storage capacity.
Step 1: Prepare and Cut Your Lumber
Start by purchasing 2×4 lumber and ripping it down the middle to create 2×2 supports. This cost-effective approach provides the right dimensions for horizontal framing while maximizing material usage. A table saw works best for making clean, straight cuts through the lumber.
The ripped 2x4s become the horizontal supports that connect the main structural elements. This preparation step saves money compared to buying pre-cut 2×2 lumber and ensures all pieces match perfectly for consistent assembly.
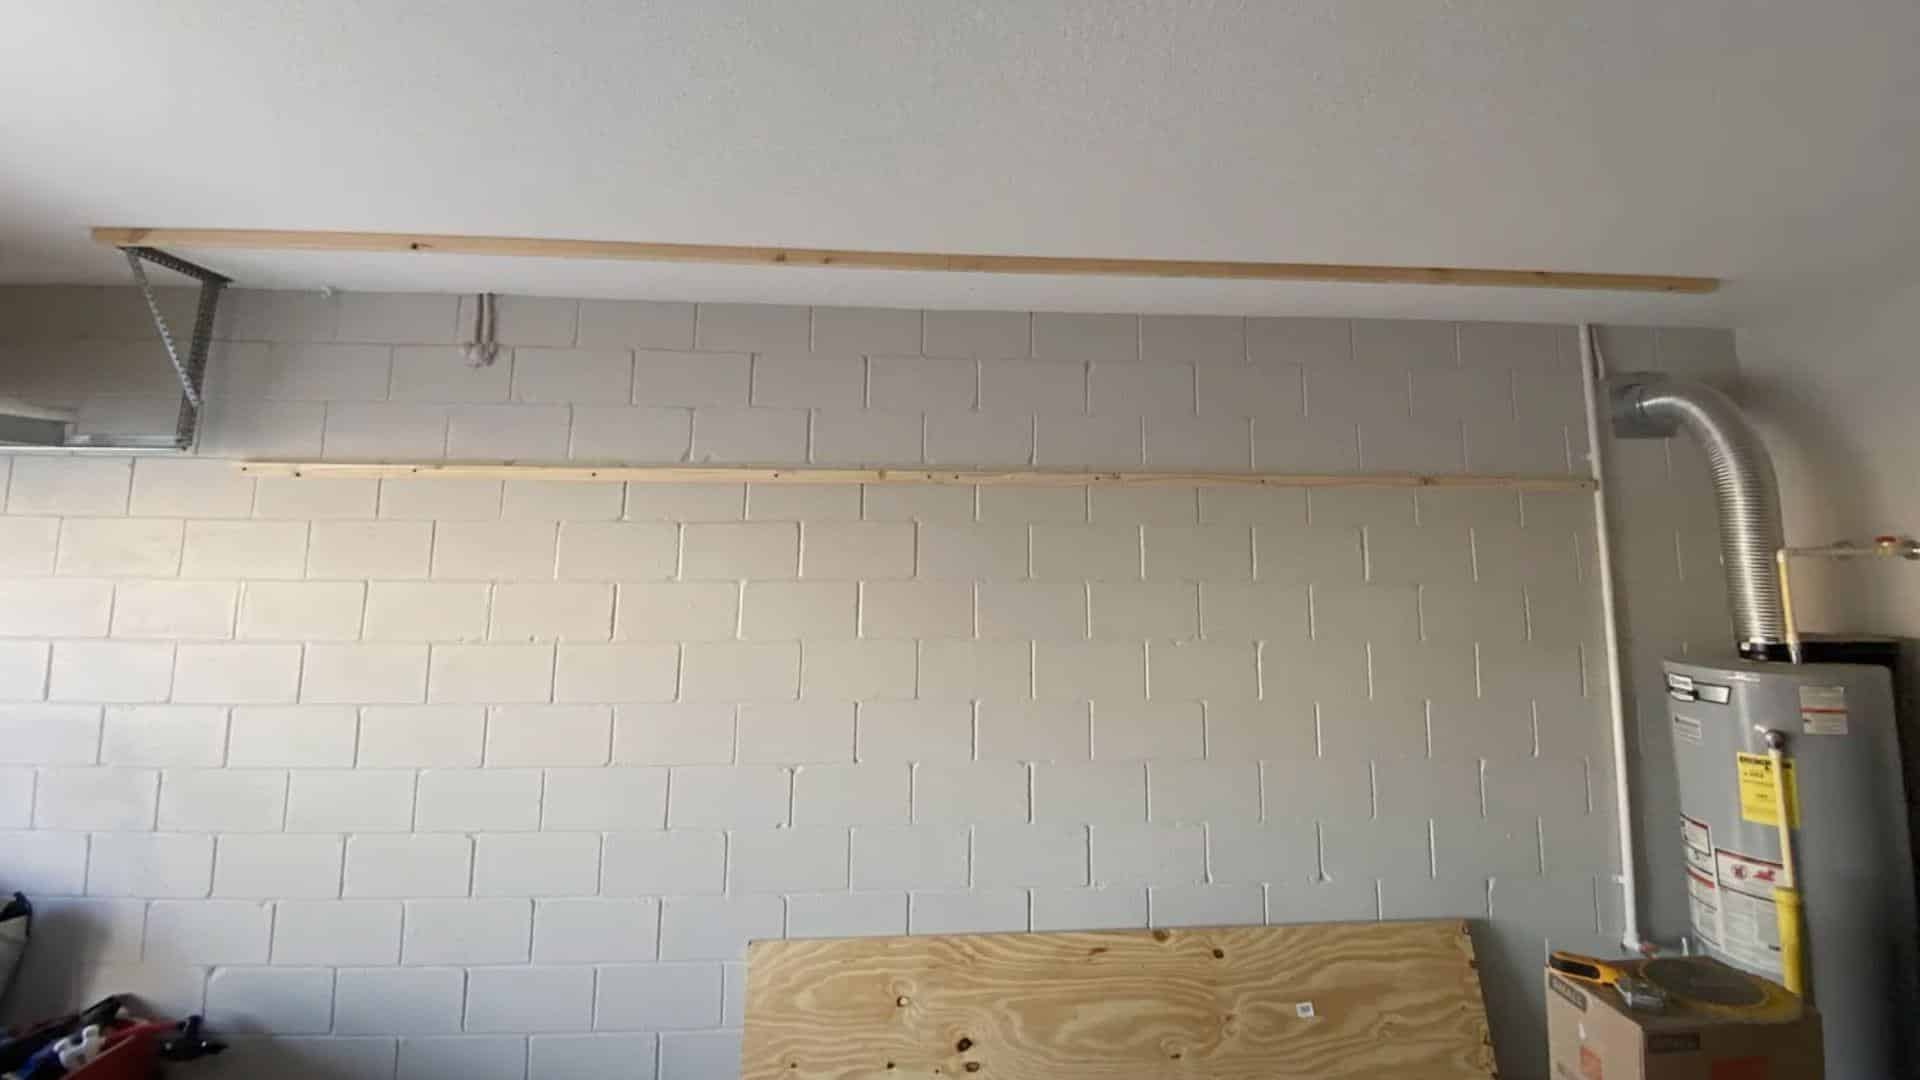
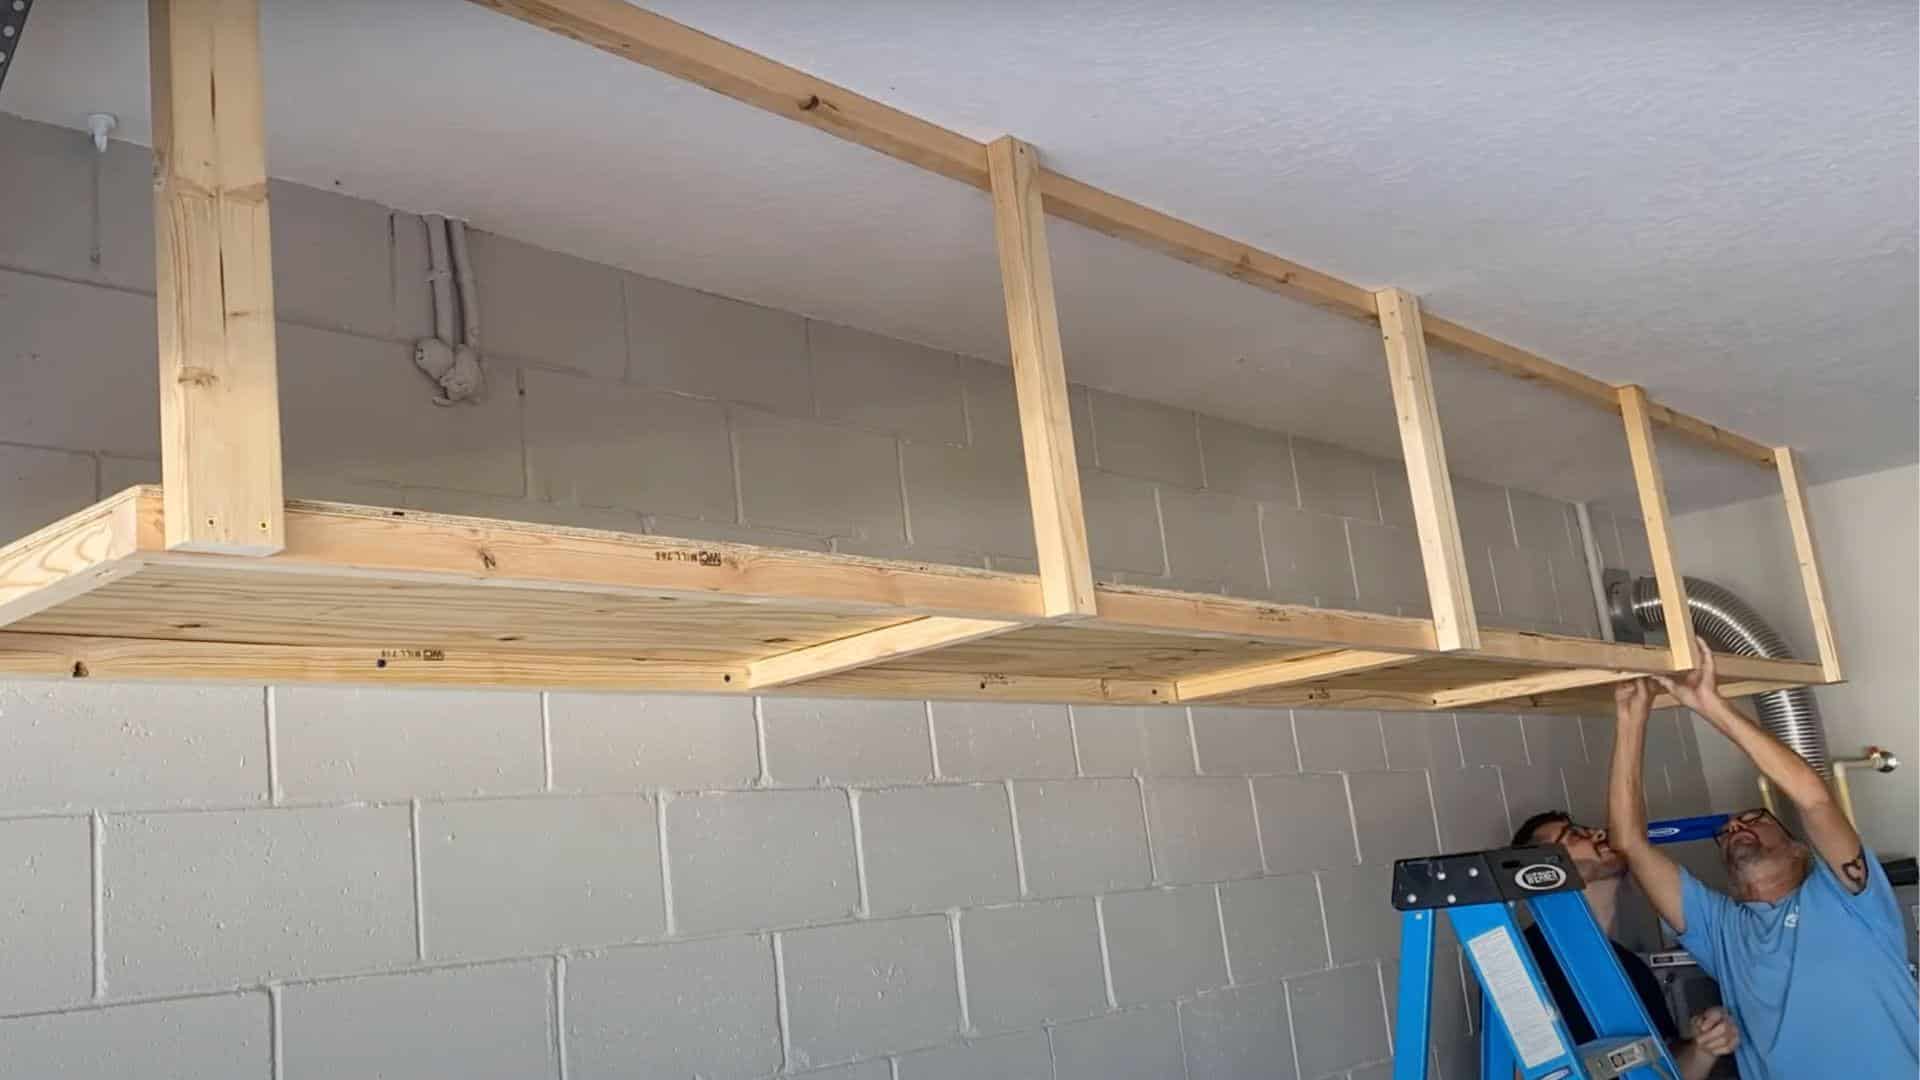
Step 2: Mount the Primary Supports
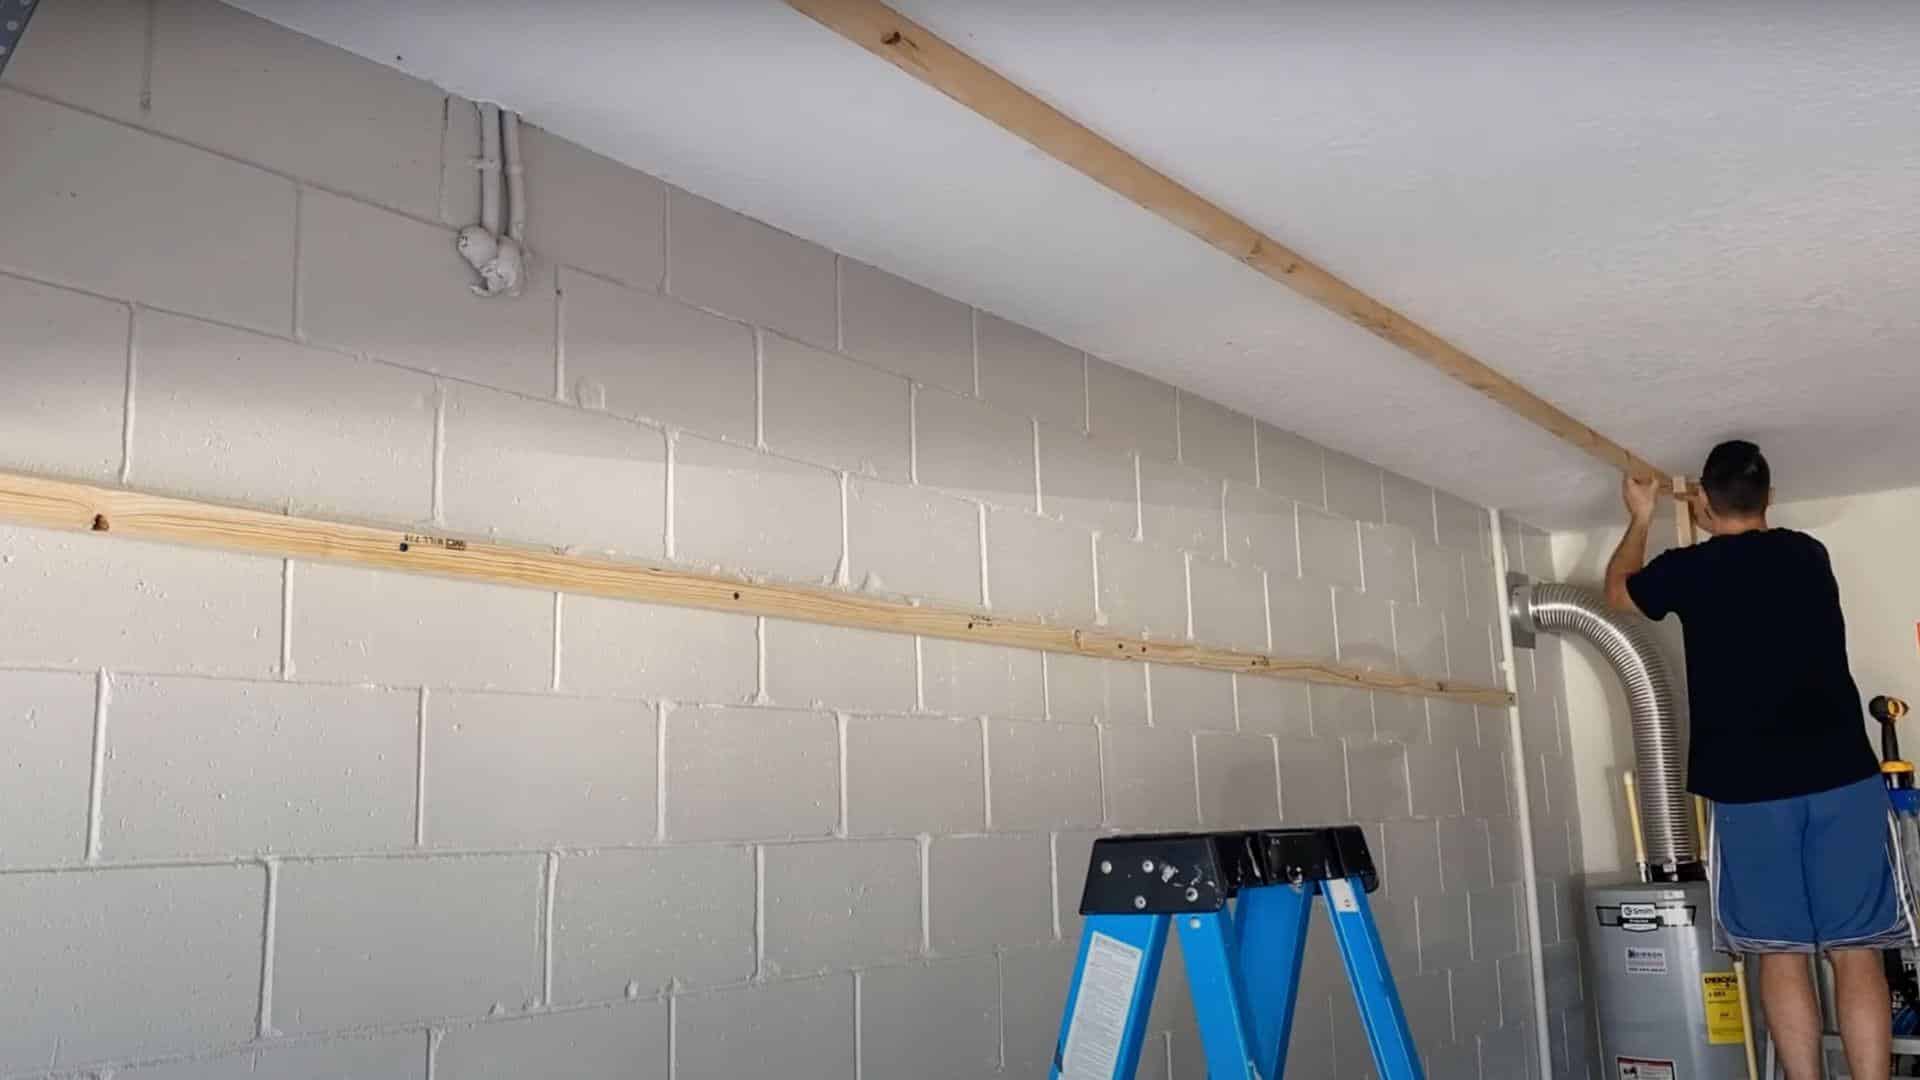
Install the first support directly to the ceiling using 4-inch lag screws for maximum holding power. Position this support as close to the ceiling joists as possible to distribute weight effectively across the garage structure. Mark joist locations carefully before drilling pilot holes.
Mount the second primary support to the wall using Tapcon concrete anchors and a masonry drill bit with hammer function. This wall-to-ceiling configuration creates a stable triangular support system that handles both vertical loads and horizontal stress from stored items.
Step 3: Install Vertical Supports
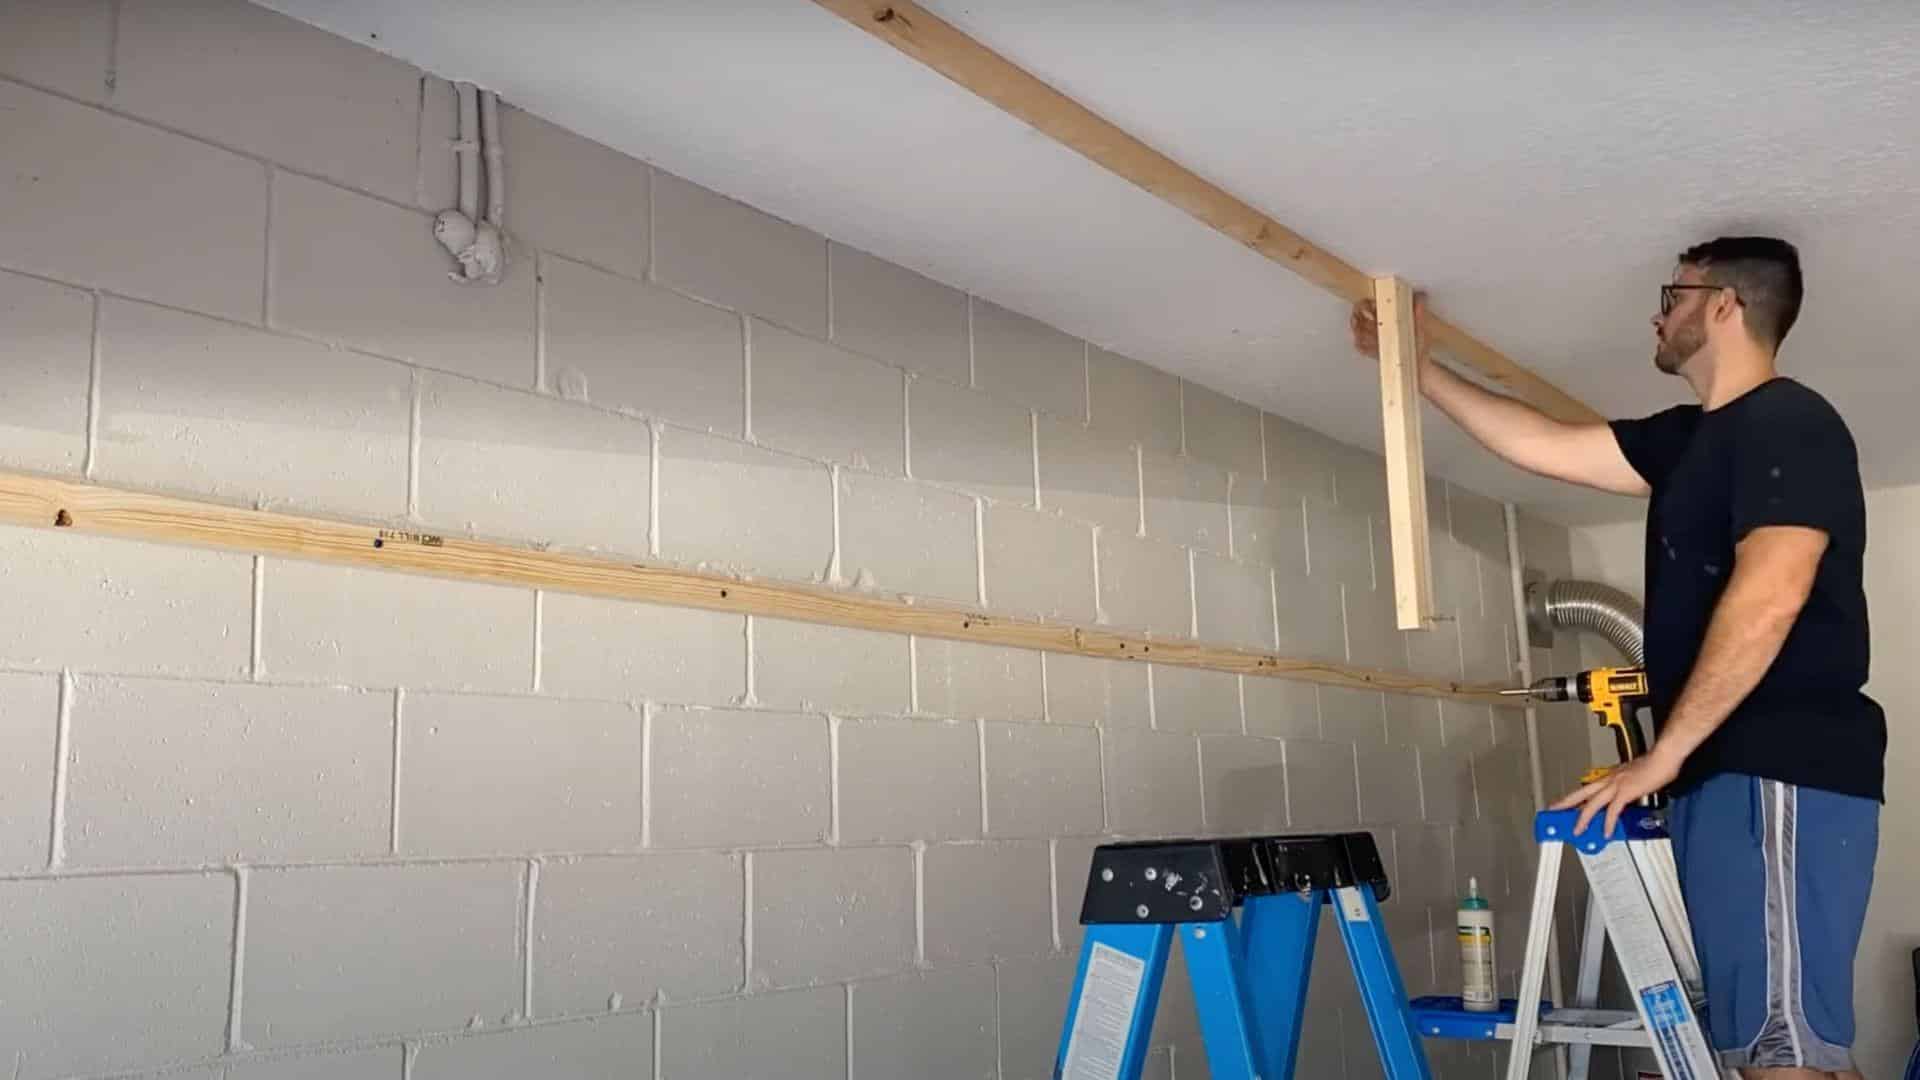
Position all vertical supports between the ceiling-mounted and wall-mounted primary supports. Fasten each vertical piece as close to the ceiling joists as possible for maximum structural connection. Use one vertical support in the middle section to connect the horizontal 2×2 pieces together.
These vertical elements transfer the storage load directly to the garage’s structural framework. Proper spacing ensures even weight distribution and prevents sagging under heavy storage loads over time.
Step 4: Add Horizontal Framing
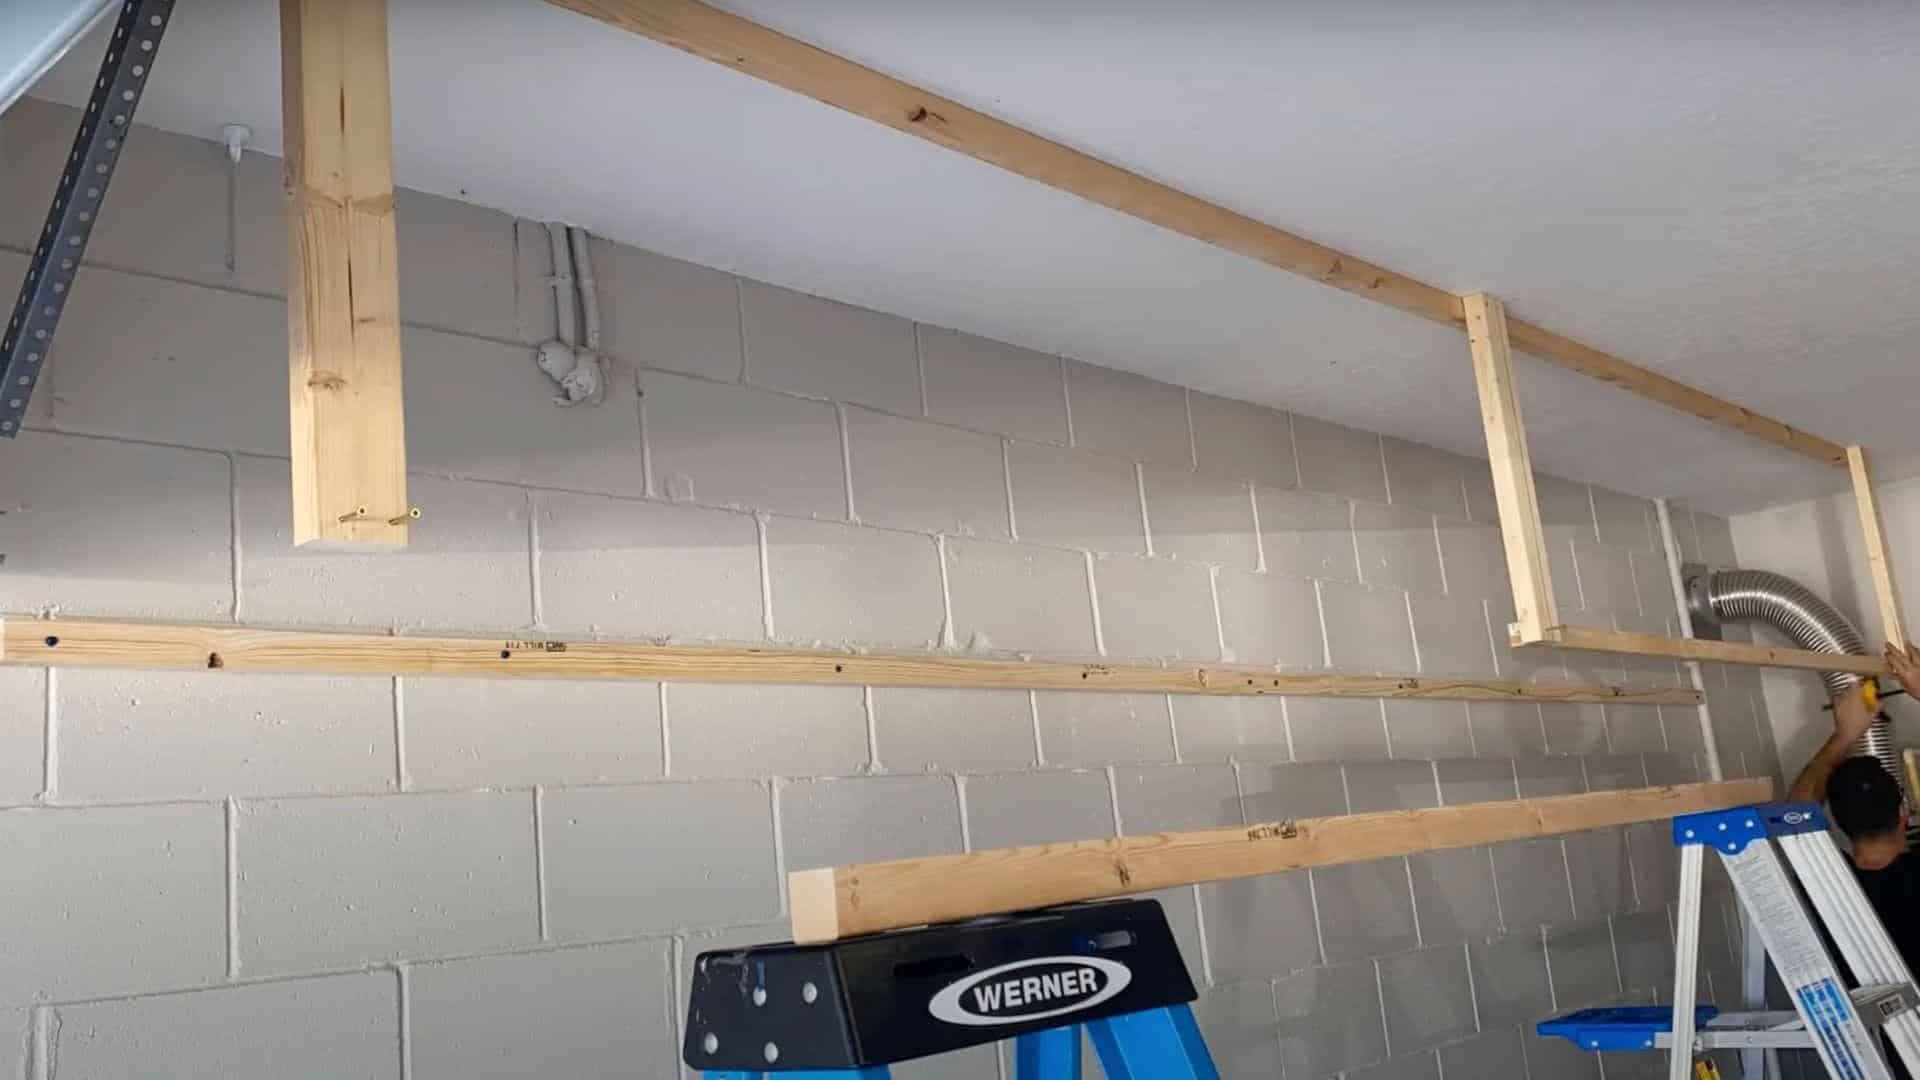
Install the horizontal 2×2 supports across the vertical framework to create the shelf structure. These ripped 2×4 pieces span between vertical supports and provide the foundation for the plywood decking. Space them evenly to support the plywood without gaps or weak spots.
The horizontal framing creates a grid pattern that distributes weight evenly across the entire storage platform. This step completes the basic framework before adding the actual storage surface.
Step 5: Lay and Secure the Plywood Shelf

Position the plywood sheet across the completed frame, ensuring it spans just under 16 feet to maximize material usage. Create an overlap between the 2×2 supports and plywood edges for added structural integrity. This overlap prevents the plywood from splitting under load.
Move the full 8-foot plywood sheet over the framework to align with the support structure. Secure the plywood to every horizontal support using appropriate screws to prevent movement and ensure a solid storage surface.
Step 6: Reinforce with Bracing and Hardware
Install horizontal supports underneath the plywood using a Kreg pocket hole jig for clean connections. Drill pocket holes on both ends of each support piece, using 2×3 lumber with two holes per end where supports meet. This creates hidden fastening points that maintain a clean appearance.
Add strong tie angles at all connection points where 2x4s and 2x2s meet for extra structural strength. These metal brackets prevent joint separation under load and provide long-term stability for the storage system.
Video Tutorial
Check out the video for more insights! Watch a step-by-step demonstration of how to build overhead garage storage using 2×4 lumber and basic tools.
By – DIY Dillon
Alternative Approaches to Overhead Storage
These alternative approaches offer flexibility for different garage configurations while maintaining storage functionality and safety standards.
Using Metal Brackets or Pre-Made Kits
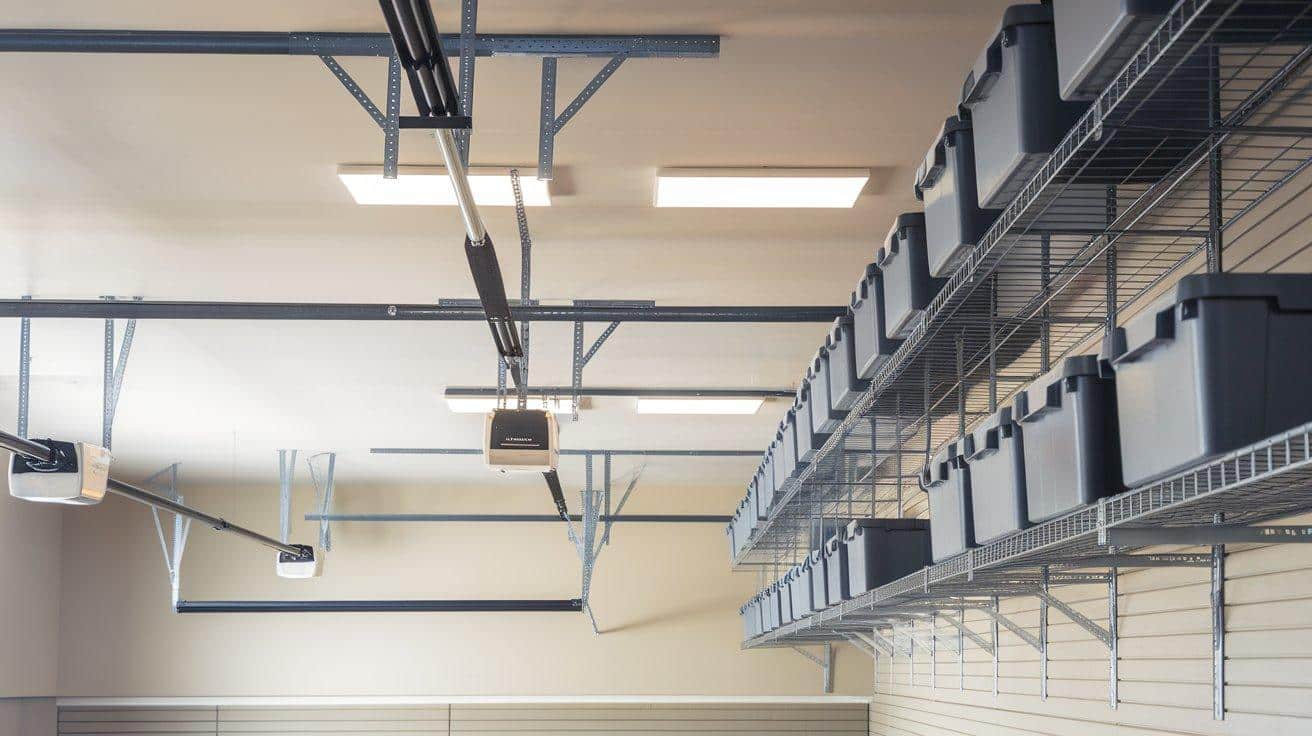
Commercial metal bracket systems provide faster installation compared to building from scratch. These kits typically include pre-engineered brackets, mounting hardware, and detailed instructions for various ceiling types. Most systems support 300-600 pounds when properly installed to ceiling joists.
Key Advantages:
- Faster installation with minimal cutting required
- Pre-engineered weight ratings for safety assurance
- Adjustable height options for different storage needs
- Professional appearance with powder-coated finishes
Wall-To-Ceiling Hybrid Designs

Garages with limited ceiling access or unique layouts benefit from hybrid mounting systems. This approach combines wall mounting with ceiling support to work around garage door tracks, electrical systems, or low ceiling areas. The design adapts to irregular spaces while maintaining structural integrity.
Key Benefits:
- Works around garage door mechanisms and tracks
- Accommodates low ceiling heights effectively
- Reduces ceiling load by sharing weight with walls
- Flexible positioning for awkward garage layouts
Maintenance and Safety Tips
Regular upkeep and proper safety practices ensure your overhead storage system remains secure and functional for years.
- Inspect mounting points annually – Check lag screws and concrete anchors for loosening or corrosion.
- Monitor weight distribution – Avoid placing all heavy items in one section of the storage platform.
- Use proper ladder safety – Always maintain three points of contact when accessing stored items.
- Check for sagging or deflection – Look for any bowing in plywood or horizontal supports under load.
- Keep emergency access clear – Never block garage door operation or emergency exit paths.
- Store items in sturdy containers – Use bins with secure lids to prevent items from falling.
- Avoid storing hazardous materials – Keep flammable liquids, chemicals, and paint off overhead storage.
Conclusion
Building overhead garage storage with 2×4 lumber converts wasted ceiling space into valuable storage real estate.
The combination of proper planning, quality materials, and systematic construction creates a storage solution that serves homeowners for decades.
Success depends on understanding your garage’s structural limits and following proven construction techniques.
Taking time to locate ceiling joists, use appropriate fasteners, and plan for adequate clearances prevents costly mistakes.
Regular maintenance keeps your storage system functioning safely over time. Annual inspections and proper weight distribution ensure long-term reliability without compromising garage functionality.
Ready to reclaim your garage floor space? Start by measuring your ceiling area and gathering the materials listed above. Your organized, clutter-free garage awaits just one weekend of focused work.
Frequently Asked Questions
Is It Cheaper to Buy or Build Garage Shelving?
Building garage shelves costs less if you own tools and have skills. Pre-made options offer convenience and durability despite higher upfront prices.
What Is the Best Wood for Garage Storage?
Cedar, teak, and plywood resist moisture better than particleboard or medium-density fiberboard (MDF). Choose water-resistant wood species for high-humidity garage environments.
How Do You Waterproof a Wooden Garage?
Tanking slurry provides the most cost-effective garage waterproofing solution. This cement-based mixture prevents water entry and comes in pre-mixed or powder form.