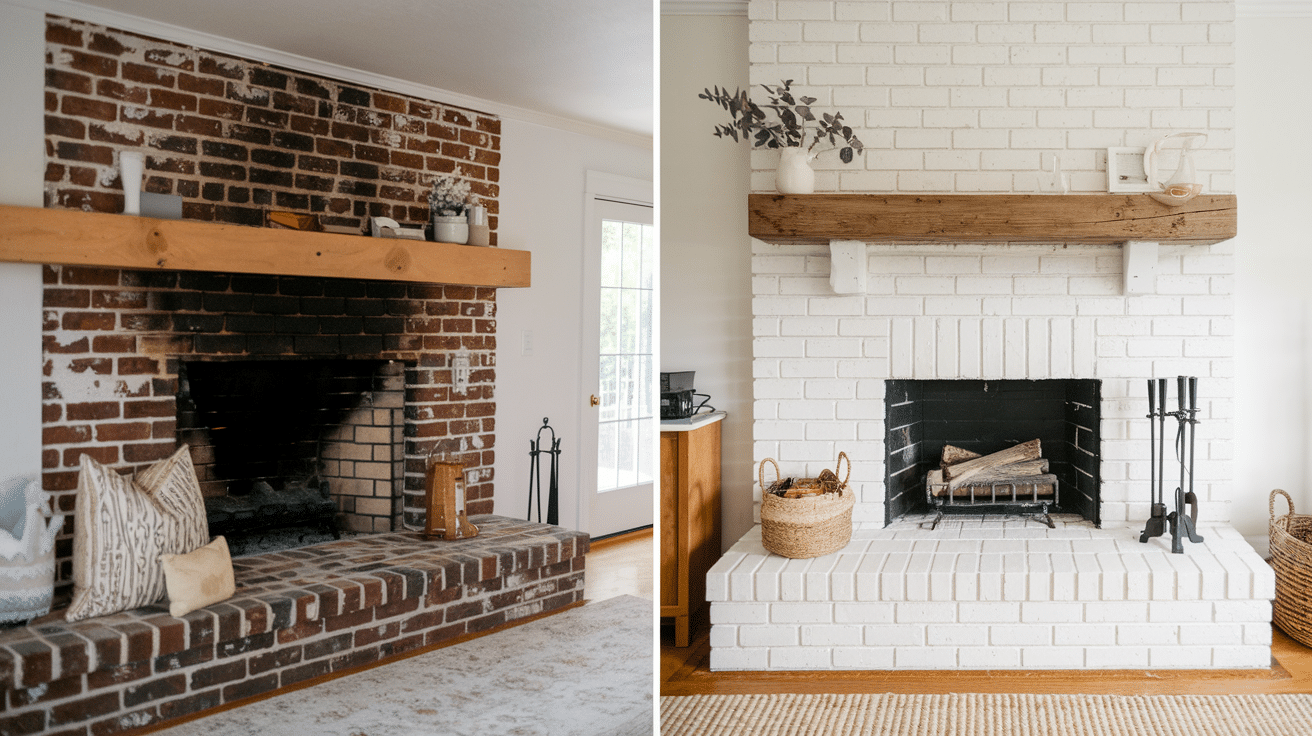
Does your old fireplace make your room look outdated? Professional renovations can cost thousands of dollars and take weeks to complete.
Many homeowners feel stuck with their boring brick or stone fireplaces. But you don’t need to spend a fortune to give your fireplace a fresh new look.
Clever DIY tricks can help you update your fireplace on a tight budget. With the right materials and simple techniques, you can create an attractive focal point that friends will notice. Most projects can be completed in just one weekend.
This guide provides step-by-step methods for creating a DIY budget makeover for your fireplace. You’ll learn paint techniques, tile options, and wood treatments that work. You’ll save money while getting professional-looking results that boost your home’s value.
Ready to turn your ordinary fireplace into something truly special?
Assess Your Fireplace Type and Needs
Before starting any makeover project, it’s essential to determine the type of fireplace you have. Different fireplaces need different approaches and materials.
Wood-burning units have different safety rules from gas or electric models. The surface material also affects which DIY methods will work best for your space.
| Fireplace Type | Surface Options | Key Safety Notes |
|---|---|---|
| Wood-burning | Brick, stone, tile | Check the chimney, heat-resistant materials only |
| Gas | Brick, drywall, tile | Verify that gas lines and proper ventilation are required |
| Electric | Drywall, wood, tile | Standard electrical safety, most flexible options |
Safety always comes first with any fireplace project. Wood-burning fireplaces can get extremely hot and require heat-resistant paint and materials.
Gas units require proper ventilation and should never block air vents. Electric fireplaces offer the most freedom since they don’t produce real flames or extreme heat.
Check your fireplace manual or call a professional if you’re unsure about ventilation requirements. Most DIY projects work well, but some changes might need permits in your area.
Step-by-Step DIY Fireplace Makeover Guide
Change your old fireplace into a stunning focal point with this simple weekend project, which requires minimal tools and delivers maximum impact. This budget-friendly makeover can completely alter your living space’s atmosphere without the need for costly contractors or extensive renovations.
Tools Required
| Tool | Purpose |
|---|---|
| Hammer | Remove old mantel, age wood |
| Crowbar | Pry off existing mantel |
| Razor blade | Cut through old caulk |
| Level | Check straight lines |
| Measuring tape | Find center point |
| Plastic spackle knives | Apply mortar to bricks |
| Tile cutter | Cut bricks to size |
| Drill | Install new mantel |
Materials Required
| Material | Quantity | Cost Range |
|---|---|---|
| Thin brick (carbon color) | 2-3 boxes | $80 per box |
| Thinset mortar (gray) | 1 bag | $15-20 |
| White grout | 1 bag | $10-15 |
| Silicone piping bag | 1 piece | $5-10 |
| Brick spacers | 1 pack | $5-8 |
| Wood beam (2×4 + mantel wood) | As needed | $30-50 |
| Minwax Early American stain | 1 can | $8-12 |
Step 1: Remove the Old Mantel
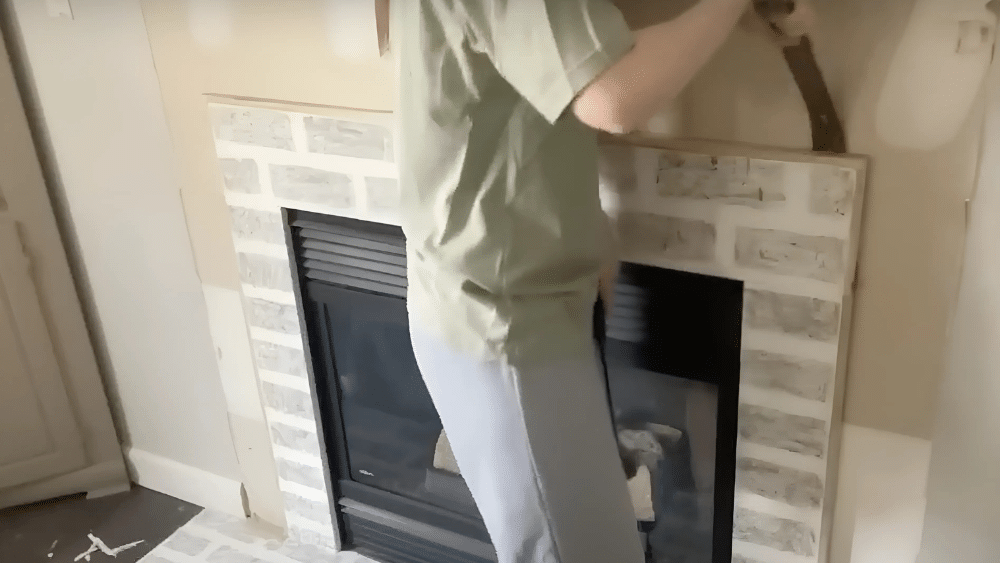
- Cut caulk lines around all edges of the mantel.
- Use a crowbar to gently pry away from the wall.
- Remove any finishing nails left behind.
Remember: Wear safety glasses when removing old materials to protect your eyes from debris.
Step 2: Prepare the Surface and Find the Center
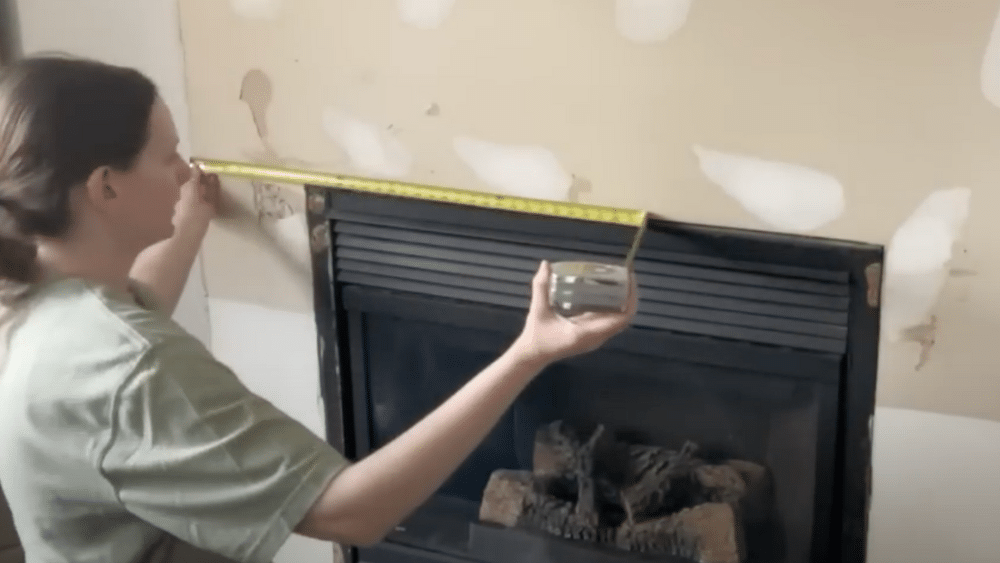
- Measure the total width and divide by 2.
- Mark the center point with a pencil.
- Use the level to draw the vertical center line.
Remember: Starting from the center gives you the most balanced look when you reach the edges.
Step 3: Apply Thin Brick with Mortar
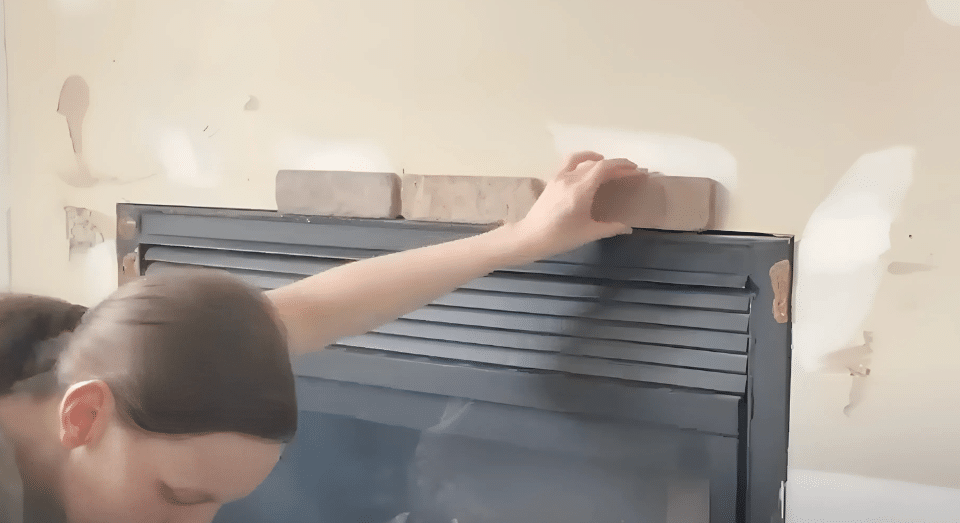
- Spread mortar evenly on the back of each brick.
- Start from the center and work toward the edges
- Use spacers between bricks for consistent gaps.
Remember: Work in small sections so the mortar doesn’t dry out before you place the bricks.
Step 4: Grout the Brick Lines
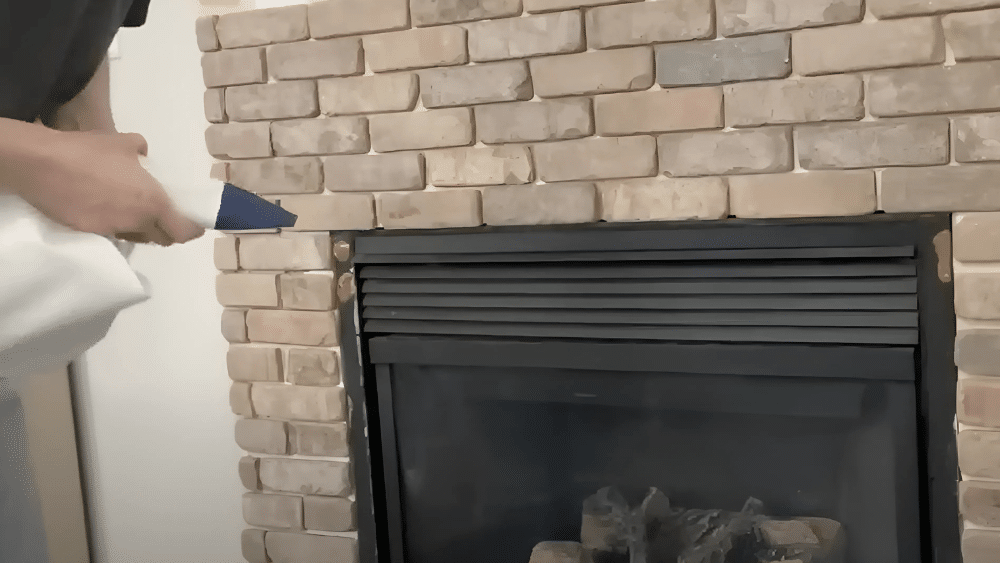
- Fill the piping bag with mixed grout.
- Squeeze grout only into the gaps between bricks.
- Smooth with your finger after 10 minutes of drying.
Remember: Don’t smear grout on the brick surface – keep it only in the gaps for a clean look.
Step 5: Create and Age the Wooden Beam
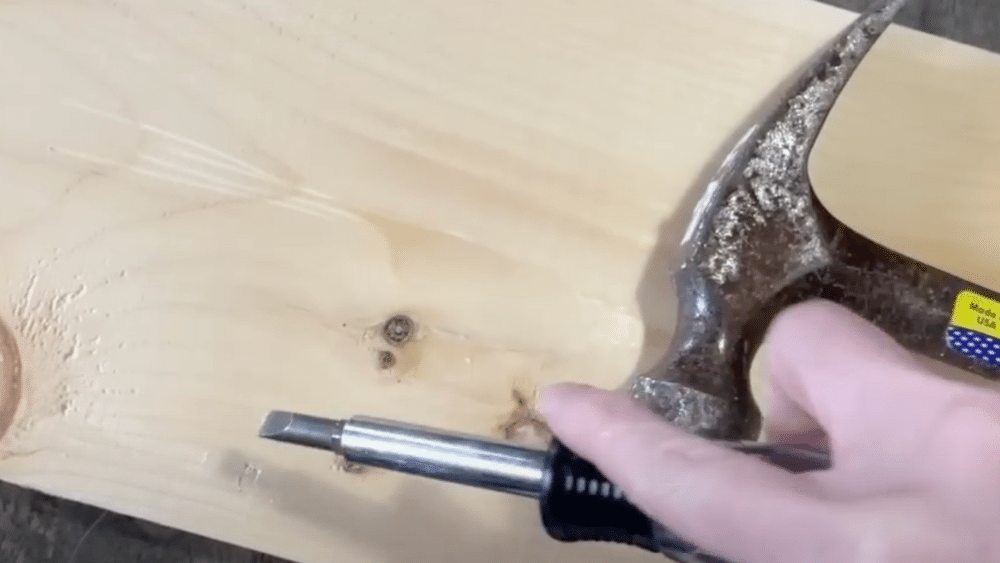
- Make random dents and scratches with a hammer and a screwdriver.
- Apply a thin coat of stain with a brush or a cloth.
- Use Q-tip to darken the scratches you made.
Remember: The more damage you make to the wood, the more aged and authentic it will look.
Step 6: Install the New Mantel
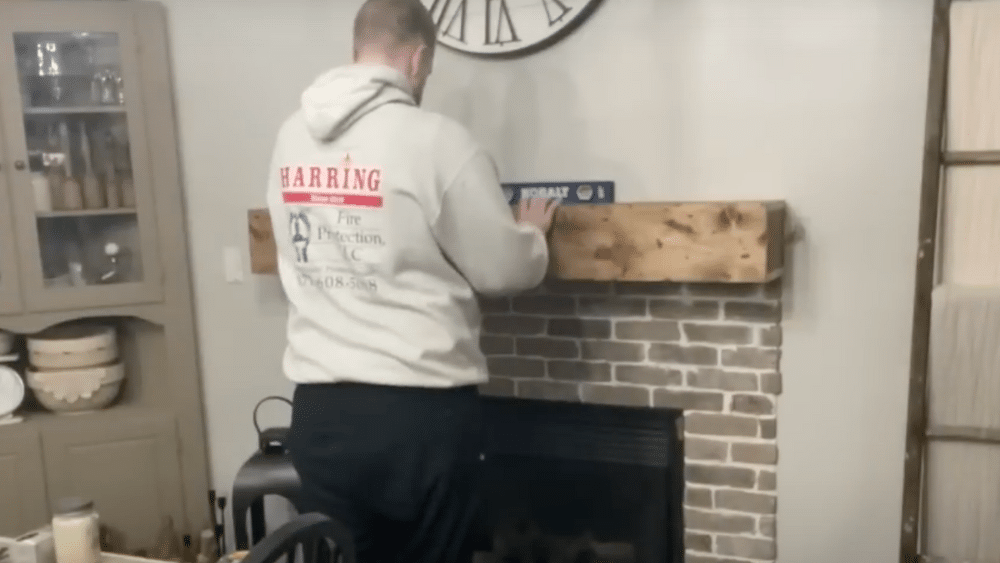
- Drill 2×4 support into wall studs.
- Slide the hollow wooden box over the support.
- Secure with screws and touch up with spackle.
Remember: Make sure to hit wall studs for proper support – your mantel needs to hold decorative items safely.
Video Tutorial
For a visual tutorial, refer to this video by Genevieve Lynn
Common Mistakes to Avoid
1. Skipping surface preparation – Failing to clean, sand, or prime your fireplace surface before starting can lead to poor adhesion. Paint and materials won’t stick properly, causing them to peel or fall off within months of your project.
2. Using the wrong type of paint – Regular wall paint can’t handle fireplace heat and will bubble, crack, or discolor quickly. Always use heat-resistant paint rated for high temperatures, especially around wood-burning units.
3. Not sealing tiles or materials – Leaving brick, tile, or stone unsealed allows moisture and soot to penetrate the surface. This causes staining and discoloration, making cleaning much harder over time.
4. Forgetting to use spacers during installation – Installing tiles or bricks without proper spacers causes uneven gaps and sagging materials. The weight pulls everything down before the adhesive sets, creating crooked lines and a poor appearance.
5. Not checking for proper ventilation – Blocking air vents or ignoring clearance requirements creates serious safety risks. Gas fireplaces need adequate airflow, and all types require specific distances from combustible materials for safe operation.
Conclusion
A DIY budget makeover can completely change your fireplace without breaking the bank.
You’ve learned how to assess your fireplace type, follow the six key steps, and avoid common mistakes that cost time and money. With thin brick, the right tools, and a bit of patience, you can create a stunning focal point for your room.
This project saves you thousands compared to hiring professionals. Most homeowners finish everything in one weekend using basic tools and materials from home improvement stores.
The results look just as good as expensive renovations.
Your fireplace makeover is waiting for you. Start by identifying the type of fireplace you have, then gather your necessary materials and tools.
What fireplace style will you choose for your space? Please share your results and any questions in the comments section below.
