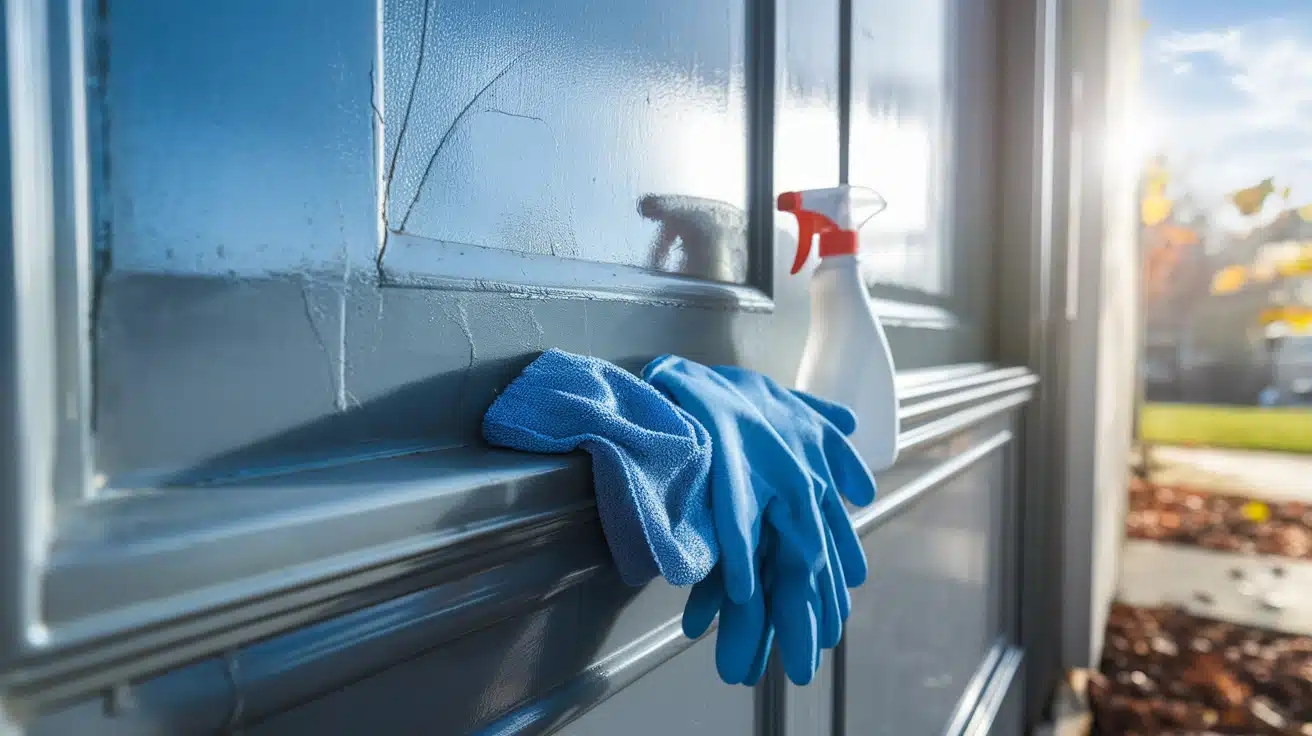
A dirty metal door can make even the nicest home look tired and worn out. Over time, dirt, dust, and weather can leave marks and rust spots that don’t go away on their own.
Cleaning metal doors isn’t just about appearance; it helps keep the door strong and prevents damage before it occurs.
When a metal door is clean and well-maintained, it lasts longer and retains its shine. Plus, a shiny door welcomes guests and makes a great first impression.
This guide offers simple and easy methods for cleaning metal doors, keeping them fresh and in good condition for years. There is no need for fancy tools or hard work; follow a few easy steps that anyone can follow.
Understanding Different Types of Metal Doors
When it comes to cleaning metal doors, knowing the type of metal you’re dealing with is key. Different materials require different care to keep your doors looking great without causing damage.
The most common materials used for metal doors are steel, aluminum, and wrought iron.
| Metal Type | Key Features | Cleaning Tips | What to Avoid |
|---|---|---|---|
| Steel Doors | Strong, durable, usually painted or coated to resist rust. | Use mild, non-abrasive cleaners; wipe gently to protect the finish. | Avoid harsh chemicals, steel wool, or any other abrasive materials that could scratch. |
| Aluminum Doors | Lightweight; naturally rust-resistant; often anodized. | Clean with mild soap and water; rinse and dry well. | Avoid using acidic or abrasive cleaners that can damage the anodized coating. |
| Wrought Iron Doors | Decorative, prone to rust if neglected. | Use gentle cleaning solutions and a soft brush for detailed cleaning; apply a rust-inhibiting primer or paint after cleaning. | Avoid neglecting maintenance; refrain from using harsh scrubbers. |
Why Proper Cleaning Matters for Metal Doors
Metal doors are a popular choice for both residential and commercial buildings thanks to their strength, durability, and modern appearance.
Without proper care, metal doors can accumulate dirt, grime, and moisture, which can lead to rust, corrosion, and even damage to the door’s mechanisms.
Understanding why proper cleaning matters is the first step to maintaining your doors’ beauty and longevity.
Here are the key reasons why taking care of your metal doors is so important:
- Prevents Rust and Corrosion: Dirt, moisture, and environmental pollutants can cause metal to oxidize and rust over time. Regular cleaning removes these harmful elements before they damage the surface.
- Maintains Appearance: Clean metal doors look polished and inviting, enhancing your home’s curb appeal or the professional look of a business. Neglected doors quickly become dull and unsightly.
- Extends Door Lifespan: Routine maintenance prevents wear and tear, saving you money on costly repairs or replacements in the long run.
- Improves Functionality: Dirt and grime can accumulate in hinges, locks, and handles, causing them to stick or malfunction. Cleaning helps ensure your doors open and close smoothly every time.
- Protects Against Weather Damage: Exposure to rain, salt (in coastal areas), and pollutants can accelerate metal deterioration. Proper cleaning removes these harmful substances, protecting your door from premature aging.
Materials Required
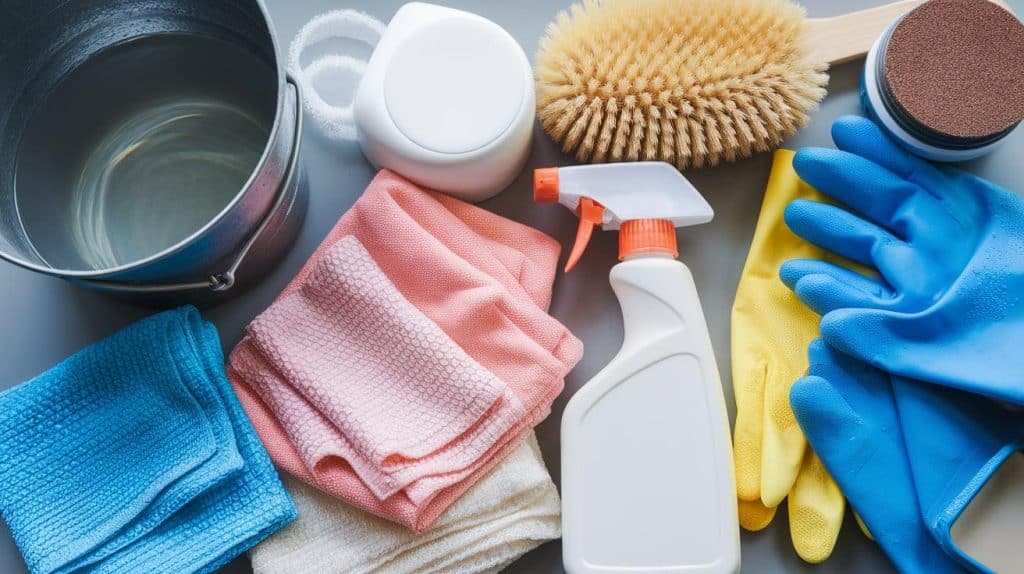
To effectively clean and maintain your metal door, gather the right tools and supplies. Having everything ready ensures a smoother cleaning process and helps achieve the best results.
| Item | Purpose |
|---|---|
| Microfiber cloths or sponges | To wipe down the door |
| Warm water | To dilute detergent or soap |
| Mild detergent | For cleaning the door surface |
| Soft-bristled brush | For cleaning corners and crevices |
| Rubber gloves | To protect hands from cleaning solutions |
| Spray bottle | To apply the vinegar solution |
| Rust remover or fine sandpaper | For removing rust spots |
| Clean clothes or towels | For drying the door |
| Metal sealant or wax | To protect and finish the door |
Step-by-Step Cleaning Process
Cleaning metal doors requires a careful approach to ensure they remain in great condition, free from dirt, grime, and rust. Follow these simple yet effective steps to keep your doors looking their best.
Step 1: Remove Surface Dust and Dirt
Start by wiping the door with a dry microfiber cloth to remove any loose dust and debris. This will prevent dirt from scratching the surface during the cleaning process.
For corners and crevices, use a soft-bristled brush or an old toothbrush to reach areas that are harder to clean. Ensure that you cover all the nooks and crannies to achieve a thorough dust removal.
Pro Tip: Always clean from top to bottom. This will help prevent dirt from falling onto areas that you’ve already cleaned.
Step 2: Prepare Your Cleaning Solution

Next, prepare your cleaning solution. In a bucket, mix warm water with a mild detergent or soap. This is effective for general cleaning and dirt removal.
Alternatively, you can use a 50/50 mixture of water and white vinegar in a spray bottle. Vinegar is a great natural cleaner that helps break down grime and can also help with removing stubborn spots.
Pro Tip: Always test the cleaning solution on a small, hidden spot of the door before applying it to the entire surface to ensure it doesn’t damage the finish.
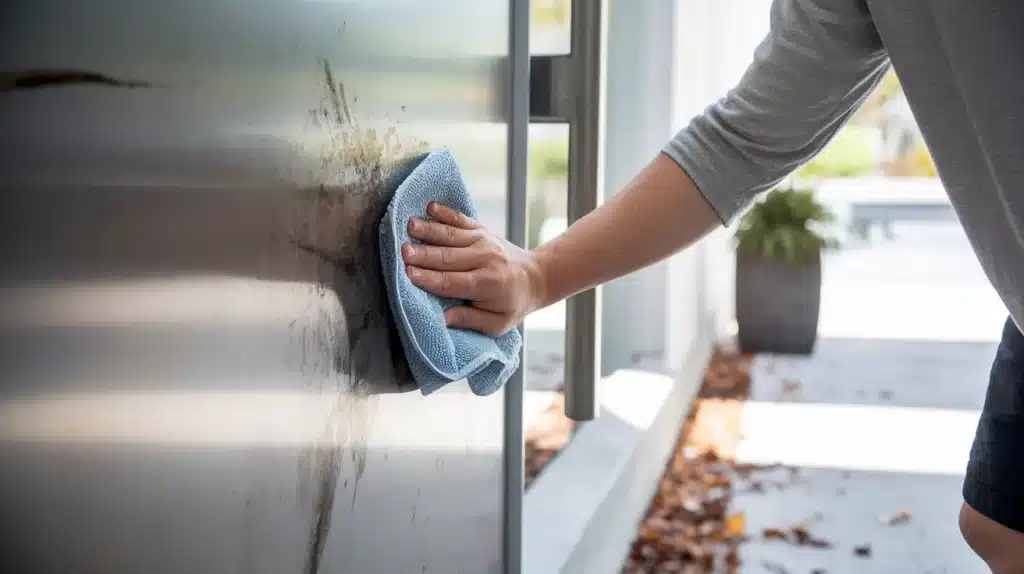
Step 3: Wash the Door Surface
Dip a sponge or soft cloth into the prepared cleaning solution and gently scrub the door’s surface. For larger areas, a microfiber cloth is a suitable option.
If there are stubborn spots or areas with built-up grime, use a soft-bristled brush to scrub those spots gently, but avoid applying too much pressure to prevent surface damage.
Pro Tip: Rinse the sponge or cloth frequently to avoid re-depositing dirt on the surface. This ensures you’re only using clean water for the cleaning process.
Step 4: Treat Rust Spots (if Needed)
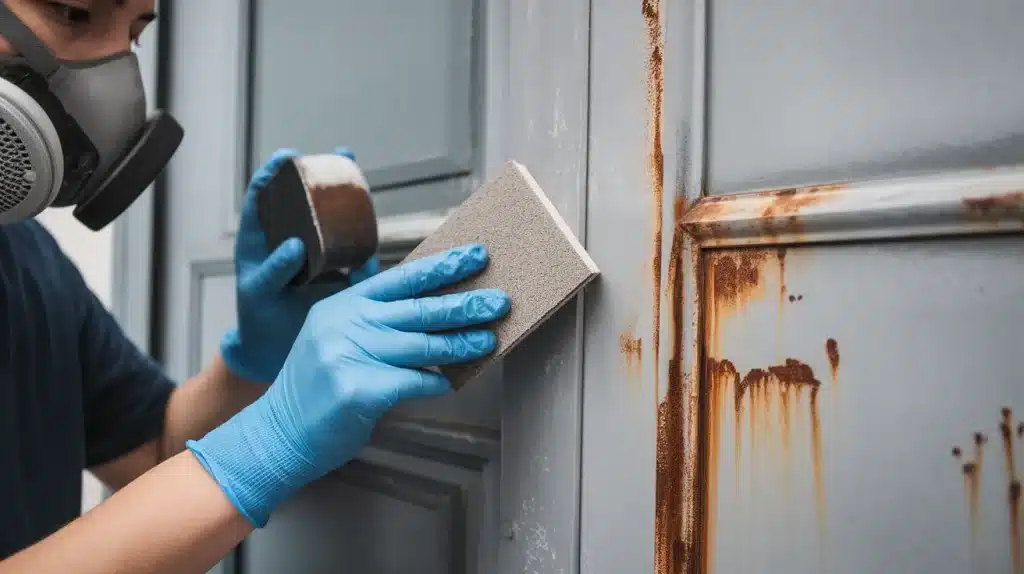
If your door has any visible rust spots, treat them using a rust remover. Follow the product’s instructions carefully. If the rust is light, you may be able to gently remove it by sanding the area with fine-grit sandpaper.
Once the rust is removed, wipe the area clean with a damp cloth. If necessary, you can apply a rust-resistant primer or paint to protect the door from further rusting.
Pro Tip: When working with rust removers or sanding, wear a mask and gloves to protect yourself from inhaling fumes or particles.
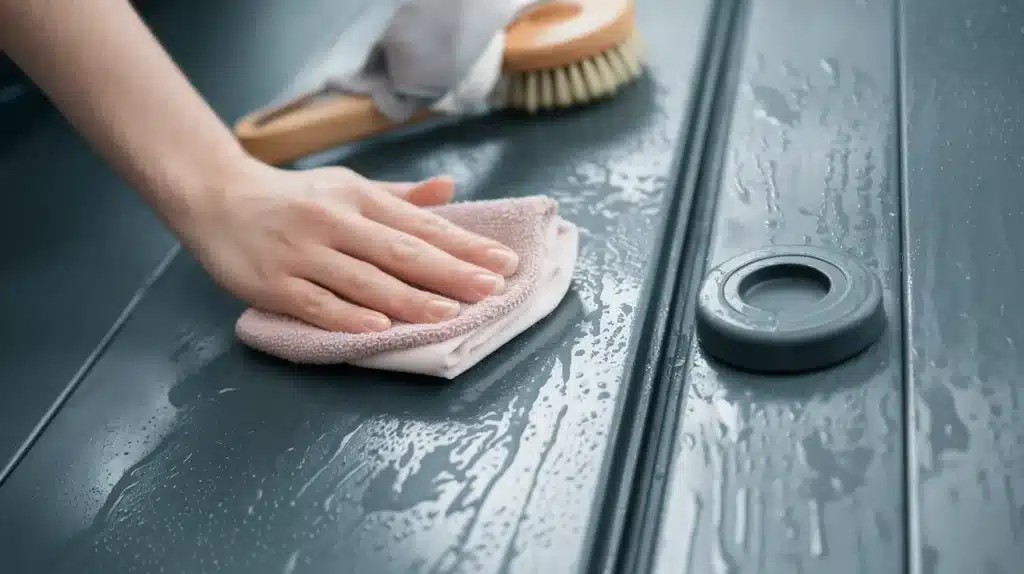
Step 5: Rinse and Dry Thoroughly
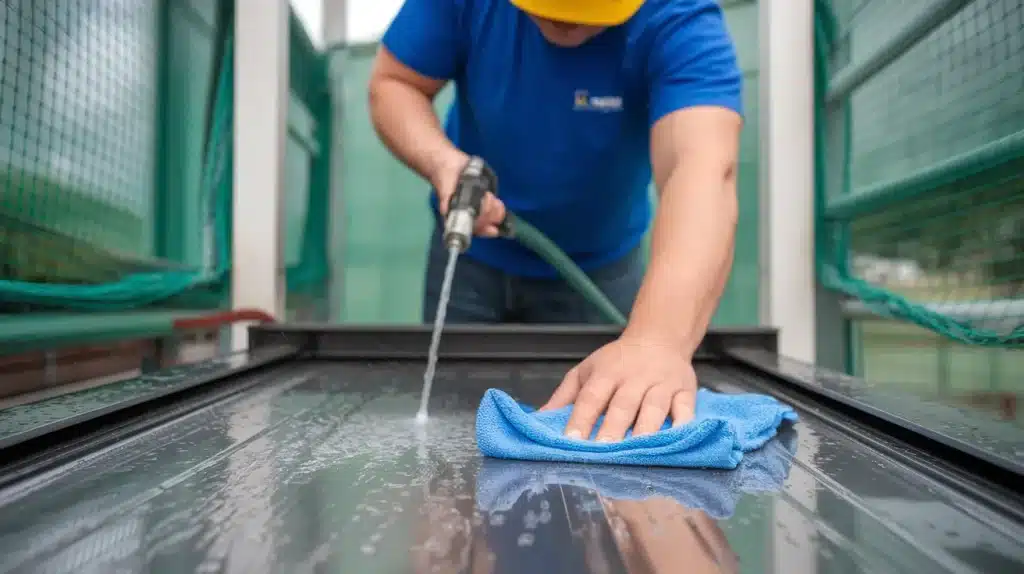
After cleaning, rinse the door with clean water to remove any soap or cleaning solution residue. It’s important to ensure that no cleaning product is left behind to avoid leaving streaks or damage.
Once rinsed, dry the door immediately with a clean microfiber cloth. This helps prevent water spots and moisture from seeping into the door, which can lead to rust, especially in humid environments.
Pro Tip: In humid climates, drying the door quickly is essential to prevent rust formation. Make sure to thoroughly dry any nooks and crevices.
Step 6: Apply Protective Coating (optional)
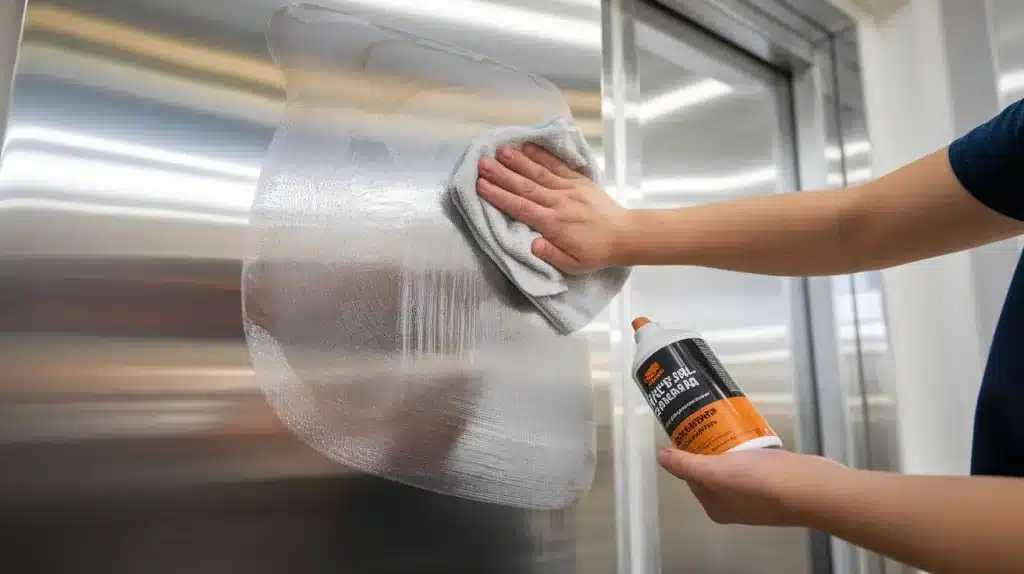
For added protection and a shiny finish, apply a clear metal sealant or wax to the door. This will help protect the surface from dirt, moisture, and other contaminants, making future cleaning easier.
Follow the product’s instructions for optimal results, ensuring that you apply the coating evenly and allow sufficient time for it to dry before touching the surface.
Pro Tip: Reapply the protective coating every 6 to 12 months to maintain the door’s shine and protection. This will ensure that the door remains in good condition and lasts longer.
Maintenance Tips to Keep Metal Doors Looking New
Here are some essential tips to help you protect your doors from damage and maintain their shine:
Preventing Rust and Corrosion
- Regularly inspect your metal doors for signs of rust or chipped paint.
- Wipe off any moisture immediately to avoid water buildup.
- Apply rust-resistant primer or paint to vulnerable areas as needed.
- Use a rust remover or mild abrasive on small rust spots before repainting.
Routine cleaning schedule
- Clean your metal doors at least once every three months, or more often in harsh weather conditions.
- Remove dust, dirt, and debris using a soft cloth and mild soap solution.
- Avoid letting bird droppings, tree sap, or salt deposits sit on the surface; if left too long, they can cause damage.
Protective Coatings and Sealants
- Apply a clear protective coating or sealant designed for metal surfaces to create a barrier against moisture and pollutants.
- Reapply sealants annually or as recommended by the product’s instructions.
- Consider using wax-based products for added shine and protection on painted metal doors.
Common Challenges When Cleaning Metal Doors
Cleaning metal doors may seem straightforward, but it often presents its own set of challenges. Here are some common challenges people encounter when cleaning metal doors and why they matter:
Rust and Corrosion Buildup: Rust forms when metal reacts with moisture and oxygen, especially on outdoor doors. It can be tough to remove and may require special rust removers, sanding, or repainting to fully restore the surface.
Scratches and Surface Damage: These scratches not only hurt the door’s appearance but can also expose it to further rust and corrosion.
Stubborn Stains and Dirt: Grease, bird droppings, tree sap, and hard water deposits often leave marks that regular cleaning can’t easily remove.
Cleaning Around Hardware: Dirt tends to collect in hinges, locks, and handles, where cleaning is more difficult due to tight spaces and moving parts. Extra care is necessary to prevent damage to these components.
Weather Effects: Exposure to sunlight, rain, snow, and salty air can cause fading or damage to metal doors over time. Regular cleaning might not fully reverse this damage, making protective coatings important.
Conclusion
Regularly cleaning your metal doors is essential for maintaining their appearance and optimal functionality.
Key tips include using the right cleaning products, preventing rust buildup, and applying protective coatings.
If rust is too extensive or your door has significant damage, it may be time to call a professional for repairs or refinishing.
Remember, a little regular care goes a long way in preserving the longevity of your doors. By following these steps, you can ensure that your metal doors stay in great condition for years to come.
Do you have questions or tips of your own? Share them in the comments below!
