
Your kitchen backsplash feels boring and outdated, but expensive tile renovations cost thousands of dollars.
You want a fresh, stylish look that won’t break your budget or require professional installation.
Shiplap backsplashes offer the perfect solution; they’re affordable, easy to install yourself, and create incredible farmhouse charm in any kitchen or bathroom. You can change your space in just one weekend.
This guide showcases beautiful shiplap backsplash ideas, ranging from classic white horizontal boards to bold navy designs with gold accents.
You’ll also receive our straightforward steps installation process, which any DIY beginner can follow successfully.
What is a Shiplap Backsplash?
A shiplap backsplash uses horizontal or vertical wooden boards with overlapping edges to create a textured wall behind your sink, stove, or counters.
Originally used on ships and barns for weatherproofing, shiplap now adds farmhouse charm and visual interest to modern kitchens and bathrooms.
You can choose from real wood boards for an authentic texture, MDF or plywood faux options for budget-friendly projects, or removable peel-and-stick versions that look realistic but can be easily removed for renters.
Key Types:
- Real wood (pine, oak)
- faux materials (MDF, plywood)
- peel-and-stick vinyl planks
17 Shiplap Backsplash Ideas to Try
Change your kitchen or bathroom with these stunning shiplap backsplash designs. From timeless white horizontal boards to bold vertical patterns, you’ll find the perfect style to match your home.
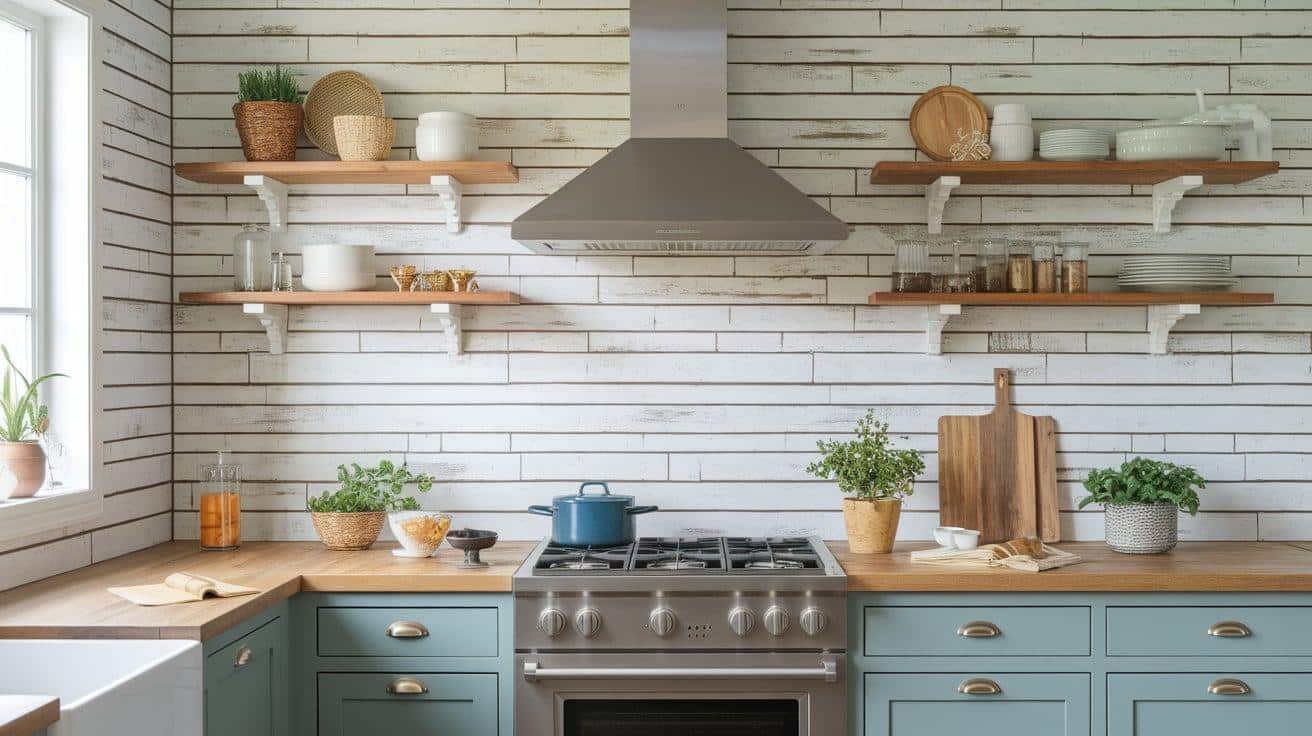
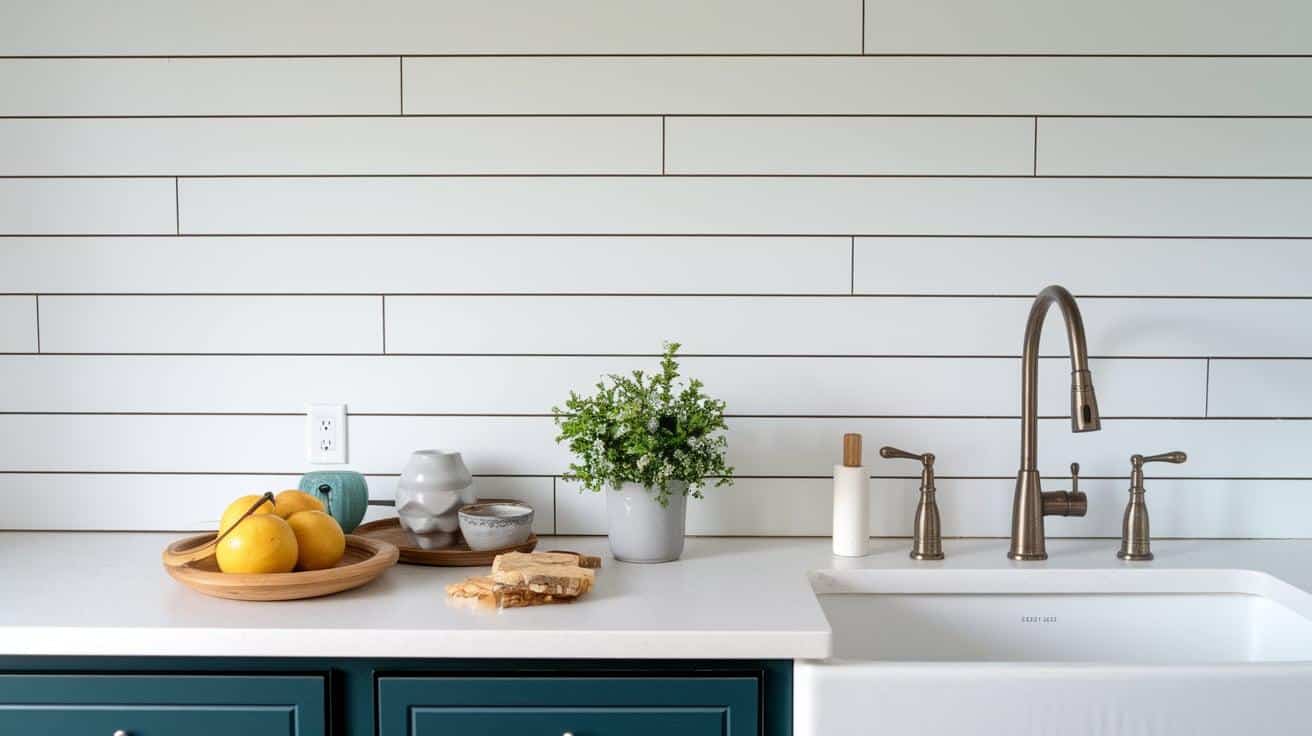
1. Classic White Horizontal Shiplap
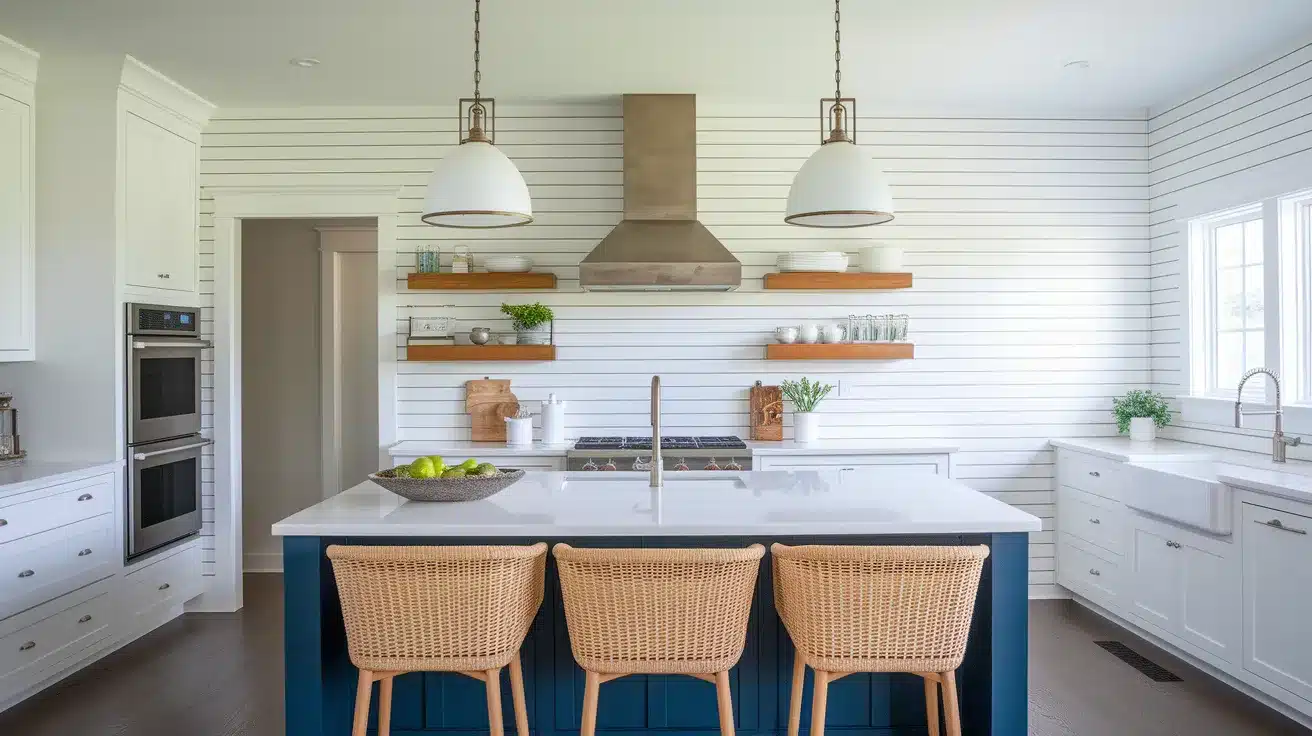
White horizontal shiplap creates a clean, farmhouse aesthetic that complements any cabinet style. You can paint it in pure white or cream for a softer feel. This timeless design pairs well with both modern and traditional kitchens.
Best For: Farmhouse, traditional, and transitional kitchen styles
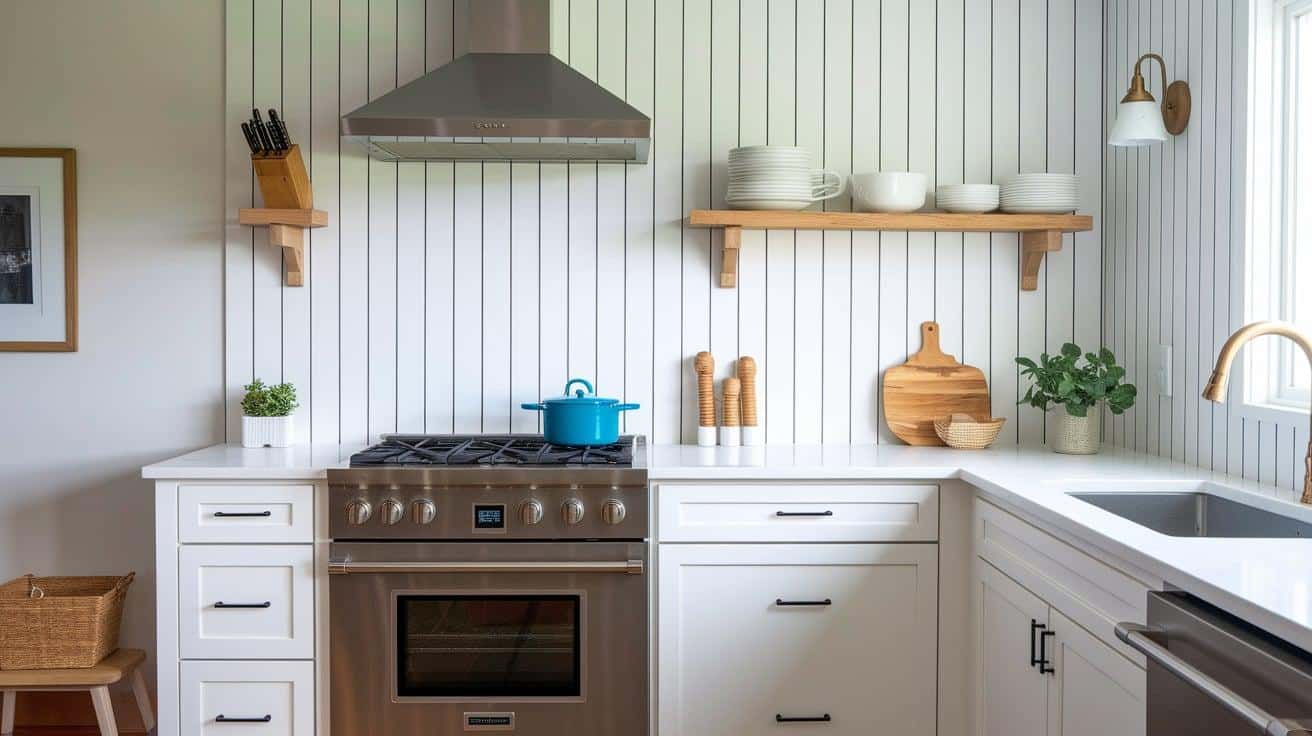
2. Vertical Shiplap for a Contemporary Edge
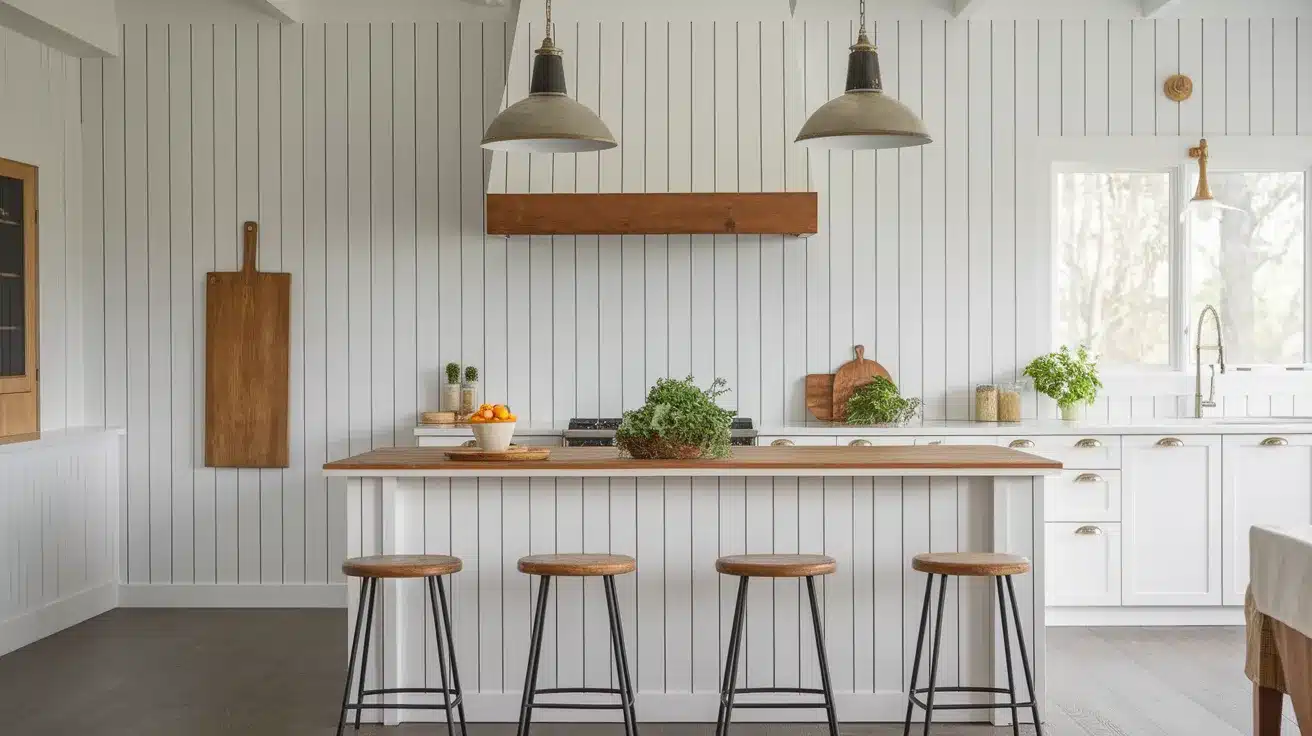
Vertical shiplap makes your walls look taller and adds a modern twist. You can use narrow or wide boards depending on the size of your space. This style works great in smaller kitchens to create height.
Best For: Modern kitchens, small spaces, and contemporary homes
3. Rustic Natural Wood Finish
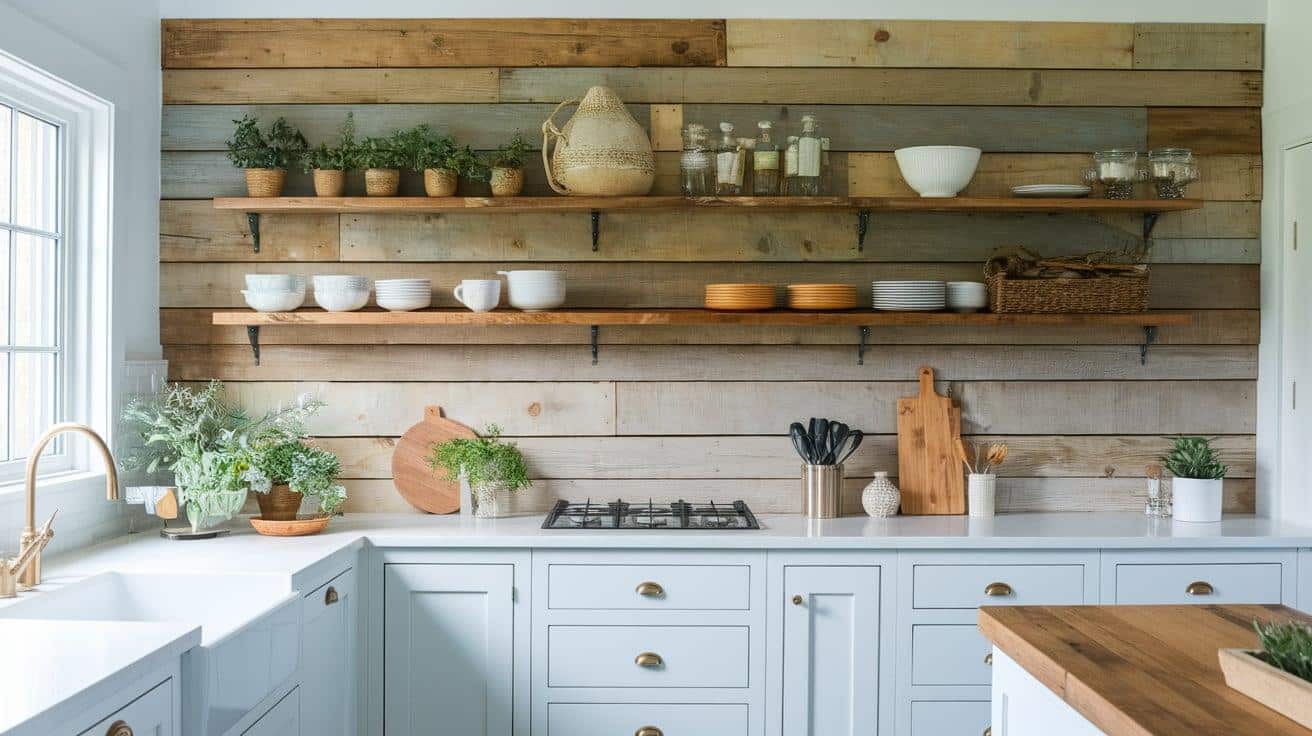
Natural wood shiplap brings warmth and texture to your kitchen. You can choose pine, cedar, or reclaimed barn wood for authentic character. The natural grain patterns create visual interest without the need for paint.
Best For: Rustic, cabin-style, and country kitchens
4. Charcoal Gray Shiplap for a Moody Vibe
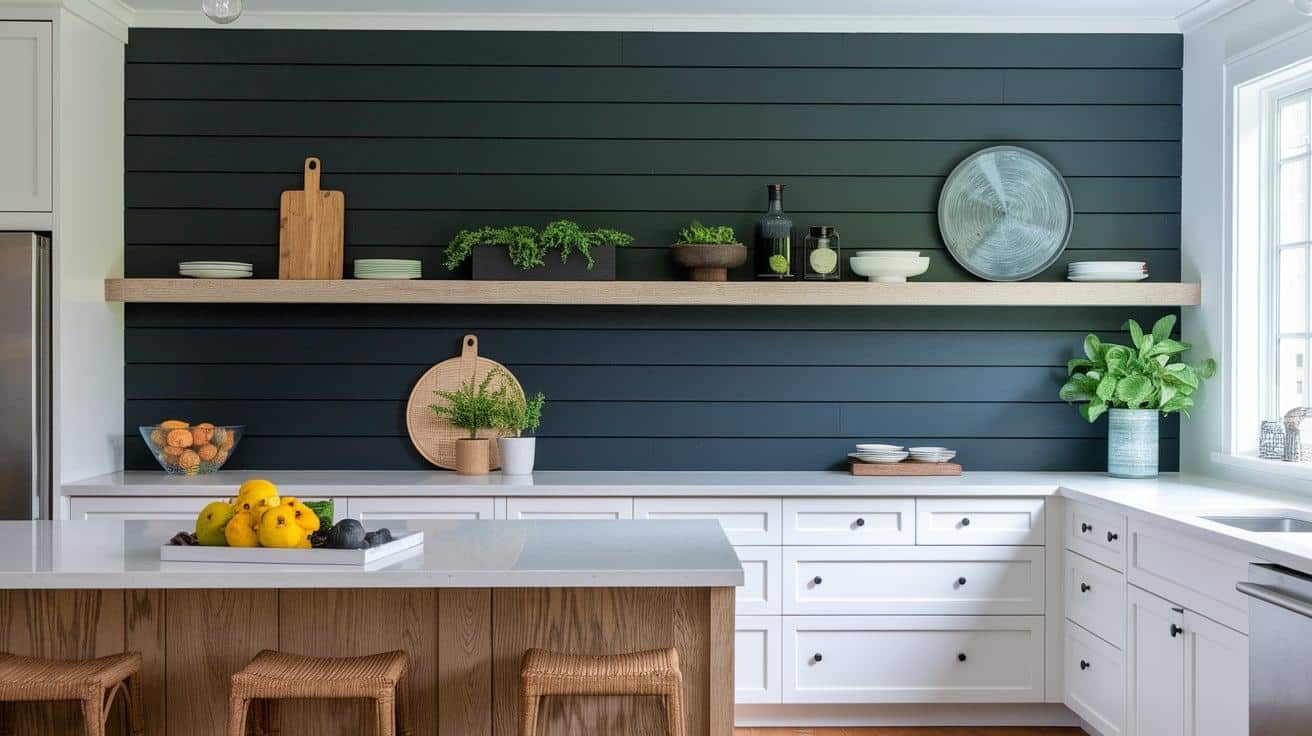
Dark gray shiplap creates drama and sophistication in your kitchen. You can pair it with white or light-colored cabinets for a contrasting effect. This bold choice works well with stainless steel appliances.
Best For: Industrial, modern, and dramatic kitchen designs
5. Painted Navy Shiplap with Gold Accents

Navy blue shiplap adds rich color and pairs beautifully with gold hardware. You can use brass faucets and cabinet pulls to complete the look. This combination creates a luxurious feel.
Best For: Traditional, coastal, and upscale kitchen designs
6. Distressed Reclaimed Wood Boards
Weathered reclaimed wood gives your backsplash authentic vintage charm. You can find old barn wood or fence boards for this look. Each piece tells a story with unique wear patterns.
Best For: Farmhouse, vintage, and shabby chic kitchens
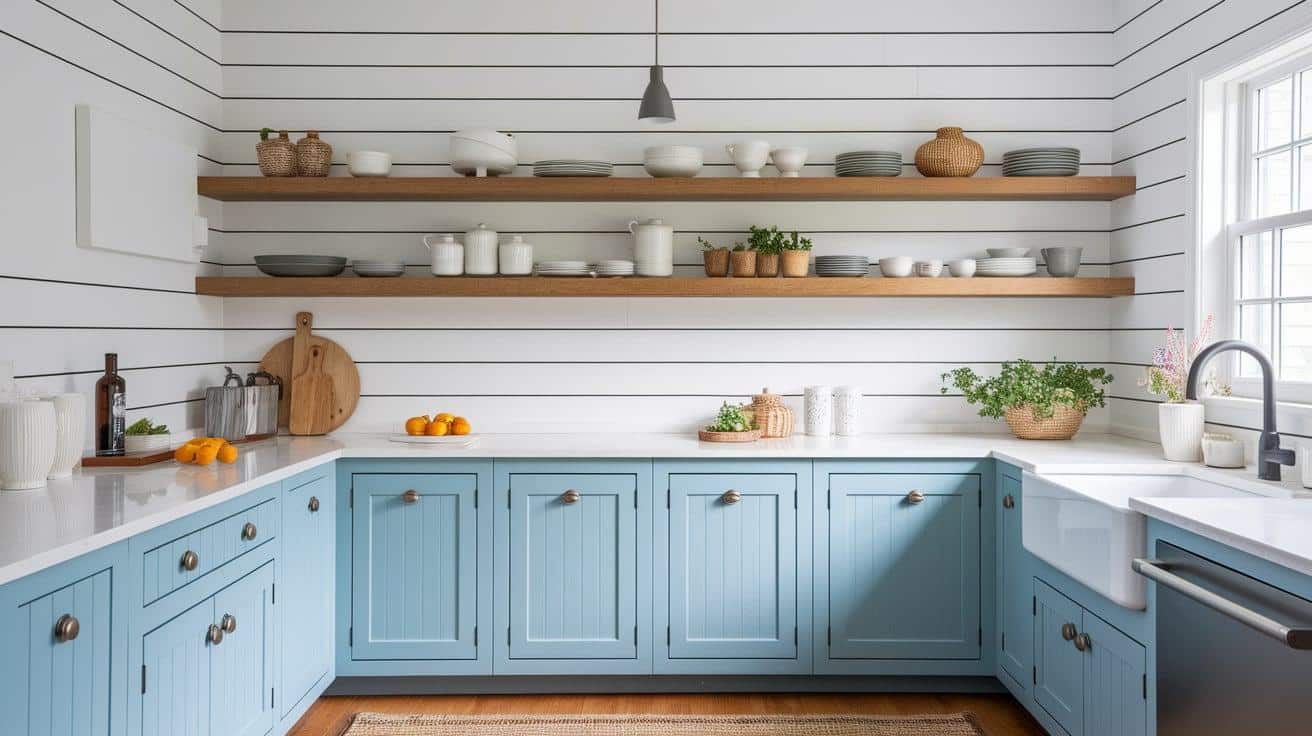
7. Coastal Blue Shiplap with White Cabinets
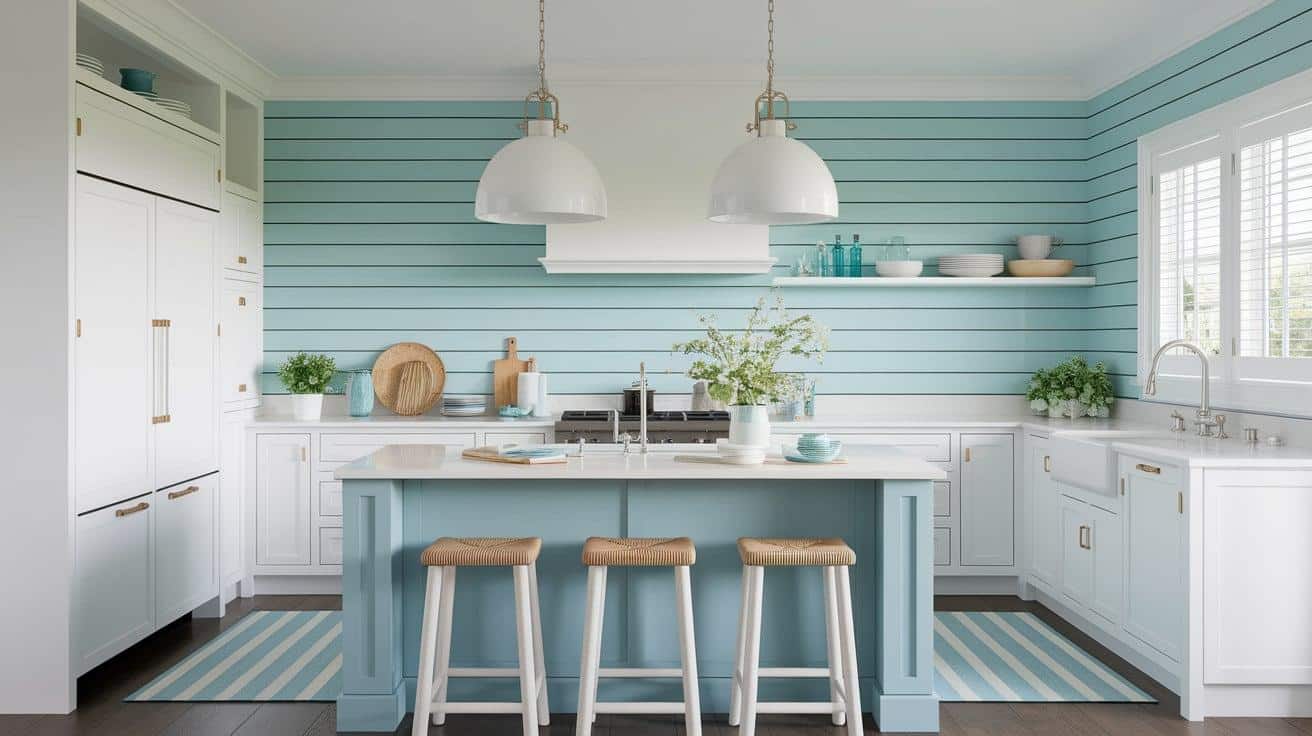
Light blue shiplap creates a beachy, relaxed atmosphere in your kitchen. You can choose soft aqua or pale blue tones. This color combination feels fresh and calming.
Best For: Coastal, beach house, and cottage-style kitchens
8. High-Gloss Black Shiplap
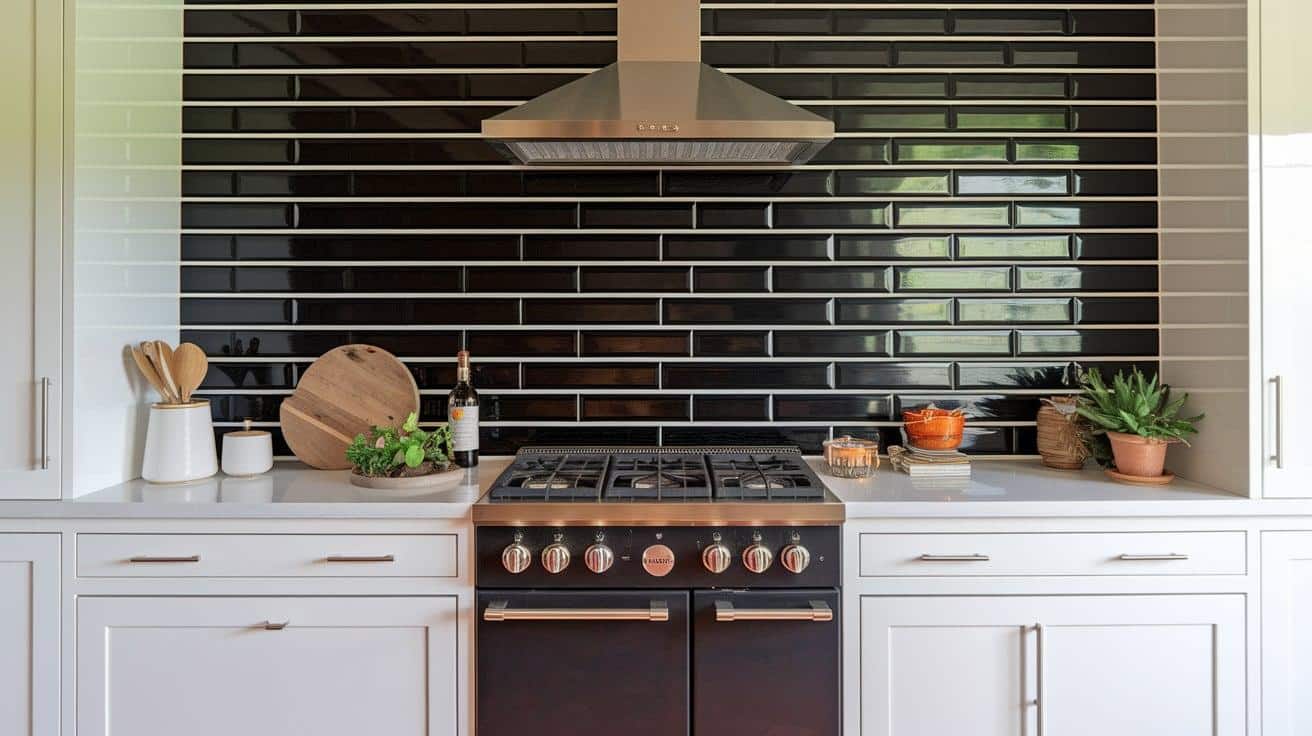
Black shiplap with a glossy finish makes a bold statement. You can use it as an accent wall behind your stove. The shiny surface reflects light, creating depth.
Best For: Modern, dramatic, and high-contrast kitchen designs
9. Stained Oak Shiplap for Warmth
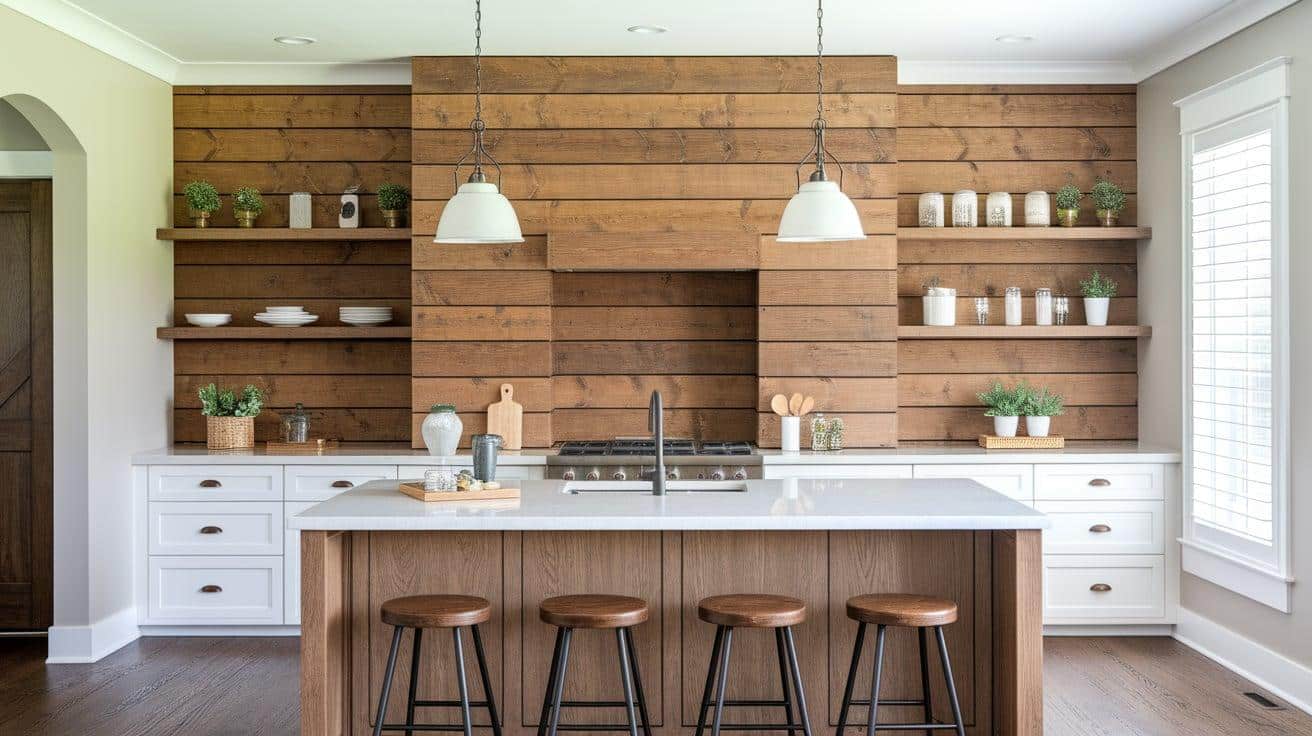
Oak shiplap with natural stain brings rich wood tones to your space. You can match it to hardwood floors or wood cabinets. This choice adds warmth without being too rustic.
Best For: Traditional, craftsman, and warm-toned kitchens
10. Thin Vertical Planks for Subtle Texture
Narrow vertical boards create subtle texture without overwhelming your space. You can use 1-inch or 2-inch wide planks for this look. This style adds interest while staying understated.
Best For: Minimalist, contemporary, and small kitchens
11. DIY Faux Shiplap Painted on Drywall
Painted faux shiplap gives you the look without the cost of real boards. You can use painter’s tape and paint to create lines on your wall. This budget-friendly option works great for renters.
Best For: Budget projects, rental properties, and quick updates
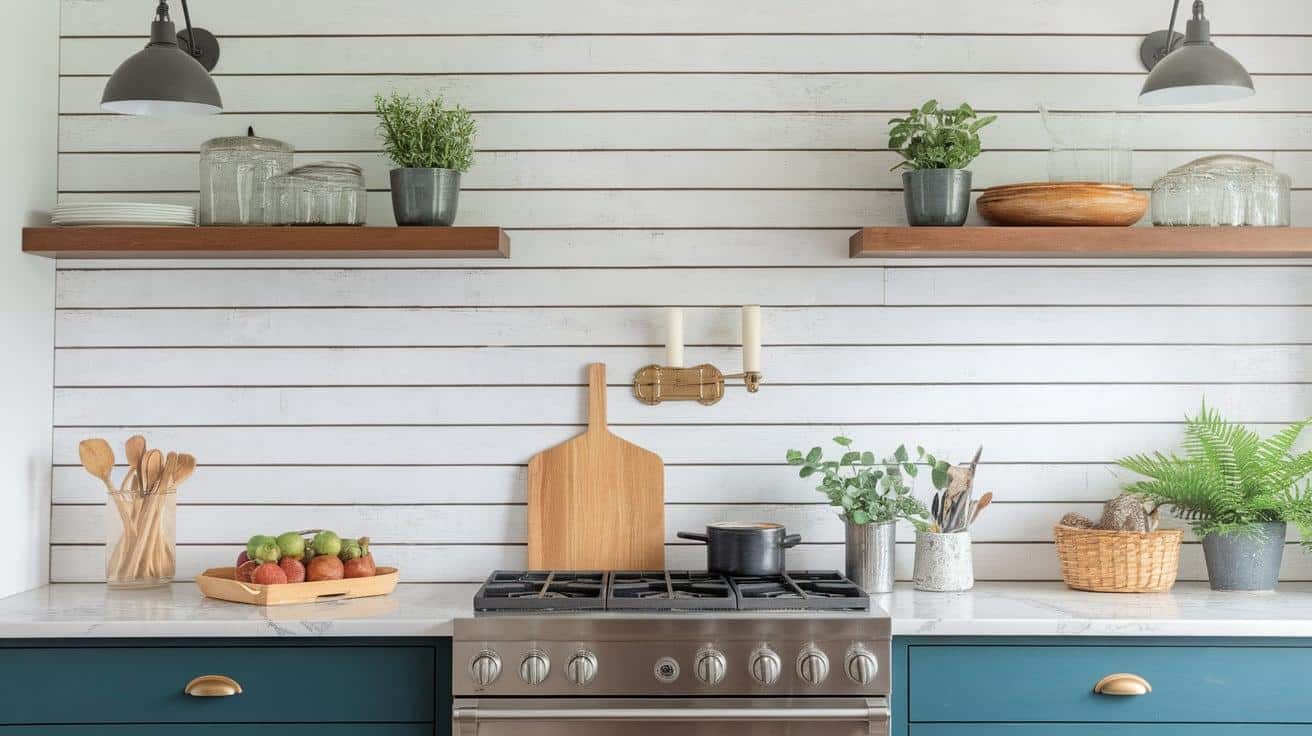
12. White Shiplap with Floating Wood Shelves

White shiplap provides a clean backdrop for natural wood floating shelves. You can display dishes, plants, or decorative items on the shelves. This combination adds storage and style.
Best For: Open shelving designs, farmhouse, and functional kitchens
13. Herringbone Patterned Shiplap
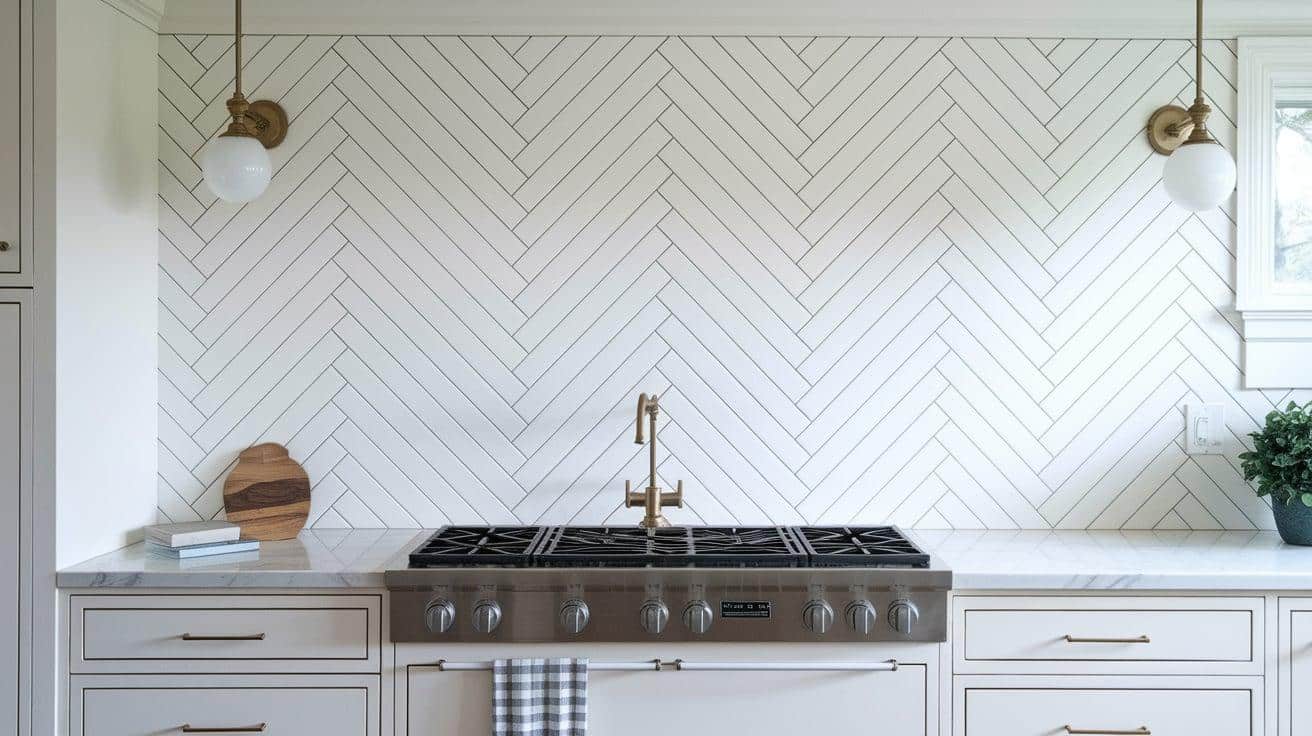
Herringbone shiplap creates a sophisticated zigzag pattern on your wall. You can cut standard boards at angles to create this design. This pattern adds visual interest and movement.
Best For: Traditional, upscale, and pattern-loving homeowners
14. Matching Cabinet Color Shiplap
Paint your shiplap the same color as your cabinets for a cohesive look. You can use different finishes to create subtle variation. This approach makes your kitchen feel larger and unified.
Best For: Small kitchens, monochromatic designs, and seamless looks
15. Range Hood Framed with Shiplap
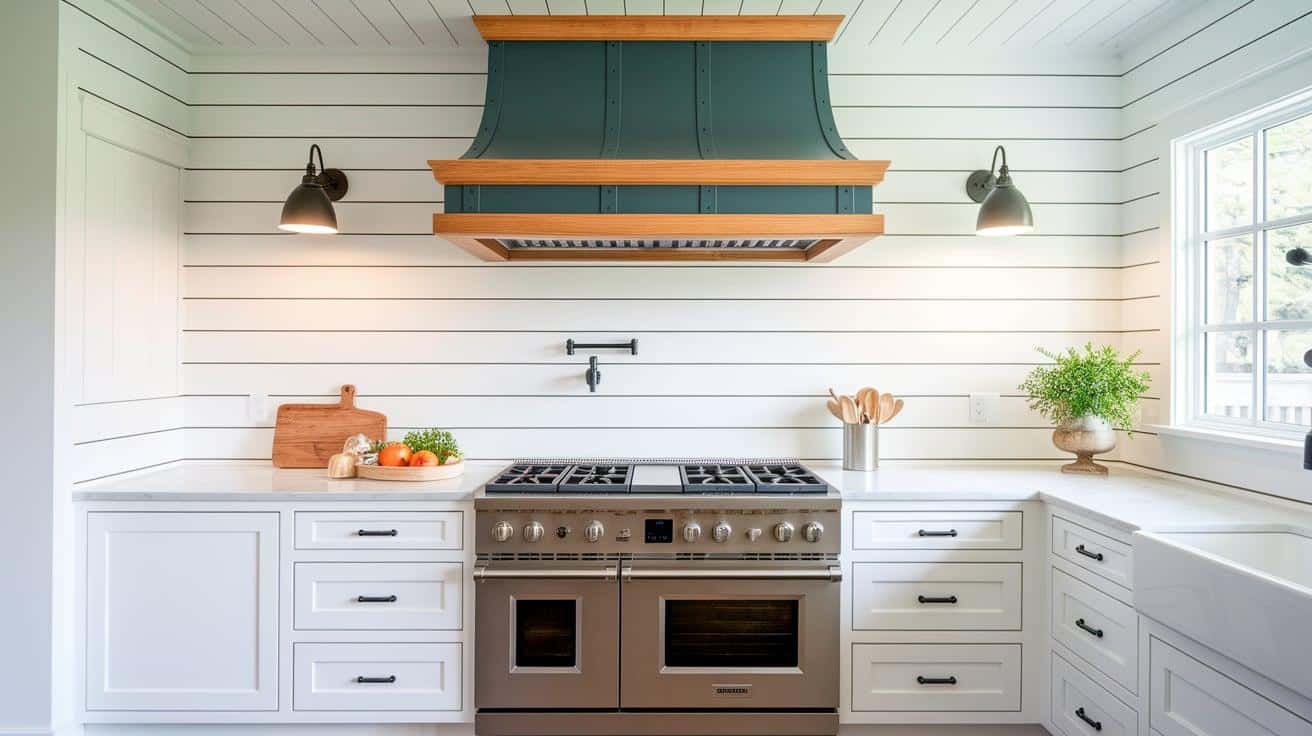
Use shiplap to frame your range hood and create a focal point. You can extend it from the counter to the ceiling for drama. This treatment makes your hood look like built-in furniture.
Best For: Statement walls, cooking zones, and custom-built looks
16. Chevron Accent Backsplash
![]()
Chevron shiplap creates a trendy V-shaped pattern behind your sink or stove. You can use it as an accent with plain walls around it. This geometric design adds modern flair.
Best For: Modern, geometric, and accent wall applications
17. Peel-and-Stick Shiplap for Renters
Removable peel-and-stick shiplap lets you get the look without permanent changes. You can find realistic wood-look options at home stores. This solution works great for apartments and rentals.
Best For: Rental properties, temporary updates, and commitment-free decorating
How to Install a Shiplap Backsplash
Installing a shiplap backsplash is easier than you think. Follow these five simple steps to create a beautiful wood accent wall in your kitchen or bathroom.
Essential Tools & Materials
| Tools | Materials |
|---|---|
| Measuring tape | Shiplap boards |
| Level | Nails or construction adhesive |
| Saw (miter or circular) | Caulk and sealant |
| Nail gun or hammer | Paint or primer |
| Sanding block/sander | Painter’s tape |
| Caulk gun | Cleaning supplies |
| Pencil | Optional: outlet extenders, spacers |
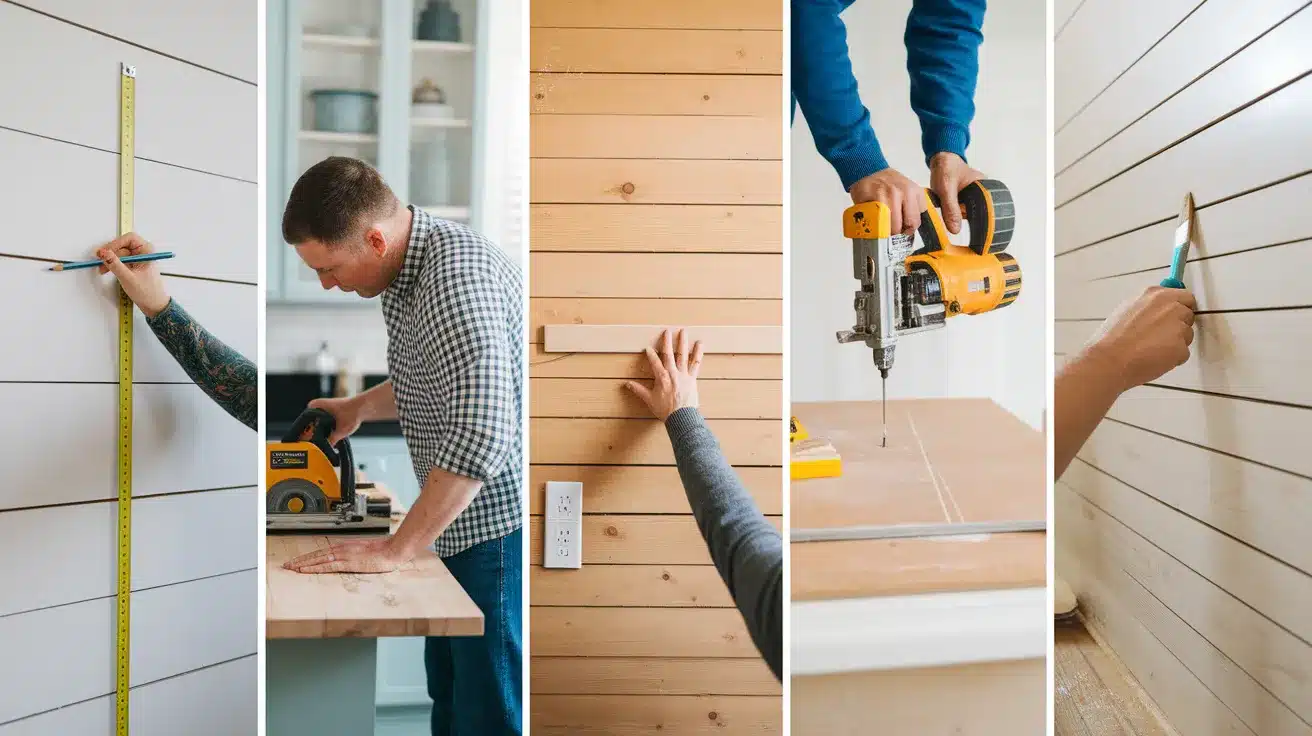
Step 1: Measure and Plan the Space
Start by measuring your wall space from the counter to the cabinet or the ceiling. Mark the center point of your wall to ensure balanced board placement. Plan whether you want horizontal or vertical boards before you begin cutting.
Materials Needed: Measuring tape, pencil, level, calculator
Step 2: Choose and Prep Your Materials
Select your shiplap type based on your budget and style preferences. Cut all boards to the correct length using a miter saw for clean edges. Sand any rough spots and wipe boards clean with a damp cloth.
Materials Needed: Shiplap boards, miter saw, sandpaper (120-grit), tack cloth
Step 3: Prep the Wall
Clean your wall surface completely and check for any bumps or holes. Use a level to mark horizontal or vertical guidelines on the wall. Locate and mark wall studs with a stud finder for secure attachment.
Materials Needed: Wall cleaner, spackle, level, stud finder, pencil
Step 4: Install the Shiplap
Begin installing from your center mark or bottom edge, working outward or upward. Use finish nails or construction adhesive to attach each board securely. Cut boards carefully around outlets and switches using a jigsaw for precise fits.
Materials Needed: Finish nails, nail gun or hammer, construction adhesive, jigsaw, safety glasses
Step 5: Finish with Paint or Sealant
Fill all nail holes with wood filler and let dry completely. Apply caulk along edges where boards meet cabinets or countertops. Paint or stain your shiplap, then seal with polyurethane for kitchen use.
Materials Needed: Wood filler, caulk, paint or stain, polyurethane sealant, brushes
Pros and Cons of a Shiplap Backsplash
| Pros | Cons |
|---|---|
| Affordable and budget-friendly | Not naturally waterproof without sealing |
| Stylish and adds visual texture | It can be harder to clean in greasy or wet areas |
| Easy to customize with paint or stain | May require regular maintenance or sealing |
| DIY-friendly and easy to install | Not ideal for all kitchen or bathroom zones |
| Works with many design styles | Potential for warping if exposed to moisture |
Maintenance Tips for Shiplap Backsplashes
Keep your shiplap backsplash looking fresh and beautiful with these essential care guidelines.
- Grease and splatter removal: Wipe down with warm soapy water and a soft cloth immediately after cooking to prevent buildup.
- Best sealant choice: Apply polyurethane sealant in satin or semi-gloss finish for kitchen backsplashes to repel moisture and grease.
- Touch-up paint strategy: Keep leftover paint for quick fixes and sand lightly before applying new coats for smooth results.
- Weekly cleaning: Use white vinegar and water (1:1 ratio) to remove stubborn stains and disinfect naturally.
- Reapply sealant annually: Check your sealant yearly and reapply thin coats as needed, especially around sink and stove areas.
- Monitor for warping: Check boards regularly for moisture damage, especially near sinks, and replace damaged pieces quickly.
Final Thoughts
Shiplap backsplashes prove you don’t need expensive materials to create a stunning kitchen makeover. With different design ideas to choose from, you can find the perfect style for your space, whether you love classic white farmhouse charm or bold navy sophistication.
The 5-step installation process makes this a perfect weekend DIY project. You can complete the entire backsplash in just two days with basic tools and materials from your local home store.
From measuring and planning to the final coat of sealant, each step is simple enough for beginners.
Your new shiplap backsplash will add texture, warmth, and personality to your kitchen while staying within budget. The best part? You’ll have the satisfaction of creating something beautiful with your own hands.
Ready to start your shiplap backsplash project? Browse through our design ideas again and pick your favorite style. Then gather your materials and start measuring – your dream kitchen is just one weekend away!
