
Tired of staring at that boring fireplace while dreaming of a luxurious makeover? Professional fireplace renovations can cost thousands of dollars, leaving many homeowners feeling stuck with outdated designs.
But what if you could create a stunning Roman clay fireplace finish for a fraction of the price? This DIY approach gives you the rich, textured look of expensive plaster work without breaking the bank.
You’ll save hundreds while achieving results that rival high-end designs. Plus, the natural clay finish adds warmth and character that paint simply can’t match.
Ready to turn your fireplace from drab to fab? This step-by-step guide will show you exactly how to create a beautiful Roman clay finish using simple tools and affordable materials that anyone can master.
What is Roman Clay?
Roman clay is a natural mineral-based coating made from fine clay particles, mica, and earth pigments. This ancient plaster technique creates rich, textured surfaces that feel smooth to the touch.
Unlike regular paint, Roman clay soaks into surfaces and prevents peeling over time. It handles fireplace heat better than limewash and offers superior durability compared to standard paint.
The clay also regulates humidity naturally, making it ideal for fireplace areas.
Roman clay comes in several finish options. You can choose a matte finish for a soft, modern look or a suede-like texture that feels luxurious. Color choices range from warm cream tones to deep terracotta shades, with custom colors possible by mixing different clay pigments.
The result is a timeless finish that adds character and warmth to any fireplace surround while lasting longer than traditional alternatives.
Why Choose Roman Clay for Your Fireplace?
Roman clay creates a smooth, modern look that never goes out of style. The natural texture adds visual depth while maintaining clean lines that work with any decor.
Unlike busy tile patterns or heavy stone, Roman clay provides a sophisticated backdrop that lets your fireplace become the focal point without overwhelming the room.
- Heat resistant and safe: Handles high temperatures without cracking or releasing harmful fumes
- Eco-friendly and non-toxic: Made from natural earth materials with no VOCs or harmful chemicals
- Improves air quality: Helps regulate humidity levels naturally while being safe for families and pets
The cost savings are significant compared to major renovations. Installing tile or stone veneer can cost thousands of dollars plus professional labor.
Roman clay gives you a high-end look for a fraction of the price, and you can apply it yourself over a weekend. Most homeowners save 60-80% compared to traditional fireplace makeovers.
Step-by-Step DIY Roman Clay Fireplace Guide
This complete guide will walk you through building a stunning Roman clay fireplace for around $300 in materials.
Tools Required
| Tool | Purpose |
|---|---|
| Drill with bits | Securing screws and making holes |
| Circular saw | Cutting 2x4s and drywall |
| Level | Ensuring straight lines |
| Measuring tape | Accurate measurements |
| Utility knife | Scoring drywall |
| Staple gun | Attaching corner bead |
| Sandpaper/sander | Smoothing surfaces |
| Plastic putty knives | Applying Roman clay |
Materials Required
| Material | Quantity | Purpose |
|---|---|---|
| 2×4 lumber | 15-20 pieces | Frame Construction |
| Drywall sheets | 4-6 sheets | Wall covering |
| Wood screws | 2 lbs | Securing frame |
| Drywall screws | 1 lb | Mounting drywall |
| Corner bead | 8-10 pieces | Clean edges |
| Drywall mud | 1 bucket | Smoothing joints |
| Crown molding | 6 feet | Under mantle detail |
| Base cap molding | 6 feet | Floor transition |
| Primer | 1 quart | Surface Preparation |
| Roman clay | 1 gallon | Final finish |
Step 1: Plan and Frame the Base
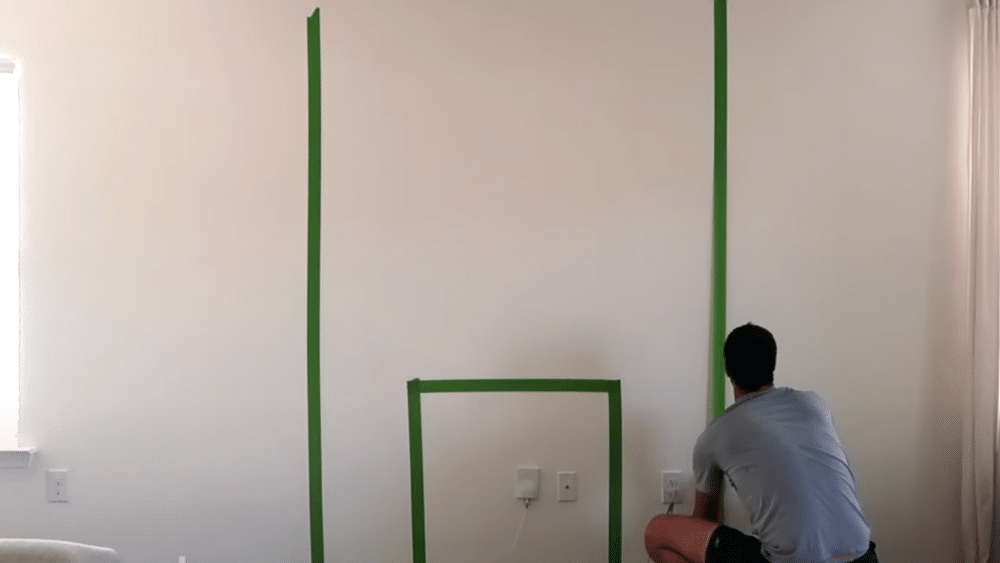
Start by measuring your wall space and taping out your design to visualize the final look. Remove existing baseboards carefully using a scoring knife and pry tools.
Build the main frame using 2x4s, creating a box structure that’s 6 feet wide and extends about 13 inches from the wall.
- Measure and mark your fireplace dimensions on the wall
- Remove baseboards by scoring caulk lines first
- Cut 2x4s to size and build the bottom box frame
Remember: Take time to double-check all measurements before cutting any materials.
Step 2: Build the Upper Structure
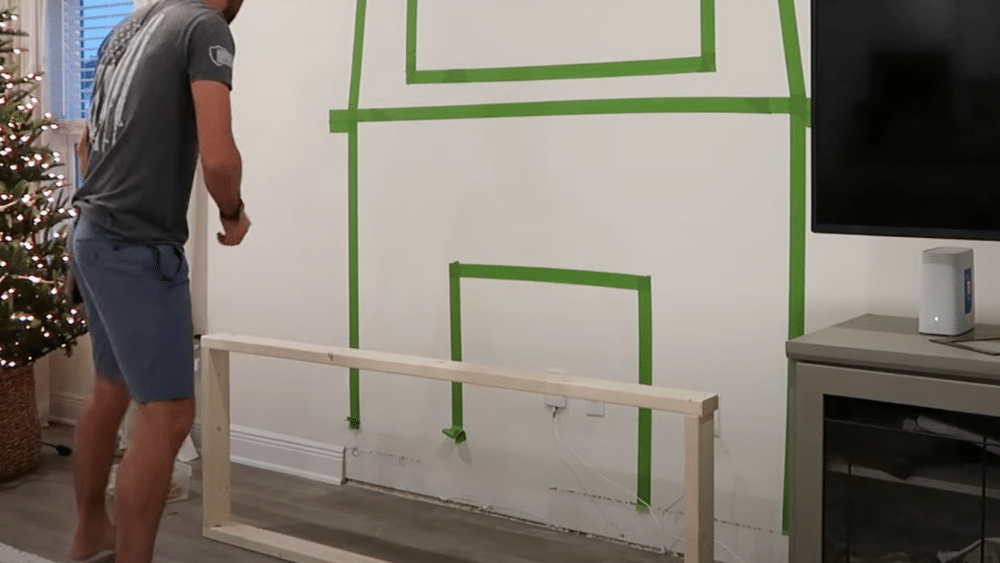
Construct the angled top section by cutting 2x4s at a 12-degree angle for a modern sloped look. Build this section on the ground first, then secure it to the wall studs.
Add horizontal supports where your electric fireplace insert will mount.
- Cut top frame pieces at 12-degree angles for the slope
- Build the upper box on the ground before mounting
- Add mounting points for your fireplace insert
Remember: Use clamps to hold pieces together while screwing for better accuracy.
Step 3: Install Drywall and Corner Bead

Cover the entire frame with drywall pieces, cutting them to fit each section. Score the drywall with a utility knife to get exact shapes needed.
Install corner bead on all outside edges using a staple gun, then apply drywall mud to all seams and screw holes.
- Cut drywall pieces to fit each section of the frame
- Install corner beads on all outside edges for clean lines
- Apply drywall mud to seams and sand smooth when dry
Remember: Sand thoroughly between coats for the smoothest possible finish.
Step 4: Add Finishing Details
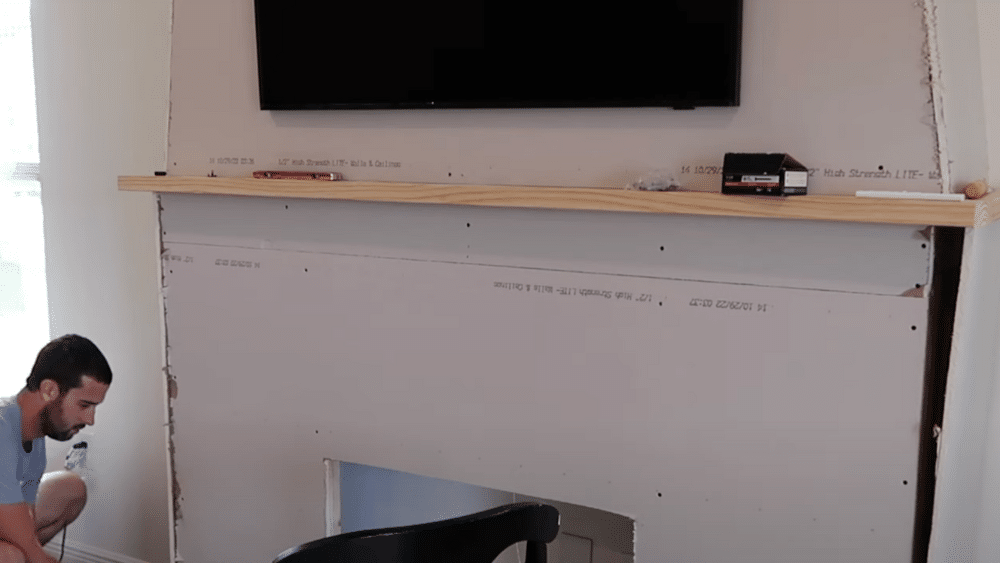
Install crown molding under the mantle area and base cap molding where the fireplace meets the floor. Cut an access hole on the side for electronics if needed.
Fill all nail holes with wood filler and caulk any gaps between the fireplace and wall.
- Install crown molding under the mantle for a polished look
- Add base cap molding to blend with existing baseboards
- Cut access panel holes for electronics and cords
Remember: Pre-drill holes for molding to prevent splitting the wood.
Step 5: Prime the Surface
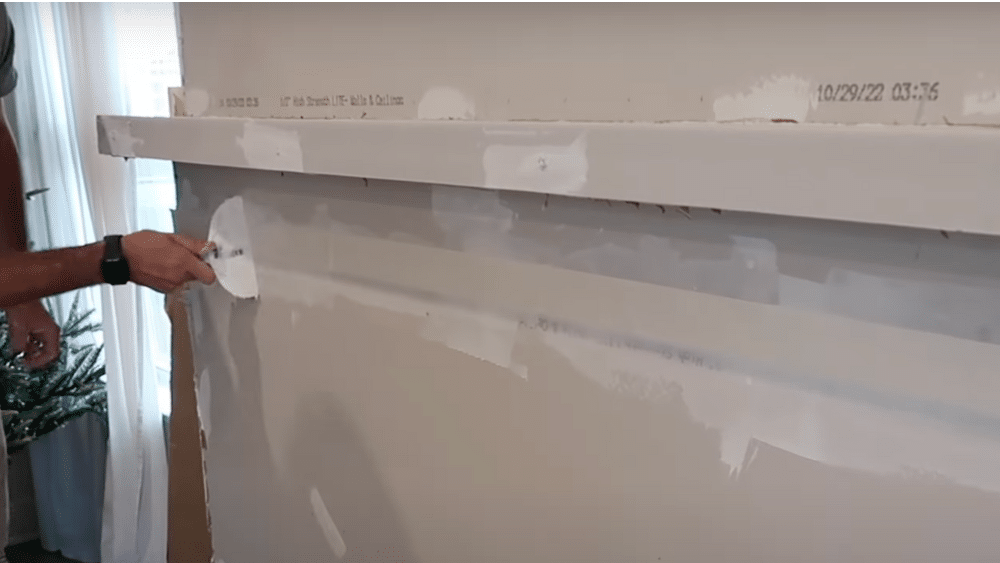
Apply two even coats of high-quality primer to the entire fireplace surface. This step ensures proper adhesion of the Roman clay and helps achieve an even final color. Allow each coat to dry completely before proceeding.
- Clean the surface of all dust and debris first
- Apply primer in thin, even coats using a roller
- Let each coat dry completely before adding the next
Remember: Good primer coverage is essential for Roman clay to adhere properly.
Step 6: Apply Roman Clay Finish
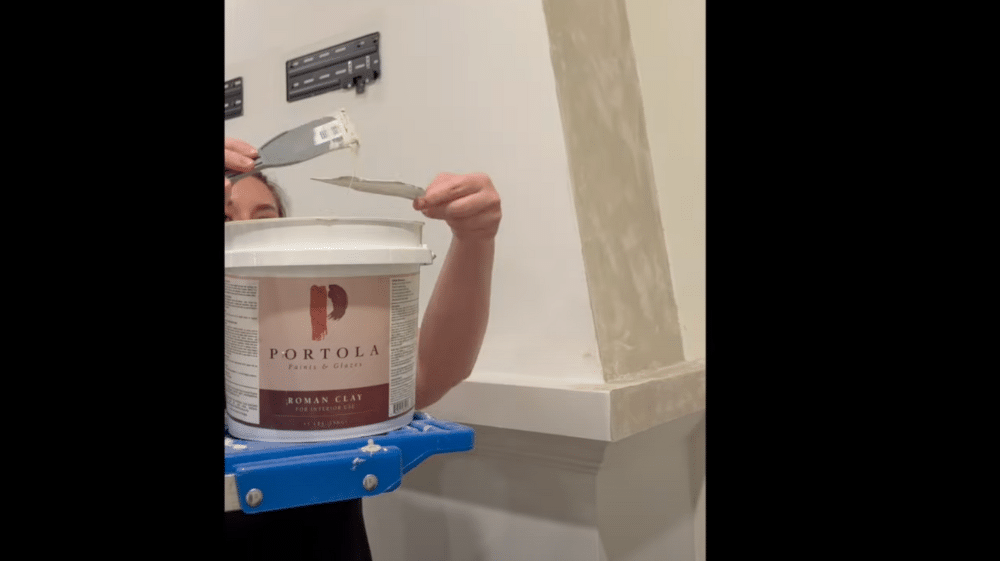
Using plastic putty knives, apply the Roman clay in X-patterns and organic swoops for natural texture. Work in small sections to maintain a wet working edge.
Apply two coats over two days, allowing the first coat to dry completely before adding the second.
- Work in small sections to keep the clay workable
- Create X-patterns and curved motions for organic texture
- Apply two thin coats rather than one thick coat
Remember: The clay looks wild when wet but dries to a beautiful, smooth finish.
Video Tutorial
For a visual tutorial, refer to this video by Kaylee | The Simple Cozy Haven
Cost Breakdown: Roman Clay Fireplace
Here’s what you can expect to spend on your Roman clay fireplace project compared to other popular materials.
1. Roman Clay Pricing per Square Foot
| Coverage Area | Roman Clay Cost | Labor (DIY) | Total per Sq Ft |
|---|---|---|---|
| 50-100 sq ft | $8-12 | $0 | $8-12 |
| 100-200 sq ft | $7-10 | $0 | $7-10 |
| 200+ sq ft | $6-9 | $0 | $6-9 |
2. Project Size Cost Estimates
| Fireplace Size | Coverage Area | Roman Clay Materials | Other Materials* | Total DIY Cost |
|---|---|---|---|---|
| Small (4×6 ft) | 35-45 sq ft | $280-450 | $150-200 | $430-650 |
| Medium (5×8 ft) | 55-70 sq ft | $385-630 | $200-250 | $585-880 |
| Large (6×10 ft) | 75-90 sq ft | $525-765 | $250-300 | $775-1,065 |
Other materials include primer, tools, drywall, lumber, and hardware
3. Cost Comparison with Other Materials
| Material Type | Cost per Sq Ft | Small Fireplace | Medium Fireplace | Large Fireplace |
|---|---|---|---|---|
| Roman Clay (DIY) | $8-12 | $430-650 | $585-880 | $775-1,065 |
| Ceramic Tile | $15-25 | $800-1,200 | $1,100-1,600 | $1,500-2,100 |
| Natural Stone | $25-45 | $1,400-2,500 | $1,900-3,200 | $2,600-4,200 |
| Marble Surround | $40-80 | $2,200-4,800 | $3,000-6,400 | $4,100-8,500 |
Money-Saving Tips
When undertaking home improvement projects or renovations, there are several effective strategies to reduce costs without compromising quality.
By being strategic about purchasing, labor, and materials, you can save significant amounts of money. Here are some practical tips to help you cut expenses while still achieving great results.
-
Bulk Buying: Purchase Roman clay in larger quantities.
Potential Savings: Save 15-20% on materials. -
DIY Installation: Skip professional labor costs.
Potential Savings: Save $800-2,000. -
Repurpose Materials: Use existing mantels or trim pieces.
Potential Savings: Save $200-500. -
Tool Borrowing: Borrow or rent specialty tools.
Potential Savings: Save $100-300. -
Off-Season Shopping: Buy materials during sales periods.
Potential Savings: Save 10-25% on supplies.
Conclusion
Your DIY Roman clay fireplace project can transform your living space for a fraction of traditional renovation costs.
This natural, heat-resistant finish creates a sophisticated look that works with any decor style while saving you thousands compared to tile or stone alternatives.
The best part? You can complete this project over a weekend with basic tools and materials costing around $300-800, depending on your fireplace size.
Roman clay offers durability, safety, and timeless appeal that will enhance your home’s value for years to come.
Ready to start your fireplace makeover? Gather your materials, set aside a weekend, and follow our step-by-step guide. Your new Roman clay fireplace will become the stunning focal point your living room deserves.
What questions do you have about your DIY Roman clay fireplace project? Share your thoughts in the comments below!
