Tired of staring at those outdated cabinet doors that make your space look like it’s stuck in the 1980s?
I understand that cabinet replacement quotes can exceed $5,000, which seems impossible when you’re on a tight budget.
But what if I told you there’s a way to change your cabinets for under $500 completely?
I’ve helped hundreds of homeowners save thousands by building their doors using simple techniques that consistently work. With just basic tools and weekend time, you can create custom doors that look like they came from a high-end showroom.
In this guide, I’ll walk you through three different door styles from beginner-friendly slab doors to impressive Shaker styles with step-by-step instructions that guarantee success. Let’s turn that cabinet makeover dream into reality without breaking the bank.
What are DIY Cabinet Doors?
DIY cabinet doors are custom-built cabinet doors that you create yourself, rather than purchasing pre-made ones from stores.
These doors can save you 50-70% compared to professional cabinet installation while giving you complete control over style, size, and finish.
DIY cabinet doors are any doors you build in your workshop or garage using basic woodworking tools. Unlike factory-made doors, you have complete control over every aspect, from the selection of wood to the final finish. You can make them any size, style, or color to match your specific needs and design preferences.
The main difference between DIY and store-bought doors is customization and cost. Store doors come in standard sizes and limited styles.
Why Choose DIY Over Store-Bought Doors
Massive Cost Savings – Professional cabinet door replacement costs $100-$ 300 per door, including installation. DIY doors cost $15-$ 50 each in materials, depending on the wood choice and style complexity.
Perfect Fit Every Time- Store-bought doors come in standard sizes that rarely match your exact cabinet openings. This creates gaps, requires filler strips, or forces you to rebuild cabinet boxes.
Complete Style Control – Choose any wood species, stain color, or paint finish you desire. Mix and match styles within the same kitchen if desired.
Perfect Fit Every Time Store‑bought doors often leave gaps or alignment issues, but with your own DIY cabinet doors, you avoid that and if adjustment is needed later, check out How to Adjust Cabinet Doors for a Perfect Fit for easy, screwdriver-level tweaks.
Step-by-Step Guide to DIY Cabinet Doors
Follow this step-by-step guide to build flawless DIY cabinet doors, from selecting the style to cutting, assembling, and mounting with professional-level precision.
Tools Required
| Tool | Purpose | Why Essential |
|---|---|---|
| Table Saw | Cuts all door components: crosscuts rails/stiles, rips grooves, cuts tongues | Handles 90% of precise cutting operations |
| Miter Gauge w/ Plywood Fence | Makes accurate 90° crosscuts and prevents tearout | Ensures square cuts with clean, backed edges |
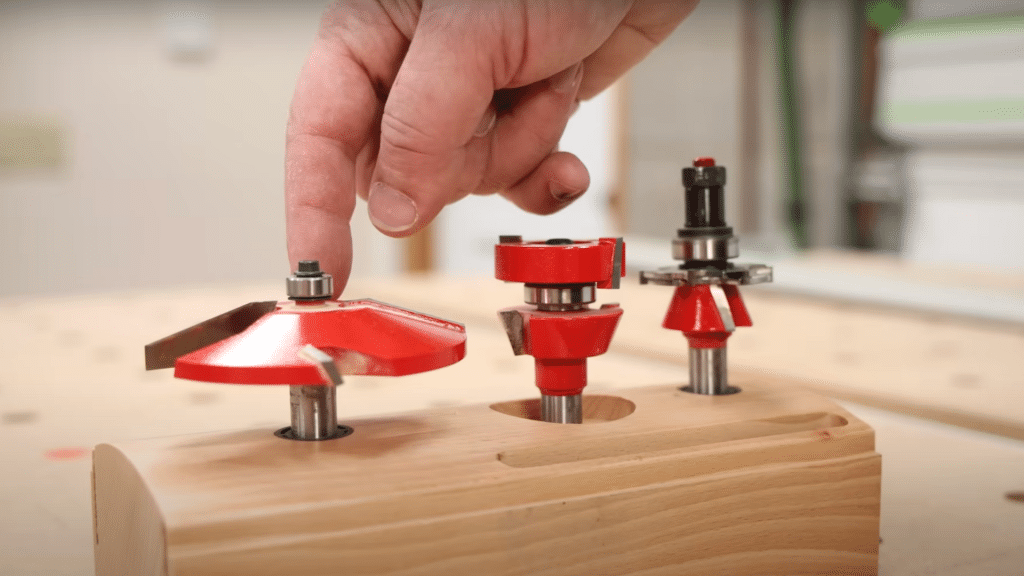
| Router Table w/ Bit Set | Cuts grooves, tongues, and shapes raised panel profiles | Creates detailed joinery and profiles not possible with a table saw |
| Hinge Installation Jig | Drills hinge cup holes accurately | Guarantees consistent hinge placement and door alignment |
| Door Positioner Jig | Holds doors in position for hinge plate marking | Ensures perfect door-to-cabinet alignment |
| Clamps (Multiple) | Holds assemblies square and secure during gluing | Prevents warping and ensures strong, aligned joints |
| Iron (Household) | Activates adhesive on iron-on edge banding | Produces a finished edge on plywood doors |
Material Required
| Material | Purpose | Why Essential |
|---|---|---|
| MDF (Medium Density Fiberboard) | Used for slab doors and door panels | Flat, stable, and ideal for painted finishes |
| Solid Wood Boards | Used for frame components in Shaker and raised panel doors | Strong, durable, and offers natural wood aesthetics |
| 1/4″ MDF Panels | Center panels for Shaker-style doors | Won’t expand or contract, stays smooth under paint |
| Iron-on Edge Banding | Covers plywood edges for a clean finish | Hides plywood layers and creates paint-ready edges |
| Euro-Style Concealed Hinges | Hidden hardware for modern door mounting | Allows for easy adjustment and clean aesthetics |
| Wood Glue | Bonds frame joints while allowing panel movement | Ensures lasting joints without restricting natural wood behavior |
| 80-Tooth Crosscut Blade | Cleanly cuts across the wood grain | Delivers smooth cuts with minimal tearout or sanding needed |
| Flat-Tooth Ripping Blade | Cuts grooves with flat bottoms | Avoids ridges in joints for better fit and finish |
| 180-Grit Sandpaper | Final smoothing before assembly and finishing | Prepares surfaces for ideal paint or stain adhesion |
| Space Balls (Rubber Wedges) | Keeps panels quiet and centered while allowing movement | Accommodates expansion while preventing rattling or cracking |
Step 1: Select Door Style and Calculate Dimensions
Choose between a slab (beginner), Shaker (intermediate), or raised panel (advanced) style based on your skill level and the tools available to you. Measure cabinet openings and determine if you want inset doors (fit inside the opening minus 1/8″ reveal) or overlay doors (cover the cabinet face).
Calculate all part dimensions, including rails, styles, and panels. Use high-quality materials – MDF for painted doors and solid wood for natural finishes. Plan your cuts to minimize waste and ensure consistent grain direction.
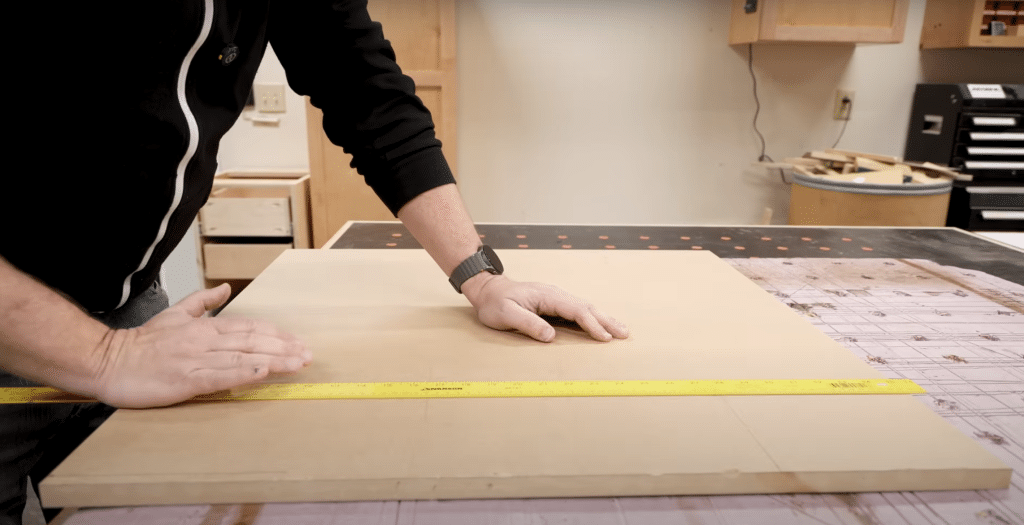
Pro Tip: Always trim factory edges first they’re damaged from shipping and will make your project look unprofessional no matter how well you build it.
Step 2: Cut All Parts to Precise Dimensions
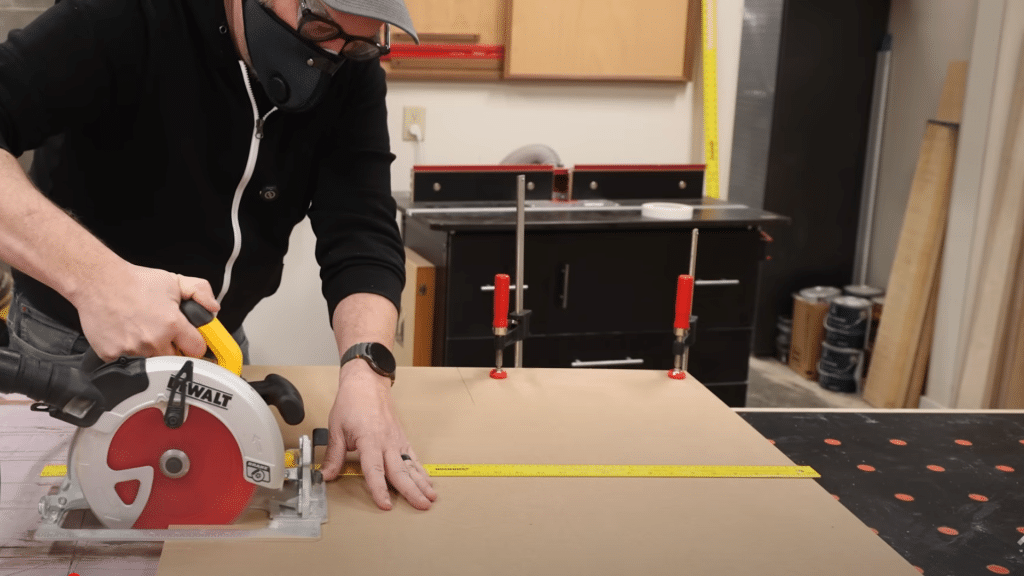
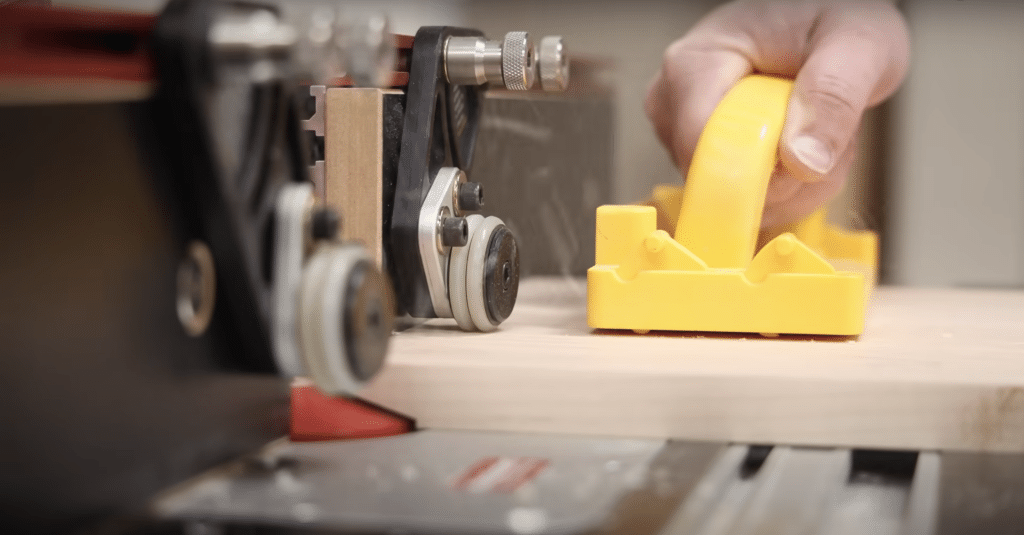
Set up your table saw with an 80-tooth crosscut blade for clean cuts. Use a miter gauge with a plywood fence for accurate crosscuts. Cut one piece first, then use it as a template with stop blocks for identical parts. For slab doors, cut to final size. For frame doors, cut rails and styles to calculated lengths.
Always back up crosscuts with scrap wood to prevent tearout. Work methodically and double-check measurements before cutting expensive materials.
Pro Tip: Use stop blocks and cut all identical parts at once this works faster and guarantees perfect matching lengths without remeasuring each piece.
Step 3: Create Grooves in Frame Parts (Frame Doors Only)
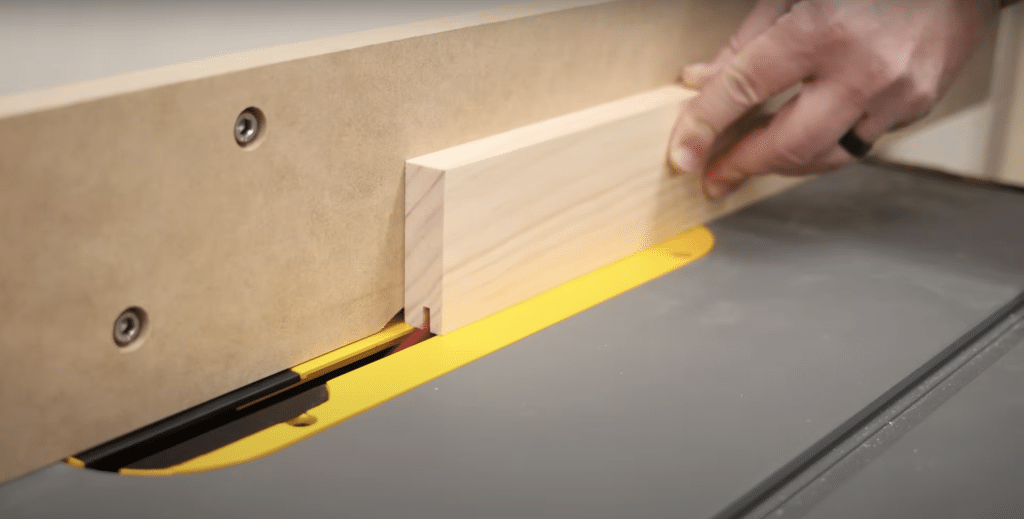
Switch to a flat-tooth ripping blade for groove cuts. Set the blade height to 1/4″ and position the fence to center the groove on your frame pieces.
Make first pass, flip the board end-for-end, and make second pass to ensure perfect centering. Test fit with your panel material and adjust the fence slightly until you get a snug fit without gaps. Run all frame pieces through once your setup is perfectly dialed in.
Pro Tip: Always test your setup on scrap wood first, then dial in the perfect fit before running your good materials this prevents costly mistakes.
Step 4: Cut Tongues on Rail Ends
Keep the same blade setup, but adjust height to just below the groove depth. Set fence so blade outer edge is 1/4″ away. Use a miter gauge to nibble away material until you reach the fence, then flip and repeat on the opposite face.
Test fit frequently and raise the blade incrementally until you achieve a snug fit that goes together with light pressure. The joint should hold together when picked up, but not require forcing.
Pro Tip: Sneak up on the perfect fit by making multiple light passes it’s better to make extra cuts than ruin a joint by cutting too much at once.
Step 5: Prepare and Fit Center Panel
For Shaker doors, cut a 1/4″ MDF panel to fit grooves with slight clearance. For raised panels, glue up solid wood boards if needed, then plane smooth.
Use router table with raised panel bit, making three progressive passes two heavy cuts to remove bulk material, then final light pass to eliminate burn marks. Test the panel’s fit in the frame grooves to ensure smooth operation without binding or rattling.
Pro Tip: Pre-finish solid wood panels before assembly this prevents visible gaps when the wood contracts and ensures professional appearance.
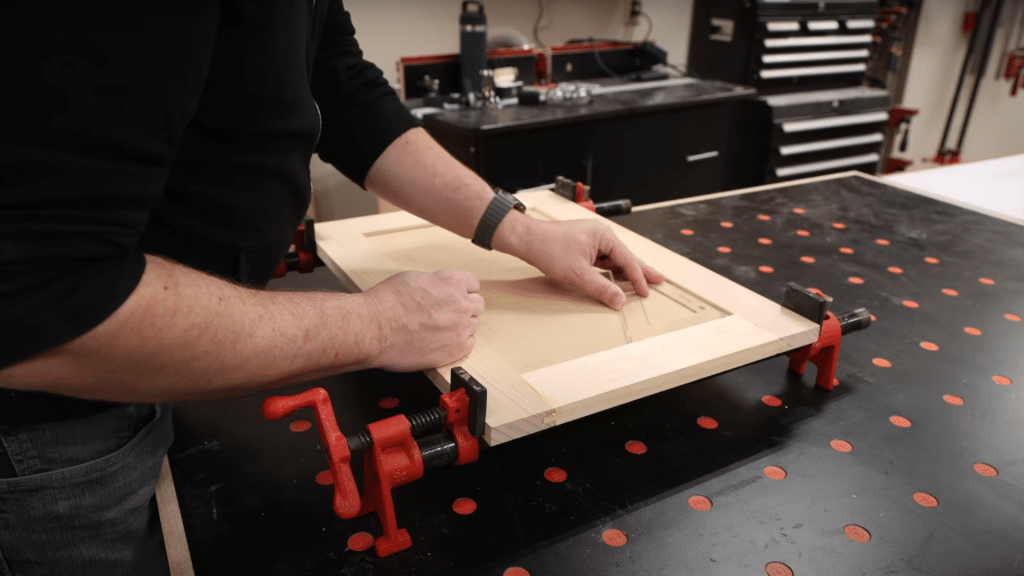
Step 6: Sand and Assemble Door
Sand all parts to 180 grit, paying attention to joint areas. Apply glue only to frame joints; never glue solid wood panels, as they need room for seasonal movement.
Use clamps with even pressure and check for square using diagonal measurements. For solid wood panels, add tiny dabs of glue only at the top and bottom center, or use space balls to prevent rattling while allowing movement.
Pro Tip: Remove any glue squeeze-out immediately with damp cloth, especially in detailed areas – it’s nearly impossible to sand out later without damaging profiles.
Step 7: Install Hinges and Mount Door
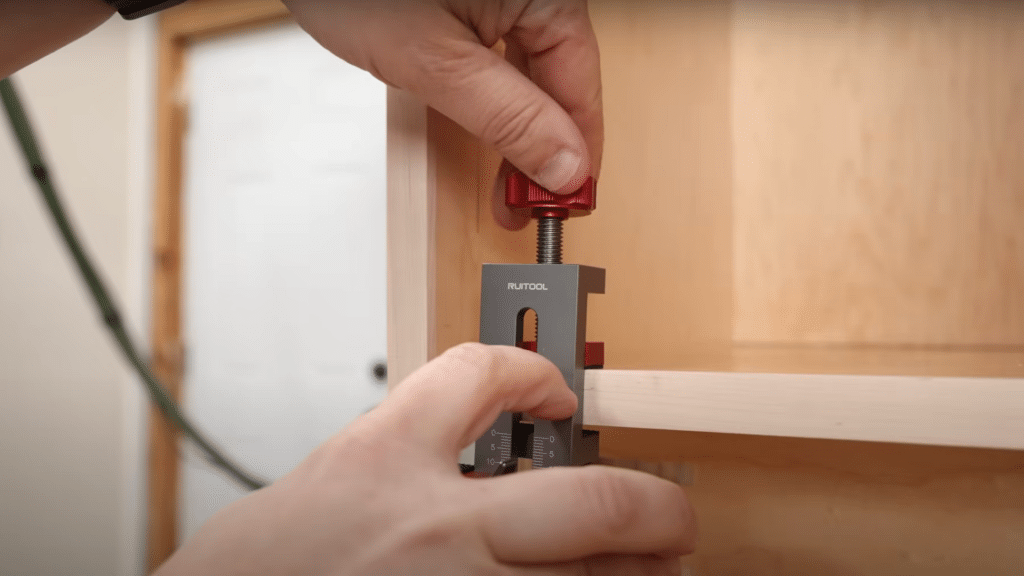
Select the correct Euro hinges using online selection tools based on the door type (inset or overlay) and cabinet style. Use a hinge boring jig to drill cups 3″ from the top and bottom edges. Install door-side hinges first, then use the door positioner jig to mark hinge plate locations on the cabinet.
This ensures perfect alignment every time. Make final adjustments using built-in hinge screws for perfect reveals and smooth operation.
Pro Tip: Use a door positioner jig rather than measuring it guarantees perfect hinge plate placement and eliminates guesswork for professional results.
Video Tutorial
I want to acknowledge MWA Woodworks for the insightful video, which was a key reference in putting this guide together.
Painting and Finishing Tips for DIY Cabinet Doors
Achieving a smooth, professional finish on your DIY cabinet doors requires the right preparation and technique. Many homeowners rush through the finishing process, resulting in doors that appear homemade.
1. Clean All Surfaces First
- Start by wiping down your doors with a tack cloth to remove all dust and debris. Even tiny particles will show through your final finish. Pay special attention to routed details and grooves where dust likes to hide. Use compressed air to blow out hard-to-reach areas if it is available.
- For solid wood doors, inspect for any glue squeeze-out that may have been overlooked during the assembly process. Scrape it off with a sharp chisel; don’t sand it, as this will spread the glue and create finish problems later.
2. Fill Imperfections and Gaps
- Use wood filler to fill any nail holes, dents, or gaps in your door construction. For painted finishes, use a paintable wood filler that won’t show through the paint. Apply it slightly proud of the surface since it will shrink as it dries.
- Allow the filler to dry completely according to the manufacturer’s instructions. Sand it flush with 120-grit sandpaper, then progress to 150-grit sandpaper for a smoother finish.
3. Sand Progressively for Smoothness
- Start with 120-grit sandpaper to remove any construction marks and level the surface. Move to 150-grit, then finish with 180-grit for painted surfaces or 220-grit for stained finishes. Always sand with the grain direction on solid wood components.
- Pay attention to edges and routed details. Use sanding blocks on flat surfaces to prevent rounding over sharp edges. For detailed areas, fold sandpaper to fit into grooves and profiles.
4. Select Quality Paint and Tools
- Use high-quality paint designed for cabinets – these formulations level better and cure harder than standard wall paint. Semi-gloss or satin finishes are ideal for durability and cleanability.
- Invest in quality brushes and rollers. Cheap tools leave marks and fibers in your finish. Use synthetic brushes for water-based paints and natural bristles for oil-based products.
5. Apply Multiple Thin Coats
- Two or three thin coats always look better than one thick coat. Thin coats level better, dry more evenly, and are less likely to sag or run. Allow each coat to dry completely before applying the next one.
- Light sanding between coats with 320-grit paper improves adhesion and smoothness, but be careful not to sand through to the primer. Remove all dust before applying the next coat.
Conclusion
Building your own cabinet doors isn’t just about saving money; it’s about creating something you can be proud of for years to come. You now have everything needed to change those tired old cabinets into custom pieces that reflect your personal style.
Remember, every expert started as a beginner. Start with simple slab doors to build confidence, then progress to more complex styles as your skills develop. The tools and techniques I’ve shared will serve you well beyond this single project.
Take that first step today. Measure your cabinet openings, choose your door style, and start building. Your future self will thank you every time you walk into that altered space.
Drop a comment below and let me know which door style you’re planning to tackle first!
Frequently Asked Questions
What Wood to Use for Diy Cabinet Doors?
Pine for budget-friendly painted doors, poplar for a high-quality painted finish, and maple or oak for natural-stained doors. MDF works great for painted slab doors.
How Thick Should Wood Be for Cabinet Doors?
Use 3/4-inch thick wood for door frames and 1/4-inch wood for center panels. This provides proper strength and standard hinge compatibility.
What Is the Least to Most Expensive Wood for Cabinets?
Pine (cheapest), poplar (mid-range), maple, and oak (most expensive). MDF costs less than pine, but only works for painted finishes.