You can absolutely build your own patio cover, even if you’ve never tackled a big construction project before. This type of cover is perfect for beginners because it doesn’t require complicated house connections or advanced carpentry skills.
The best part is how much money you’ll save compared to hiring contractors. A DIY patio cover typically costs less than half of a professional installation.
Plus, you get exactly what you want instead of settling for standard designs. This straightforward project utilizes simple materials that can be found at any home improvement store.
Each step builds upon the last, so you’ll gain confidence as you work.
With this guide, you’ll have a beautiful, sturdy cover that adds real value to your home and sets you up perfectly for your next outdoor project, like deck railings.
Materials Needed
Before you start building, gather all your materials in one place. Having everything ready saves time and keeps your project moving smoothly. Here’s what you’ll need for a basic 10×10 patio cover.
| Category | Item/Material | Purpose/Description |
|---|---|---|
| Wood Materials | 4×4 Posts, 2x6s, 2x4s | Vertical posts, beams, crossbars, and support |
| Wooden Hoop (optional) | Hanging elements/decor | |
| Roofing Materials | Metal Roofing Sheets, Roofing Screws, Adhesive | Roof protection and attachment |
| Fasteners/Hardware | Concrete & Wood Screws, 3-inch Screws | Securing posts, beams, joints |
| Nuts & Bolts, Brackets, Anchor/Angle Plates | Strengthen and join connections | |
| Tools | Drill & Bits, Saw, Hammer, Screwdriver, Pliers | Cutting, fastening & adjustments |
| Measuring Tape, Level, Ladder/Step Ladder | Measurement, alignment, access | |
| Paint Brush/Stain Tools | For wood finishing | |
| Safety Gear | Gloves, Safety Glasses, Hearing & Dust Protection, Knee Pads | Installer safety |
| Finishing Materials | Wood Stain/Paint, Sealer | Wood protection, finish |
| Curtain Hooks/Drapes, Outdoor Lighting (optional) | Shade/decor, evening use | |
| Miscellaneous | Concrete Mix | Setting posts |
| Landscape Fabric, Window Wells/Covers (optional) | Weed prevention, extra support |
Step-by-Step Guide to Building Your Patio Cover
Now comes the fun part: building your patio cover from start to finish. These eight simple steps will guide you through the entire process without any guesswork.
Step 1: Planning and Measuring the Space
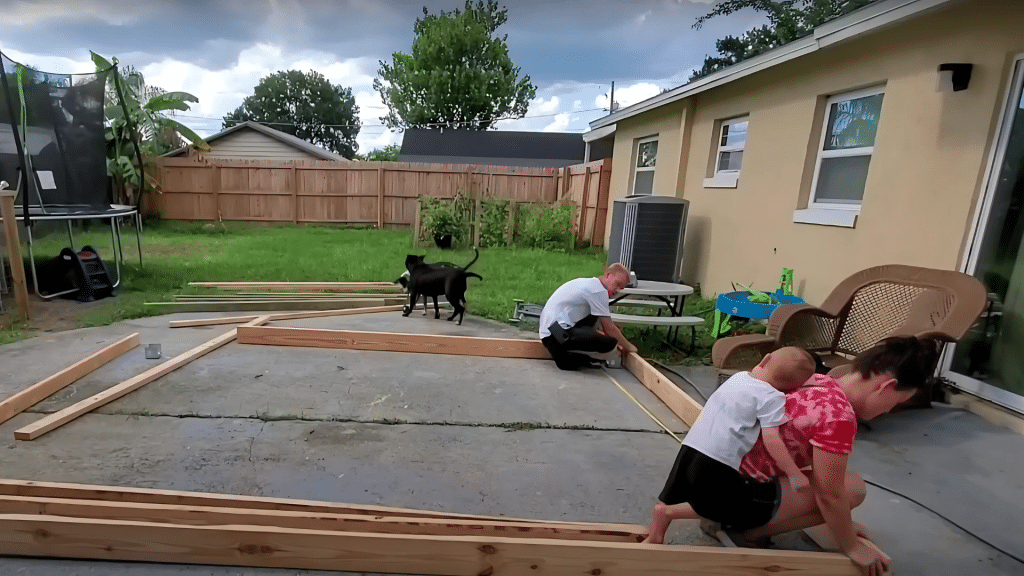
Start by deciding exactly where your patio cover will go. A 10×10 space works well for most patios and provides good coverage. Mark the four corners where your posts will sit using chalk or tape.
Measure twice to make sure your layout is square. The distance between opposite corners should be exactly the same. Take time to get this right because everything else depends on accurate measurements.
Check for any obstacles like sprinkler heads or electrical lines before you start drilling. Move any patio furniture or decorations out of your work area.
Step 2: Preparing and Securing the Posts
Use your concrete bit to drill holes for the anchor screws. Most concrete screws need holes that are slightly smaller than the screw diameter. Check your screw package for the exact bit size to use.
Insert the concrete screws and tighten them until they’re snug but not over-tight. Place your 4×4 posts over the screws and mark where you need to drill through the wood.
Drill pilot holes through the posts and secure them with washers and nuts. Use your level to make sure each post stands perfectly straight before final tightening.
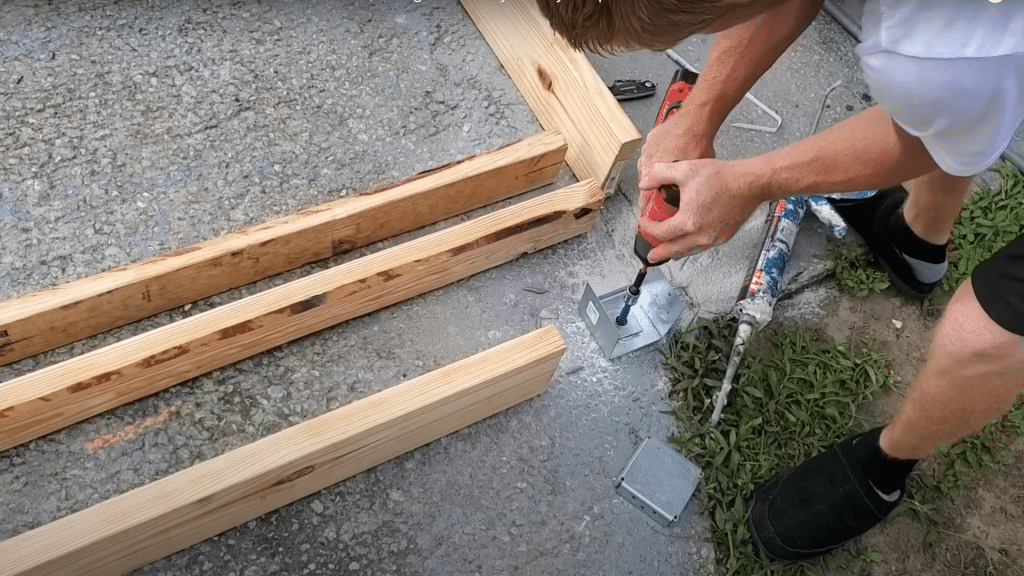
Step 3: Constructing the Frame
Measure and cut your 2×6 boards to connect the posts at the top. These boards form the main frame that will support your roof. Attach them to the inside faces of the posts using 3-inch wood screws.
Pre-drill holes to prevent the wood from splitting. Make sure each connection is tight and secure. Check that your frame is square by measuring the diagonals again.
Add temporary braces if needed to keep everything in place while you work on the next steps.
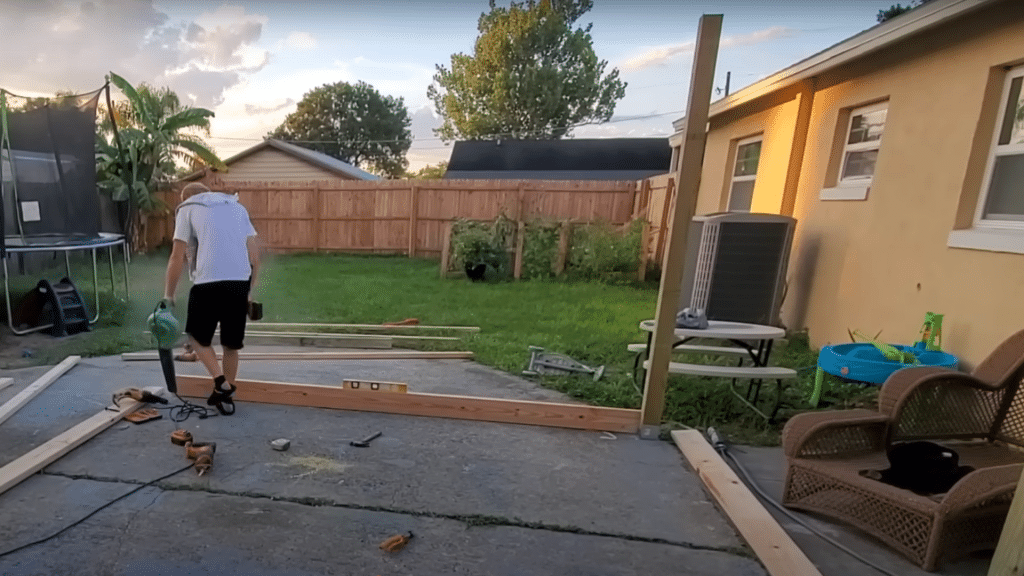
Step 4: Adding Crossbars and Roof Support
Cut 2×4 boards to span between your main frame pieces. Space these crossbars about 24 inches apart for good roof support. This spacing works well for most roofing materials and prevents sagging.
Use metal brackets where the crossbars meet the frame for extra strength. These brackets help prevent the wood from twisting or pulling apart over time.
Double-check that all your crossbars are level and evenly spaced. Any mistakes here will show up when you install the roof.
Step 5: Installing the Roof
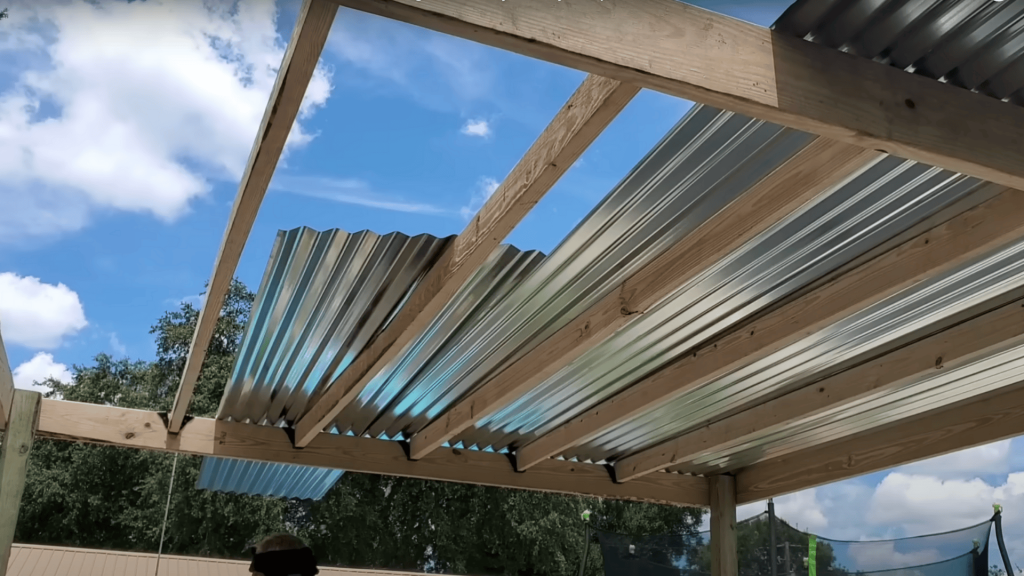
Metal roofing sheets work well for patio covers because they’re lightweight and weather-resistant. Start at one end and work your way across, overlapping each sheet slightly.
Use self-drilling roofing screws every 12 inches along the crossbars. These screws have rubber washers that seal the holes and prevent leaks. Don’t over-tighten them or you might damage the sealing washer.
Make sure each sheet lies flat and secure before moving to the next one. Trim the final sheet to fit if needed using tin snips or a circular saw with a metal blade.
Step 6: Staining and Sealing the Wood
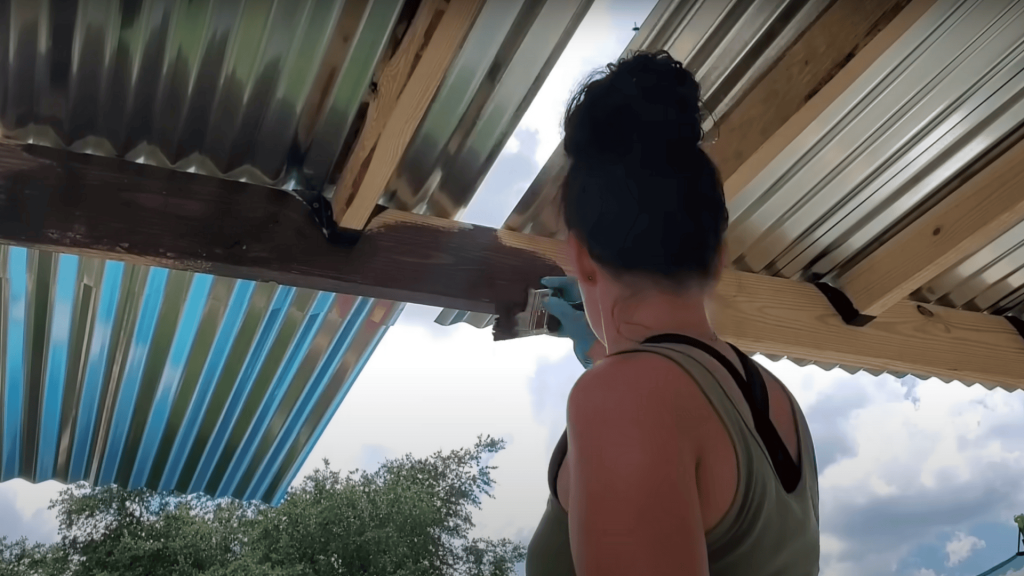
Choose a stain that protects against both water and UV damage. Apply stain to all exposed wood surfaces using a brush or roller. Work in sections and follow the wood grain for the best appearance.
Let the first coat dry completely before adding a second coat if needed. Pay extra attention to the ends of boards where moisture can soak in most easily.
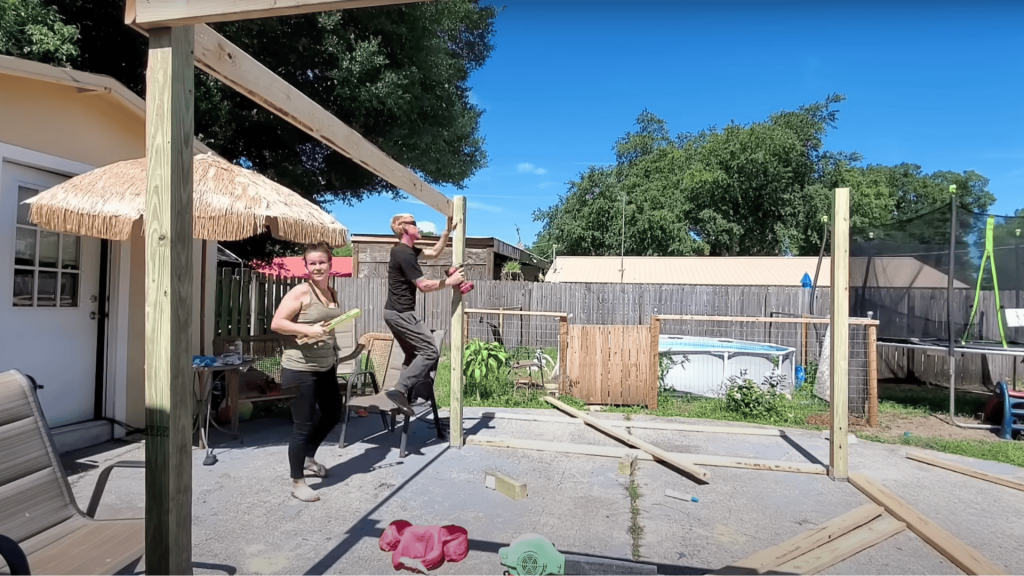
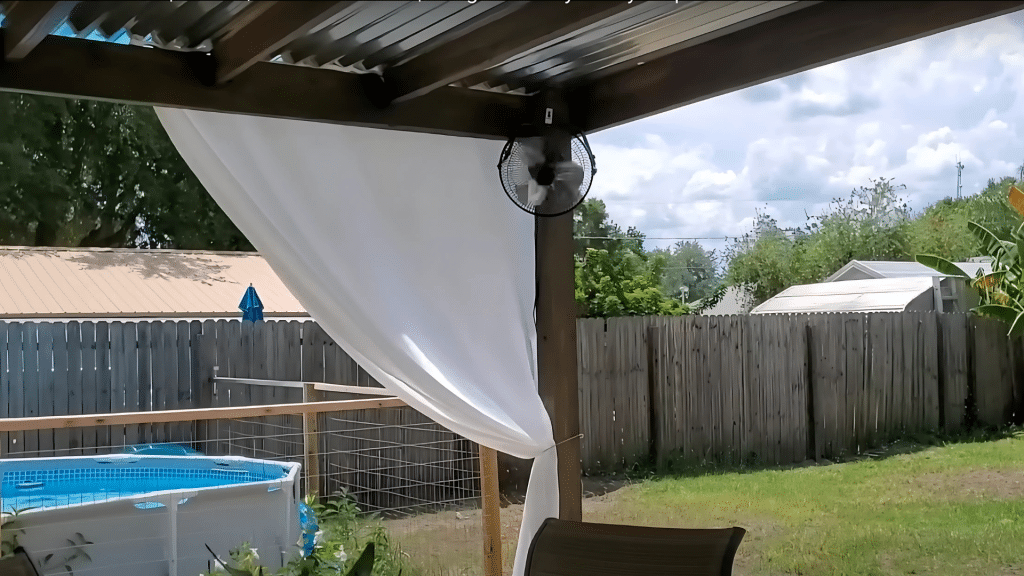
Step 7: Adding Decorative Elements
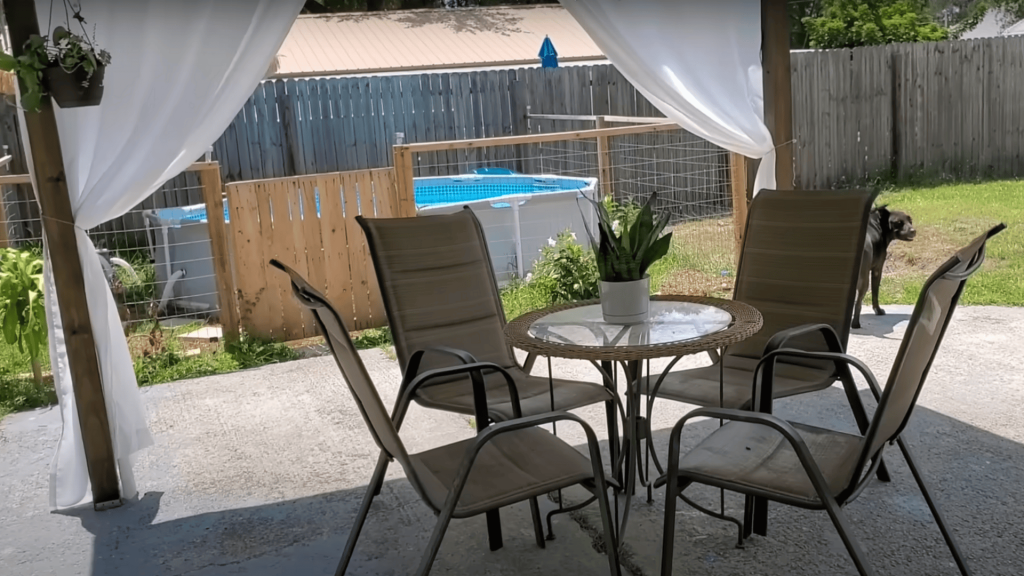
Consider hanging outdoor curtains from the frame for extra privacy and style. String lights along the crossbars create a cozy evening atmosphere. Hanging plants from the frame add natural beauty and color.
Keep decorative elements lightweight so they don’t stress the structure. Make sure anything you hang can withstand wind and weather.
Step 8: Additional Reinforcements
Add diagonal braces between posts if your area gets strong winds. These braces prevent the structure from swaying or shifting during storms. Cut 2×4 boards to fit diagonally and secure them with carriage bolts.
Consider adding knee braces where the main frame meets the posts. These angled supports add significant strength with minimal material cost.
Tips for Building a Freestanding Patio Cover
These helpful tips will make your patio cover project go more smoothly and safely. Following these guidelines helps prevent common mistakes and ensures better results.
| Tip | Why It Matters | How to Do It |
|---|---|---|
| Safety first | Prevents injuries during construction | Wear safety glasses and gloves at all times. Be extra careful with power tools and overhead work |
| Use the right tools | Avoids frustration and mistakes | Choose fresh drill bits for concrete work. Keep saw blades sharp for clean, safe cuts |
| Stay organized | Saves time and prevents errors | Sort materials by type and size. Keep everything in designated work areas |
| Double-check measurements | Prevents costly cutting mistakes | Measure twice before making any cuts. Take breaks when tired to maintain focus |
| Check local codes | Ensures legal compliance | Verify permit requirements and building codes before starting construction |
| Plan for the weather | Protects your work and materials | Cover materials during rain. Avoid concrete work in freezing temperatures |
How to Maintain Your Patio Cover
Regular maintenance keeps your patio cover looking great and lasting longer. Simple care tasks prevent small problems from becoming expensive repairs.
- Check twice yearly for damage – Look for loose screws, cracked wood, or damaged roofing. Tighten loose connections and replace damaged parts promptly.
- Clean the roof regularly – Remove leaves and debris that can trap moisture. Rinse metal roofing with a garden hose and scrub stubborn spots with a soft brush.
- Reapply wood stain every 2-3 years – Keep lumber protected from weather damage. Sand lightly before staining if the old finish is peeling or worn.
- Address problems quickly – Fix small issues before they become major repairs. Small fixes are much easier and cheaper than reconstruction projects.
- Inspect after storms – Check for wind damage or loose materials after severe weather. Look for bent roofing or shifted posts that need attention.
Conclusion
Building a freestanding patio cover is a rewarding project that adds value and comfort to your outdoor space.
The step-by-step process breaks down into manageable tasks that most homeowners can handle. With careful planning and attention to detail, you’ll have a sturdy cover that provides years of shade and protection.
Take your time with each step and don’t rush the process. Quality construction pays off with better appearance and longer life.
Start gathering your materials and tools, then set aside a weekend to tackle this project. You’ll be enjoying your new patio cover before you know it!
Have you built your own patio cover, or are you planning to start this project? Share your experiences, questions, or photos in the comments below!
Frequently Asked Questions
What Is the Best Material for The Roof of a Freestanding Patio Cover?
Metal roofing sheets offer the best combination of durability, weight, and cost for most patio covers. They’re lightweight, weather-resistant, and available in many colors.
Do I Need a Permit for Building a Patio Cover?
Check with your local building department before starting construction. Many areas require permits for structures over a certain size or height.
Can I Customize the Size of My Patio Cover?
You can adjust the dimensions to fit your space and budget. Keep post spacing under 12 feet for adequate support with standard lumber sizes.