Water pooling behind your wood retaining wall?
You’re not alone. Poor drainage destroys thousands of retaining walls every year, turning solid structures into rotting, unstable hazards.
Most homeowners think their retaining wall just needs to look good and hold back soil. But without proper water management, even the strongest wooden walls will bow, crack, and eventually collapse. Water pressure builds up behind the wall, creating a ticking time bomb in your yard.
The good news? You can prevent this costly disaster with the right drainage techniques. Simple fixes like French drains, weep holes, and proper backfill materials can add decades to your wall’s life.
This guide shows you exactly how to protect your investment and keep water where it belongs.
Why Proper Drainage Matters for Wood Retaining Walls?
Wood retaining walls face serious threats when water sits too long. Moisture creates the perfect conditions for rot, causing wood fibers to break down and weaken over time. Even pressure-treated lumber will eventually fail when constantly wet.
Key drainage problems include:
- Moisture and Rot Risks: Constant wetness breaks down wood fibers and creates weak spots
- Soil Pressure Build-Up: Hydrostatic pressure can reach thousands of pounds behind your wall
- Drainage and Soil Erosion Control: Water washes away supporting soil, creating dangerous gaps
But the bigger danger comes from hydrostatic pressure – the force water creates when it builds up behind your wall. This invisible pressure can push against the wood until it bows outward or collapses completely. Without proper drainage, water also washes away the soil that supports your wall from behind.
This erosion creates empty spaces, removing the very foundation your retaining wall depends on. The result? A structure that looked solid yesterday becomes a safety risk today. Smart drainage systems solve all three problems by moving water away before damage starts.
Step-by-Step Wood Retaining Wall Guide
Build a strong, long-lasting retaining wall that resists water damage and soil pressure. Follow these steps and refer to the tools and materials suggested:
Tools Required:
| Tool | Purpose |
|---|---|
| Shovel | Digging a trench and moving soil |
| Mallet/Hammer | Driving stakes and leveling sleepers |
| Circular Saw | Cutting sleepers to size |
| Spirit Level | Ensuring sleepers are level |
| Impact Driver | Driving screws and fixings |
| Tape Measure | Measuring distances and checking the square |
| String Line | Creating straight reference lines |
Materials Required:
| Material | Quantity/Type |
|---|---|
| Railway Sleepers | 100x200mm (double stack) |
| Type 1 Hardcore | 2-3 inch layer for base |
| Mortar Mix | 5:1 sand to cement ratio |
| Plasticizer | For workable mortar |
| Bitumen Black Paint | Waterproofing coating |
| Power Fast Screws | 90mm for joining sleepers |
| Hex Head Timber Screws | 200mm for corners |
| Wooden Stakes | For string line setup |
Step 1: Set Up String Lines and Layout
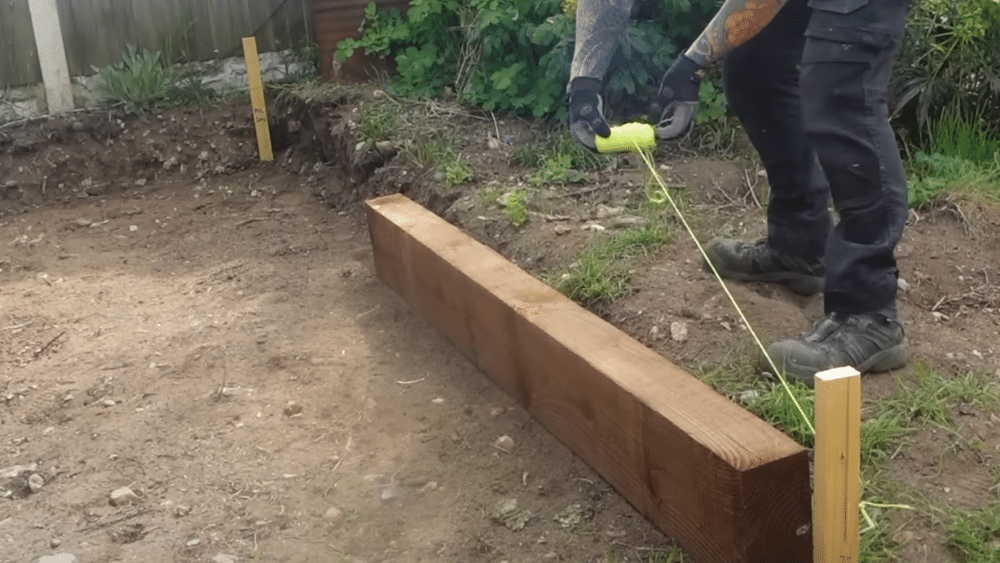
Mark your retaining wall area and create straight reference lines using wooden stakes and string. Use the 3-4-5 rule to ensure perfect 90-degree corners – measure 300mm along one line, 400mm along the other, and the diagonal should be 500mm. This method works for any size project by scaling up the measurements.
- Drive wooden stakes at each corner of your planned wall
- Run string lines between stakes to mark the back edge of sleepers
- Check corners are square using the 3-4-5 triangle method
Pro Tip: Keep string lines tight and at a comfortable working height – you’ll be checking against them constantly during construction.
Step 2: Prepare the Foundation Trench
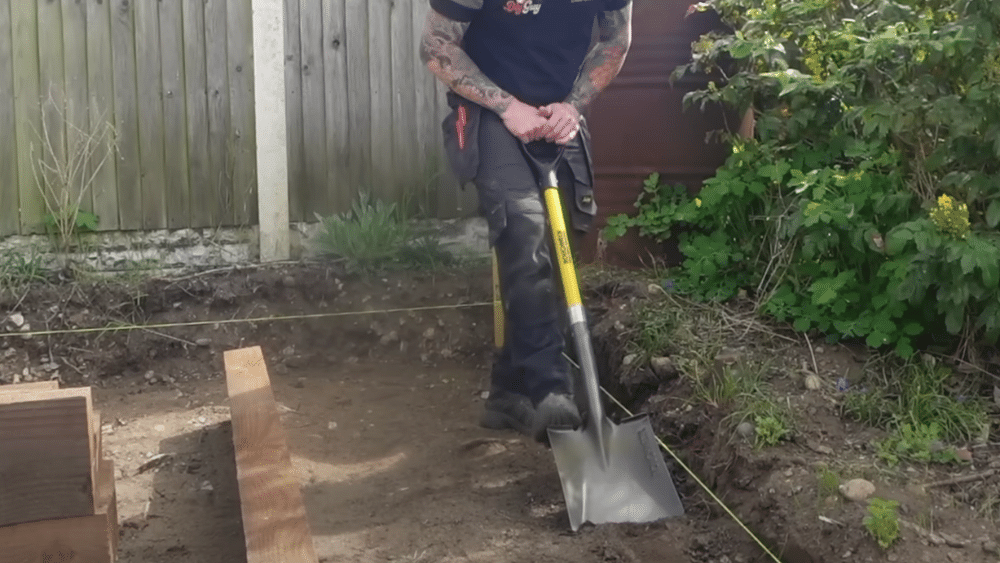
Dig a shallow trench 2-3 inches deep along your string line, just the width of your shovel. The ground doesn’t need to be perfectly level at this stage since you’ll level the sleepers later with mortar. Focus on creating a consistent depth rather than precise leveling.
- Dig a trench 2-3 inches deep along the entire string line
- Keep the trench width consistent with your shovel blade
- Don’t worry about perfect leveling – rough is fine
Pro Tip: Save time by not over-digging – you’ll achieve perfect levels during the sleeper installation process.
Step 3: Install Drainage Base
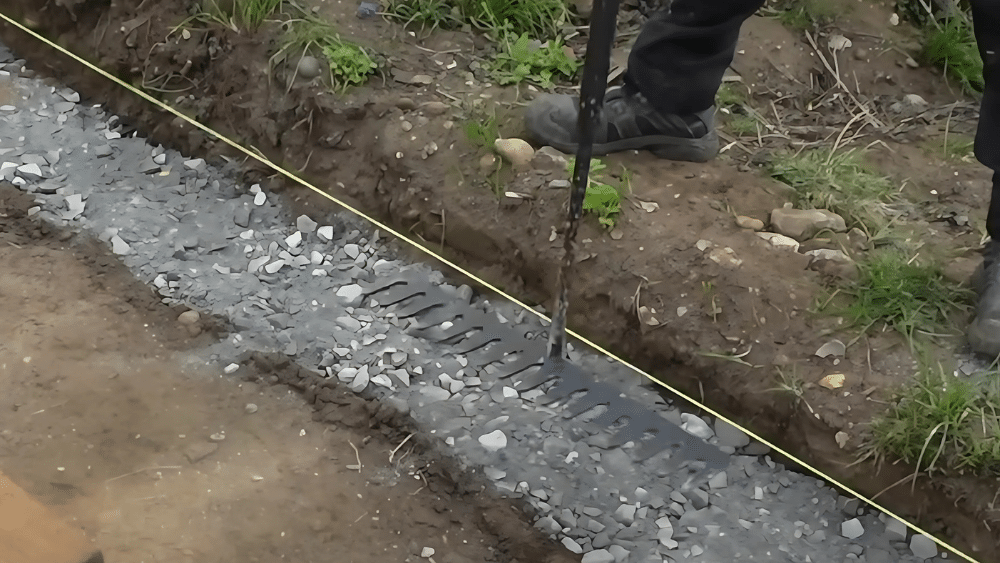
Replace the removed soil with 2-3 inches of Type 1 hardcore and compact it down to ground level. This material provides excellent drainage, allowing water to flow away from the sleepers instead of sitting around them, causing rot. Compact thoroughly, but don’t stress about perfect leveling yet.
- Fill the trench with Type 1 hardcore to ground level
- Compact using a rake or tamper until dense and flat
- Test drainage by pouring water – it should soak through quickly
Pro Tip: Good drainage is your wall’s best defense against rot – never skip this step even if it seems unnecessary.
Step 4: Position and Waterproof Sleepers
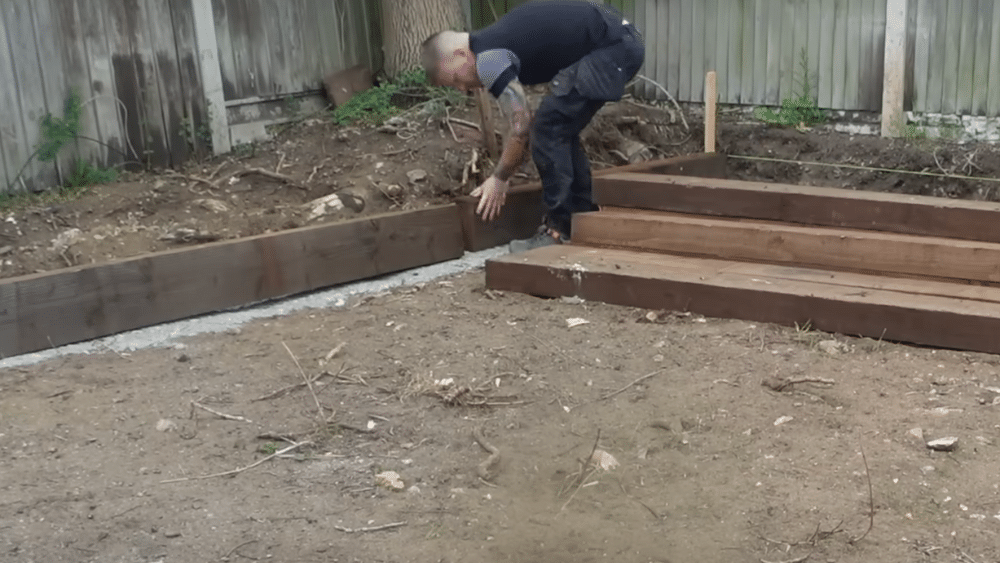
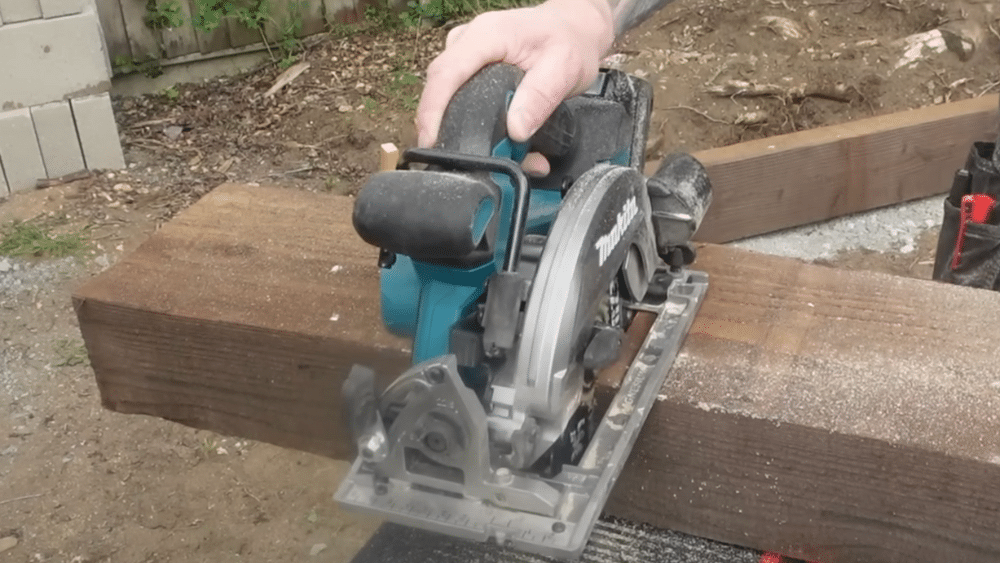
Place sleepers roughly in position along your string line, then cut any sleepers to fit corners or ends. Mark cuts on all four sides for accuracy when using a circular saw. Apply two coats of bitumen black paint to any surfaces that will contact soil, allowing 24 hours drying time between coats.
- Position sleepers roughly along the string line for the initial layout
- Cut sleepers to size, marking all four sides before cutting
- Apply bitumen paint to surfaces that will touch the soil
Pro Tip: Only waterproof surfaces that will actually contact soil – visible faces should remain natural wood color.
Step 5: Set Sleepers in Mortar
Create small mortar pads using a 5:1 sand-cement mix with plasticizer every 2-3 feet along each sleeper. Lower sleepers onto these pads and use a level and mallet to tap them perfectly level and against your string line. The mortar pads create drainage gaps while providing solid support.
- Mix a 5:1 mortar with a plasticizer for workability
- Place mortar pads every 2-3 feet, not continuous beds
- Level sleepers using a mallet while keeping against the string line
Pro Tip: Don’t let sleepers drop onto mortar – lower them gently to avoid squashing the carefully placed pads.
Step 6: Secure and Stack Sleepers
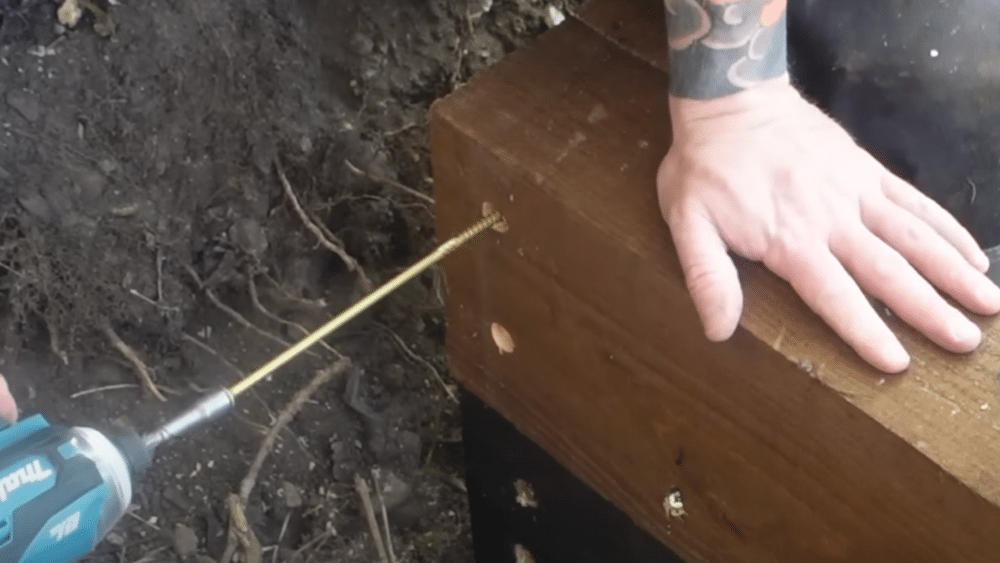
Once bottom sleepers are level and set, add your second course either directly stacked or half-bonded for extra strength. Drive 90mm screws at an angle every 2-3 feet to join the courses together. Use 200mm hex-head screws at corners, counter-sinking the heads slightly.
- Stack the second course of sleepers on top of the first
- Drive 90mm screws every 2-3 feet to join courses
- Use 200mm screws at corners for maximum strength
Pro Tip: Pre-drill pilot holes at an angle to prevent the wood from splitting when driving screws.
Step 7: Backfill and Finish
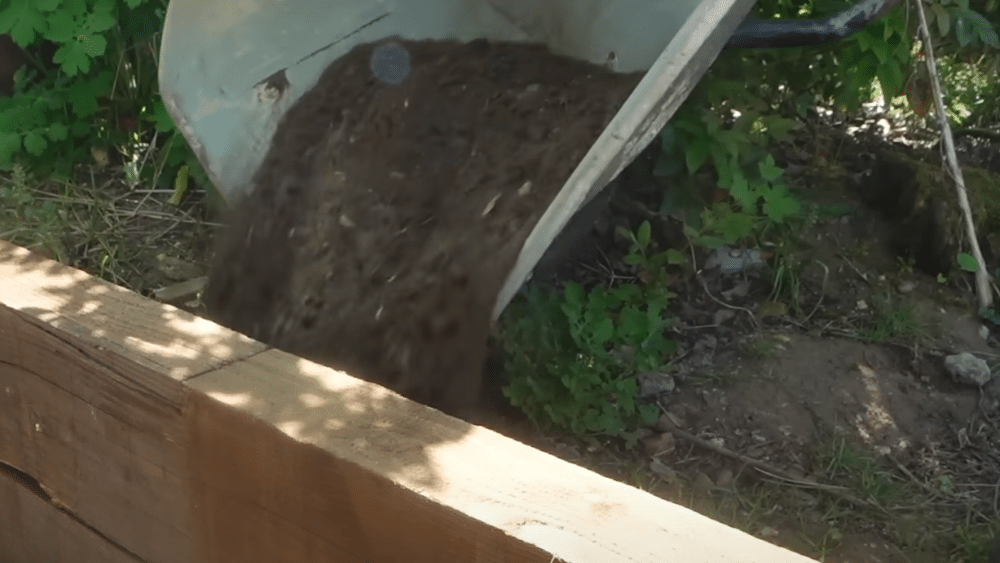
Compact the soil firmly around the back of your sleepers using your boot or a tamper. Fill any gaps completely to provide full support to the wall structure. The front area can be finished with your chosen material – grass, gravel, or paving – ensuring the mortar pads remain hidden.
- Backfill soil firmly around sleeper backs
- Compact thoroughly to eliminate air gaps
- Plan the front finish to hide visible mortar pads
Pro Tip: Proper backfilling is crucial for wall stability – take time to compact soil thoroughly rather than just filling gaps.
For a visual tutorial, refer to this video by The DIY Guy
Mistakes to Avoid While Working on a Wood Retaining Wall
- Not including a drainage pipe: Many builders skip installing perforated drainage pipes behind retaining walls, leading to water buildup and eventual wall failure. A proper drainage pipe collects water and directs it away from the structure, preventing hydrostatic pressure that can push walls outward.
- Using only soil as backfill: Filling the space behind your retaining wall with regular soil creates poor drainage conditions. Soil holds water against the wall, causing rot in wood and creating pressure buildup. Always use gravel or crushed stone for the first 12 inches behind the wall.
- Ignoring slope or not sloping the pipe: Drainage pipes must have a consistent downward slope of at least 1% (1 inch per 8 feet) to work properly. Without a proper slope, water sits in the pipe instead of flowing away, making your drainage system useless when you need it most.
- Blocking weep holes with debris or soil: Weep holes allow water to escape through the wall face, but they get clogged easily with leaves, dirt, or fine soil particles. Regular cleaning and proper sizing prevent blockages that turn your drainage system into a water trap.
- Skipping the gravel layer: Installing drainage pipes directly in soil reduces their effectiveness significantly. A 6-inch gravel bed around the pipe improves water collection and prevents soil from clogging the perforations, ensuring long-term drainage performance.
Maintenance Tips for Long-Term Drainage Efficiency
1. Periodic inspections after rain: Check your retaining wall within 24 hours after heavy rainfall to spot drainage problems early. Look for standing water, wet spots on the wall face, or unusual moisture patterns that indicate your drainage system isn’t working properly.
2. Clearing weep holes and checking for blockages: Remove leaves, dirt, and debris from weep holes every few months using a small wire or compressed air. Blocked weep holes stop water from escaping, creating pressure behind your wall that can lead to structural failure.
3. Signs of failure: bulging wall, pooling water, soil seepage: Watch for walls that bow outward, water collecting behind or in front of the structure, and soil washing out through gaps. These warning signs mean your drainage system has failed and needs immediate attention before costly repairs become necessary.
4. Annual drainage pipe inspection: Use a flashlight or camera to check visible sections of your drainage pipe for clogs, damage, or root intrusion. Clear any blockages with a drain snake or high-pressure water, and replace damaged sections to maintain proper water flow.
5. Monitor soil settlement and erosion: Check for sunken areas behind your wall or exposed foundations that indicate soil washout. Add fresh backfill material as needed and ensure proper compaction to maintain support for your retaining wall structure.
Conclusion
Proper drainage protects your wood retaining wall investment for decades to come. Without it, even the strongest walls fail within a few years from water damage and soil pressure.
The key steps are simple: install a solid foundation with Type 1 hardcore, add perforated drainage pipes, use gravel backfill, and create weep holes for water escape. Regular maintenance keeps your system working – check after storms, clear blockages, and watch for warning signs like bulging or pooling water.
Remember: Good drainage isn’t optional for retaining walls. It’s the difference between a structure that lasts 5 years and one that serves you for 30+ years.
Ready to build your drainage system? Start with the foundation prep and work your way up. Your future self will thank you for doing it right the first time.


