Finding the right clamp for your woodworking project can be tough. Store-bought clamps are often costly or not the exact size needed for your work. I’ve faced this problem too.
Good news, you can make your wood clamps at home with basic tools and materials. These do-it-yourself clamps work just as well as store-bought ones and fit your exact needs.
In this guide, I’ll show you how to build a simple yet strong wood clamp from start to finish. You’ll learn which materials to pick, how to cut and join the parts, and tips to make your clamp last longer.
Let’s get started with creating your very own custom wood clamp.
What Makes DIY Clamps Worth Building
Building your own clamps offers several clear advantages over buying ready-made options. First, you save significant money – commercial clamps can cost $20-$ 50 each, while homemade versions utilize inexpensive materials like plywood scraps and basic hardware.
You also get exactly the size and configuration you need for your specific projects, rather than settling for standard sizes that might not fit your work.
The flexibility of custom clamps becomes especially valuable for unusual projects or tight spaces where commercial clamps won’t reach. You can modify the design, add protective padding, or create specialized shapes that work with curved or angled pieces.
Plus, there’s real satisfaction in using tools you built yourself, and the skills you learn can be applied to other woodworking challenges in your shop.
Step-by-Step Process to Make a DIY Clamp
The DIY clamp-making process involves cutting plywood to size, drilling holes for bolts, and assembling with hardware. This simple step approach creates durable, custom wood clamps that fit your exact project needs without breaking the bank.
Tools Required:
| Tool | Explanation |
|---|---|
| Circular saw or table saw |
– Cuts plywood to size – Ensures clean, straight edges |
| Router |
– Cuts adjustment slots – Allows multiple clamp positions |
| Drill with counter sink and Brad point bits |
– Drills clean, precise holes – Prevents splintering |
Key Materials:
| Material | Explanation |
|---|---|
| 6mm bolts (quarter-inch bolts) |
– Adjustable tightening mechanism – Square end prevents spinning |
| 6mm washers |
– Distributes pressure evenly – Prevents damage to wood |
| 6mm or quarter-inch wing nuts |
– Hand-tightening for easy adjustment – Provides extra grip |
| Scrap pieces of ¾ inch plywood |
– Main body of the clamp – Budget-friendly, uses off-cuts |
Step 1: Preparing the Plywood
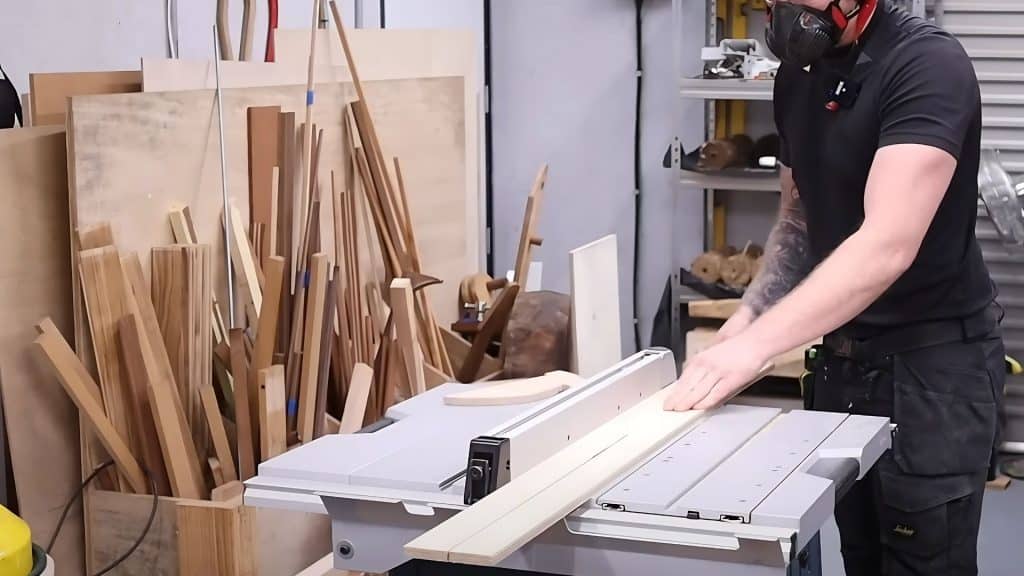
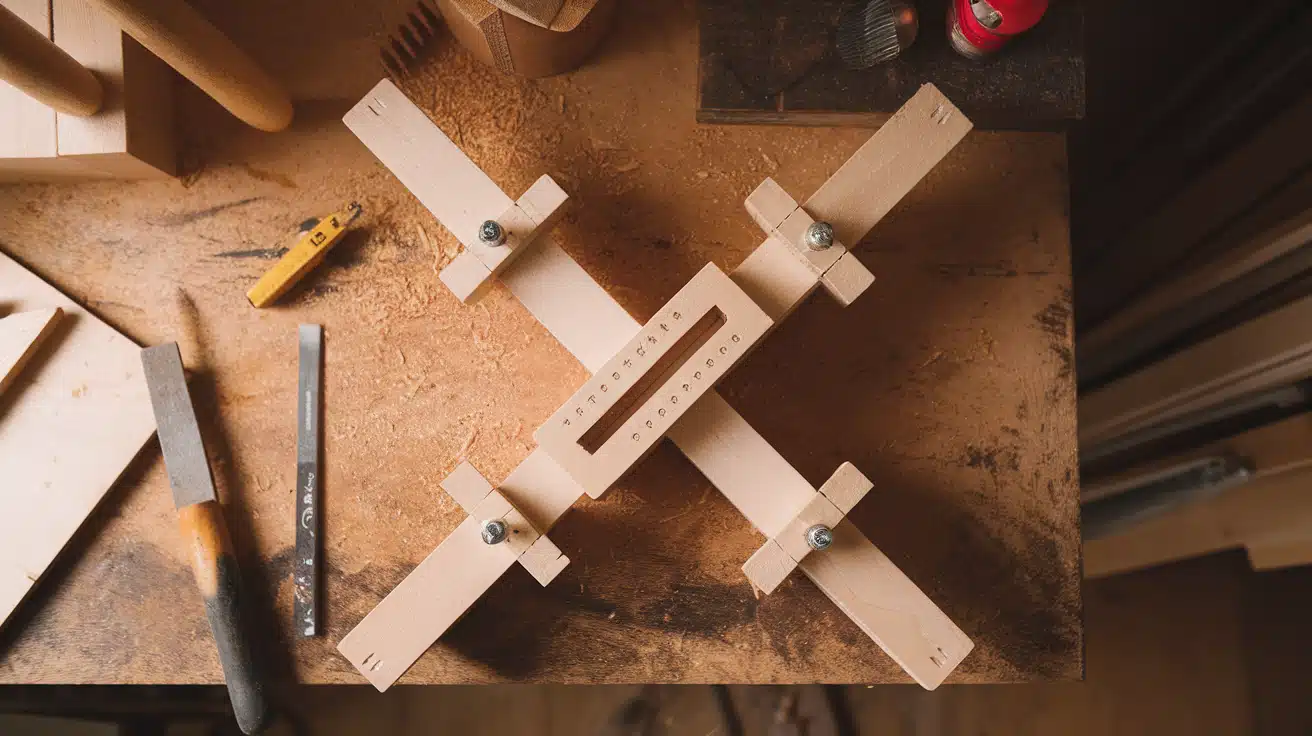
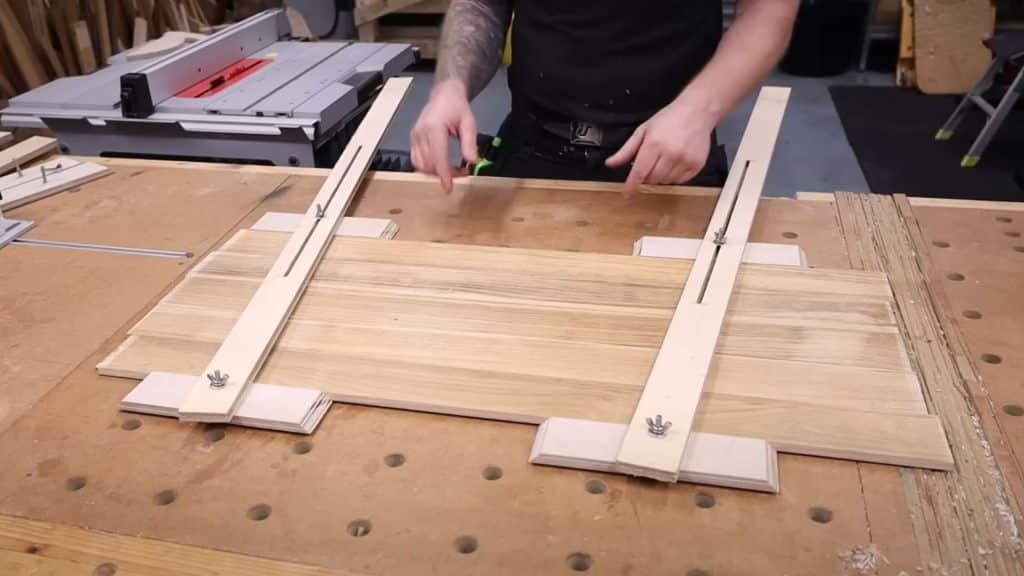
Cut plywood into two equal 110mm wide strips using a circular or table saw for clean cuts. This width gives your clamp a good balance between strength and weight while keeping it easy to handle.
The 3/4-inch thickness provides the sturdiness needed to withstand clamping pressure without warping.
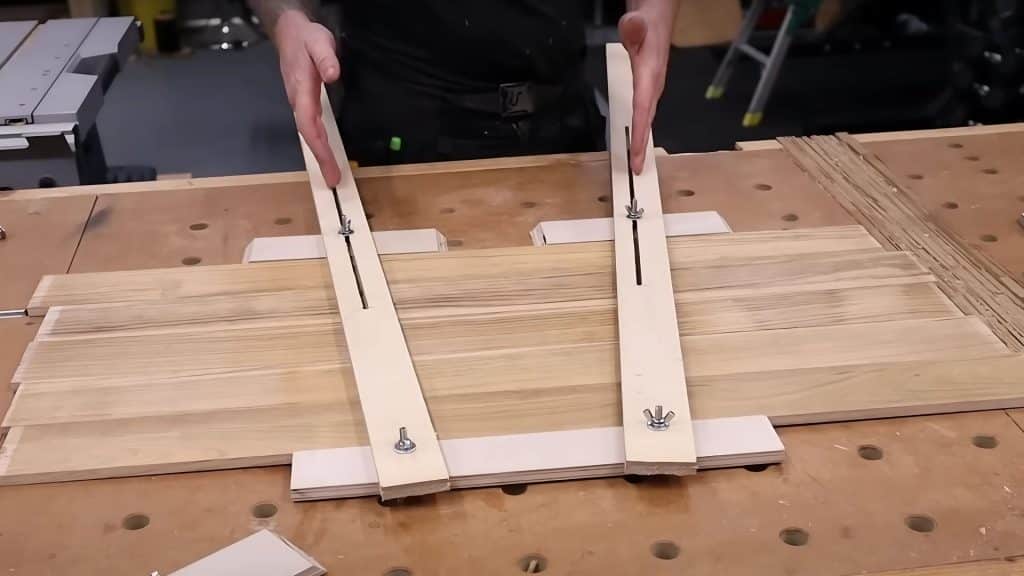
If making adjustable clamps, use a router to create adjustment slots. Run the router down the center of each strip, creating a channel for the bolts to slide through. For fixed-width clamps, drill holes at set positions where you need the most common clamping widths.
Pro Tip: Sand all cut edges to prevent splinters and protect your workpieces from marks. A quick pass with 120-grit sandpaper is all you need.
Step 2: Drilling Holes for Clamping Mechanism
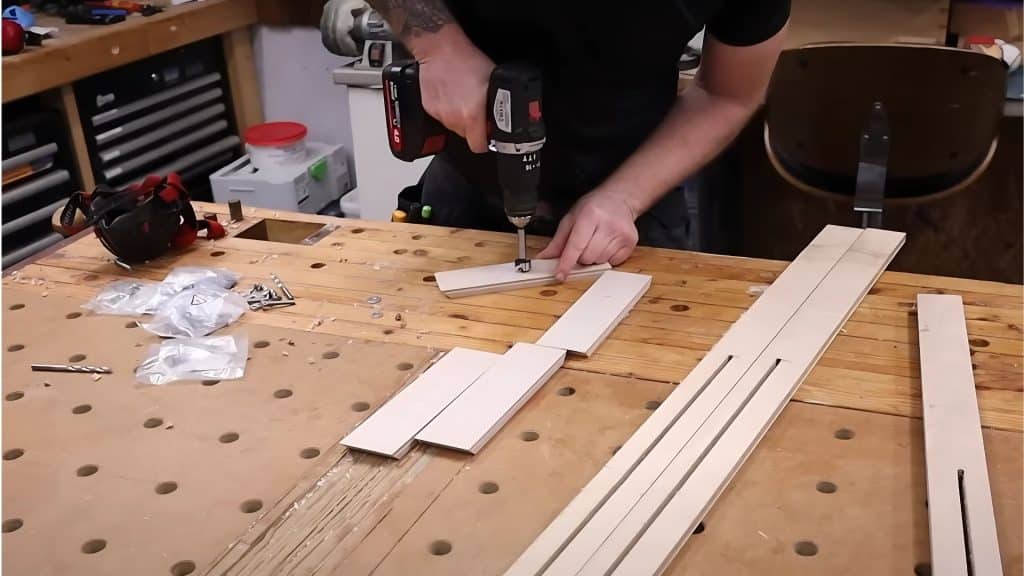
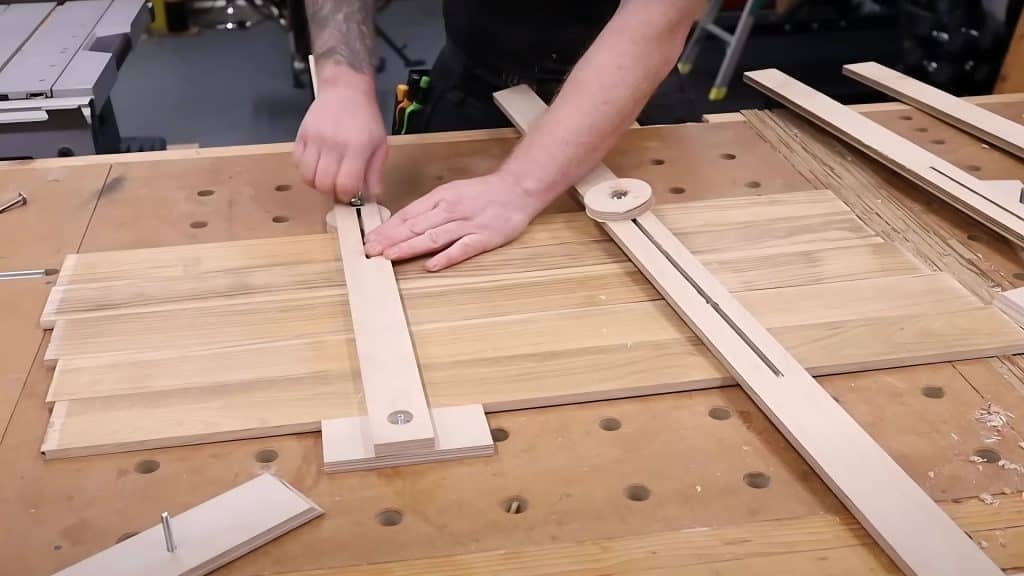
Mark hole positions on four 3/4 inch plywood pieces, spacing them evenly about 1-2 inches from each end. Precise measurements aren’t critical for this step, but keeping the holes roughly the same distance from the edges helps with balance.These pieces will serve as the clamping jaws that contact your workpiece.
Drill countersink holes first for bolt head recesses, making them deep enough so bolt heads sit flush with or slightly below the wood surface. Then follow with 6mm/quarter-inch holes drilled completely through the marked spots. The clean holes allow the bolts to pass through smoothly.
Pro Tip: Place scrap wood beneath when drilling to prevent tear-out on the bottom side. This keeps your clamp parts looking clean and working smoothly.
Step 3: Assembling the Clamps
Insert bolts through the holes with square shoulders seated firmly in wood. The square part of the coach bolts should sink into the wood slightly, preventing them from spinning when you tighten the wing nuts. This means you can adjust the clamp with one hand instead of needing to hold the bolt steady.
Add washers and wing nuts over bolt threads without fully tightening at first. The washers spread pressure and prevent the wing nuts from digging into the wood.
Test the clamp by checking alignment and pressure, making any needed adjustments to ensure the jaws meet squarely when closed. A proper alignment means even pressure across your workpiece.
Pro Tip: Apply a small amount of wax to bolt threads for smoother tightening and loosening. This reduces friction and makes the clamps easier to adjust when working on projects.
Demonstrating the Clamps
See how these homemade clamps perform in real woodworking situations, from basic edge gluing to specialized applications. The demonstrations show different clamp variations and techniques for getting proper pressure distribution across various joint types.
1. Basic Clamp Operation
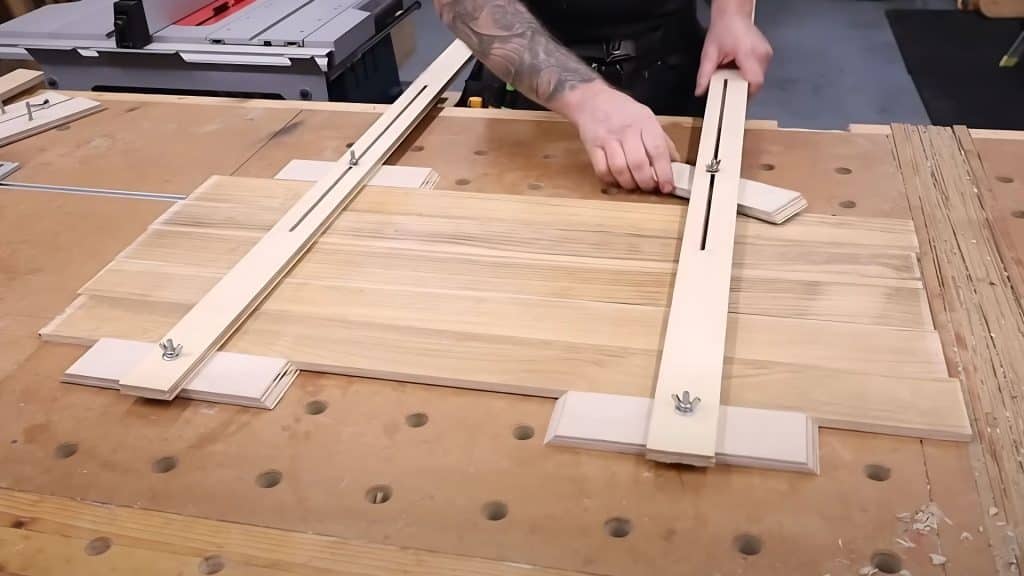
Position your clamp around the boards you need to join. The flat jaw surfaces should sit square against your workpieces to apply even pressure across the joint. Turn the wing nuts to tighten, watching for glue squeeze-out as a sign of proper pressure.
The lever action of these clamps comes from the mechanical advantage of the threaded bolts. As you tighten the wing nuts, they pull the jaws together with strong, controlled force ideal for woodworking joints.
Pro Tip: Place wax paper under your glue joints to catch drips and prevent the clamp from sticking to your project.
2. Single Top Piece Variation
This version uses one longer top piece instead of two separate jaw pieces. The design creates stronger central pressure that spreads outward, making it ideal for wide panels or case glue-ups.
The single top piece makes this clamp more stable but bulkier than the standard version. You’ll get more uniform pressure across wider boards, though reaching edges can be harder with this design.
Pro Tip: Add cork or rubber facing to your jaw pieces to improve grip and protect delicate surfaces.
3. Circular Disc-Based Clamps
These clamps use round discs at contact points instead of flat surfaces. The discs can roll slightly as pressure is applied, helping to pull joints tight while clamping.
The rolling action works well for angled joints and curved surfaces. However, these clamps may slip more easily than flat-jawed versions and offer less contact area. They shine when working with non-parallel surfaces.
Pro Tip: Mark your different clamp types with colored tape to quickly grab the right style for each job.
Special thanks to John McGrath (Man In Shed) for providing valuable insights in their video, which I referenced while creating this guide.
Why Proper Clamping is Crucial?
Proper clamping holds wood pieces firmly in the exact position while the glue cures, creating tight, gap-free joints that maximize strength. It prevents movement that would ruin precision work and distributes pressure evenly across the joint to avoid warping or misalignment.
When Quality Clamping Makes the Difference
Quality clamping is essential during panel glue-ups and when joining mitered corners that might otherwise slip out of alignment.
Large projects often require many clamps used simultaneously, and the true test comes when finished pieces show no gaps and joints remain tight even after years of use.
Mistakes to Avoid When Making Clamps
Material Selection Issues
- Using thin or soft wood that warps and dents under clamping pressure
- Choosing regular bolts instead of coach bolts with square shoulders
- Forgetting washers, allowing wing nuts to damage the wood surface
- Selecting wood with knots or defects that weaken the clamp structure
Construction Problems
- Drilling holes too close to edges, risking splits when pressure is applied
- Creating slots that are too wide, causing bolts to wiggle and lose clamping force
- Failing to countersink bolt heads, leaving them to scratch your workpieces
- Neglecting to sand or finish the clamp jaws, resulting in rough surfaces that mark projects
Usage Errors
- Overtightening clamps, resulting in stripped threads or cracked wooden parts
- Using clamps directly on wet glue without protective barriers
- Storing clamps in damp areas can cause rust and wood swelling
- Applying uneven pressure by tightening one side more than the other
Conclusion
Making your wood clamps puts control right in your hands. By following the steps in this guide, you’ve learned how to build tools that match your exact needs at a fraction of the cost of store-bought tools.
Remember that quality materials matter – use sturdy plywood and proper hardware for clamps that last. Pay attention to bolt placement and jaw alignment to ensure even pressure on your projects. These homemade clamps offer flexibility that commercial options can’t match. Need an odd size or special shape? Now you can build it.
What’s your next woodworking project? Try your new clamps on a simple glue-up first, then move to more complex joints. Please share a photo of your DIY clamps in the comments below, or check out our guide on building your workbench!
Frequently Asked Questions
What Can I Use if I Don’t Have Wood Clamps?
As clamp alternatives, use rope with twist sticks, heavy books, ratchet straps, or elastic bands. Spring clips and tape also work for temporary holding.
What to Use to Hold Wood While Cutting?
Secure wood while cutting with a vise, bench dogs, or clamps. For quick jobs, try a non-slip mat beneath the wood or have someone safely hold the piece away from the cutting area.
How Do You Clamp Wood with Glue?
Apply even glue to clean, dry surfaces, align pieces precisely, then secure with clamps until dry. Space clamps evenly for consistent pressure and wipe excess glue with a damp cloth.
