An outdoor fireplace brings warmth, light, and comfort to your backyard. It creates a welcoming place to gather with friends and family on cool evenings.
Before starting, think about your space, the look you want, and how much time you can give to the project.
Building one is rewarding and adds lasting beauty to your home when planned carefully and done with patience.
Good preparation helps you save time, avoid mistakes, and get results that feel balanced and natural.
With the right materials, simple tools, and steady effort, you can build an outdoor fireplace that becomes a favorite part of your outdoor life.
Outdoor Fireplace Installation
Start by looking at your outdoor area and choosing the best spot for your fireplace. Consider its purpose for warmth, cooking, or decoration, and how it fits into your space.
Decide between wood or gas based on your needs and safety rules in your area. Check for any required permits or clearances before starting construction.
Plan your budget, timeline, and gather all needed tools and materials ahead of time.
Preparing early helps prevent delays and ensures smooth progress during the build. A clear plan will make your project easier, safer, and more enjoyable from start to finish.
Materials and Tools You’ll Need
Gathering the right materials and tools before starting ensures a smoother and faster build. Use quality supplies that can handle outdoor conditions and high heat.
| Materials | Tools |
|---|---|
| Fireplace kit or concrete blocks | Level and measuring tape |
| Fire bricks and high-temperature mortar | Trowel and putty knife |
| Masonry adhesive for outdoor use | Rubber mallet and hammer |
| Sand or gravel for the base | String line and stakes |
| Chimney cap and angle iron | Safety gloves, goggles, and dust mask |
| Capstones and hearth pieces | Wheelbarrow and broom |
On average, building an outdoor fireplace takes around one to two days for most DIY builders. Allow extra time for curing to ensure lasting strength before lighting your first fire.
How to Build an Outdoor Fireplace
Building an outdoor fireplace adds charm, warmth, and functionality to your outdoor space. With a quality kit like the Barrington model, the process is simple and beginner-friendly.
Step 1: Prepare the Foundation
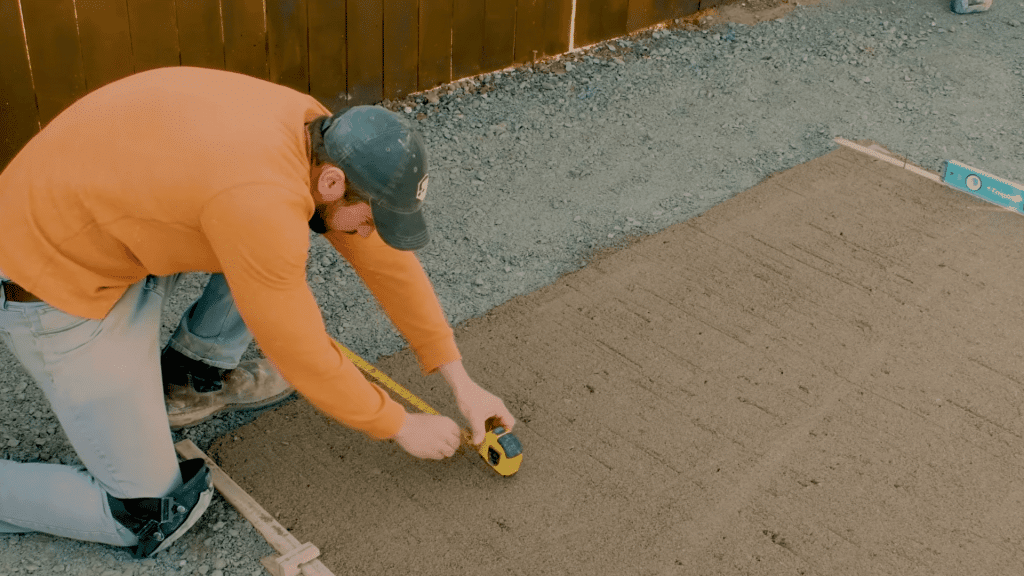
Begin by creating a level and solid foundation using a concrete pad or compacted gravel base. The foundation supports the entire structure, preventing shifting or cracking.
Check local codes, measure accurately, and ensure the base is perfectly flat before starting. A strong foundation guarantees long-term stability and alignment.
Step 2: Lay the Base Course
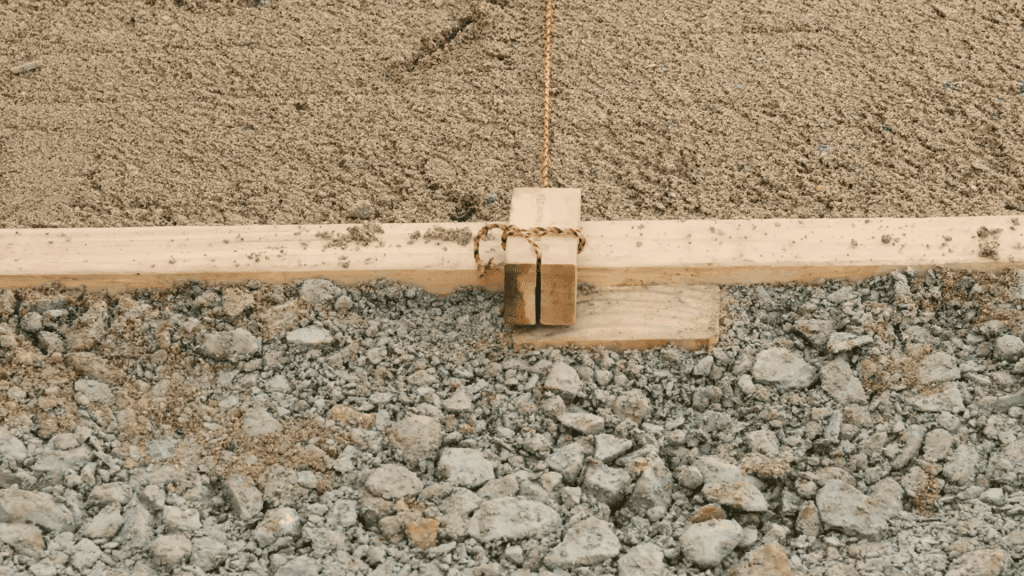
Set up a string line to keep your layout straight and true. Dry-fit your first layer of blocks, adjusting until every piece is level front to back and side to side.
This base course determines the accuracy of all future layers, so take your time to ensure perfection.
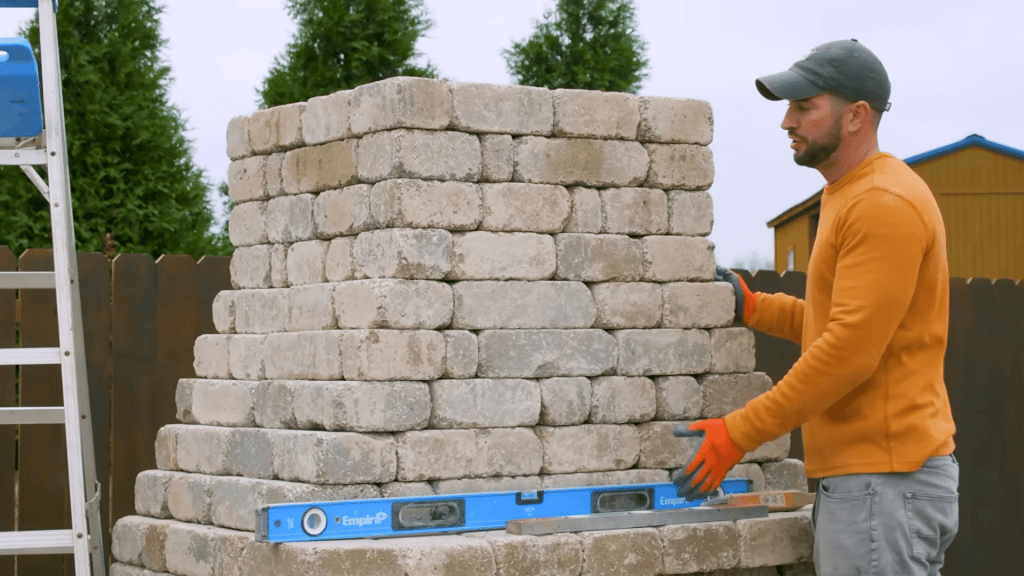
Step 3: Leveling and Squaring the Base
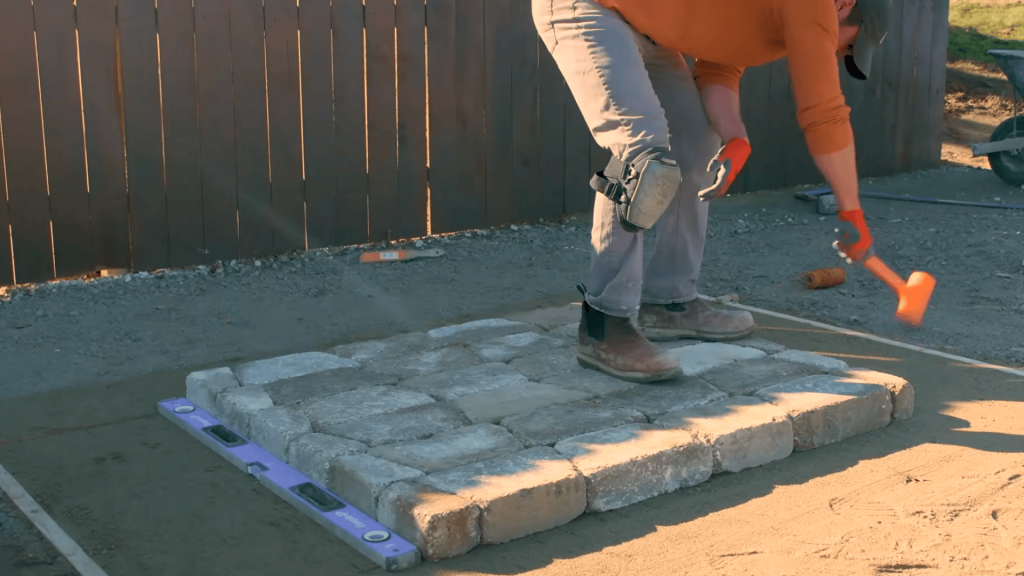
Lay the first course of blocks carefully on the foundation. Use a long level to check front-to-back, side-to-side, and diagonal alignment.
Adjust each block by adding or removing sand as needed until perfectly level. Take extra time here; an accurate, square base ensures every layer above stays straight and stable.
Step 4: Build the Hearth and Firebox
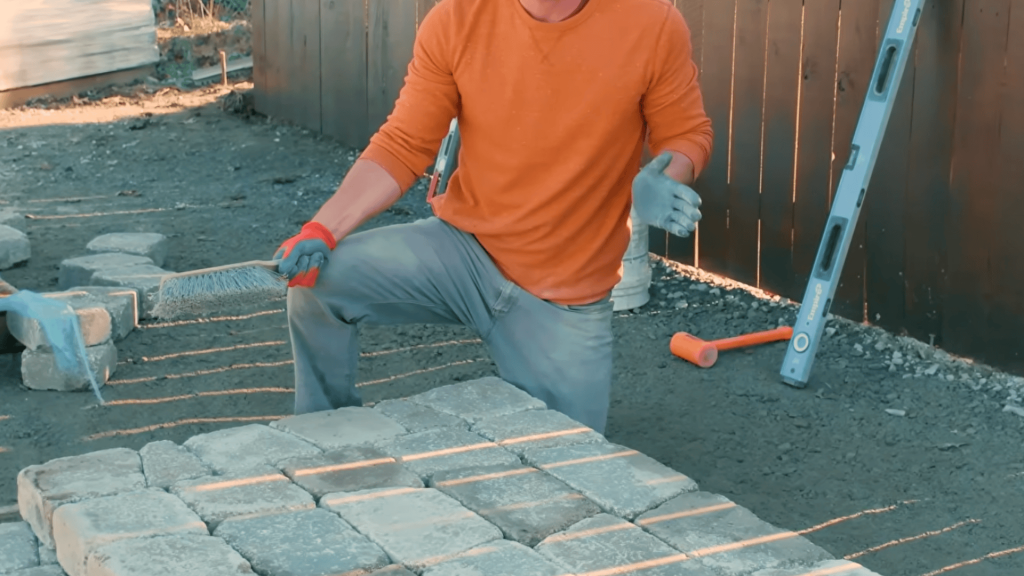
Install hearth blocks with extra adhesive since they’ll bear weight and traffic. Line the firebox with fire bricks for heat resistance, gluing each brick to the next and to the wall.
Overlap the corners for strength. This step forms the functional core of your fireplace where fires will safely burn.
Step 5: Install the Lintel and Smoke Chamber

Glue the lintel blocks above the firebox opening and center the angle iron on top. Check that it sits flush and level to prevent gaps.
Build the smoke chamber above, stepping in each layer slightly. This section directs airflow and supports the chimney for efficient ventilation.
Step 6: Construct the Chimney
Stack chimney blocks vertically, gluing each layer and ensuring it’s plumb with no twist. Use a level often to maintain straight alignment.
The chimney provides proper draft and smoke release, so accuracy is vital. Keep surfaces clean between layers for tight bonding and a smooth finish.
Step 7: Cap and Finish
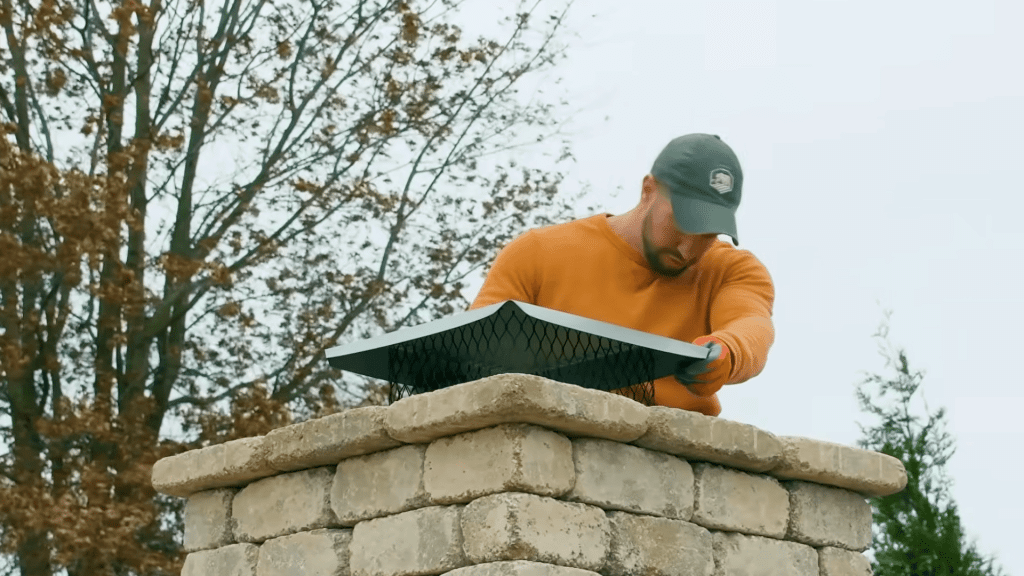
Apply adhesive about one inch from the capstone edges, then position caps evenly with matching overhangs. Hide imperfections by turning rough edges inward.
Finally, attach the chimney cap securely. Allow adhesives to cure completely before use. Your outdoor fireplace is now ready to enjoy year-round.
For a more detailed visual demonstration, watch the step-by-step outdoor fireplace build by Cornerstone Rocks on their channel.
Smart Building Tips for a Perfect Build
Follow these smart, easy tips to keep your fireplace build smooth, safe, and perfectly aligned from start to finish.
- Check levels often: Keep every course straight using a long level for accuracy.
- Dry-fit first: Arrange blocks before gluing to ensure perfect placement and alignment.
- Clean surfaces: Remove dust before adding glue for better bonding and stability.
- Use a mallet: Tap blocks gently instead of forcing them into place.
- Measure twice: Always confirm spacing before gluing to maintain even walls.
- Let glue cure: Allow full drying time before using the fireplace safely.
Following these simple steps helps you avoid errors, save time, and create a fireplace that looks beautiful and lasts for years.
Essential Safety Guidelines
Safety should always come first when working on your outdoor fireplace. Wear gloves, safety glasses, and sturdy shoes to protect yourself from sharp edges and falling blocks.
Avoid lifting heavy pieces alone, ask for help, or use lifting tools.
Keep your work area clean and organized to prevent trips or accidents. Always check that your foundation is solid before stacking.
Once the fireplace is complete, allow the adhesive to cure fully before lighting a fire. Follow local fire codes and maintain safe clearance from nearby structures or plants.
Final Thoughts
An outdoor fireplace brings lasting comfort and atmosphere to your outdoor space.
It encourages conversation, calm evenings, and time spent together under the open sky.
Once it’s built, it becomes a natural gathering place that enhances every moment outdoors. Choose durable materials, maintain them well, and they will reward you for years.
Start planning your design today, gather your tools, and take the first step toward creating a warm and inviting backyard centerpiece that truly reflects your personal style.
The sooner you begin, the sooner you’ll enjoy the glow of your own outdoor fireplace.