
My old laminate countertop had seen better days, but replacing it wasn’t in the budget.
Custom sizes were expensive, and off-the-shelf options didn’t fit right. That’s when I decided to refinish what I already had instead of starting from scratch.
With the right prep, paint, and epoxy, laminate can look just as polished as new stone or solid surface.
The best part? It costs a fraction of the cost of a full replacement. In this guide, I’ll show exactly how I resurfaced my countertop for under $60: durable, glossy, and good as new.
Before You Start: Is Your Laminate a Good Candidate?
Before diving into a refinishing project, it’s important to know whether your existing laminate can actually handle it.
Not every countertop is worth saving, and a little inspection up front saves a lot of frustration later.
When to Refinish vs. Replace
Check the condition of your laminate first. If the substrate underneath is solid, smooth, and securely bonded, it’s a great candidate for resurfacing.
Small scratches or dull spots don’t matter; paint and epoxy will cover those.
However, deep water damage, soft, swollen seams, or visible delamination mean replacement is the better option. Painting over damaged laminate might look fine at first, but the finish won’t last.
Safety Basics
Good ventilation is key. Work with windows open and fans running to keep fumes moving out.
Wear gloves, safety glasses, and a respirator when sanding or using epoxy to protect against dust and VOCs.
Keep pets and kids out of the area until the project is finished and the surface has cured.
Proper prep and safety make the process smoother and help you get a professional-looking result without risk.
Step-by-Step: How to Resurface Laminate Countertops With Paint and Epoxy
For a countertop that looked brand new without spending hundreds on replacement. This guide walks you through exactly how to refinish a laminate surface with paint and epoxy for a durable, glossy finish that lasts.
Materials Required
| Item | Purpose |
|---|---|
| Screwdriver & wrench | Disconnect the sink and plumbing |
| Painter’s tape & plastic | Protect cabinets and walls |
| Degreaser & alcohol | Clean and prep the surface |
| Sandpaper (120–220 grit) | Roughen the laminate for adhesion |
| Bonding primer | Helps paint stick to slick surfaces |
| Base paint & foam roller | Adds color and coverage |
| Two-part epoxy | Creates a durable, glass-like coating |
| Mixing cup & stir sticks | Blend the epoxy evenly |
| Torch or lighter | Remove surface bubbles |
| Gloves & respirator | Ensure safety during epoxy use |
Step 1: Remove the Sink and Prep the Area
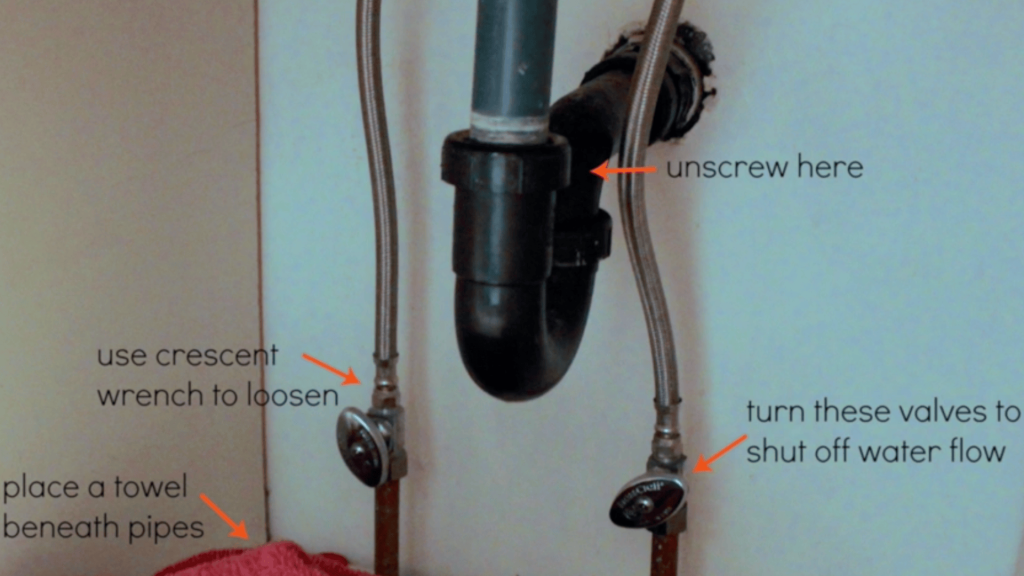
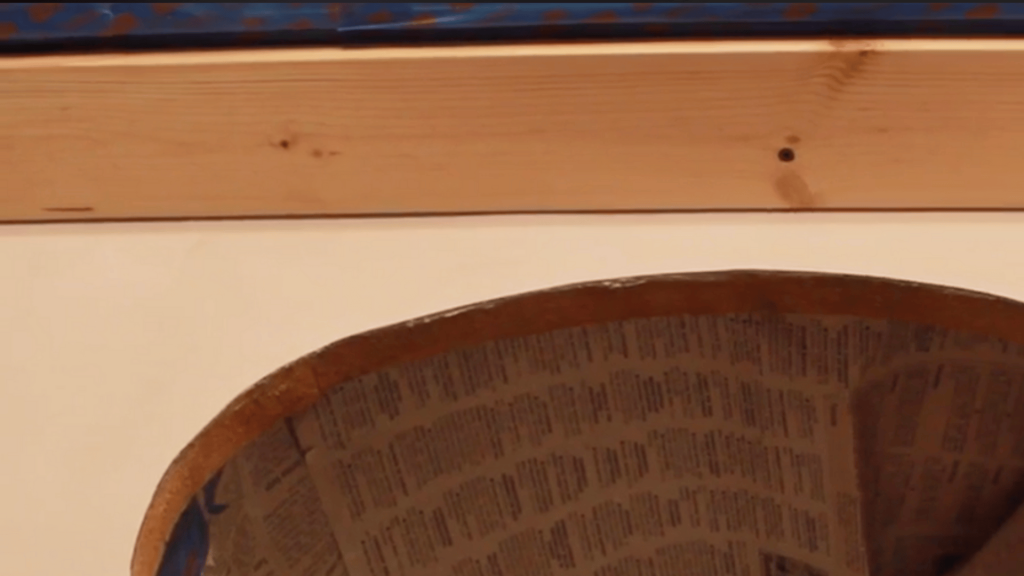
Turn off the water, disconnect the pipes, and lift the sink carefully. Cover cabinets, backsplash, and nearby walls with painter’s tape and plastic. Keeping the area clean and protected makes everything easier later.
Step 2: Clean and Sand the Countertop
Make sure the countertop is clean and ready. If it has any oil or residue, scrub with a degreaser, rinse well, and let it dry. Sand lightly to scuff the laminate, then wipe with alcohol to remove dust. This helps the primer grip properly for a lasting finish.
Step 3: Apply the Primer
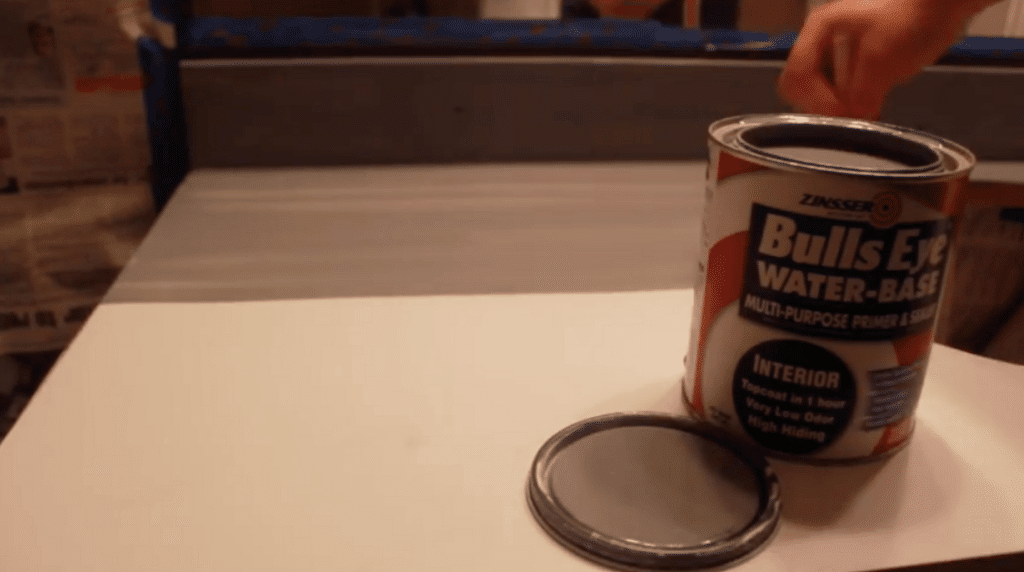
Roll on a thin coat of bonding primer over the counter, backsplash, and edges. Once it dries, apply a second coat for full coverage.
You can try tinting your primer slightly darker. It gives more depth when using darker paint tones.
Step 4: Paint the Base Color and Add Accents
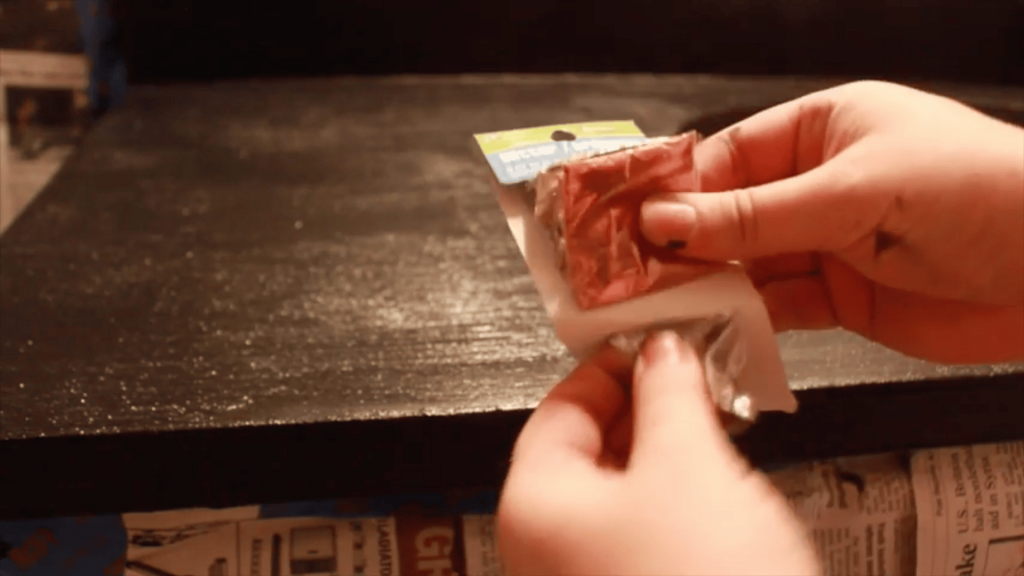
Apply a smooth, even coat of your base paint. While it’s still tacky, sprinkle fine glitter or add a few metallic leaf specks for dimension.
Use used small pieces of copper leaf, which give the final finish a natural, stone-like look.
Step 5: Mix and Pour the Epoxy
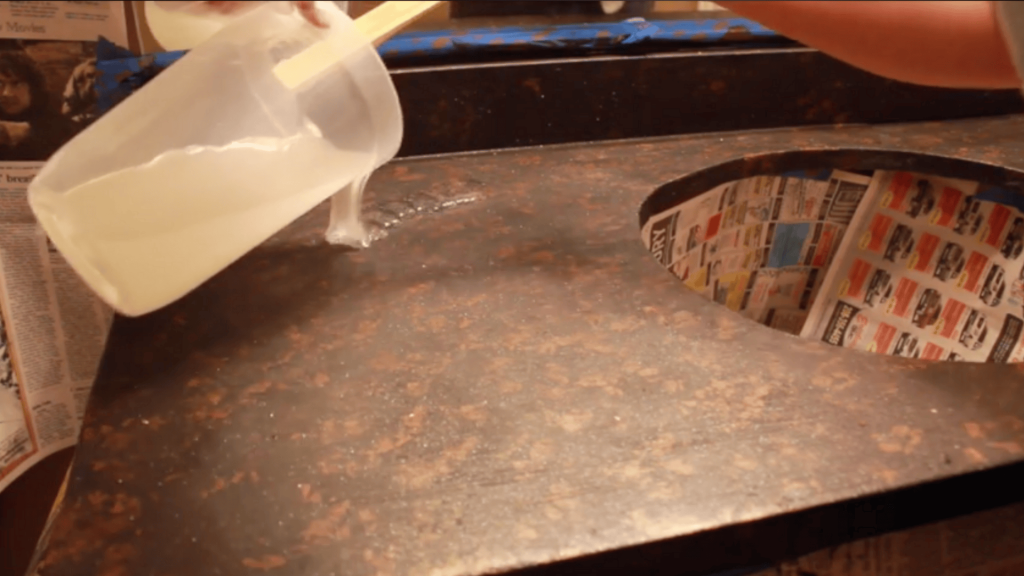
Measure equal parts resin and hardener into a clean container, stirring carefully to blend without trapping air.
Pour evenly across the surface and let it self-level. You always keep a bright light nearby to catch missed spots or bubbles early.
Step 6: Pop the Bubbles
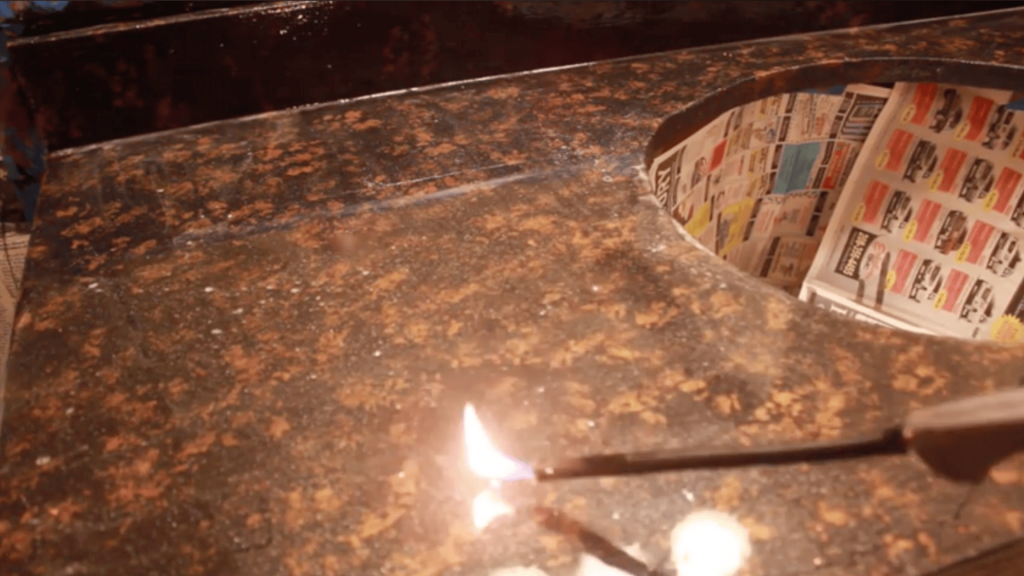
Use a lighter or torch to wave gently over the epoxy surface, moving quickly to avoid overheating one spot. The bubbles rise and pop, leaving a flawless, glossy finish that hardens beautifully as it cures.
Step 7: Remove Tape and Let It Cure
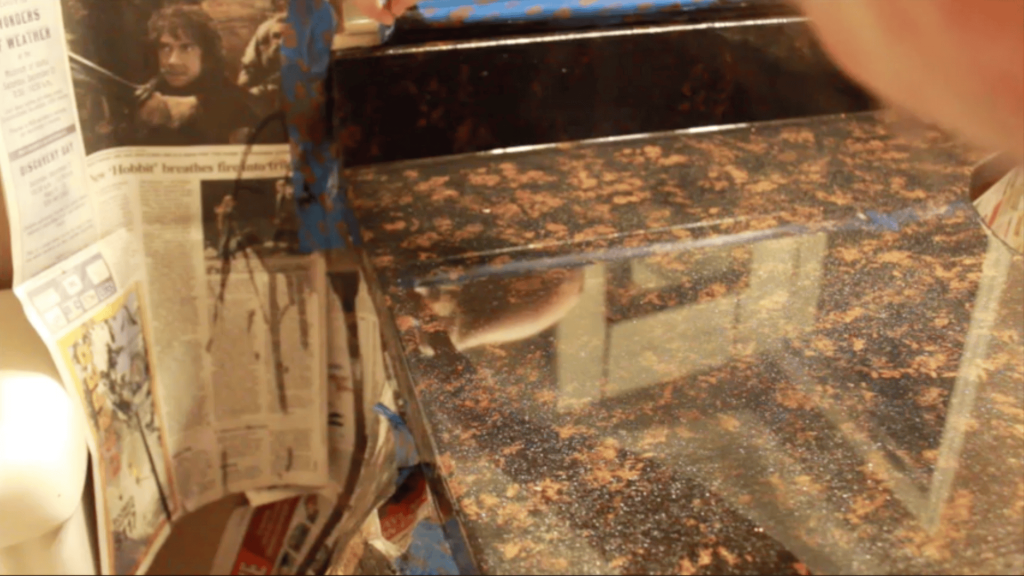
Once the epoxy feels tacky but not wet, remove all tape and protective covering.
Let the surface cure for about 72 hours before reinstalling the sink or using the counter. Patience here pays off with a durable, professional finish.
Step 8: Replace the Sink
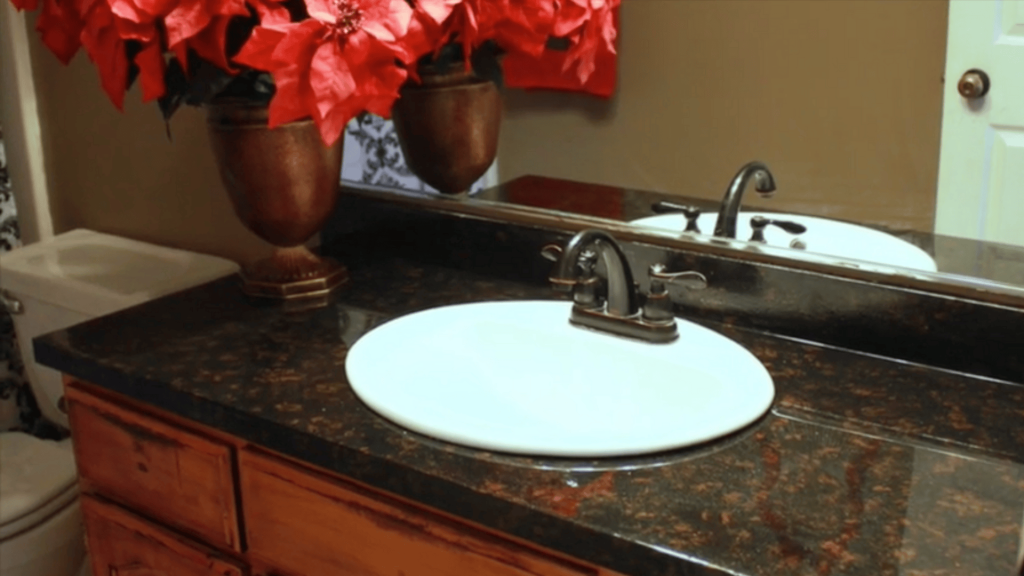
Once the epoxy has fully cured, usually after 72 hours, it’s safe to reinstall the sink.
Carefully position it back into the cutout, apply a fresh bead of silicone sealant around the rim, and reconnect the plumbing.
Tighten fittings gently to avoid stressing the new finish. This final step brings the whole project together, giving your refinished countertop a clean, professional look that’s ready for everyday use.
Pro Tip: Always test your full paint and epoxy combo on a scrap piece first because epoxy can deepen or shift colors more than expected once it cures.
Video Tutorial
Special thanks to MadeByMarzipan for providing valuable insights in their video, which I referenced while creating this guide.
Cost, Time, and Results
Refinishing laminate countertops is one of those projects that gives a huge return for a small investment.
The total cost depends on the products you choose, but most DIYers can expect to spend $50–$100 on paint, primer, epoxy, and supplies.
That’s far less than replacing a countertop, which can easily cost $300–$800 for standard laminate or over $2,000 for stone.
In terms of time, the active work takes about a day and a half, including cleaning, painting, and pouring the epoxy.
The curing process takes another two to three days, so patience pays off. The final result feels smooth, glossy, and durable, almost like real stone, with a finish that instantly upgrades the entire bathroom or kitchen space.
Maintenance and Care
A newly resurfaced laminate countertop doesn’t need much to stay looking fresh, but a few good habits will make it last for years.
Regular cleaning and small precautions go a long way in keeping that glossy, just-finished shine.
- Clean Gently: Use mild dish soap and a soft cloth; skip abrasive pads that can scratch the epoxy finish.
- Avoid Heat Damage: Always place hot pots or hair tools on trivets to prevent warping or dull spots.
- Protect from Cuts: Use cutting boards; epoxy may be tough, but knives can still leave marks.
- Wipe Spills Quickly: Clean acidic or colored liquids right away to prevent staining or etching.
- Refresh the Shine: Buff with countertop polish or a little mineral oil every few months to maintain luster.
With a bit of routine care, your refinished countertop will keep its smooth, polished look for years to come.
Conclusion
Refinishing my laminate countertop turned out to be one of the most satisfying DIY projects I’ve done.
It was affordable, simple to follow, and the results looked far more expensive than they cost. What I love most is how durable and easy it is to maintain; a little care keeps it looking brand new.
If you’re thinking about updating your counters without breaking the bank, this method is definitely worth a try.
Take your time, follow each step carefully, and you’ll be amazed at the look. Have you tried resurfacing your countertops? Share your experience or questions in the comments below!
Frequently Asked Questions
How Durable Is an Epoxy-Coated Laminate Countertop?
When properly prepped and cured, epoxy creates a hard, glossy surface that resists spills, stains, and daily wear: just avoid cutting directly or placing hot pans without trivets.
Do I Have to Remove the Sink?
Yes, it’s strongly recommended. Removing the sink prevents bonding it to the epoxy and makes future replacements or cleaning edges much easier.
How Do I Prevent Bubbles in the Epoxy?
Work in a warm, dry room, mix thoroughly, pour immediately, and move a heat gun or lighter gently across the surface to release trapped air.
How Long Before I Can Use the Countertop Normally?
Most epoxy finishes harden within a few hours but need up to 72 hours to fully cure — wait for that time before using the surface.
