A dedicated craft room changes creativity into focus by providing a space that’s both inspiring and organized.
It helps you stay productive, reduces clutter, and keeps every material within easy reach. A well-planned setup encourages more time spent creating and less time searching for supplies.
Study practical craft room ideas that improve both function and style, with thoughtful craft room layout design tips that suit any space.
From choosing the right workspace to optimizing storage, every detail contributes to a room that fuels imagination and efficiency.
A craft room becomes your personal studio, where inspiration, order, and creativity come together seamlessly.
Assessing Your Space & Needs
Before designing your craft room, start by defining its purpose based on the type of crafts you love: sewing, painting, paper crafting, or mixed media.
Measure your available space carefully, noting natural light, wall lengths, and alcoves that can influence your setup.
Choose a craft room layout design that fits your lifestyle, whether it’s a compact nook, a shared office, or a multi-station workspace for different activities.
Consider your budget and preferred style, from rustic farmhouse to modern minimalist.
Finally, plan your workflow, how you move between creating, storing, and organizing, to ensure your craft room supports both comfort and efficiency while keeping creativity at the forefront.
Pegboard & Wall Storage Ideas
Vertical wall solutions maximize floor space while keeping essential supplies within arm’s reach throughout your creative sessions.
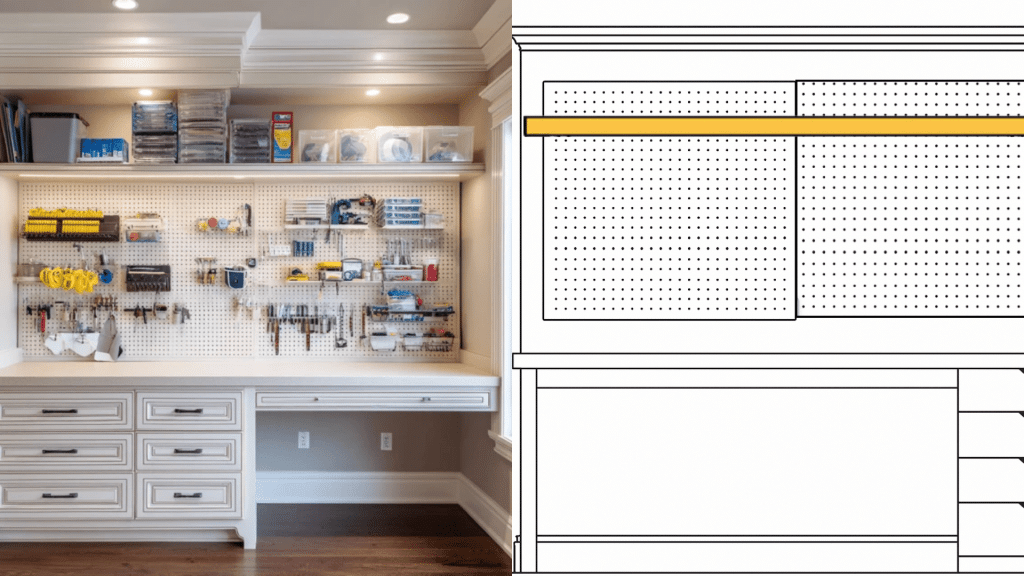
1. Pegboard Wall Organizer
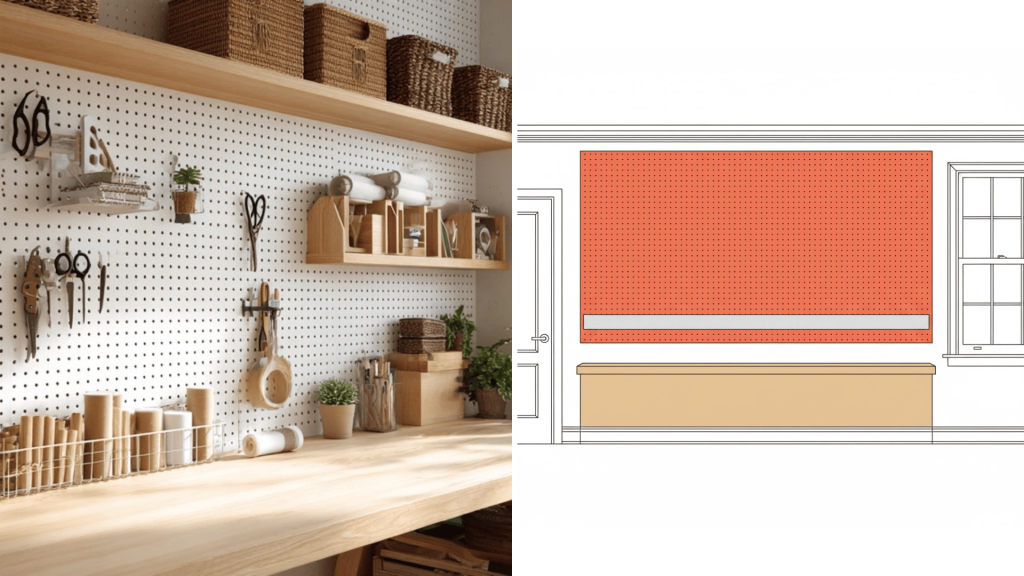
Install a full pegboard wall using hooks, baskets, and shelves to create customizable storage that adapts as your supply collection grows.
This versatile system works beautifully for hanging scissors, ribbon spools, and frequently used tools, where you can see them instantly.
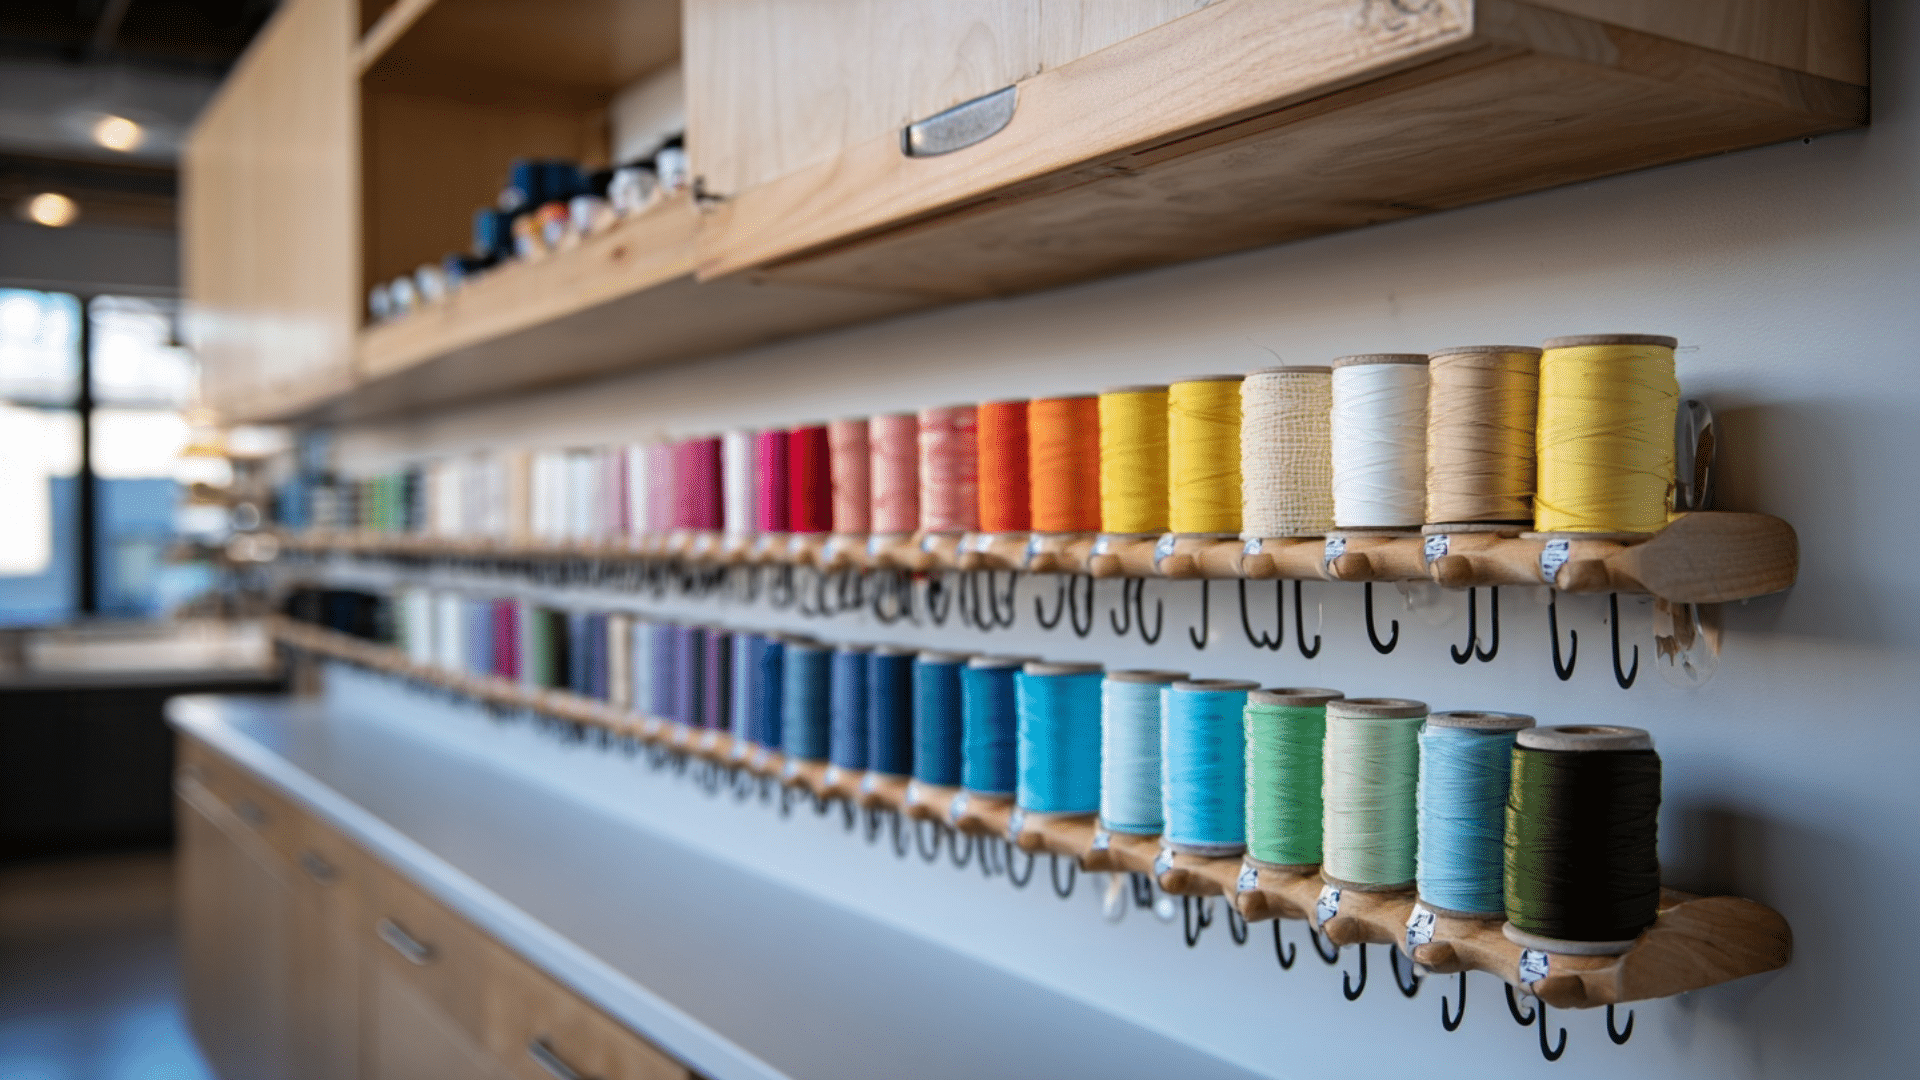
2. Ribbon & Tape Rack
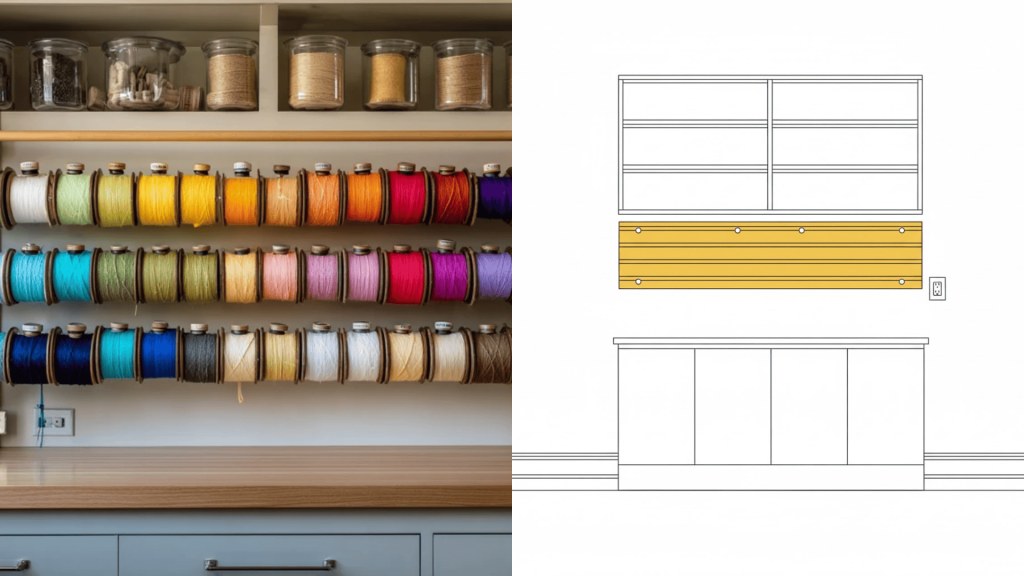
Mount wooden dowels or tension rods horizontally on your wall to create simple ribbon dispensers that prevent tangling and showcase your collection.
Thread each roll onto the dowel for easy unrolling and cutting, keeping decorative tapes organized by color or pattern for quick selection.
3. Floating Shelves Setup
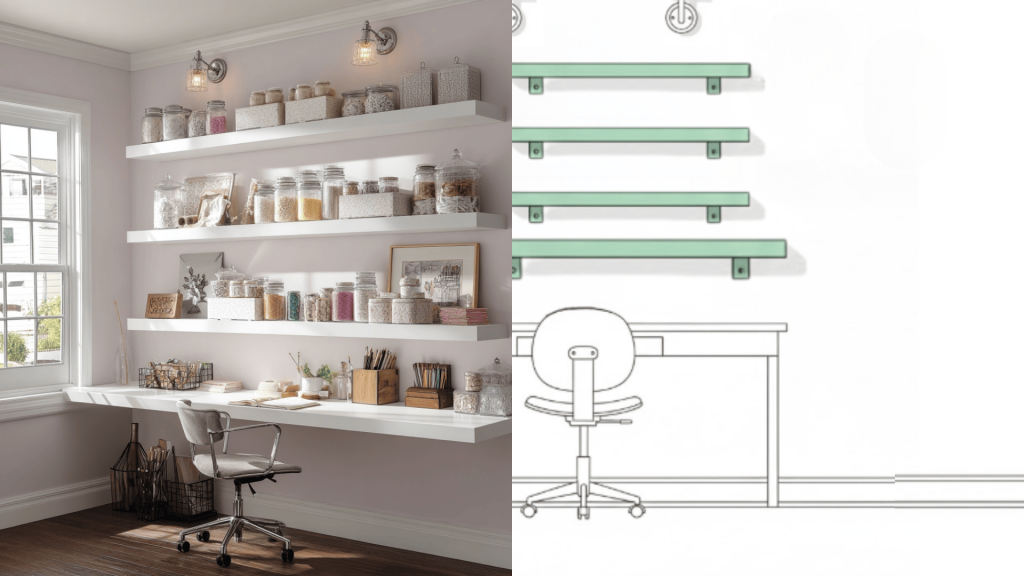
Install floating shelves at varying heights to display frequently used supplies, finished projects, and decorative storage boxes that complement your space.
Choose depths between six and twelve inches, depending on what you’ll store, creating visual interest while maintaining practical accessibility throughout your workflow.
4. Over-the-Door Organizer
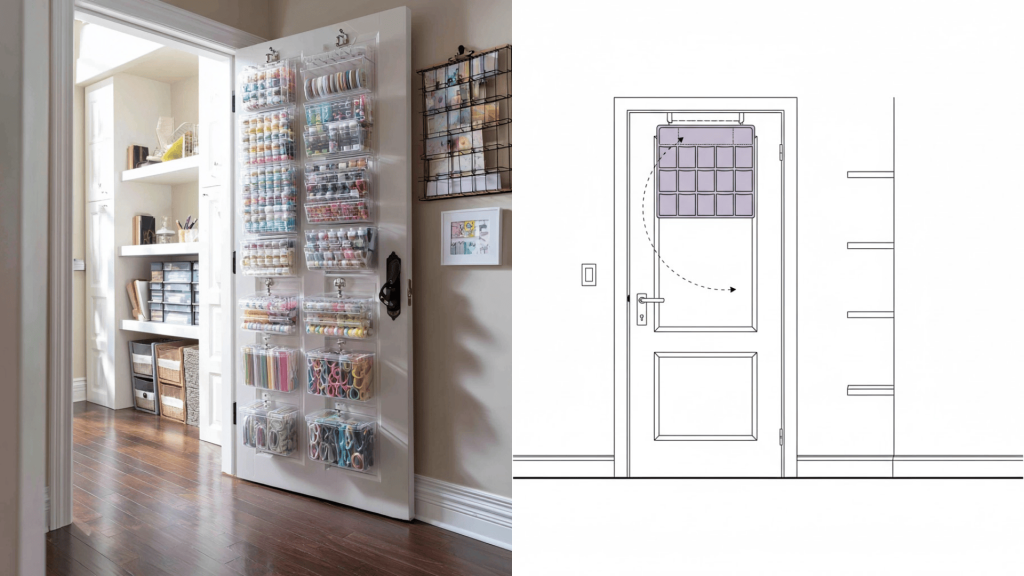
Hang clear pocket organizers or wire racks on your craft room door to use the space above the door for small supplies like buttons, beads, and embellishments.
This solution keeps lightweight items sorted and visible without requiring wall drilling, perfect for renters or those maximizing limited square footage.
5. Floor-to-Ceiling Shelving
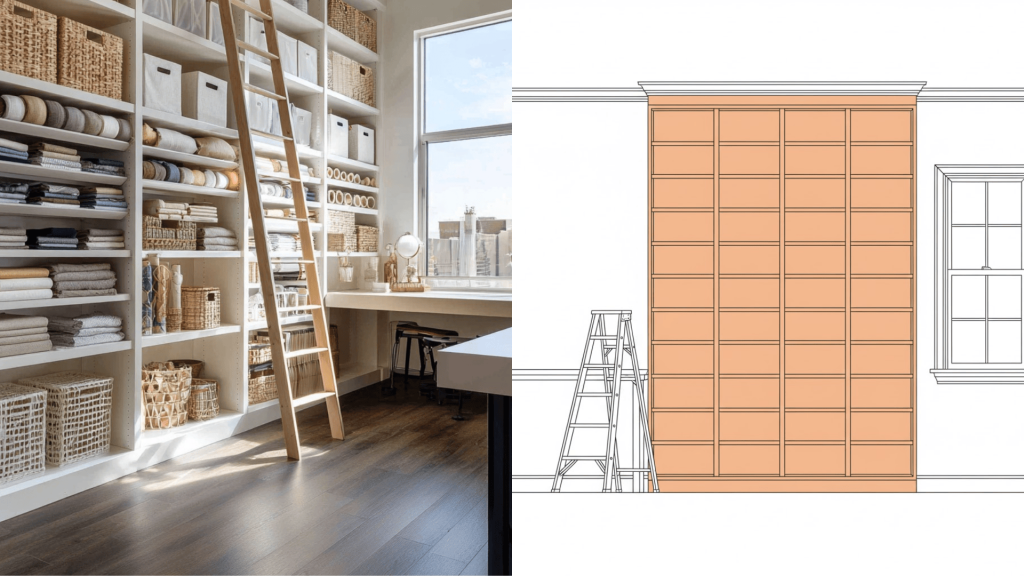
Build or install tall shelving units that reach your ceiling, creating maximum vertical storage for bins, fabric bolts, and infrequently used supplies.
Use lower shelves for heavy items and everyday materials, while upper shelves hold seasonal projects and backup inventory you access less often.
Cabinet & Shelving Storage Ideas
Enclosed storage and smart shelving combinations keep supplies dust-free while maintaining an organized appearance in your creative space.
6. Modular Cube Storage
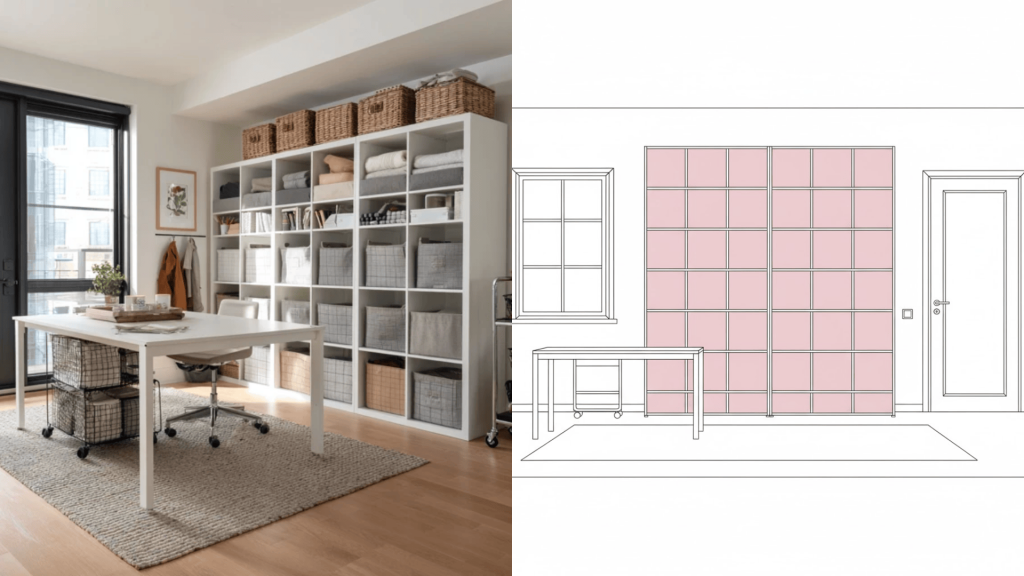
Invest in modular cube systems that allow you to mix open cubbies with fabric bins, creating flexible storage that grows with your supply collection.
These units work wonderfully along walls or as room dividers, offering both display space and hidden storage in one cohesive system.
7. Mixed Open and Closed Shelving
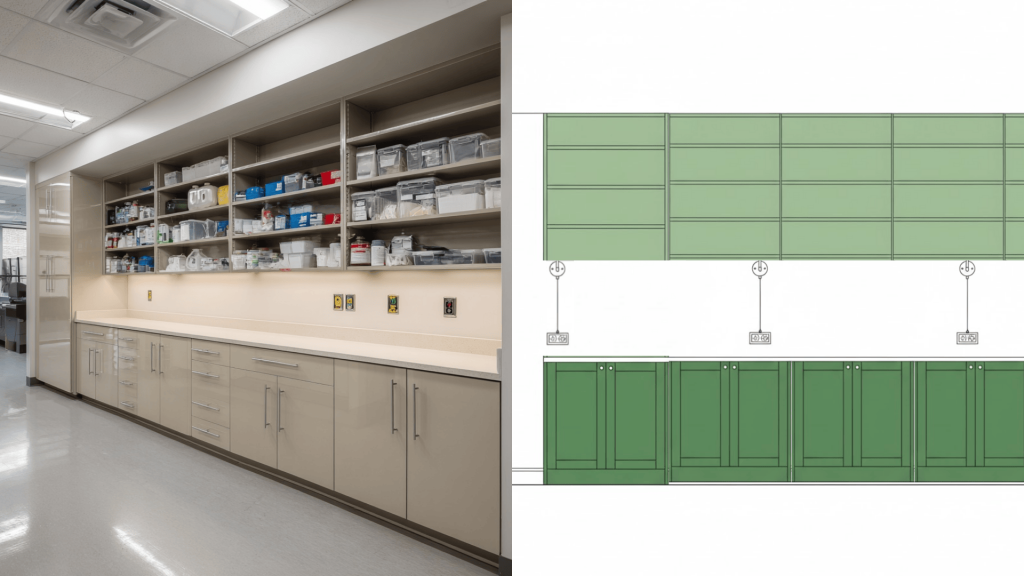
Combine open shelving for attractive displays with closed cabinets below to hide less photogenic supplies while keeping everything accessible and organized.
This balanced approach creates visual breathing room while concealing bulk materials, works in progress, and supplies you prefer kept out of sight.
8. Hidden Under-Desk Storage
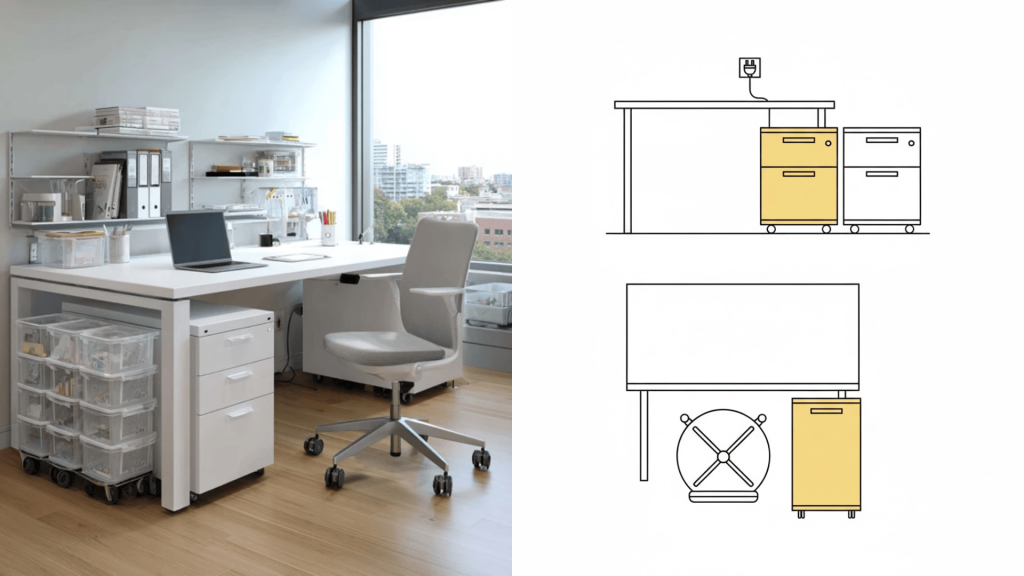
Utilize the space beneath your work surface with rolling drawer units, slim filing cabinets, or pull-out bins for paper, tools, and ongoing projects.
This keeps your workspace surface clear while maintaining easy access to essentials without constantly bending or reaching across your creative area.
9. Repurposed Vintage Furniture
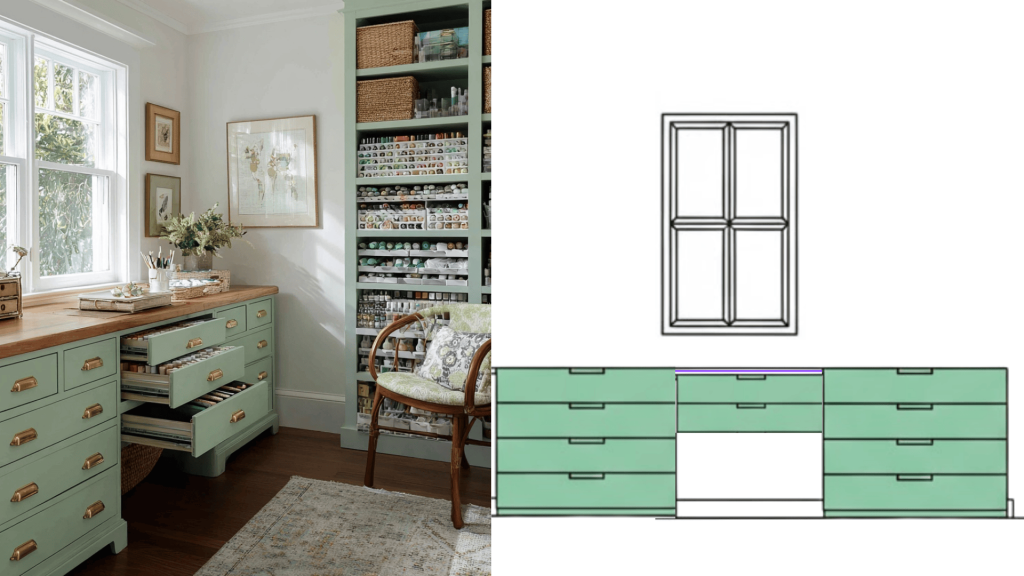
Transform dressers, china cabinets, or old filing cabinets into charming craft storage by painting them and adding organizational dividers to the drawers.
Vintage pieces often offer better quality construction than modern alternatives while adding character and unique storage solutions to your creative space.
10. Clear Labeled Storage Bins
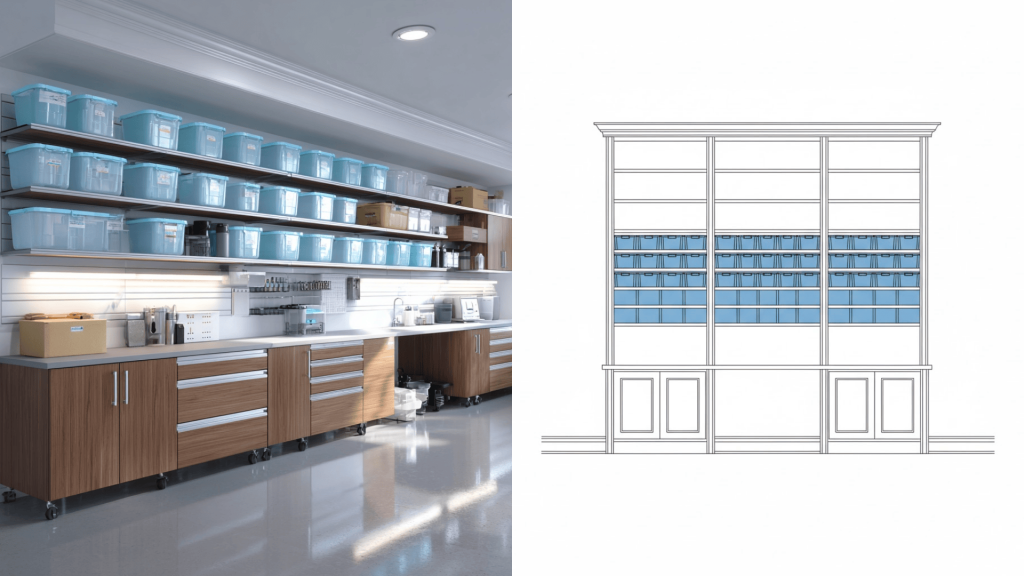
Use transparent containers with detailed labels to store sorted supplies, making it simple to locate specific items without opening multiple containers.
Stack bins on shelves by category or project type, creating a system where everything has a designated home that’s visible at a glance.
Workstation & Layout Ideas
Strategic workspace design and functional layouts create efficient creative zones where supplies, tools, and projects flow seamlessly together.
11. Center Island Worktable
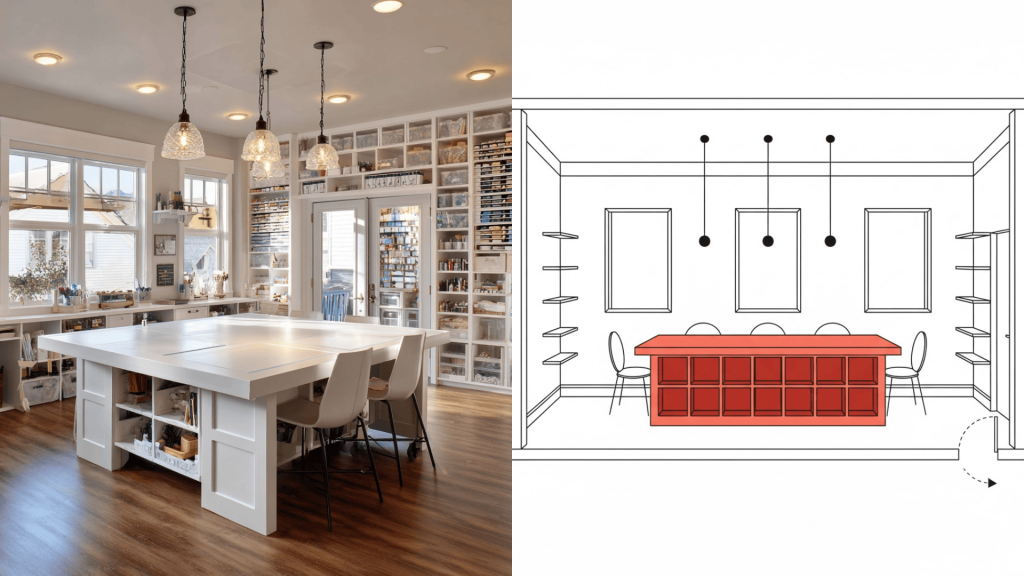
Position a large worktable in the center of your room, with storage beneath and on all sides, creating an accessible workspace from multiple angles.
This layout works wonderfully for cutting fabric, assembling large projects, or hosting craft sessions where multiple people need simultaneous workspace access.
12. Closet Craft Nook
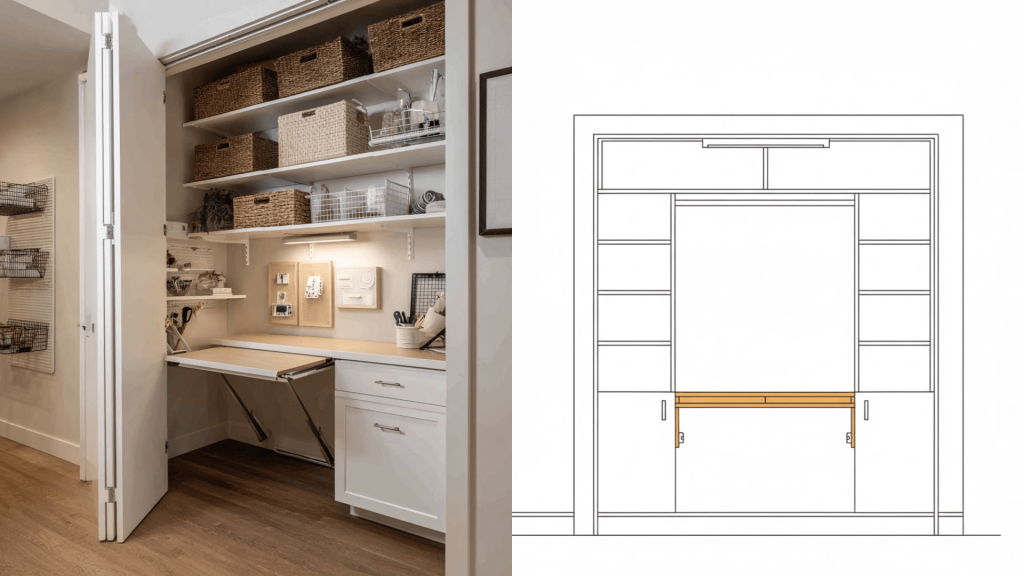
Convert a standard closet into a complete craft station by removing doors, adding a fold-down desk, and installing shelving for supplies.
This compact solution works perfectly in multipurpose rooms, allowing you to close off your creative space when not in use without sacrificing functionality.
13. Multi-Zone Craft Layout
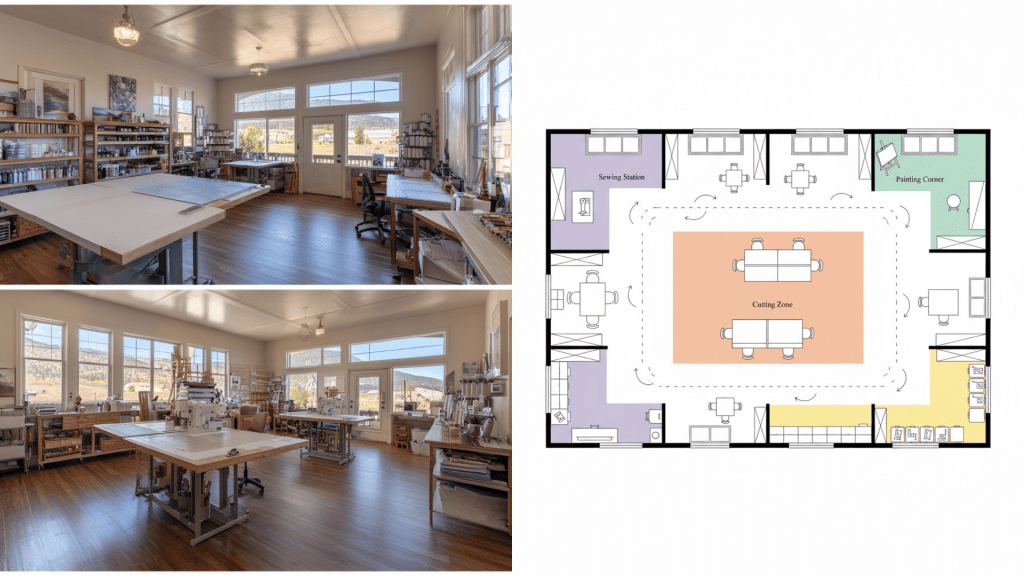
Divide your room into dedicated zones for different activities: a cutting area, a sewing station, a painting corner, and a storage section for specialized workflows.
This organization method reduces cross-contamination between messy and clean projects while keeping specific tools grouped by activity rather than randomly scattered.
14. Quick-Access Consumables Zone
Create a designated area for frequently depleted supplies like glue, tape, and thread, positioning these items where refilling and restocking happen naturally.
Keep backup inventory nearby but separate from your working stock, making it obvious when supplies run low and need replacement ordering.
15. Clean Core Work Surface
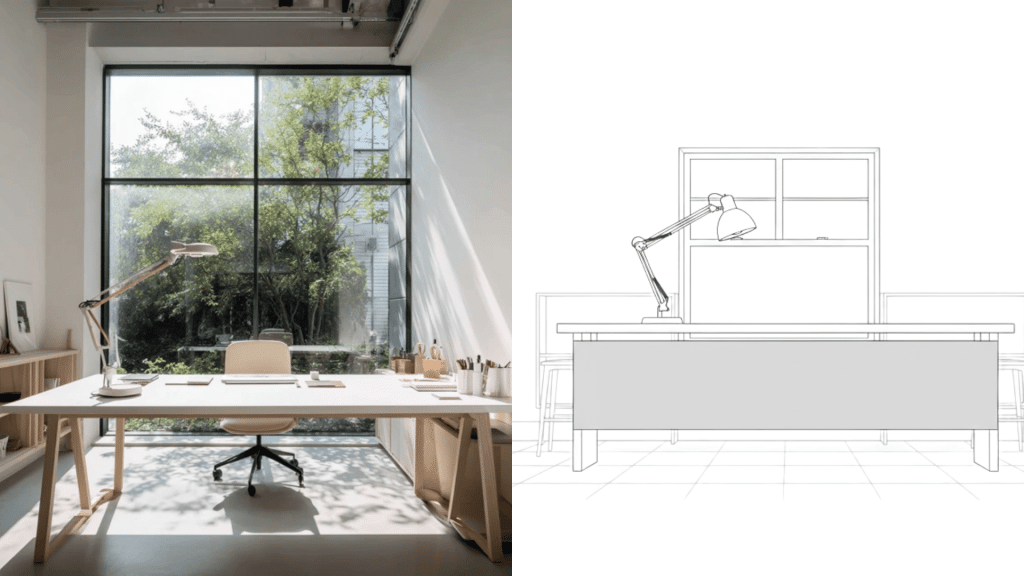
Maintain one completely clear workspace that’s always available for new projects, preventing supply creep and ensuring you always have room to start fresh.
Designate this as a no-storage zone where nothing is left overnight, and train yourself to return supplies to their proper homes after each session.
Craft Room Organization Tips
A well-organized craft room keeps creativity flowing smoothly. Use these simple ideas to maintain order and make crafting more enjoyable.
- Use labeled bins and clear containers to keep supplies easy to find
- Add vertical storage, like shelves or pegboards, to save workspace
- Keep a rolling cart for frequently used tools and materials
- Divide your space into zones for sewing, painting, or cutting
- Store rarely used items higher up and essentials within easy reach
- Schedule a weekly cleanup to maintain tidiness and focus
With consistent organization, your craft room will stay efficient, inspiring, and ready for any creative project.
Step-by-Step Layout Design Workflow
|
Common Mistakes to Avoid
Even the most creative craft rooms can fall short with a few simple oversights. Avoid these common pitfalls to keep your space efficient and inspiring.
- Limited storage: Not planning storage space in advance quickly leads to clutter.
- Bad lighting: Poor illumination makes detailed crafting difficult.
- Unused wall space: Wasting vertical areas reduces organizational options.
- Overcrowded layout: Too much furniture restricts movement and creativity.
- In undefined zones, mixing tasks disrupts focus and workflow.
By catching these mistakes early, you’ll design a craft room that stays practical, organized, and perfectly suited to your creative process.
Budgeting & Sourcing Materials
Creating a functional and stylish craft room doesn’t have to cost much when you plan smart. Combine affordable storage systems from IKEA or Target with a few premium pieces for balance and durability.
Shop second-hand furniture through local thrift stores or Facebook Marketplace to find desks or shelves you can easily repaint or customize.
For a DIY organization, build pegboards, shelving, or rolling carts with materials from Home Depot or Lowe’s.
Save further with LED task lighting, simple pendant fixtures, and budget-friendly décor accents.
These smart craft room ideas on a budget help you design a creative, organized, and affordable space that feels entirely your own.
Final Thoughts
A well-designed craft room is more than a workspace; it’s a reflection of your creativity and personal style.
By combining thoughtful layout planning, inspiring design choices, and smart organization, you can create a space that encourages focus, joy, and imagination every day.
If you’re working with a small nook or a full studio, your craft room should feel inviting, functional, and uniquely yours.
Take the first step today, sketch your layout, gather inspiration, and start transforming your vision into reality.
For more creative craft room ideas and layout design inspiration, explore our latest posts or share your setup with us to inspire other makers in the community.