That drip running down your freshly painted project? It does not mean you’ve ruined everything and must now live in shame.
Step away from the paint stripper.
Most spray paint disasters drips, orange peel, weird texture, tiny craters, even bubbles can be fixed without stripping the whole thing and starting from zero. I’d say 90% of the time your project doesn’t need a funeral. It just needs a little surgery.
Let’s walk through how to tell if your piece is actually salvageable, what you really need in your repair kit, and how to fix the most common mess ups without losing your mind (or your weekend).
Step 1: Is This Fixable or a Lost Cause?
Before you rage quit and stuff the whole thing in the trash, take one minute and actually look at what’s going on.
Usually fixable (aka: don’t panic yet)
These are surface problems. Annoying, but not fatal:
- Drips and runs
- Orange peel (that pebbly “citrus” texture)
- Small bubbles or blisters
- Dust nibs, pet hair, random fuzz
- Rough / grainy / sandy feeling
- Uneven sheen (some shiny, some dull)
- Light little craters (mild “fish eyes”)
These live on top of the paint. You can almost always sand them flat and blend them out.
Usually a strip and restart situation
These are “it’s not you, it’s the chemistry” problems:
- Paint that peels off in sheets
- Deep cracks all the way down to the original surface
- Paint that’s still sticky after two weeks
- Heavy wrinkling or shriveling over big areas
- New coat makes the old one wrinkle or curl (lifting)
Trying to “just touch these up” is like putting concealer over a sunburn. It’s not working.
The 10 Second Scratch Test
This is how you decide what camp you’re in.
- Find a hidden spot.
- Use your fingernail (yes, your actual nail) and scratch firmly.
- If the paint peels or feels rubbery, the bond is bad. That’s a strip job.
- If the paint feels hard and solid, you’re dealing with surface flaws. Those are fixable.
Once your project passes the scratch test, you’re officially in “repair” land, not “start over and cry” land.
Step 2: Build a Tiny Spray Paint Repair Kit
You don’t need a full workshop. A little repair kit will save you a ton of frustration.
Here’s what I like to keep on hand:
Sanding stuff
- 320-400 grit – for knocking down drips, runs, heavier texture
- 600-1000 grit – for smoothing, light leveling
- 1500-2000 grit (wet/dry) – for wet sanding and bringing back a smooth finish
A small sanding block is amazing for keeping things flat instead of carving divots with your fingertips.
Prep & cleaning
- Tack cloth (or a very soft, clean cloth) for removing dust
- Isopropyl alcohol or wax and grease remover
- Lint free rags
- Painter’s tape (for protecting good areas while you sand near them)
Paint & touch ups
- The same spray paint you originally used (brand, color, sheen)
- Primer (in case you sand through to bare material)
- Clear coat for anything that gets handled or lives outside
If you have all of that within arm’s reach, you’re basically armed and dangerous (in a good way).
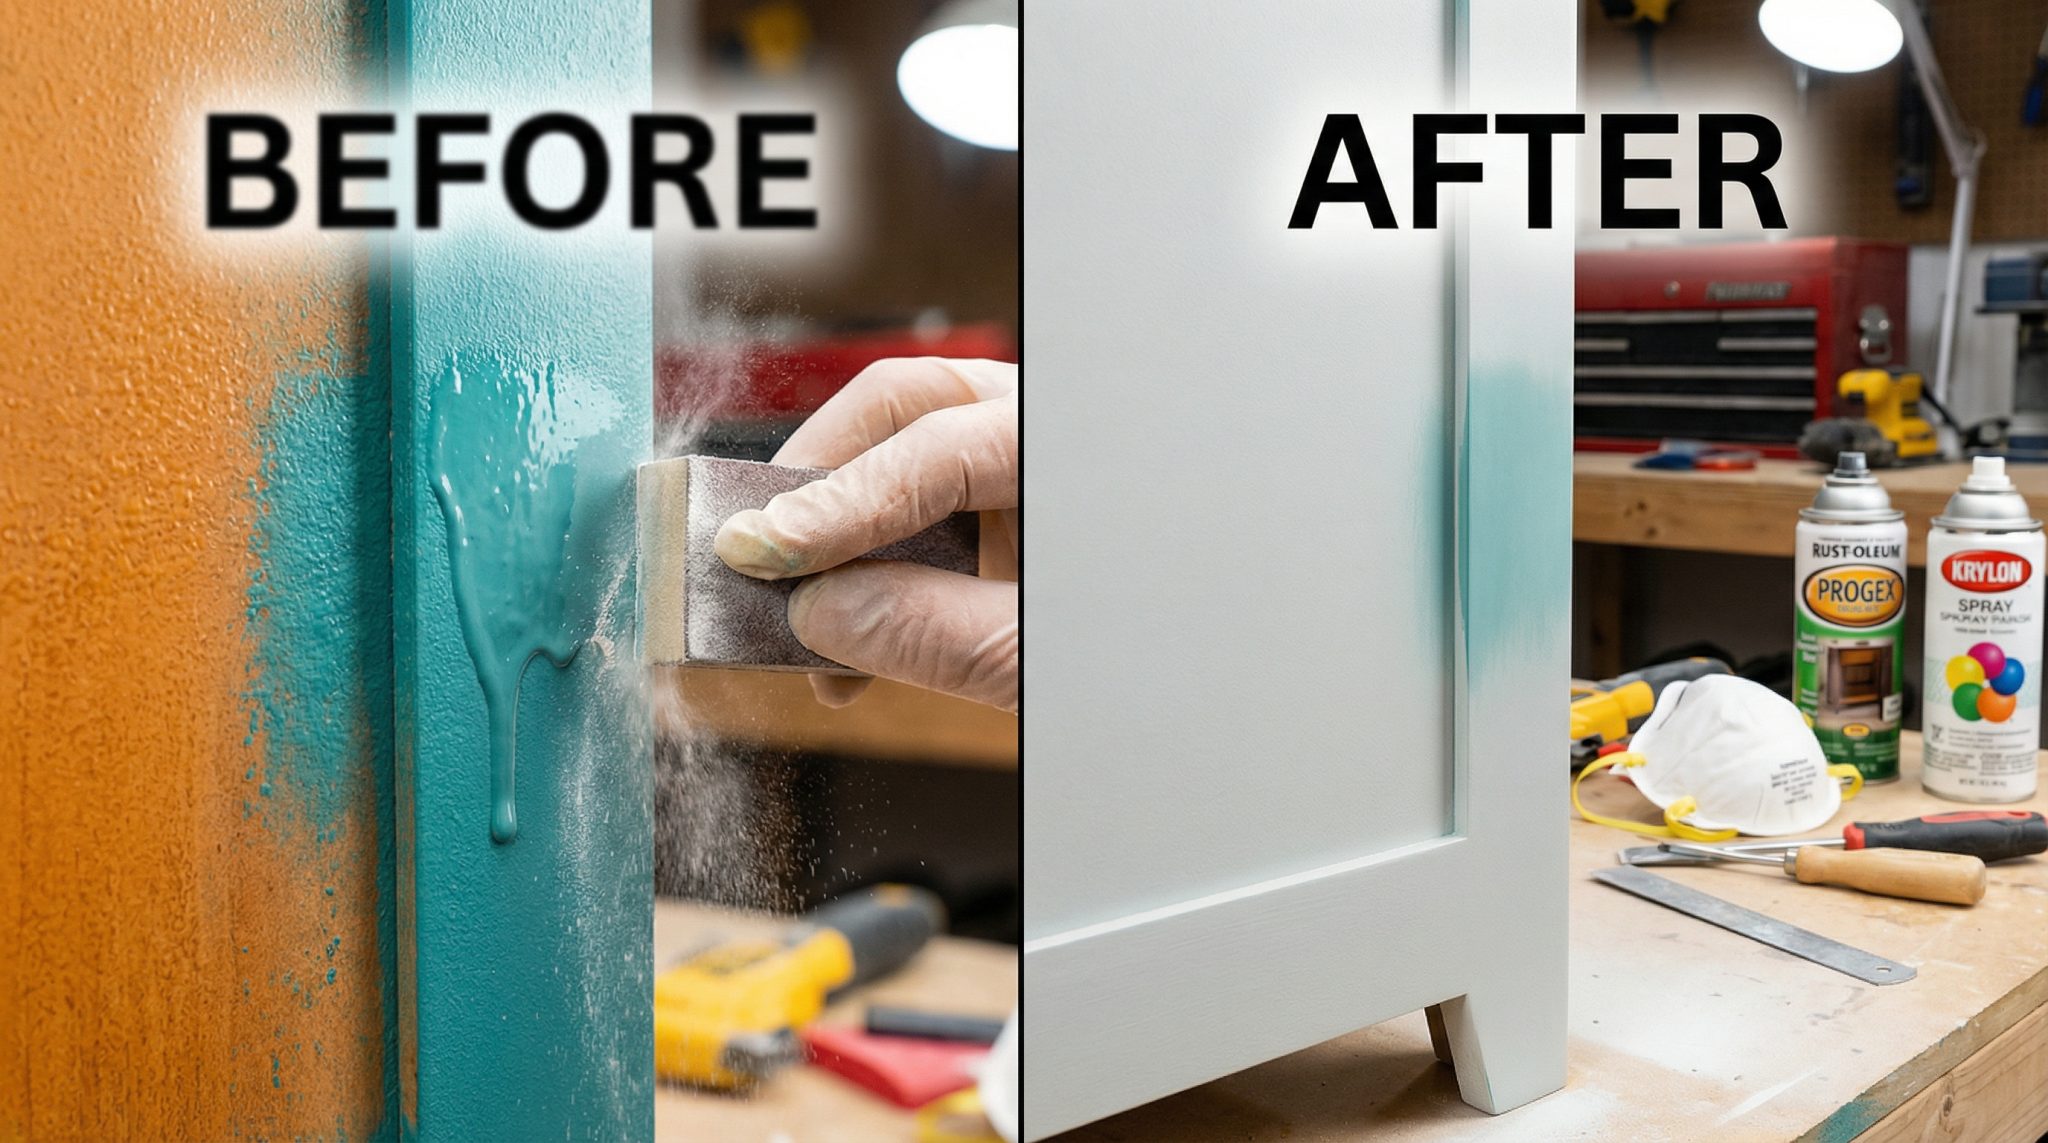
Fixing the #1 Offender: Drips & Runs
The classic. You’re spraying, you get cocky, stay in one spot a little too long, and gravity takes the wheel.
If the drip is still wet
Do. Not. Touch. It.
- Don’t swipe it with your finger.
- Don’t dab with a rag.
- Don’t blow on it like a birthday candle.
Just stop spraying and walk away. Let it dry completely thick drips can take 24-48 hours to fully harden.
Trying to “fix it while it’s wet” just smears it into a larger, uglier mess. Ask me how I know.
How to fix dried drips
Once it’s hard and fully cured:
- Level the drip
– Use 320-400 grit on a sanding block.
– Sand just the raised drip with light, even pressure until it’s flat with the surrounding paint.
- Smooth it out
– Switch to 400-600 grit and feather the edges so you don’t have a visible “patch”.
- Clean
– Wipe off dust with a tack cloth or clean cloth.
- Touch up with paint
– Light coats only.
– Hold the can about 10-12 inches away and keep it moving.
– Two thin coats are infinitely better than one heavy “please just cover it” coat.
If you can still feel the drip with your fingernail after everything’s dry, sand a little more and blend again.
How to not get drips next time
- Think mist, not hose.
- Several light coats, 50% overlap, slow passes.
- If the paint looks like it’s starting to pool or shine like wet nail polish, you’re too heavy.
Orange Peel: When Your Project Looks Like a Fruit
If your surface looks more like an orange than a smooth finish, you’ve got orange peel. It’s that bumpy, pebbled texture that’s super obvious on anything that’s supposed to look sleek.
Why it happens
- Spraying from too far away
- Cold temps or very low humidity
- Paint that’s going on too thick or too dry
- Some brands just lean more “textured” if you spray too lightly or far away
The good news? Orange peel is usually very fixable with wet sanding.
How to wet sand orange peel
Let the paint cure for at least a few days (a week is safer if it’s thick), then:
- Soak 1000 grit wet/dry paper in water for ~10 minutes.
- Lightly wet the surface.
- Sand in straight lines with very light pressure. Keep everything wet.
– You’re shaving off the high spots, not digging to bare metal.
- Move up to 1500-2000 grit, rinsing between grits.
- Wipe dry and check. The surface will look dull but should feel smooth and even.
For gloss finishes, follow with a rubbing compound to bring back the shine.
For satin or matte, the wet sanding alone is often enough or you can add one light final coat for a perfect finish with unique spray methods.
If your reflection stops looking like it’s in a funhouse mirror, you’re there.
Rough, Gritty, and Dusty: The “Why Does This Feel Like Sandpaper?” Look
Run your hand over it and it feels… crunchy? Like your project got exfoliated?
This usually means either:
- The paint dried in mid air and landed as tiny dry particles (sprayed too far, too windy, too dry), or
- Dust, fuzz, pet hair, or mystery garage crud landed in your wet paint
Fast fix for rough / grainy paint
- Lightly sand with 400-600 grit.
– You’re just knocking off the rough bits.
- Clean off all dust.
- Recoat with light, even passes at the correct distance (usually 8-12 inches), in low wind.
If the whole coat is super chalky and barely stuck, bite the bullet: sand it down harder and start with fresh paint.
Fixing dust, fuzz, and random debris
If it’s just a few little nibs:
- Wait until fully cured.
- Pick off anything loose (your fingernail works).
- Sand that tiny spot with 600-1000 grit.
- Lightly touch up with paint.
If there’s a lot:
- Sand the entire surface with 400-600 grit to level it.
- Clean like you mean it.
- Next time, spray in cleaner conditions:
– Wipe nearby surfaces
– Don’t spray right after sweeping
– Lightly dampen the floor to keep dust down
Your pets will still try to help. Try to ignore them.
Bubbles, Blisters, and Fish Eyes (Tiny Craters)
These all look different but they have the same basic message: the surface or environment wasn’t right.
Bubbles / blisters
Look like little raised bumps or blisters under the paint.
Common causes:
- Spraying in hot sun or on a hot surface
- Moisture in or under the paint
- Solvents or air trying to escape but getting trapped
Fix:
- Let it cure fully.
- Sand the blisters flat. If they go deep, you may hit bare surface then you’ll need primer before repainting.
- Clean and let the piece dry well.
- Repaint in the shade on a cool to the touch surface.
If the piece is warm when you put your hand on it, it’s too hot to paint.
Fish eyes / tiny craters
These are little round craters, like your paint was actively avoiding certain spots.
Almost always caused by:
Silicone or oil contamination furniture polish, wax, hand lotion, old silicone products, etc.
Fix:
- Let it cure.
- Sand the affected area with 400-600 grit to level.
- Deep clean the entire piece with alcohol or wax and grease remover (fresh rags, not that one oily rag from 2014).
- Let it dry and repaint with light, even coats.
If they keep coming back, you still have contamination. Sand, clean again, and swap to fresh rags and clean gloves. Silicone is stubborn.
Cracks, Wrinkles, Peeling & Sticky Forever: The Hard Conversations
These are the ones nobody wants to hear about… but you need to know when to walk away and start fresh.
Cracks & wrinkles
Looks like dried mud, reptile skin, or wrinkled plastic.
Why it happens:
- New coat over paint that wasn’t cured yet
- Coats sprayed too thick and too fast
- Incompatible paints (like lacquer over enamel)
- Extreme temperatures
If it’s just in small patches:
- Let it cure at least a week.
- Sand the area with 220-320 grit until smooth.
- Feather into the good paint edges.
- Prime if you hit bare surface, then repaint.
If it’s large areas:
Strip it. Your layers are basically fighting each other and you’ll be chasing problems forever.
Peeling in sheets
This is a prep problem, not a “spray skill” problem.
Caused by:
- Painting over dirt, grease, or glossy unsanded surfaces
- Skipping primer on plastic, metal, or slick finishes
- Moisture trapped underneath
Only real fix:
- Scrape and sand off all loose, peeling paint.
- Keep going until you hit either:
– Solid paint that passes the scratch test, or
– Bare material
- Feather the edges of any remaining good paint with 220-320 grit.
- Clean thoroughly.
- Prime bare spots with a bonding primer made for that surface.
- Repaint.
Painting over loose paint is like building a house on Jenga blocks. It will come off again.
Paint that never dries (still sticky after a week+)
If it’s been more than a week and it still feels tacky, something went wrong.
Common reasons:
- Coats put on way too thick
- Very high humidity
- Painting over something oily, waxy, or incompatible
You can try:
- Moving the piece to a warm, dry, ventilated area
- Very gentle warmth (like a heat gun on low, constantly moving, or a warm room)
If it’s still sticky after about two weeks?
Stop suffering. Strip it and start over under better conditions. That one is not coming back from the dead.
“Lifting” – when the new coat attacks the old one
You spray a new coat and the old one shrivels, wrinkles, or puckers up. Drama.
That means:
- The base layer wasn’t cured yet, or
- The products don’t play nice together (incompatible paints/primers)
Sadly, you cannot just patch this.
- Sand off the damaged layers (often down to bare surface)
- Rebuild with compatible products
- Give each layer proper cure time (when in doubt, wait overnight)
Patchy Color & Weird Sheen: Cosmetic Fixes
Sometimes the paint is actually fine, it just looks… bad.
Patchy or see through coverage
This is almost always just not enough paint yet.
What to do:
- Let what you’ve already done dry at least 24 hours.
- Lightly scuff the whole surface with 400 grit for sanding before spraying.
- Clean thoroughly.
- Add 2-3 light coats, letting each one flash off (usually 10-15 minutes) before the next.
If you’re painting bare wood or anything porous, use primer first so the color coat isn’t soaking in unevenly.
Uneven sheen (shiny next to dull)
Looks like accidental two tone, but not the cute Pinterest kind.
Why it happens:
- Uneven thickness of coats
- Some areas absorbed more paint
- Touching the surface before it cured, leaving fingerprints or smudges
How to fix it:
- For gloss:
– Lightly wet sand the whole surface with 1500-2000 grit.
– Either:
– Add one thin, even final coat, or
– Polish with rubbing compound to bring back the shine.
- For satin/matte:
– Light scuff with 400-600 grit.
– One consistent final coat over the entire surface.
Spot fixing sheen almost never works. It’s like ironing just one square on a wrinkly shirt.
Do You Need a Clear Coat?
Not everything needs clear coat, but it’s a good idea for:
- Furniture
- Planters and outdoor decor
- Anything that gets handled a lot
- Projects you sanded back and repaired heavily
Picking & using clear coat
- Match the sheen (gloss, satin, matte) to your color coat.
- If possible, use the same brand as your color.
- For outdoor pieces, look for UV resistant exterior clear.
How to apply:
- Wait about 24 hours after your last color coat.
- Add 2-3 light coats of clear, 10-15 minutes apart.
- Keep it thin runs in clear are way more obvious.
If you get tiny craters (solvent pops) or cloudy, milky clear (blushing), that’s usually humidity or not enough time between coats. Let it cure, sand smooth, and try again on a drier day with a bit more patience between passes.
The Core Formula for Almost Every Fix
If you remember nothing else from this entire post, remember this rhythm:
Cure → Sand → Clean → Recoat
- Let the paint fully cure, not just feel dry to the touch.
- Sand only as much as you need to level the problem.
- Clean like you’re about to serve food on it.
- Recoat in light, even passes. Don’t rush. Don’t glob.
Most spray paint problems are not permanent disasters. They’re just your project politely telling you, “Hey, that coat was a little much.”
Next time you spot a flaw, don’t panic strip or drag it to the curb. Do the scratch test, figure out what kind of drama you’re dealing with, grab your little repair kit, and walk through the steps.
Your project doesn’t need a do over. It just needs a comeback tour.