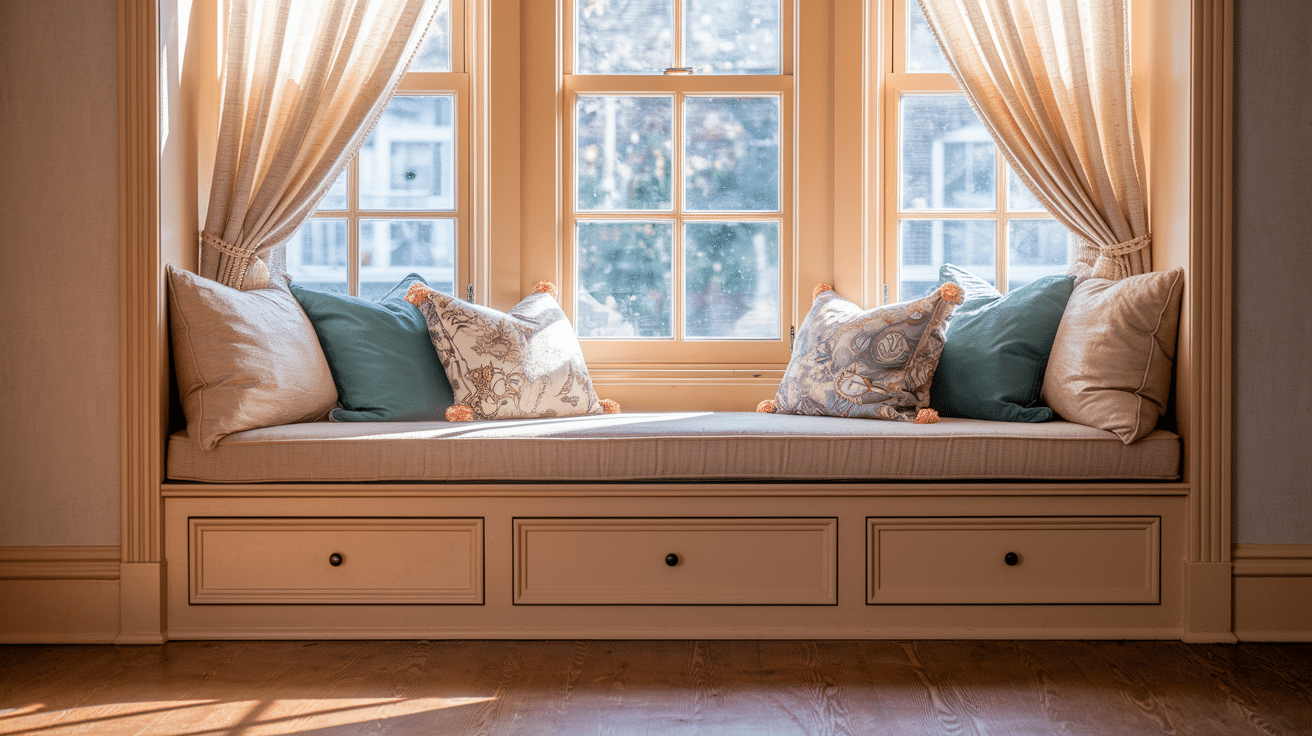
Ever looked at that empty space under your window and thought, “That would make a perfect reading nook”? You’re not alone!
A window seat isn’t just a pretty addition to your home—it’s a practical way to add seating, storage, and that cozy corner you’ve always wanted without breaking the bank.
Many homeowners wonder if they could actually build something themselves. The good news is, with some basic tools and a weekend of work, anyone absolutely can.
This guide walks through how to convert that unused window space into the favorite spot in the house—even for those who’ve never built anything before.
No fancy carpentry skills needed—just patience, basic measurements, and a desire to create something both beautiful and functional. Ready to turn that window dream into reality? Let’s get started!
What Makes Window Seats Worth the Space?
Window seats turn ordinary windows into charming focal points while solving practical needs in your home. These built-in nooks create natural gathering spots where family and friends can curl up with a book or enjoy the view outside.
Beyond their visual appeal, window seats offer hidden storage beneath — perfect for stashing extra blankets, seasonal items, or kids’ toys. They make use of otherwise empty wall space, especially in smaller homes where every square foot matters.
From a design perspective, these seating areas draw the eye toward natural light sources, making rooms feel larger and more connected to the outdoors. They bridge the gap between interior comfort and exterior views.
Whether in kitchens, bedrooms, or living spaces, a well-designed window seat converts unused space into your home’s most coveted spot.
Materials Required
| Material | Quantity | Purpose |
|---|---|---|
| 2×4 lumber | 6 pieces (5 ft each) | Main structural frame |
| MDF boards | 2 sheets (4×8 ft) | Covers the frame |
| White particle board | 1 sheet (4×8 ft) | Seat surface |
| Wood glue | 1 bottle | Secures trim & panels |
| Brad nails (1 ¾ inch) | 1 pack | Attaches MDF & trim |
| Hinges | 4 pieces | Allows seat to open |
| Wood filler | 1 small tub | Fills nail holes & seams |
| Primer | 1 can | Prepares surface for paint |
| White paint | 1 can | Finishes the bench |
| Screws | 1 box | Secures frame |
| Tape measure | 1 piece | Ensures accurate cuts |
| Level | 1 piece | Keeps frame straight |
| Saw | 1 piece | Cuts lumber & MDF |
| Nail gun | 1 piece | Speeds up assembly |
Step-by-Step Guide to Building a Window Seat
This process includes six key steps, from planning to installing trim. Follow each step carefully to create a sturdy and polished window seat.
Step 1: Planning and Preparation
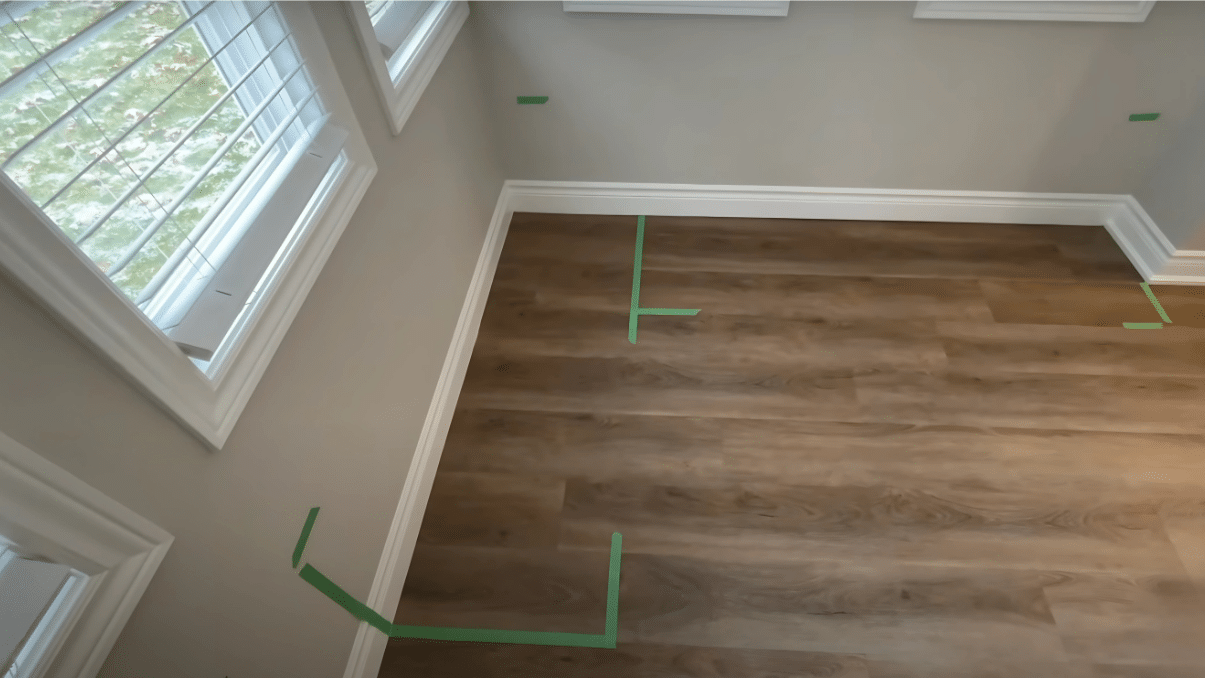
Start by marking the dimensions of your window seat on the floor using tape. This will help you visualize how much space it will take and ensure it fits well in the designated area. Plan the height, depth, and any additional features like storage compartments before purchasing materials.
Things to Keep in Mind:
- Choose a comfortable seat height, keeping cushion thickness in mind.
- Measure accurately to avoid material wastage.
- Plan for any additional storage or design elements before building.
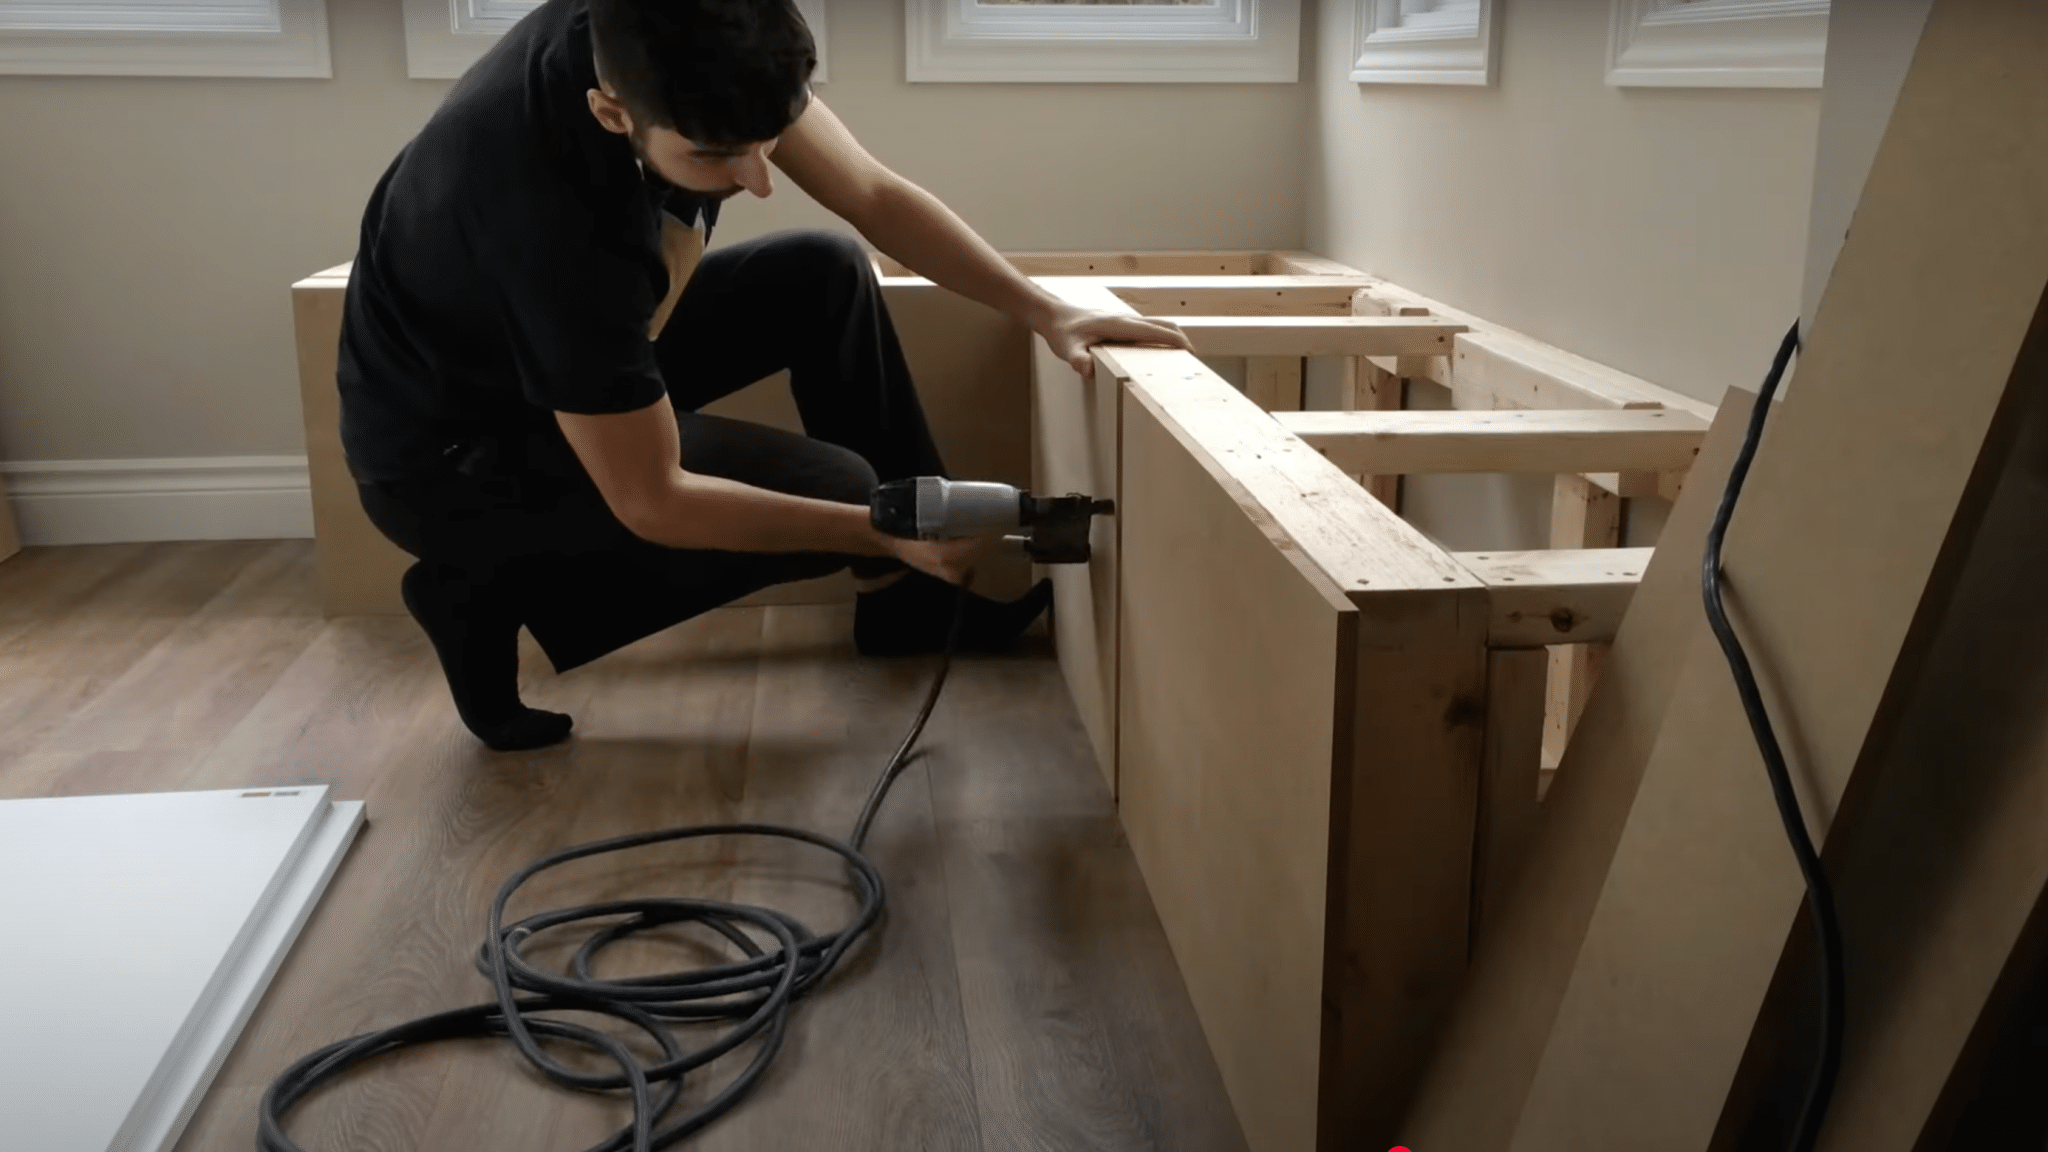
Step 2: Building the Back and Front Frames
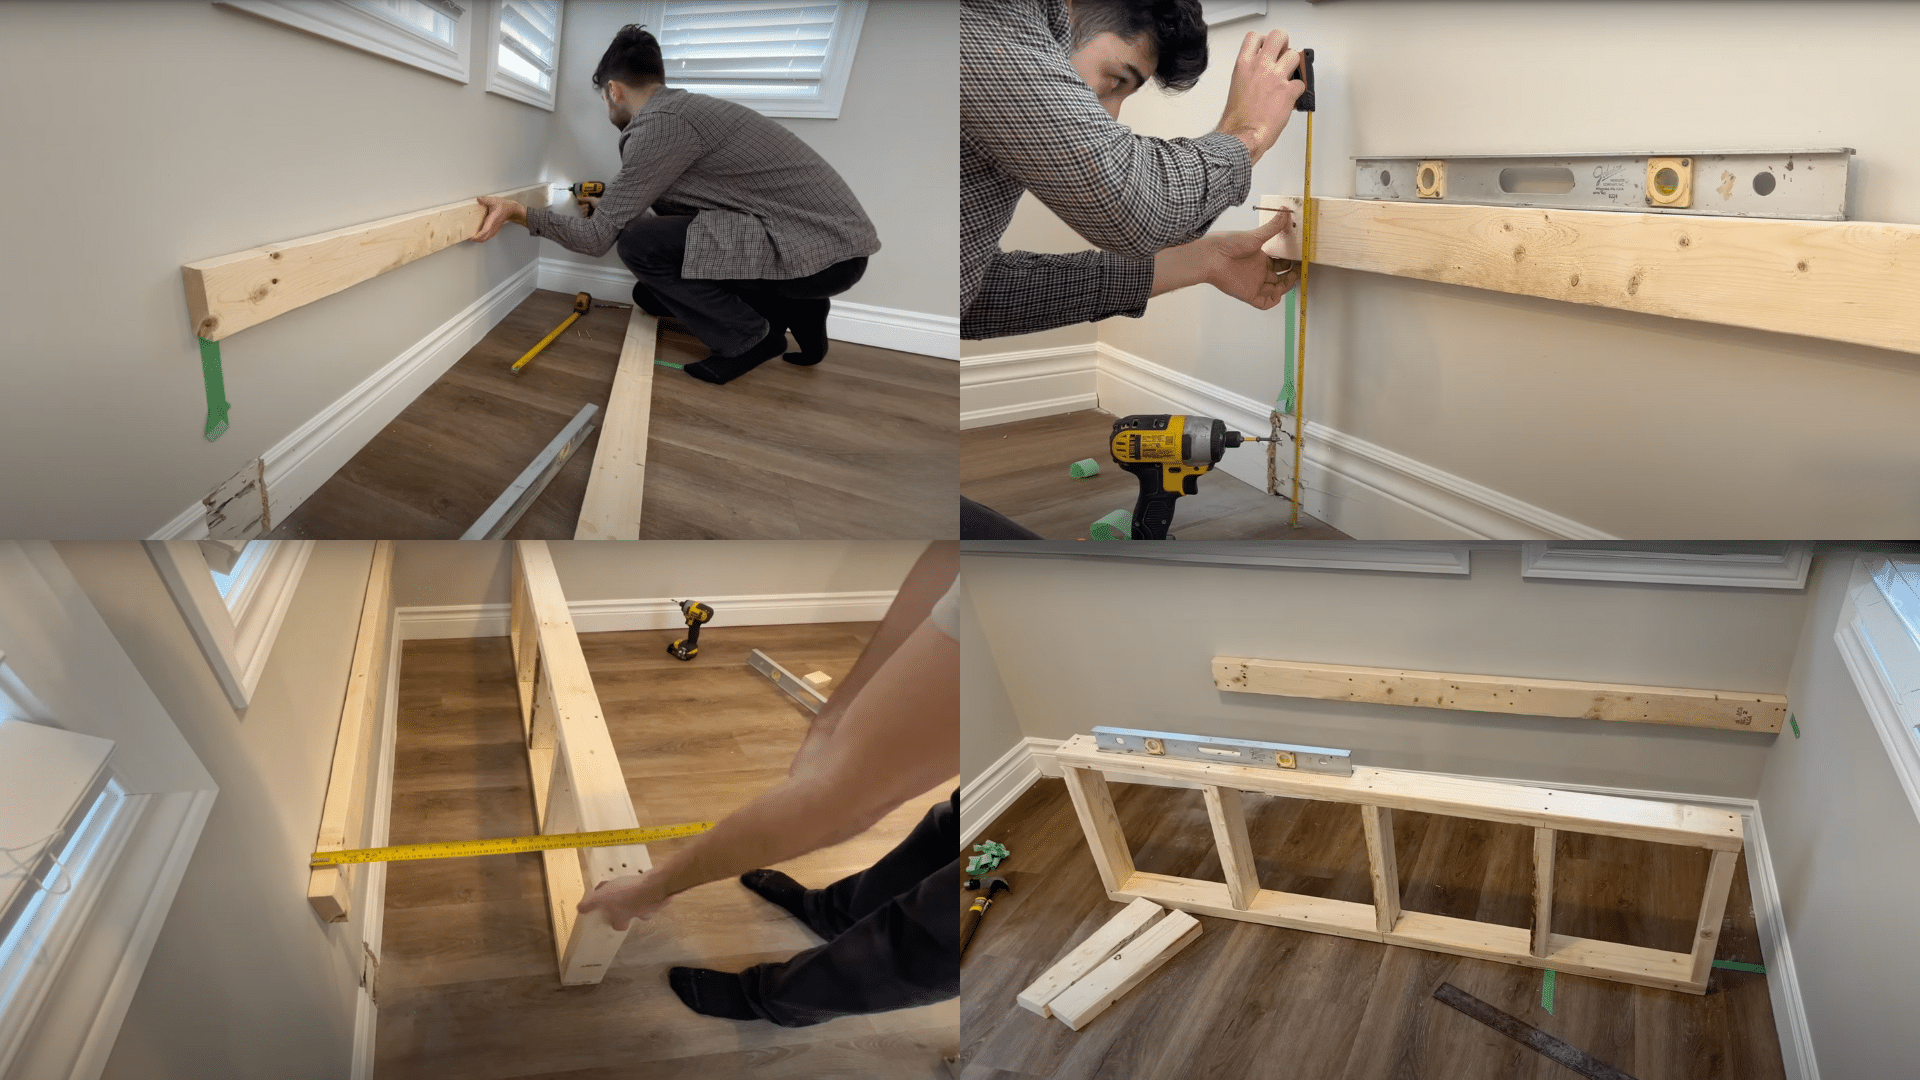
Begin by attaching a 2×4 to the wall at the desired height of the back frame. Ensure it is level before securing it with screws. Then, construct the front frame by cutting and assembling two 2x4s to match the length of the bench, adding vertical legs for support.
Things to Keep in Mind:
- Double-check that the back frame is completely level.
- Leave space for the seat thickness in your height calculations.
- Use long screws for better support and durability.
Step 3: Connecting the Frames and Adding Supports

Once the back and front frames are ready, secure them together using additional 2x4s as cross supports. This strengthens the structure and prevents wobbling. Attach extra support legs under the back frame for added stability.
Things to Keep in Mind:
- A strong frame ensures the bench can hold weight safely.
- Cross supports help prevent sagging over time.
- Use a level frequently to avoid an uneven seat.
Step 4: Framing the Right Side
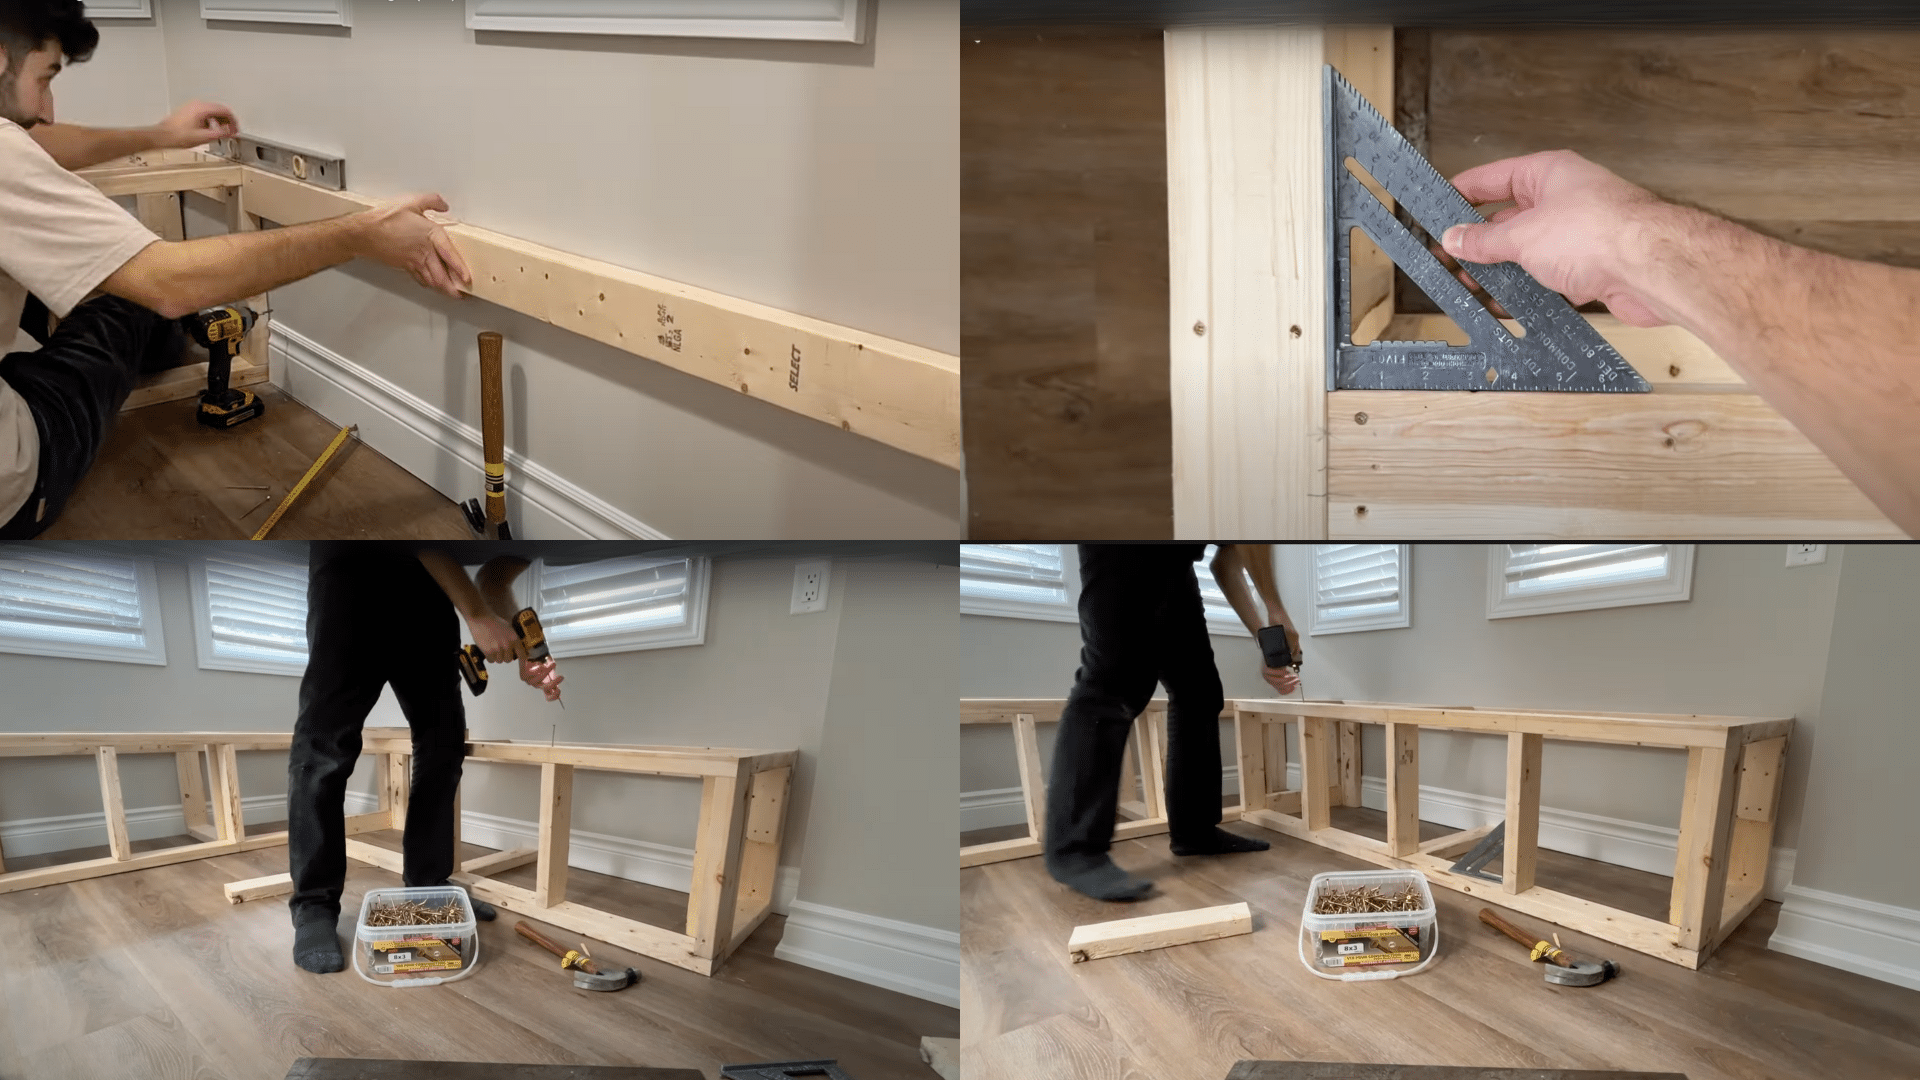
Now, build and attach the side frame to match the dimensions of the left side. Make adjustments as needed to align everything properly. Secure the side frame with screws and add extra bracing if necessary.
Things to Keep in Mind:
- Side frames should align perfectly with the front and back.
- Additional bracing improves overall stability.
- Small adjustments now can prevent issues later.
Step 5: Covering the Frame with MDF Boards
Cut MDF boards to size using a table saw and attach them to the front and sides of the frame using a nail gun.This gives the bench a smooth, professional look and prepares it for painting.
Things to Keep in Mind:
- MDF provides a clean surface for painting.
- Secure the boards firmly to avoid gaps.
- Brad nails make installation quick and neat.
Step 6: Installing Trim and Filling Gaps
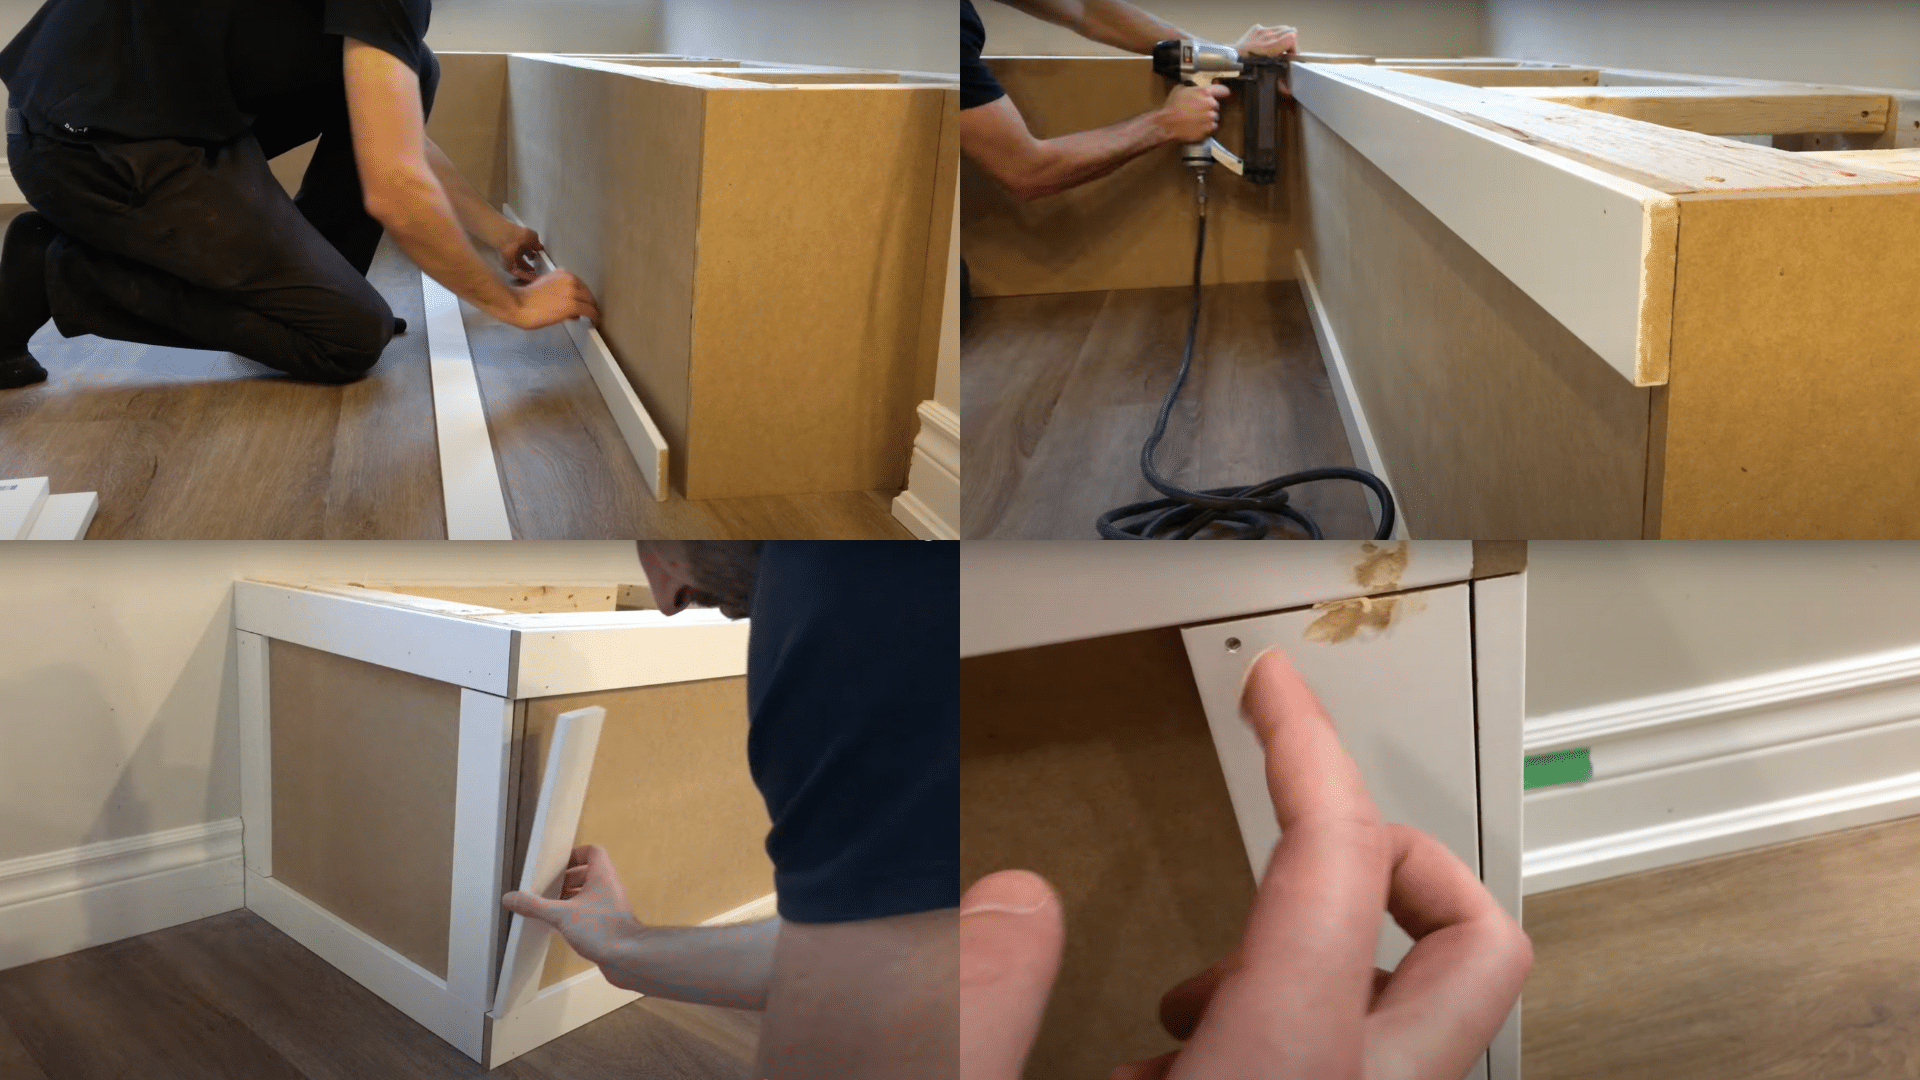
Add pre-painted MDF trim pieces along the edges to enhance the appearance of the bench.Use wood glue and brad nails to attach the trim, and then fill any gaps or nail holes with wood filler for a seamless finish.
Things to Keep in Mind:
- Trim pieces should be cut precisely for a neat look.
- Wood filler helps smooth out imperfections.
- Light sanding improves paint adhesion.
Step 7: Attaching the Seat and Painting
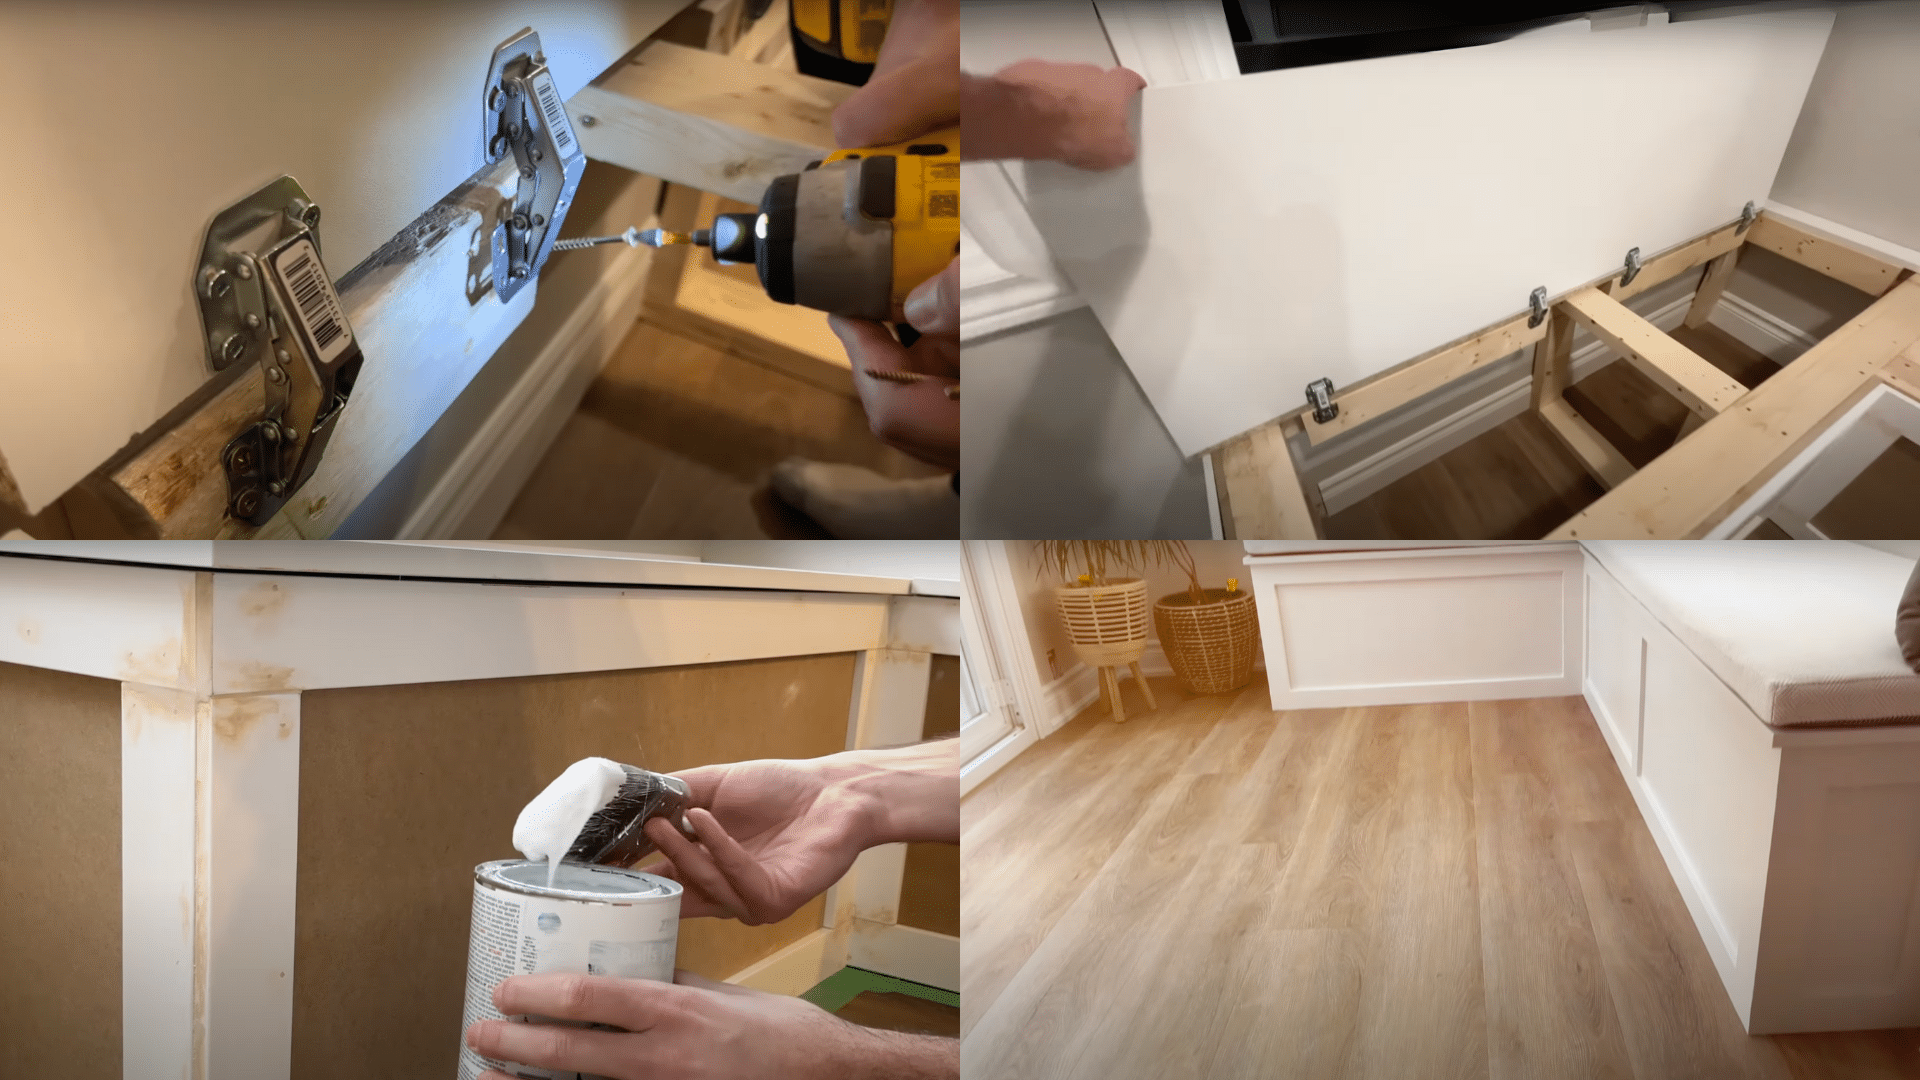
Secure the seat panel in place using hinges if you’re adding storage.Sand the entire bench, then apply primer and two coats of paint for a smooth, even finish. Allow the paint to dry completely before use.
Things to Keep in Mind:
- Hinges should be sturdy and allow easy opening.
- Thin, even coats of paint give the best results.
- Let the paint dry fully to prevent damage.
Watch How It’s Done: DIY Window Seat Video Tutorial
For more information, check out this video tutorial by nickdesgn
Common Mistakes to Avoid
Even with careful planning, DIY projects can come with challenges. Here are some common mistakes to watch out for when building your window seat:
- Ignoring Wall and Floor Alignment – Not all walls and floors are perfectly straight. If you don’t account for slight misalignments, your bench may not sit flush against the wall or floor. Use shims if needed.
- Skipping Storage Accessibility Planning – If your bench has storage, think about how it will open. Failing to leave enough clearance for hinges or using the wrong hinge type can make access difficult.
- Not Sanding Between Paint Coats – A smooth finish requires sanding between primer and paint coats. Skipping this step can leave you with a rough or uneven surface.
- Using the Wrong Fasteners – Screws and nails serve different purposes. Using nails where screws are needed can lead to a weak frame, while using oversized screws may split the wood.
-
Underestimating Material Needs – Running out of materials midway through can lead to delays. Always buy a little extra wood, nails, and paint to avoid multiple trips to the store.
Taking your time and paying attention to these details will help you achieve a professional-looking window seat.
Your Cozy Corner Awaits!
And there you have it—your very own window seat, built with your own two hands!
Remember, it doesn’t have to be perfect. Those little imperfections? They’re what make your window seat unique and truly yours. That’s something no store-bought piece could ever give you.
Grab a cup of tea, settle in, and feel that satisfaction wash over you as sunlight streams through the window.
You’ve created more than just a seat—you’ve added a special spot that transforms how you experience your home every day.
Whether it becomes your reading nook, morning coffee spot, or the place where guests naturally gather, your window seat will bring joy for years to come.
So, add those cushions, grab that blanket, and settle in. You didn’t just build a window seat—you created a little slice of comfort that’s all your own.