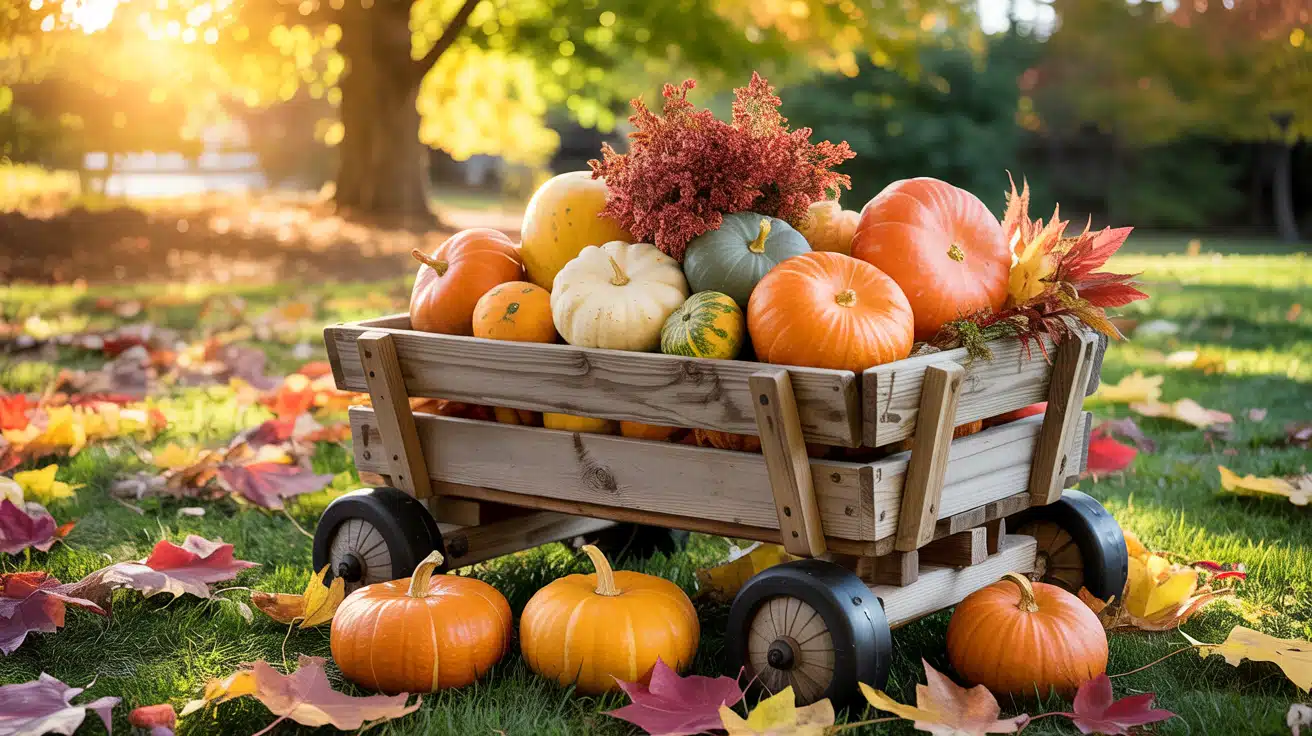
Finding the perfect way to showcase seasonal decor can be challenging when you lack porch steps or sufficient display space. I faced this exact problem when I moved to my new house and missed having spots to place my beloved fall pumpkins.
I can help you solve this display dilemma with a simple DIY wagon that works for multiple seasons.
This wooden cart not only looks great with pumpkins and mums, but it can also be used year-round for Christmas greenery and spring flowers.
In this guide, I’ll walk you through making a sturdy, good-looking wagon using basic tools and materials you can find at any home store. Let’s build something useful and fun!
Best Types of Wood for Outdoor Durability
When making an outdoor wagon, the choice of wood is crucial. Here are some good options:
- Cedar – Naturally fights rot and insects. It has a reddish tone that weathers to a silver-gray over time. It’s soft enough to work with but strong enough for your wagon.
- Pine – Very budget-friendly and readily available. With proper sealing, pine can last several years outdoors. This is what I used for my wagon project.
- Oak – Harder and heavier than pine or cedar. It’s very strong, but it costs more and can be more difficult to cut and drill.
- Redwood – Has natural oils that help it last outdoors. It resists warping and shrinking well. The color ranges from light red to deep brown.
- Cypress – Contains a natural oil called cypressene that helps it resist rot. It’s a medium-weight material that’s fairly easy to work with.
Pros and Cons of Using Softwood vs. Hardwood
| Wood Type | Pros | Cons |
|---|---|---|
| Softwood (Pine, Cedar, Cypress) | • Easier to cut and drill • Costs less • Lighter to move around • Takes stain well |
• Dents and scratches are more easily • May not last as long • Can warp with moisture changes |
| Hardwood (Oak, Maple, Walnut) | • More long-lasting • Better scratch resistance • Less warping over time • Often has nicer grain patterns |
• Costs more, sometimes a lot more • Heavier to move • Harder to cut and drill • May need special tools |
How to Properly Treat Wood for Weather Resistance

Making your wagon last through the seasons requires some preparation. Here’s how to treat your wood:
- Sand thoroughly – Start with rough sandpaper and work your way up to finer grit. Smooth wood takes treatments better.
- Apply a wood sealer – This blocks moisture from getting into the wood. Apply one or two coats and allow them to dry completely.
- Use outdoor stain – I applied a coat of stain to my wagon box. Select a stain that contains UV blockers to prevent sun damage.
- Top with clear sealant – After staining, add a clear outdoor sealant for extra protection. Look for “exterior grade” on the can.
- Yearly touch-ups – Check your wagon each spring. Add a fresh coat of sealant if the wood looks dry or the finish is wearing thin.
Materials Needed for Your DIY Wagon
| Material | Quantity | Purpose |
|---|---|---|
| 2×4 board | 1 | For building the base frame |
| 1×8 boards | 2 | For creating the box/container |
| Casters (wheels) | 4 | To make the wagon mobile |
| Dowel rod | 1 | For creating the handle |
| Eye bolts | 2 | To attach the handle to the wagon |
| 2½-inch pocket hole screws | Pack | For assembling the base frame |
| 1¼-inch pocket hole screws | Pack | For assembling the box |
| Black paint | 1 can | For painting the base frame |
| Wood stain | 1 can | For staining the box and handle |
| Corner brackets (black) | 4-8 | For decorative purposes and added strength |
| 1×2 scrap piece | 1 small piece | For part of the handle assembly |
Tools Required for Your DIY Wagon
| Tool | Purpose |
|---|---|
| Miter saw | For cutting boards to size |
| Pocket hole jig (Craig 320) | For drilling pocket holes |
| Drill | For driving screws and pre-drilling holes |
| Screwdriver | For attaching hardware |
| Paintbrush | For applying paint and stain |
| Measuring tape | For accurate measurements |
| Pencil | For marking cut lines |
| Safety equipment (goggles, etc.) | For protection while working |
Step-by-Step Guide to Building a DIY Wagon
Step 1. Cut your base frame pieces
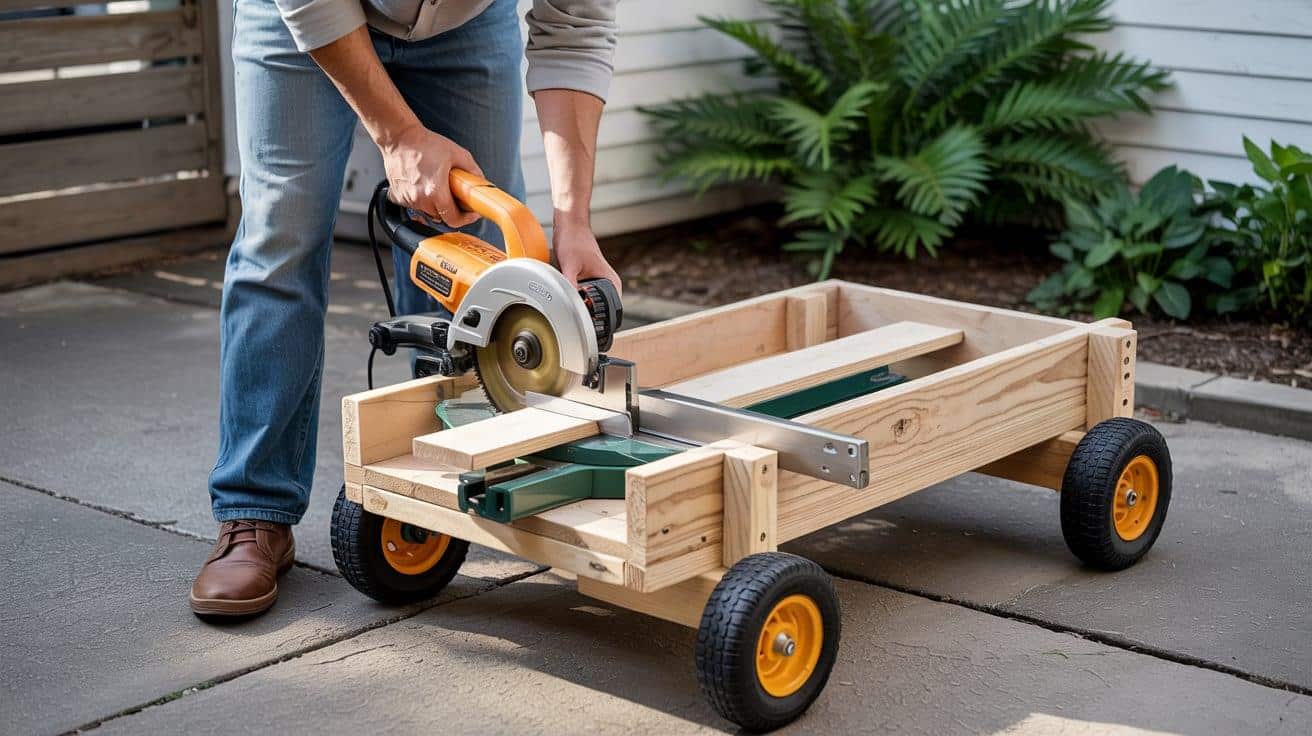
Using your miter saw, cut one 2×4 board into two longer sides and two shorter sides according to your planned wagon size. The exact measurements depend on how big you want your wagon to be.
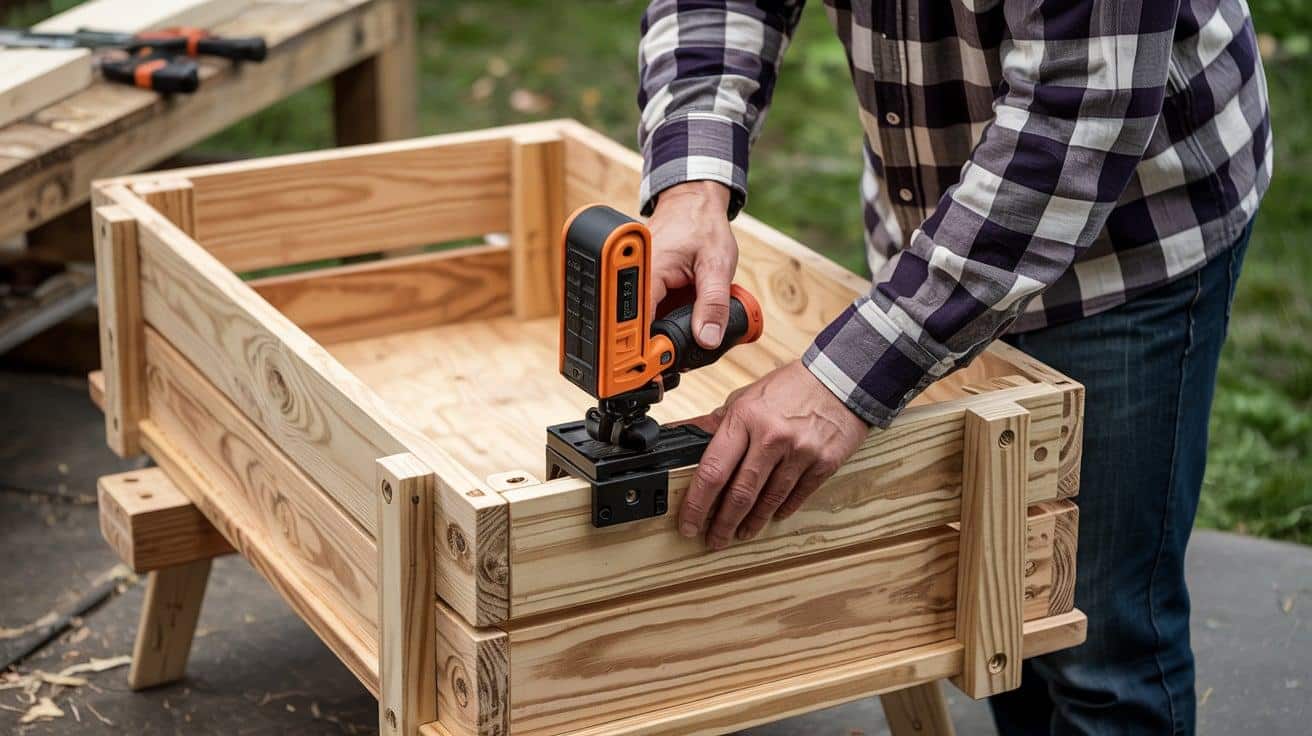
Step 2. Drill Pocket Holes in the Short Sides
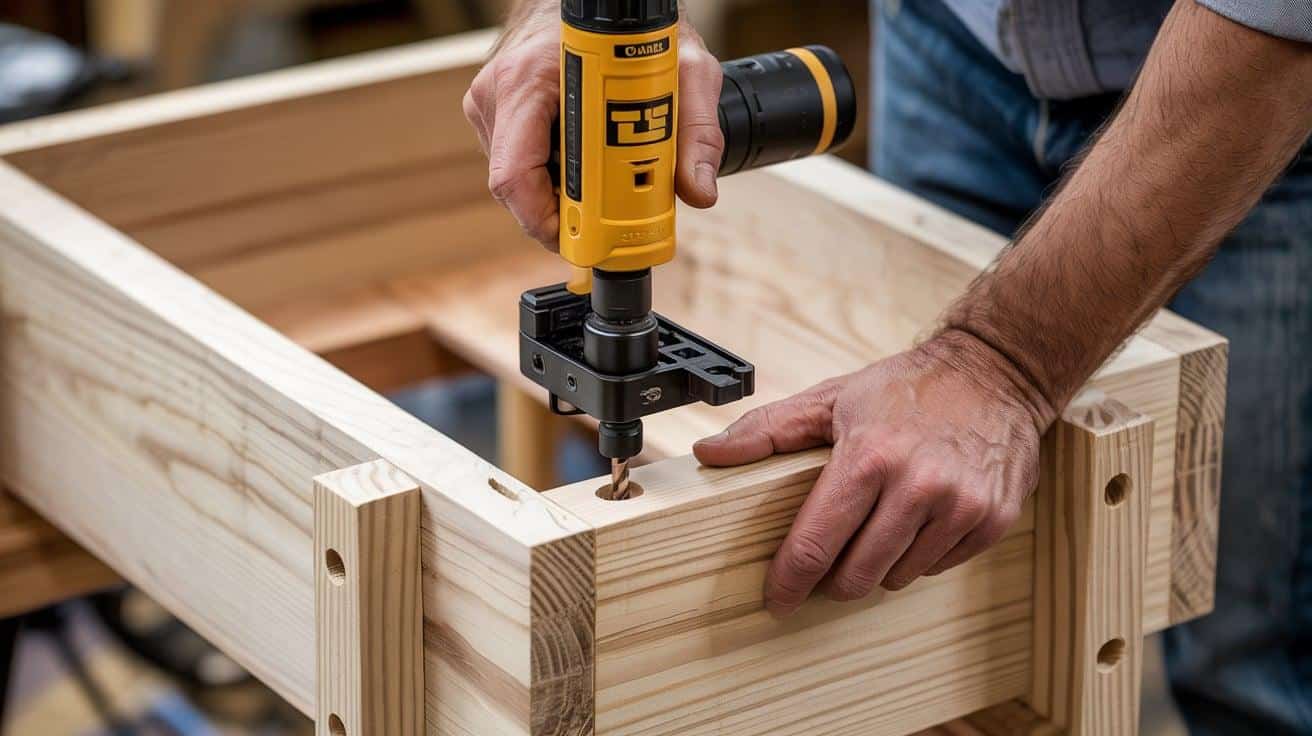
Adjust your pocket hole jig for 1½-inch thick material. Drill pocket holes into both ends of the two shorter base pieces for connecting the frame.
Step 3. Assemble the Base Frame
Connect the four base pieces using 2½-inch pocket hole screws to form a rectangle. Make sure to check that your corners are square before tightening all screws.
Step 4. Attach the Casters
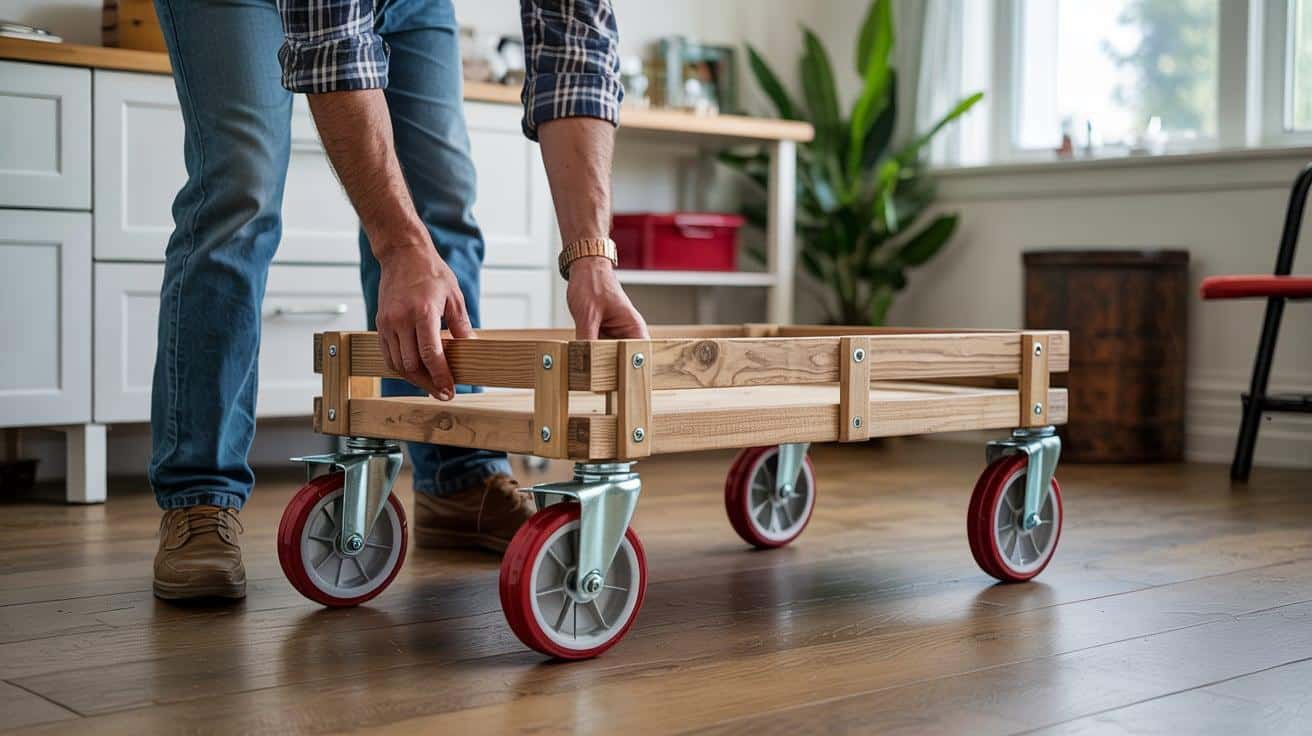
Flip your base frame upside down and screw the four casters onto each corner. This will make your wagon mobile and easy to move around.
Step 5. Paint the Base
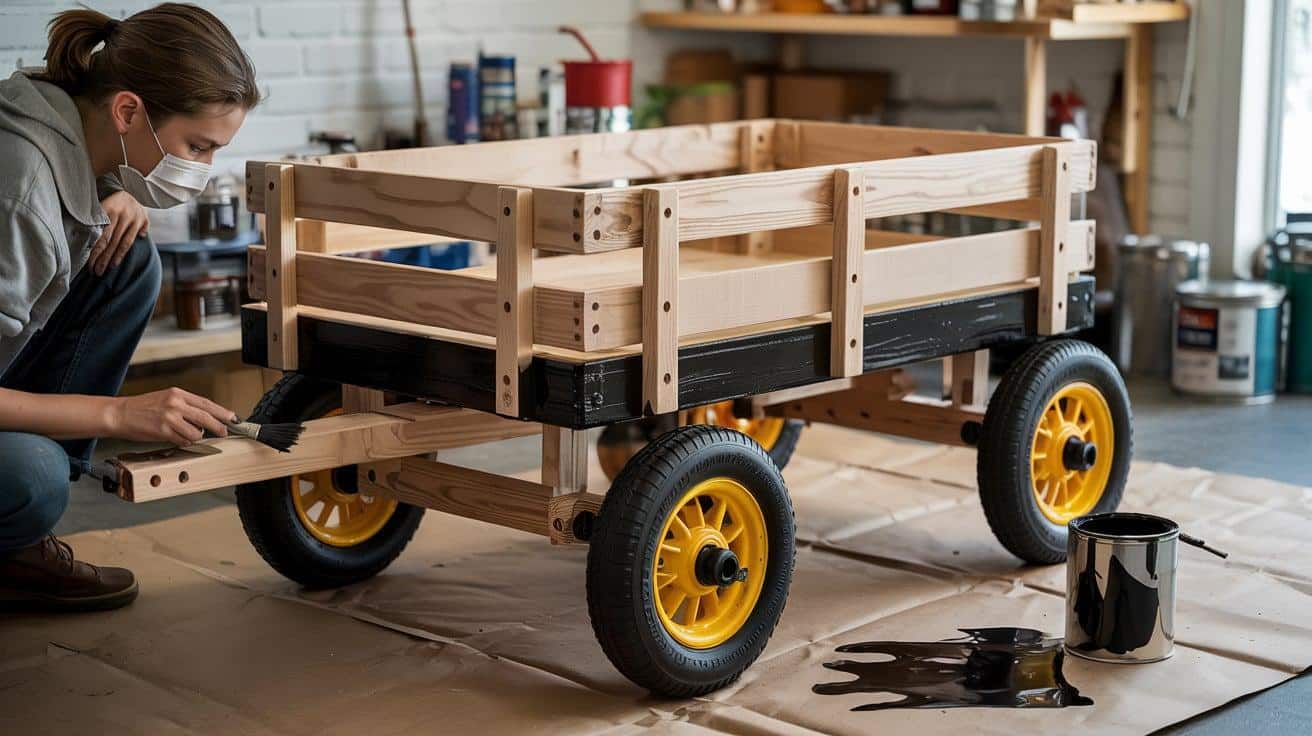
Apply black paint (or your chosen color) to the base frame and let it dry completely while you work on the box.
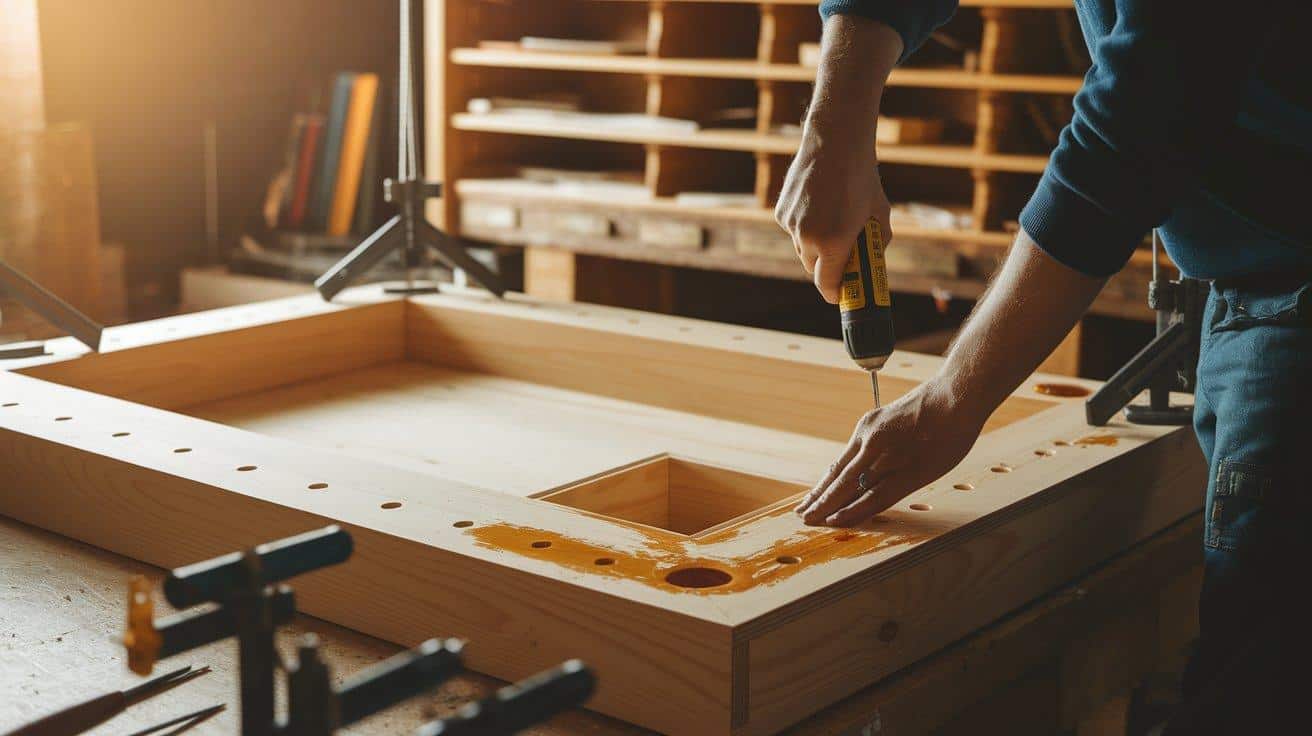
Step 6. Create the Box Bottom
Cut 1×8 boards for the box bottom. Adjust your pocket hole jig to ¾-inch setting and join these boards together using pocket holes and screws.
Step 7. Build the Box Sides
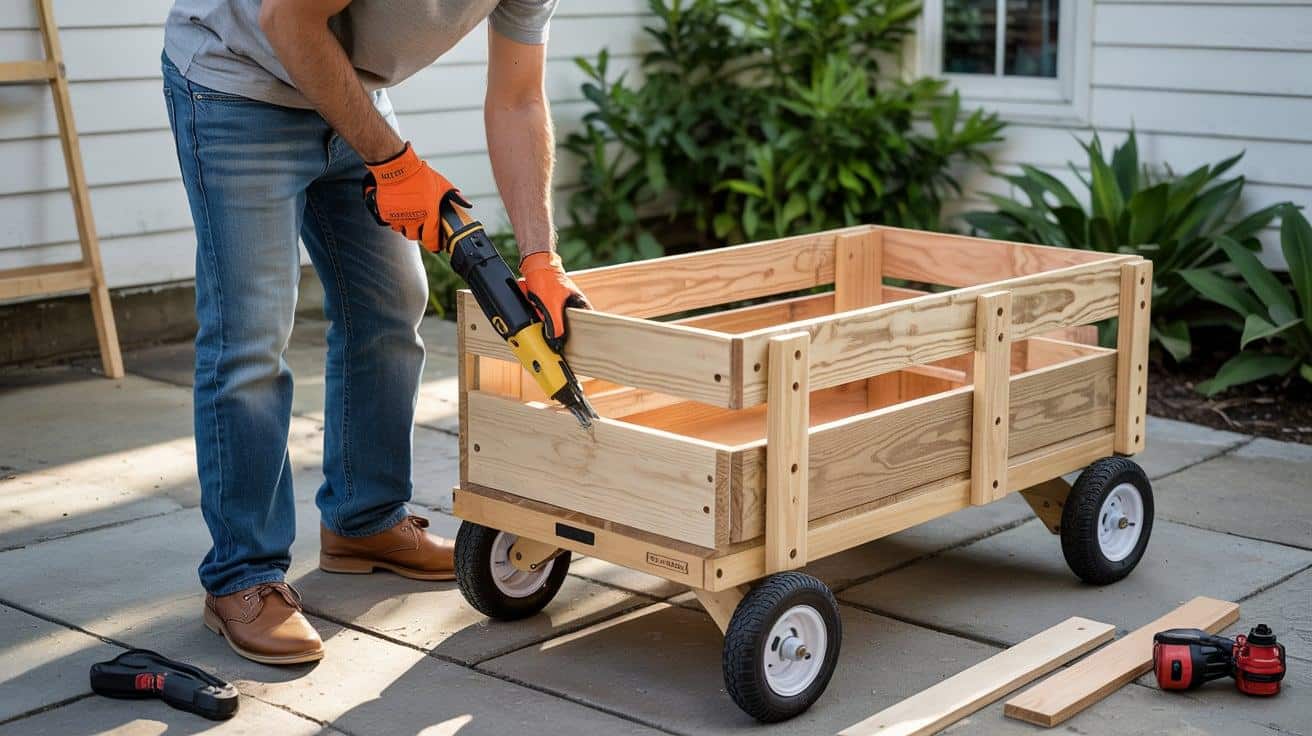
Cut four additional pieces from your 1×8 boards for the box sides. Drill pocket holes along the bottom edges and connect all sides to form a complete box.
Step 8. Stain the Box
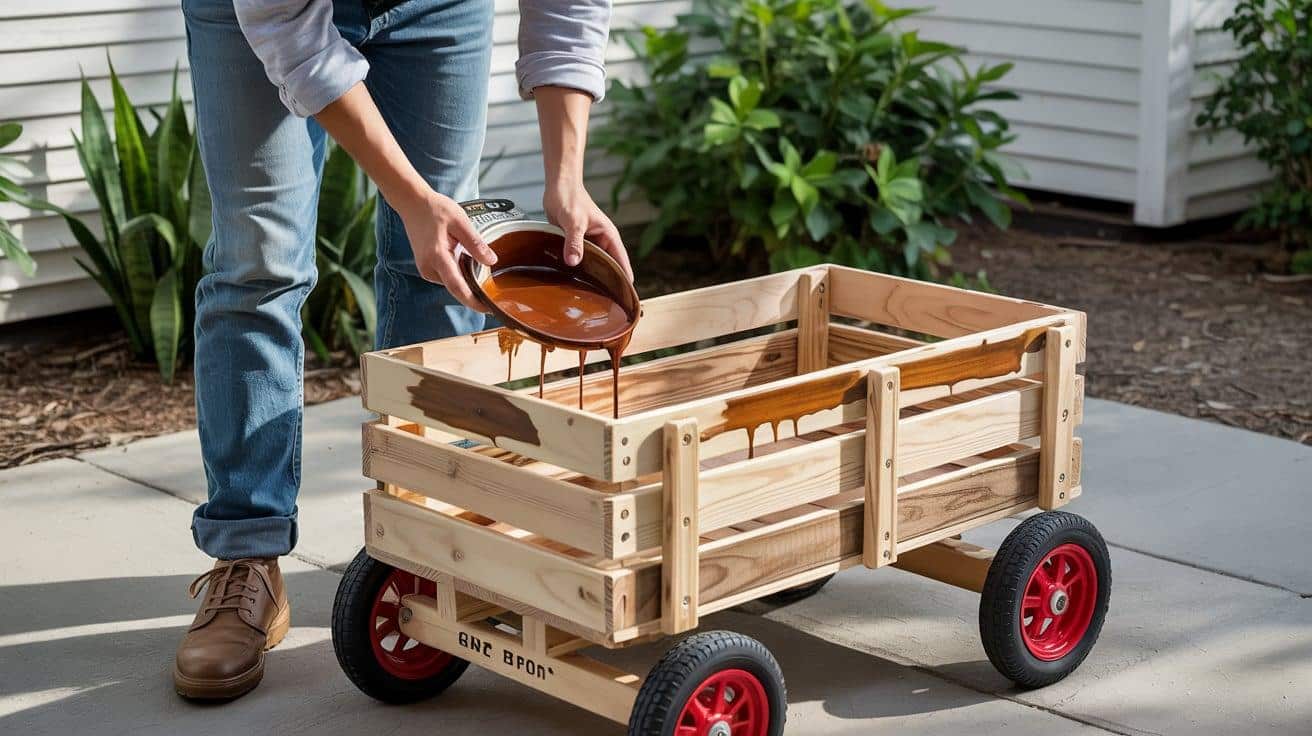
Apply wood stain to the box and let it dry completely before attaching it to the base.
Step 9. Attach the Box to the Base

Center the box on top of the base frame and secure it with screws through the bottom of the box into the frame at each corner.
Step 10. Add the Handle
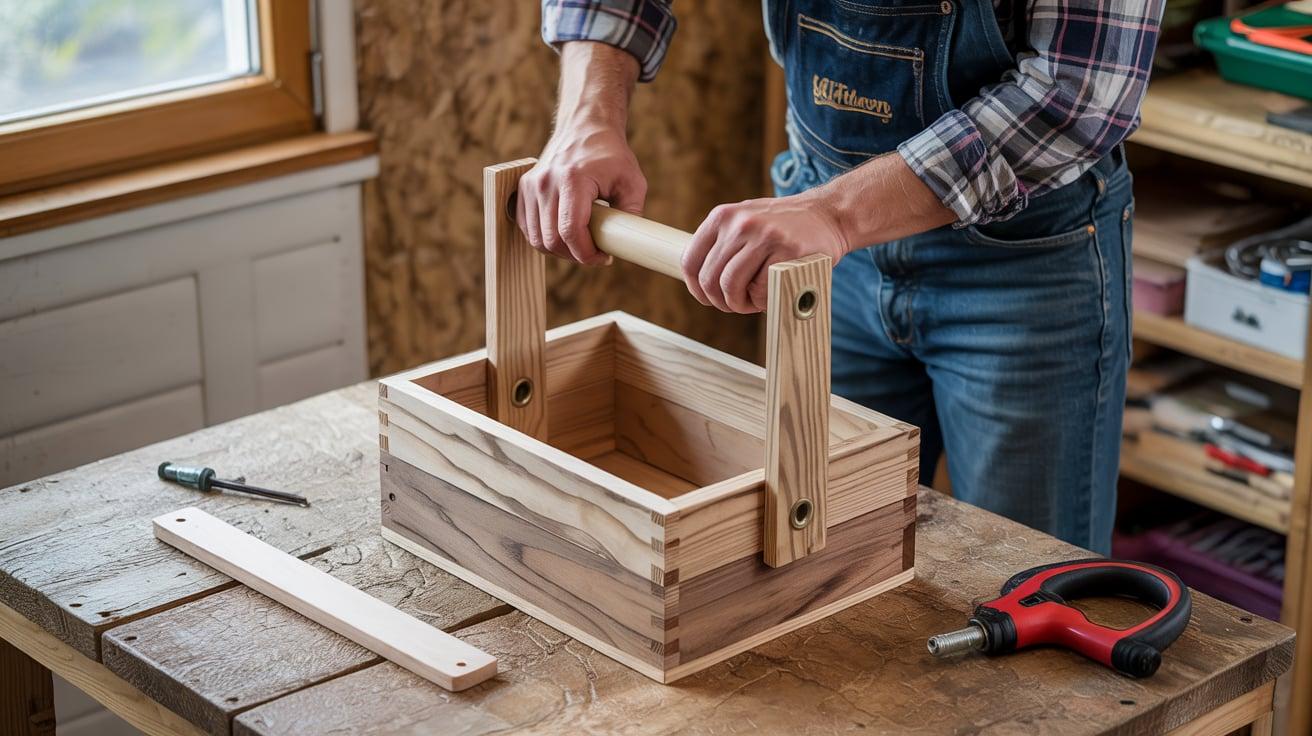
Pre-drill holes in the front of the base frame, insert eye bolts, and thread the dowel rod through. Attach a 1×2 piece at the top for grip. Stain the handle to match the color of the box.
Check out this YouTube video for detailed step-by-step guidance for creating a Charming DIY Wagon
Decorating Your DIY Wagon for the Seasons
Fall Decor Ideas for Your Wagon
Fall is when this wagon truly shines as a display piece. Start with a mix of pumpkins in different sizes and colors – try white, orange, and green for variety. Small and medium pumpkins work best, as they are less likely to tip over.
Add some mums in pots for bursts of color. Pick shades that match your home’s color scheme. Yellow, burgundy, and orange mums look great with pumpkins.
Tuck some fake fall leaves around the base of these items to fill empty spaces.
For more texture, include a few small hay bales or corn husks. A string of battery-powered mini lights woven through the display adds a warm glow for evening hours.
Try adding a small chalkboard sign with a welcome message or a fall saying.
How to Incorporate the Wagon in Your Christmas Decor?
When winter arrives, your wagon effortlessly shifts into Christmas mode. Start by filling the base with small potted evergreens or pine branches. Mini Christmas trees (live or fake) fit perfectly in the corners of the wagon.
Add pinecones, red berries, and cinnamon sticks for natural touches.
String battery-powered lights with white or multi-colored bulbs through the greenery. Red ribbon bows on the handle and corners create a gift-like feel.
For a fun touch, place wrapped empty gift boxes in the wagon, or add a vintage Santa figure among the greens. You could also fill the wagon with wrapped presents for a festive front porch display right before Christmas Day.
Transitioning Your Wagon Into Spring Decorations
When spring arrives, your wagon becomes the perfect display for your garden. Fill it with potted spring flowers, such as tulips, daffodils, and pansies, in bright colors. Mix in some green plants for contrast.
Add a watering can, small garden tools, or a pair of gardening gloves for a lived-in look. A bird house or nest adds a sweet spring touch.
Small bunches of fake or real pussy willows standing tall in the back corners give height to your display.
Try a sprinkle of moss between pots for a garden feel. As the season moves toward summer, switch to heat-loving flowers and maybe a few potted herbs that guests can smell as they pass by your welcoming wagon.
Common Mistakes to Avoid when Building a Diy Wagon
1. Not Double-Checking Measurements
- Cutting boards too quickly – Measure twice, cut once is a rule for a reason. Taking an extra minute to verify measurements saves wood and prevents frustration.
- Forgetting to account for wheel height – Your wagon’s final height includes the casters. Factor this in when planning how tall your display will be on your porch.
- Ignoring the dowel rod diameter – Make sure your dowel rod fits through your eye bolts before you buy them. This small detail can cause big headaches if overlooked.
2. Using the Wrong Fasteners or Screws
- Using indoor screws for an outdoor project – Regular screws will rust quickly outdoors. Always choose exterior-grade or galvanized screws for outdoor projects.
- Picking screws that are too short – Short screws won’t hold well, especially with the weight of seasonal items. Follow the recommended screw length for each step.
- Overlooking the pocket hole screw sizes – Pocket hole screws come in specific sizes for different wood thicknesses. Using 1¼-inch screws for 2x4s won’t work properly.
3. Forgetting to Reinforce the Bottom of the Wagon
- Skipping the corner brackets – These aren’t just for looks. They help keep your box corners square and strong through seasonal changes.
- Not securing the box to the base properly – The box must be firmly attached to the base at all four corners to prevent shifting when moving the wagon.
- Leaving the bottom as a single layer – A single layer of 1x8s may sag under heavy items. Consider adding support strips underneath for extra strength.
Conclusion
Building your display wagon does more than solve a space problem; it adds charm to your home across all seasons. The simple wooden design fits many styles and needs less work than you might think.
Remember the key points: choose wood that suits your climate, take the time to measure accurately, use outdoor-rated supplies, and double-check that the dowel and eyebolt fit.
This project stands out because it serves multiple purposes throughout the year. While fall pumpkins might be its first job, the wagon easily shifts to hold Christmas trees, spring flowers, or summer plants.
With just a few hours of work, you’ll have a display piece that neighbors will notice and guests will ask about.
