Is your ceiling fan an eyesore in your otherwise lovely room? Most homeowners ignore this fixture until it’s too late.
A simple fan update can change the entire feel of your space without breaking the bank or requiring expert skills. Our recent fan project took just one weekend and cost under $50.
You’ll see how a basic, outdated fan turned into a stylish statement piece that guests now notice for all the right reasons. This quick fix boosted our room’s look more than new furniture would have.
Keep reading to see our step-by-step fan makeover process, including the exact materials we used and helpful tips we learned along the way.
Why Consider a Ceiling Fan Makeover?
Old ceiling fans often work perfectly fine but look outdated. Many people think replacement is the only option. Not true! A makeover offers many benefits for your home and wallet.
Fan makeovers save money compared to buying new models. A complete fan replacement might cost $150-300, while most makeovers run under $50 for supplies.
- Save money – Paint, new light fixtures, and hardware cost far less than a brand-new fan
- Quick weekend project – Most makeovers take just 4-6 hours of actual work time
- No special tools needed – Basic household tools are usually sufficient
Updating your fan helps the environment too. When you fix up your current fan, you keep large items out of landfills. This small choice adds up when many homeowners make the same decision.
A makeover also lets you add your personal touch to your space. You can match your exact color scheme and style, unlike store-bought options that offer limited choices.
Materials and Tools You’ll Need
Here’s what you’ll need to turn your old ceiling fan into a fresh, modern fixture. We’ve separated everything into materials and tools to help you gather supplies efficiently.
Materials
| Category | Key Items | Purpose |
|---|---|---|
| Paint Supplies | Primer, Paint, Sandpaper, Tape | Base coating and finish |
| Fan Parts | Blades, Covers, Light Kit | Main visual update |
| Decor Decor | Pull Chains, Medallion, Hardware | Style enhancement |
| Safety Gear | Gloves, Goggles, Dust Mask | Personal protection |
| Cleaning | Degreaser, Microfiber Cloths | Prep and surface cleaning |
Tools
| Tool | Purpose |
|---|---|
| Screwdriver set | Removing and installing parts |
| Pliers | Handling small components |
| Drop cloth | Protecting floors and furniture |
| Step ladder | Reaching the ceiling fan safely |
Step-by-Step Guide to a DIY Ceiling Fan Makeover
Follow these five simple steps to update your ceiling fan without costly replacements. This guide breaks down the process into manageable tasks anyone can handle.
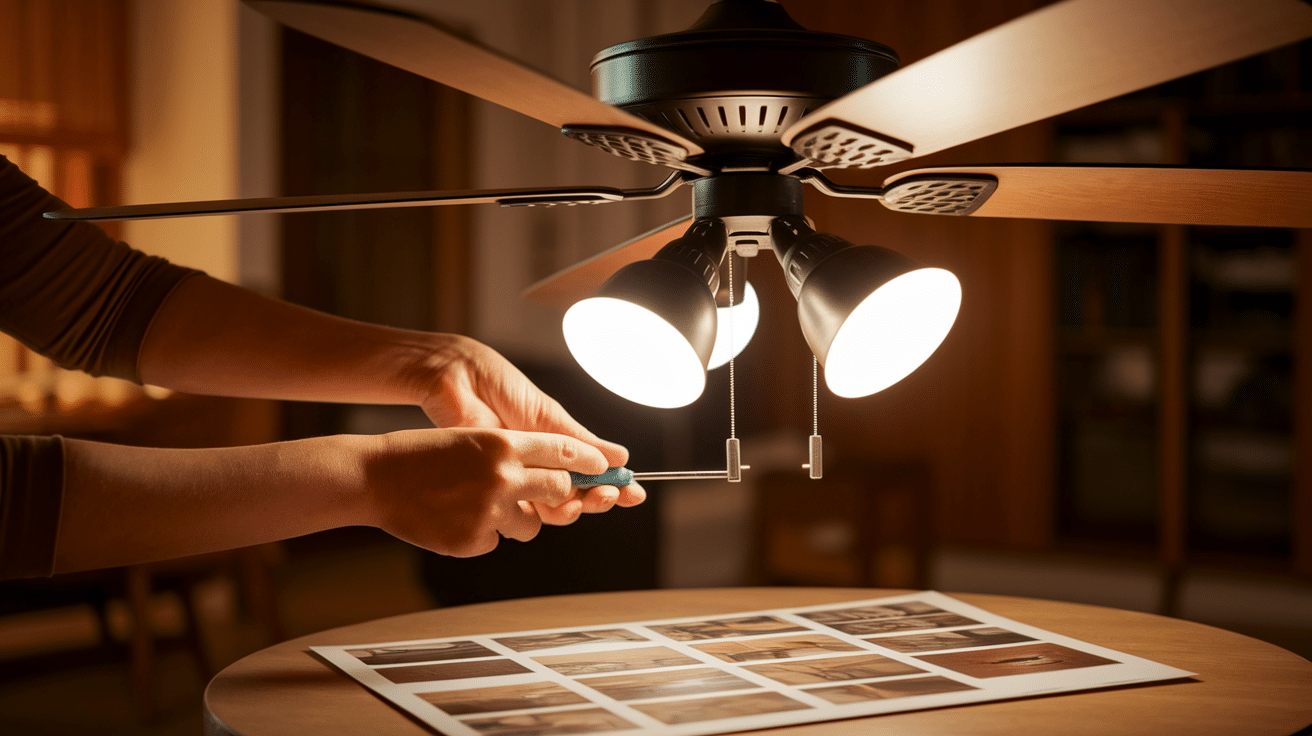
Step1: Preparation

The first step is to safely disconnect and disassemble your fan. This creates a clean slate for your makeover project. Proper prep work will make the rest of the process much easier.
- Turn off the circuit breaker to the room for complete safety
- Take photos before disassembly to remember how parts fit together
- Clean all parts with degreaser to remove dust and sticky residue
Keep in mind: Label small parts and screws in separate bags to avoid confusion during reassembly.
Step 2: Sanding and Priming
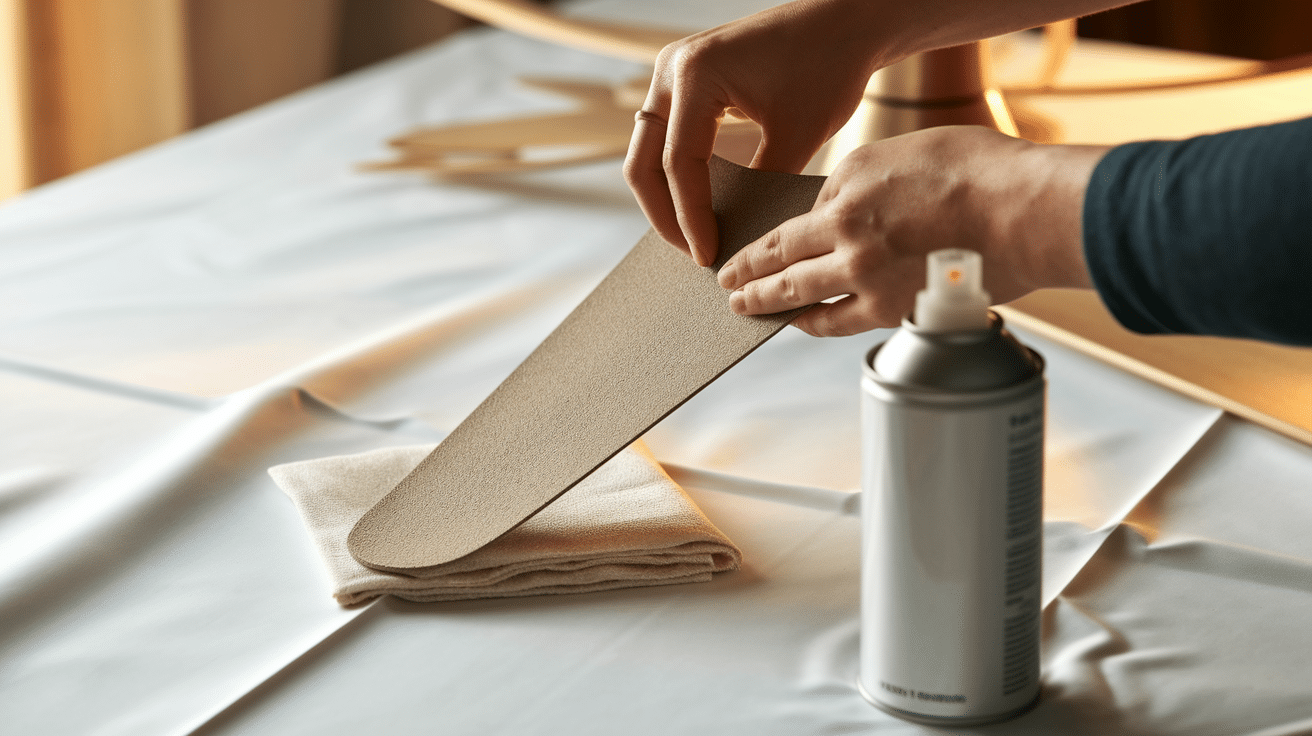
Proper surface preparation ensures your new paint job will last for years. Sanding creates a textured surface for the primer to grip. Most fan makeover failures happen because people skip this step.
- Sand all painted surfaces using 220-grit sandpaper
- Wipe away all dust with a tack cloth before moving on
- Apply thin, even coats of primer to all parts you plan to paint
Keep in mind: Work in a well-ventilated area when priming to avoid breathing in fumes.
Step 3: Painting or Staining
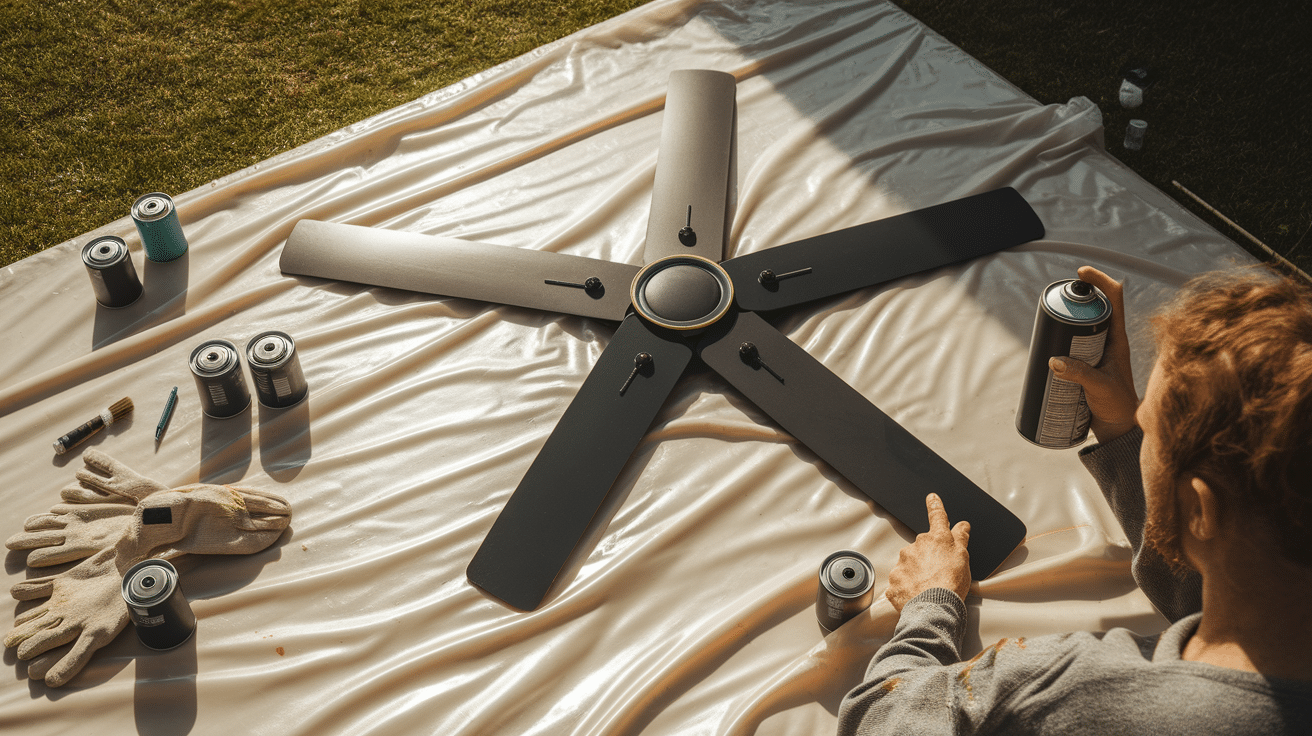
This step makes the biggest visual impact on your fan. Choose your method based on the look you want and your skill level. Quality matters more than speed here.
- Spray paint works best for metal parts and motor housing
- Hand-painting gives you more control for detailed areas
- Allow full drying time between coats for best results
Keep in mind: Temperature and humidity affect drying time, so plan your project when weather conditions are favorable.
Step 4: Upgrading Fixtures and Accessories
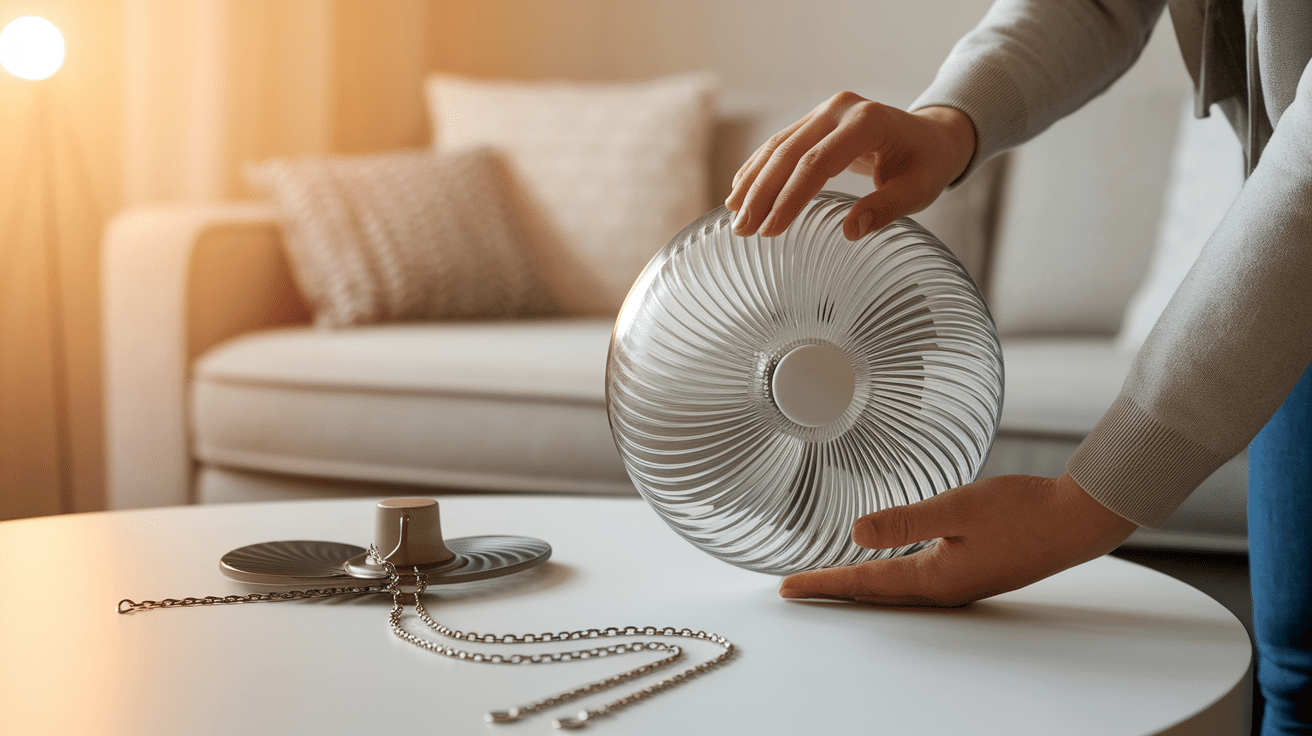
Small changes can make a big difference in your fan’s appearance. This is where you can add personal touches that match your home’s style. Be creative with your choices.
- Replace outdated light globes with modern fixtures
- Add new pull chains with decorative ends that match your decor
- Consider blade covers if your blades are damaged but still functional
Keep in mind: Verify that any new parts you buy are compatible with your fan’s make and model.
Step 5: Reassembly and Final Touches
Putting everything back together properly ensures your fan works safely and looks great. Take your time with this final step to showcase your hard work. Careful reassembly prevents wobbling issues.
- Follow your photos from disassembly to guide reassembly
- Tighten all screws firmly but avoid over-tightening
- Balance the blades if you notice any wobbling after installation
Keep in mind: Test the fan at all speeds after reassembly to ensure everything works correctly before considering the project complete.
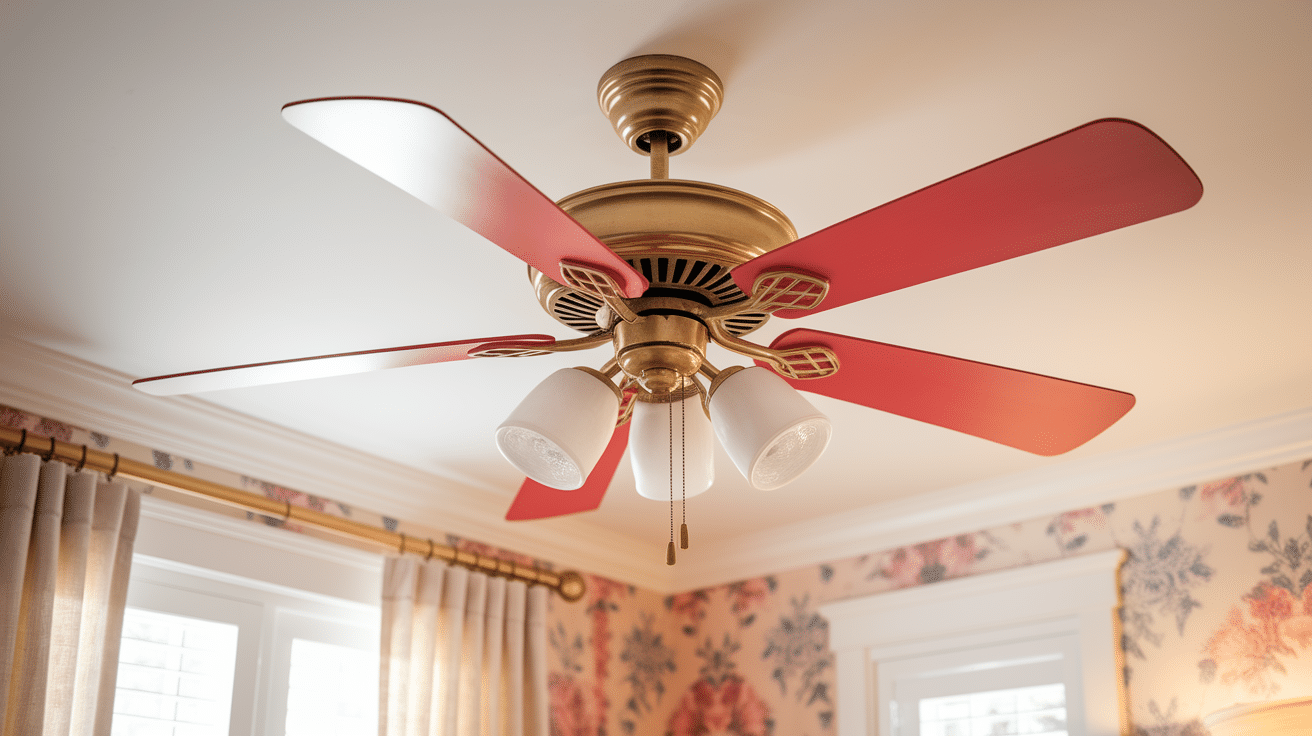
Image Comparison: Before and After Ceiling Fan
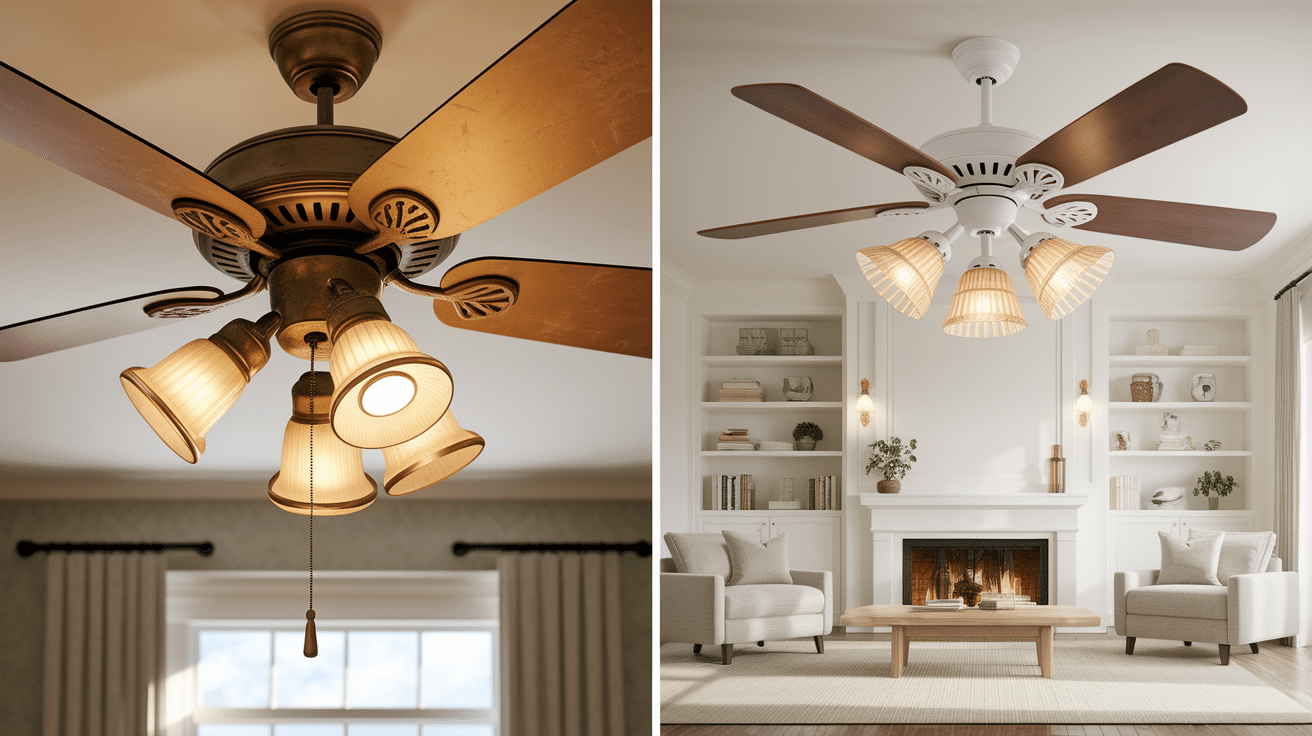
Before: The old fan shows a dated brass finish with tarnish marks throughout. Fan blades appear scuffed and discolored from years of dust buildup. The light fixture features yellowed globe covers that dim the light output. Pull chains and hardware look worn and mismatched with the room’s current style.
After: The updated fan boasts a fresh, modern paint finish that complements the room. Clean blades with new stain bring warmth to the space. Crystal-clear light covers brighten the entire area. Matching hardware and decorative pull chains create a cohesive look that enhances the room’s design.
Common Mistakes to Avoid
- Rushing the disassembly process – Taking apart your fan without documenting or labeling parts leads to frustrating reassembly problems and lost hardware.
- Not sanding properly – Skipping this step or sanding too lightly means paint won’t stick well, leading to peeling and chipping soon after your project is complete.
- Skipping primer – Going straight to paint without primer results in poor adhesion and uneven color, especially on slick metal surfaces.
- Choosing the wrong type of paint – Using interior paint on outdoor fans or standard paint instead of heat-resistant options near bulbs causes bubbling and flaking.
- Painting in poor conditions – Applying paint in high humidity or cold temperatures prevents proper curing and creates a sticky finish that collects dust.
- Ignoring balance issues when reinstalling blades – Failing to check blade alignment causes wobbling that can damage your fan motor over time.
- Over-tightening hardware – Forcing screws too tight can strip threads, crack plastic components, or cause blade warping that affects performance.
Tips for Maintaining Your Updated Fan
1. Cleaning techniques to protect paint finish
- Use a microfiber cloth with mild soap and water for monthly dusting instead of paper towels that can scratch the finish
- Avoid chemical cleaners with ammonia or alcohol that can strip paint over time
2. How to spot and fix minor wear over time
- Check screw areas regularly for paint chipping and touch up with a small craft brush
- Look for signs of finish dulling and apply a thin coat of furniture wax for protection
3. Seasonal checkups for functionality and aesthetics
- Listen for new noises which might indicate parts need adjustment or lubrication
- Test all speeds and functions twice yearly to catch issues before they affect your fan’s appearance
Conclusion
A ceiling fan update does more than just change how your room looks. It brings new life to a functional item that you use daily. With the right materials and a few hours of work, you’ve turned a forgettable fixture into something worth looking at.
Remember that small touch-ups will help maintain your fan’s fresh look. Set a reminder to clean and check your fan every few months to keep it in top shape.
We hope this guide has shown you that home fixes don’t need to be costly or hard. What other items in your home might need a simple update? Let us know in the comments which project you plan to tackle next!
