

What if your garage floor could go from looking like a crime scene to showroom-ready in just one weekend?
Most homeowners walk past their stained, cracked, and oil-spotted garage floors daily, accepting the concrete chaos as an inevitable part of life.
But here’s the secret thousands of DIY enthusiasts have figured out: garage floor resurfacing isn’t just possible, it’s surprisingly achievable and gratifying.
This budget-friendly project delivers a powerful proposal of benefits that makes it irresistible to homeowners everywhere.
Why Resurface Your Garage Floor?
Your garage floor has probably seen more action than a Hollywood stunt double, enduring oil spills, salt stains, hairline cracks, and the constant assault of heavy equipment, tools, and vehicles.
These battle scars not only look unsightly but also create safety hazards and make cleaning a nightmare.
Resurfacing addresses these issues head-on, creating a bulletproof barrier that shrugs off chemical spills and resists future cracking. The conversion is remarkable: what once required scrubbing and heavy-duty cleaners now wipes clean with a simple mop.
What You Need to Resurface a Garage Floor
Having everything organized beforehand prevents mid-project store runs that can compromise your results and timeline, ensuring a professional finish.
Tools and Materials
- Floor grinder or concrete scarifier for surface preparation
- High-quality resurfacing compound suited for your floor type
- Mixing buckets and a paddle mixer for proper compound consistency
- Squeegees and application brushes or rollers for even coverage
- Measuring tools and mixing ratios guide for accurate preparation
Safety Equipment
- N95 dust masks to protect lungs from concrete particles and chemical fumes
- Safety goggles to shield the eyes from flying debris during grinding
- Heavy-duty rubber gloves to prevent skin irritation from compounds
- Knee pads for comfort during detailed application work
- Ventilation fans circulate air and reduce dust accumulation
Step-by-Step Guide to Resurfacing Your Garage Floor
Turn your concrete wasteland into a professional-grade surface with this foolproof process that breaks down each critical phase.
Step 1: Preparation
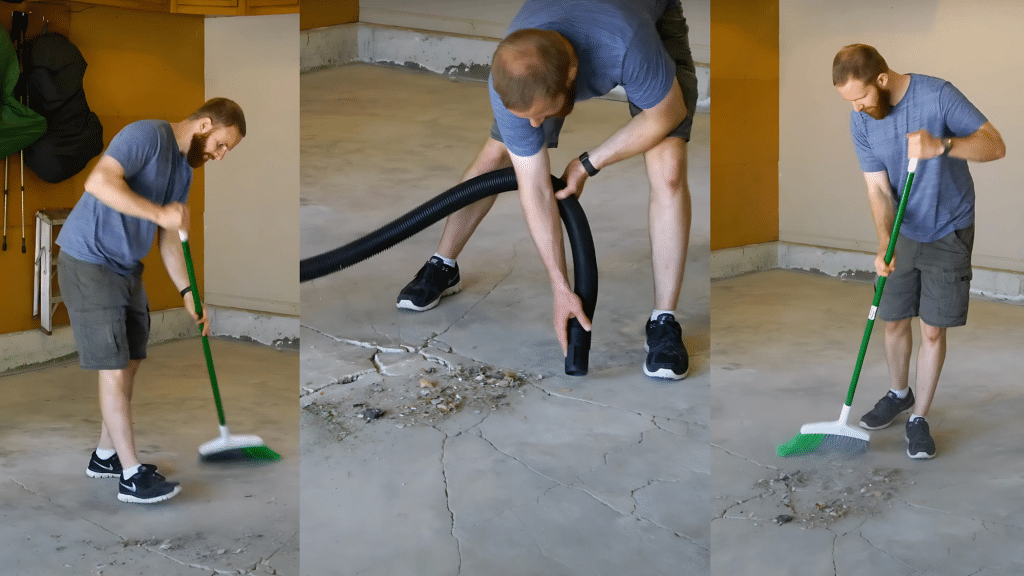
Start by completely clearing your garage and giving the floor a thorough sweep to remove all debris, dirt, and loose particles.
Next, tackle grease stains and oil spots using a heavy-duty degreaser, scrub vigorously and rinse thoroughly. Patch any significant holes or deep gouges with concrete patching compound, allowing it to cure completely.
Skipping this step is like painting over rust, the beautiful finish won’t last, and you’ll be redoing the project sooner than expected.
Step 2: Surface Repair
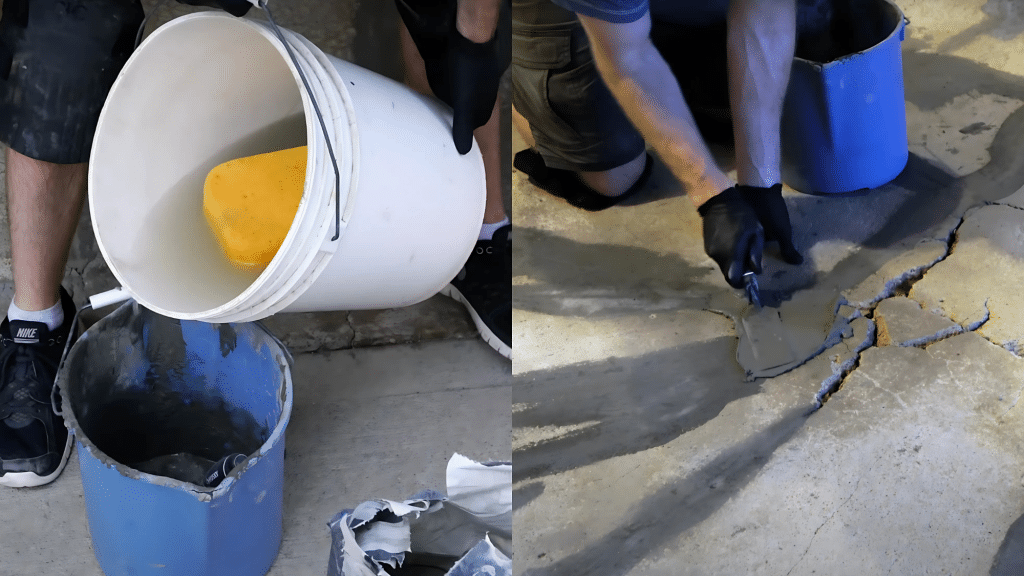
Inspect your floor carefully for cracks, chips, and uneven areas that need attention. Use appropriate concrete crack filler for hairline cracks and more substantial patching compound for larger holes or damaged sections.
Apply the filler slightly above the surrounding surface level, then use a putty knife or trowel to smooth it flush once it begins to set.
A properly prepped surface ensures your resurfacing compound adheres uniformly and creates a seamless, professional appearance.
Step 3: Mixing and Applying the Resurfacer
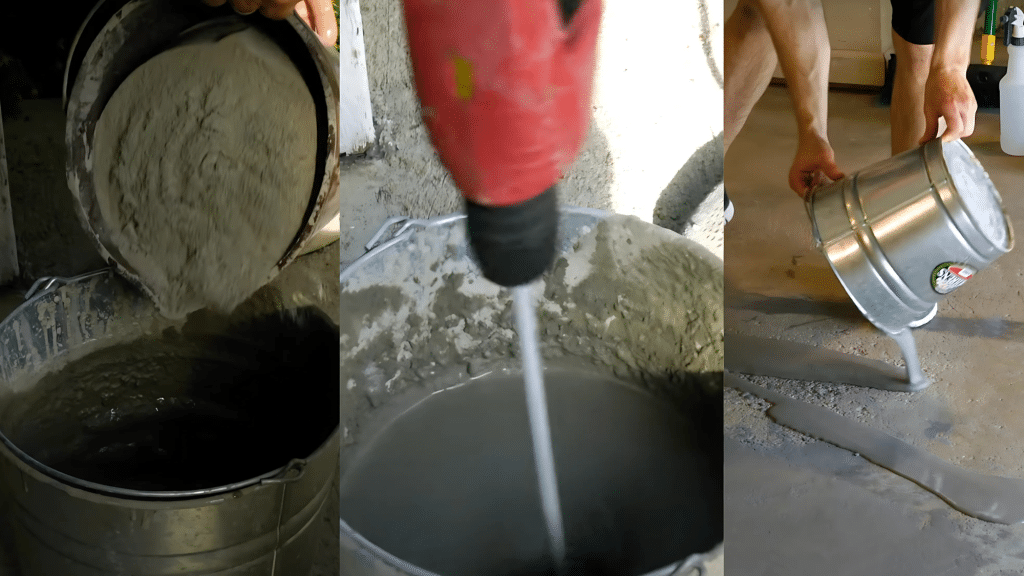
Follow the manufacturer’s mixing ratios exactly; this isn’t the time for creative interpretation. Mix only what you can use within the working time specified, typically 20-30 minutes.
Pour the mixed compound in manageable sections, then use a squeegee to spread it evenly across the surface.
Work quickly but methodically, maintaining consistent thickness throughout. Use long, overlapping strokes to eliminate streaks and ensure uniform coverage that creates a smooth, professional finish.
Step 4: Drying and Curing
Resist the temptation to rush this crucial phase.Most resurfacing compounds require 24-48 hours for initial drying, but full curing takes up to seven days depending on temperature and humidity conditions.
Keep the area well-ventilated but protected from direct sunlight, rain, and temperature extremes during this period. Avoid foot traffic during the first 24 hours and wait at least 72 hours before driving vehicles on the surface.
Proper curing ensures maximum durability and prevents premature wear or failure of your newly resurfaced floor.
Step 5: Final Touches

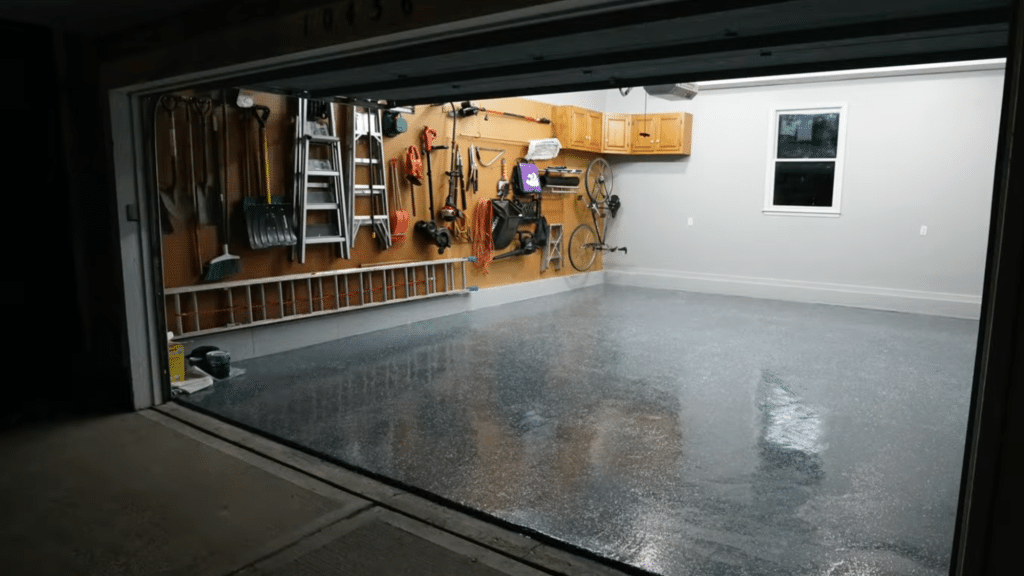
Once your floor has fully cured, consider applying a protective sealer or topcoat for added durability and easier maintenance. This provides extra protection against stains, chemicals, and abrasion.
Choose a sealer compatible with your resurfacing compound and apply it according to manufacturer instructions.
Some homeowners also add decorative flakes or texturing agents during the resurfacing process for improved aesthetics and slip resistance, creating a look that reflects their personal style.
Common Mistakes and Pro Tips
Learn from others’ costly errors and insider secrets to ensure your garage floor project succeeds the first time.
Common Mistakes to Avoid
- Skipping proper surface preparation; inadequate degreasing or rushed crack repair causes peeling within months
- Incorrect application thickness; too thin creates weak spots, while too thick leads to uneven drying and cracking
- Rushing the curing process; impatience during drying separates successful projects from complete failures
- Not mixing compound according to manufacturer ratios; creative interpretation leads to poor adhesion and durability issues
Personal Experiences & Tips
- Practice spreading technique on a small test area before tackling the entire floor
- Keep extra compound mixed for inevitable touch-ups and missed spots during application
- Always prioritize quality prep work over speed; shortcuts during preparation phase guarantee future problems
- Resist walking on the surface early, no matter how tempting; proper curing time ensures maximum durability
- Learn from my mistake: inadequate surface prep caused my first attempt to bubble and peel after three months
How Long Does a Garage Floor Resurfacing Last?
A properly resurfaced garage floor typically lasts 10-15 years with normal residential use, though high-quality materials and meticulous application can extend this to 20+ years.
The lifespan depends heavily on traffic volume, chemical exposure, and climate conditions.
Light residential use in moderate climates yields the longest durability, while heavy workshop activity or harsh weather conditions may reduce longevity to 7-10 years.
Maintenance Tips:
- Clean spills immediately to prevent staining and chemical damage to the surface
- Sweep regularly to remove abrasive dirt and debris that can wear down the finish
- Use mild detergents for routine cleaning; harsh chemicals can break down the resurfacing compound
- Reapply protective sealer every 3-5 years to maintain water resistance and durability
- Address small cracks or chips promptly before they spread and compromise the entire surface
- Avoid dragging heavy objects directly across the floor; use furniture pads or dollies instead
Conclusion
Resurfacing your garage floor yourself delivers unbeatable value that professional contractors simply can’t match.
This DIY project proves that with proper preparation, quality materials, and patience during the curing process, homeowners can achieve professional-grade results without breaking the bank.
Don’t let intimidation hold you back; thousands of homeowners have successfully completed this project using the techniques outlined above.
Your garage deserves better than oil-stained concrete, and you have the skills to make it happen.
Ready to get started? Share your resurfacing experience in the comments below or reach out with any questions about your specific situation.