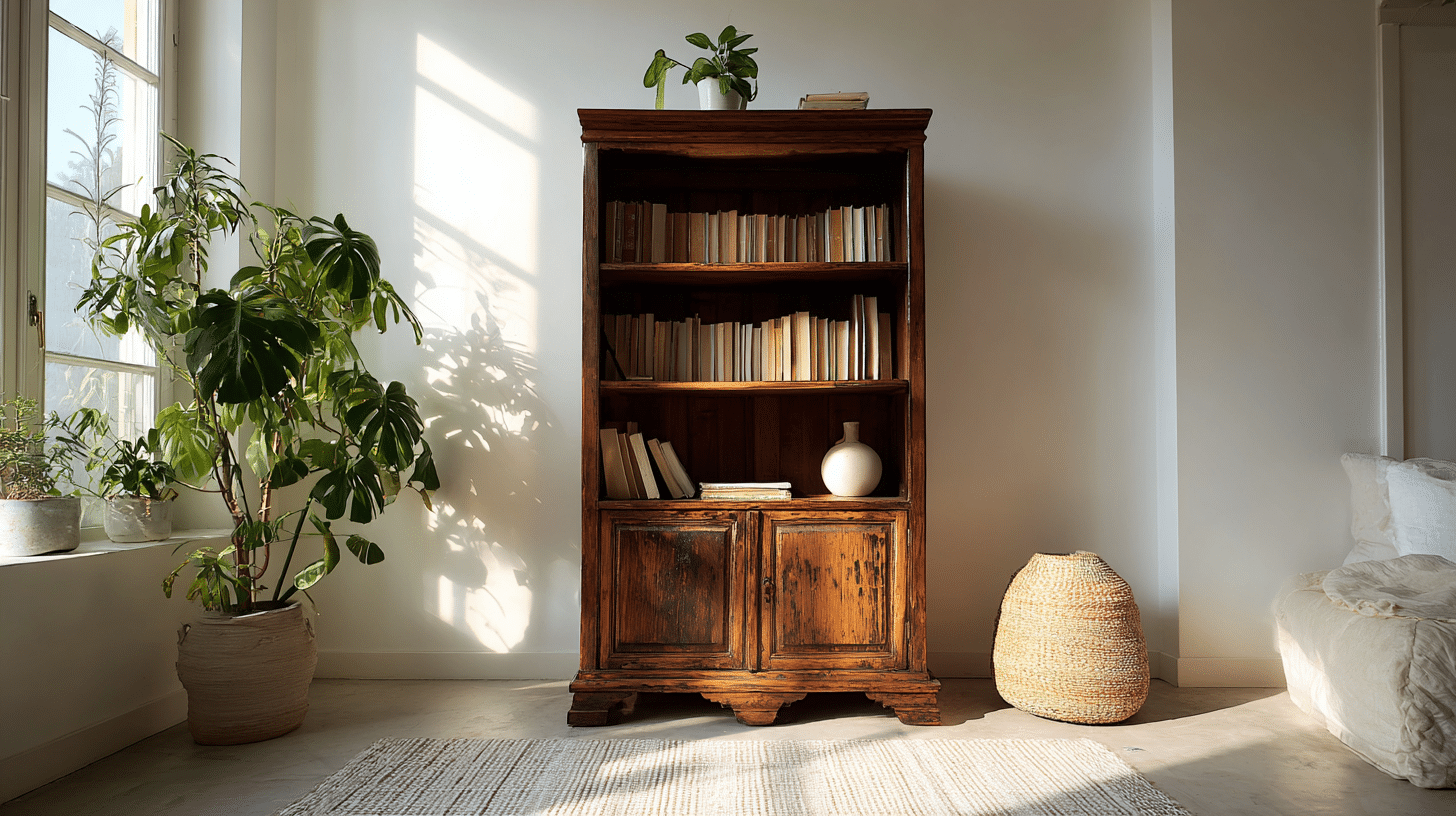

That old bookcase in your garage or attic might look worn and dated, but it holds potential waiting to be opened.
Instead of spending money on a brand-new replacement, consider giving it a makeover that will make it fresh and functional.
Renovating an existing bookcase offers numerous benefits beyond just saving money. You’ll get to create something that perfectly fits your style and space, while keeping a quality piece out of the landfill.
Older furniture often has superior construction compared to new, mass-produced items. With basic tools, you can transform a damaged bookcase into a standout piece.
This guide walks you through the process of repairing structural issues and applying the final coat of paint, helping you restore forgotten furniture.
How a DIY Makeover can be Better than Buying a New Bookcase?
A DIY makeover offers several advantages over buying a new bookcase:
- Cost Savings: Refurbishing an old bookcase is cheaper than buying a new one.
- Personalization: You can customize the design and color to fit your style.
- Environmental Impact: Upcycling reduces waste and conserves resources.
- Sense of Accomplishment: Completing a DIY project brings a rewarding feeling.
- Better Quality: Older furniture is often more durable than new, mass-produced items.
A DIY bookcase makeover not only saves money but also gives you the freedom to personalize, reducewaste, and enjoy a sense of achievement, all while improving the quality of the furniture.
It’s a bright and fulfilling alternative to buying new.
Materials You Will Require for this Makeover
Before you begin the makeover, make sure you have the right tools for the job. These essential tools will help ensure your project goes smoothly and your bookcase is both sturdy and beautiful.
| Material | Purpose |
|---|---|
| Pine trim | For replacing missing trim pieces |
| Glue | To attach trim and secure seams |
| Nails | To hold trim and pieces in place |
| Japanese saw | For trimming excess trim |
| File and sandpaper | To smooth and round the corners of the trim |
| Wood filler | To fill in cracks and large dents |
| MDF (18mm) | To make new, stronger shelves |
| Solid wood strips | For edge banding on shelves |
| Tape | To temporarily hold edge banding in place |
| Wood lathe | To smooth and trim the edges of the MDF and wood |
| Primer (white) | To cover the orange woodgrain inside the bookcase |
| Beige paint | To paint the outside of the bookcase |
| Paint roller | For applying the paint smoothly |
| Paintbrush | For smoothing the paint and edges |
| Hot fluid wooden blocks | To lift the shelves off the table while painting |
| Sandpaper | For smoothing between coats of paint |
| Wooden blocks (for the drawer) | To reinforce the broken drawer |
| Nails (for drawer repair) | To secure the wooden blocks in place for drawer repair |
The Complete Bookcase Makeover Process Step by Step
Now, let’s get into each step of the makeover process, starting with fixing the missing trim and making your bookcase look brand new.
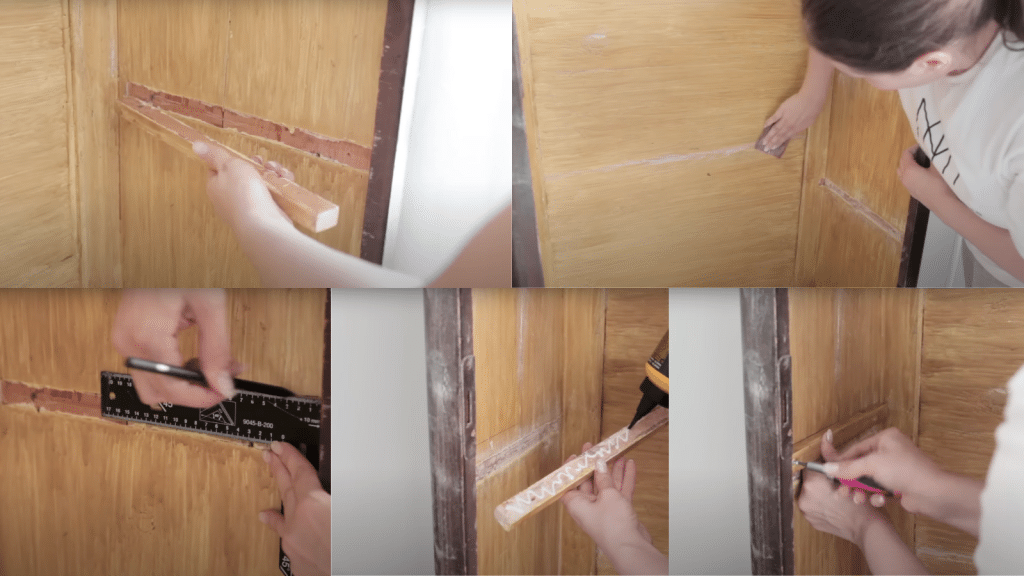
Step 1: Fixing the Missing Trim
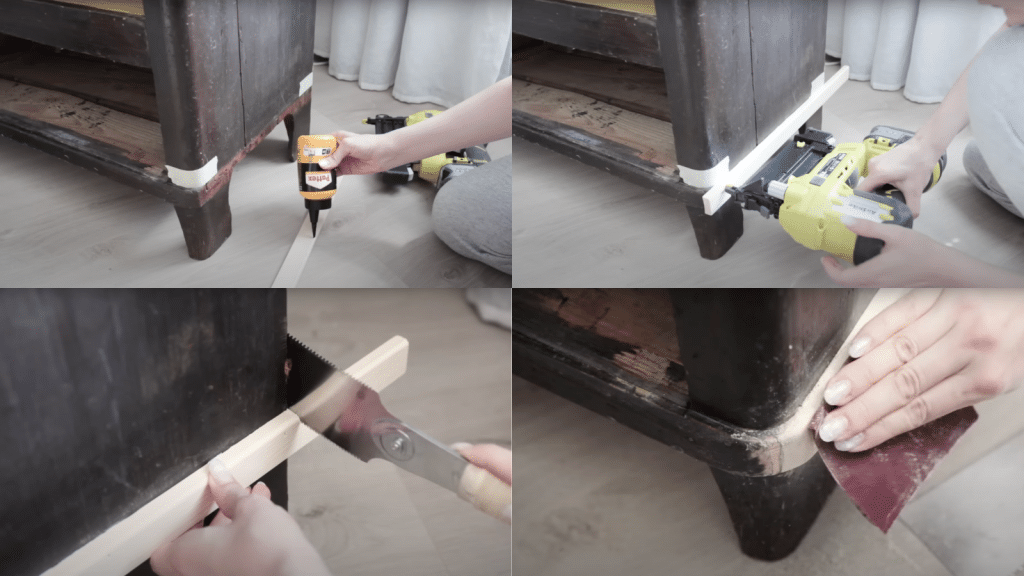
Start by tackling the missing trim on the bookcase. The trim is necessary to bring the piece back to life and give it a more finished look. Use pine trim that fits the gaps nicely, but may need some adjustments.
To make the corners rounded and neat, trim the edges slightly using a Japanese saw.
Apply glue to the back of the trim and press it into place, securing it with nails to prevent movement while the glue dries. After attaching the trim, cut off any excess with a saw. Finally, smooth the corners and edges with a file and sandpaper.
Helpful Tips:
- When applying glue, use just enough to cover the surface without making a mess.
- Nail the trim in place as you go to keep it secure while the glue sets.
Step 2: Filling the Cracks
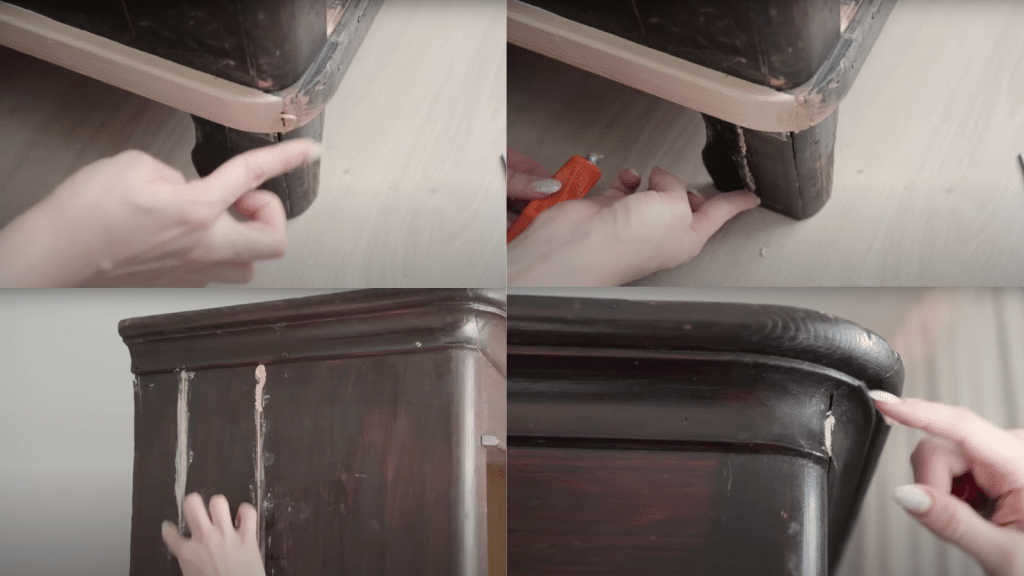
Next, fill in the cracks and dents in the wood. Old furniture, especially bookcases, often has small cracks or holes from wear and tear.
Don’t fill every dent, as the wood’s character is essential, but larger cracks need attention.
Use wood filler for these cracks, applying it evenly with a putty knife. Once dried, sand it smooth to blend with the wood.
Helpful Tips:
- Only fill the most significant cracks to maintain the piece’s character.
- Sand the filled areas in the same direction as the grain to ensure a smooth finish.
Step 3: Fixing the Seams
If there’s a gap at the top corner of the bookcase, it needs fixing. Since the glue alone won’t hold the seam, add a small wooden block to the backside of the seam for extra support.
After applying glue to the gap, pull the seam together and secure the block with nails to keep everything in place.
This helps reinforce the bookcase and ensures the seam won’t pull apart later.
Helpful Tips:
- Position the small wooden block behind the seam so it doesn’t interfere with the bookcase’s functionality.
- Use clamps or nails to keep the seams tightly together while the glue dries.
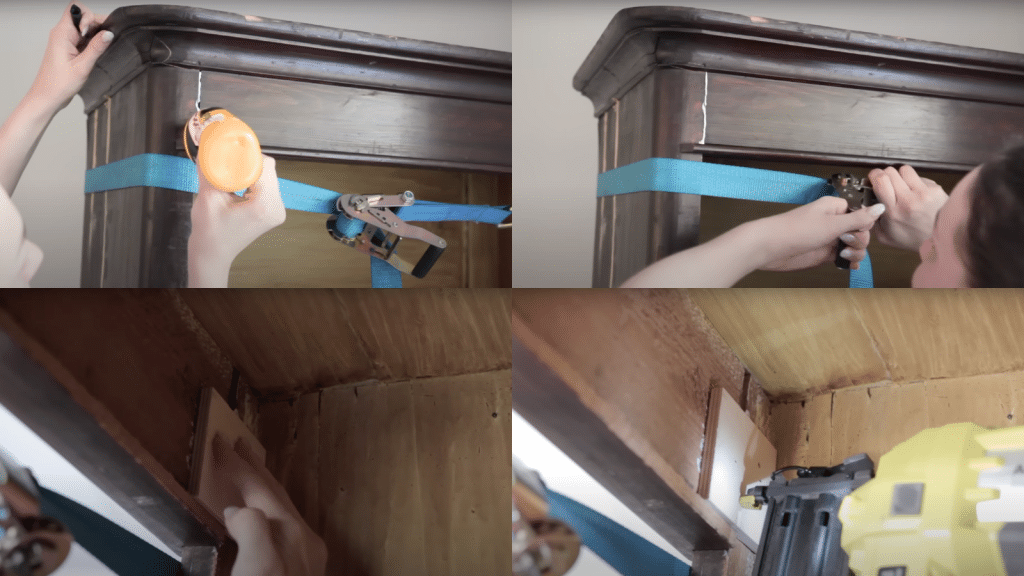
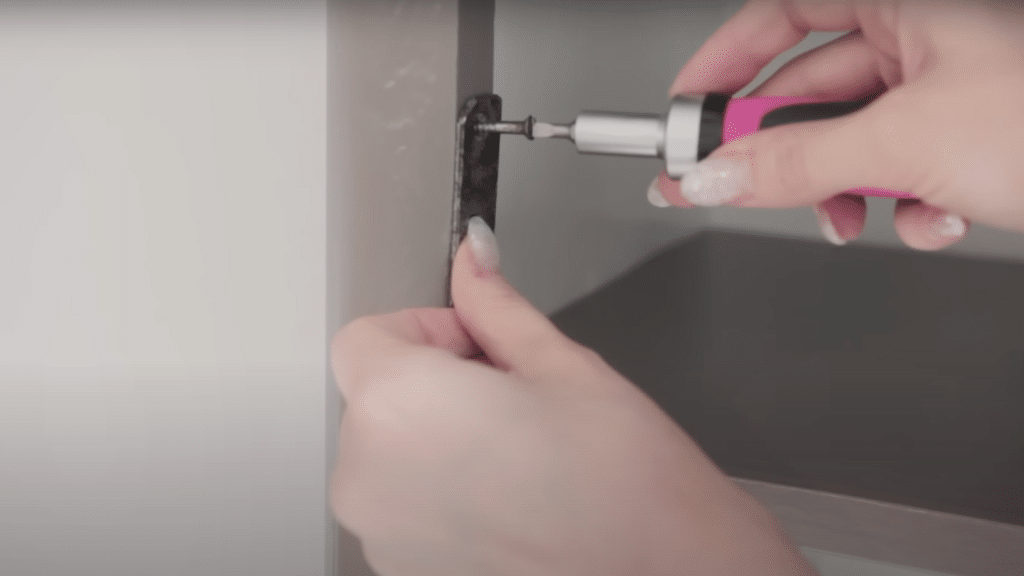
Step 4: Adjusting the Shelves
If the shelves in the bookcase aren’t evenly spaced, adjust them. Start by removing the old brackets, which were glued and screwed into place.
Remove old brackets, measure new positions, sand the bookcase, then reattach with new screws and glue for secure placement.
Helpful Tips:
- Sand the area thoroughly before reattaching the brackets to create a smooth surface.
- When applying glue, be sure also to screw the brackets in place to ensure a firm hold.
Step 5: Building New Shelves
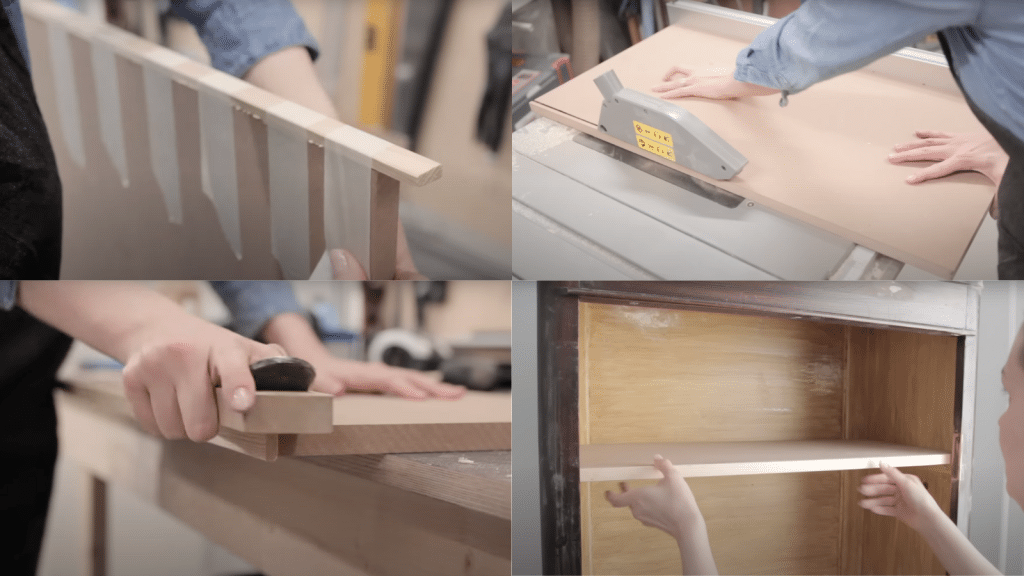
The original shelves might be too weak, so replacing them with new, stronger ones is a good idea.
Use 18mm MDF for the shelves because it’s durable and strong. After cutting the shelves to size, use solid wood strips to apply edge banding.
Secure banding with tape until glue dries. Smooth edges using a wood lathe. Trim shelves to length with a track saw and to depth with a table saw for a perfect fit.
Helpful Tips:
- When cutting MDF, measure carefully to avoid mistakes.
- Use a wood lathe or sandpaper to smooth out the edges of the wood banding for a clean finish.
Step 6: Painting the Bookcase
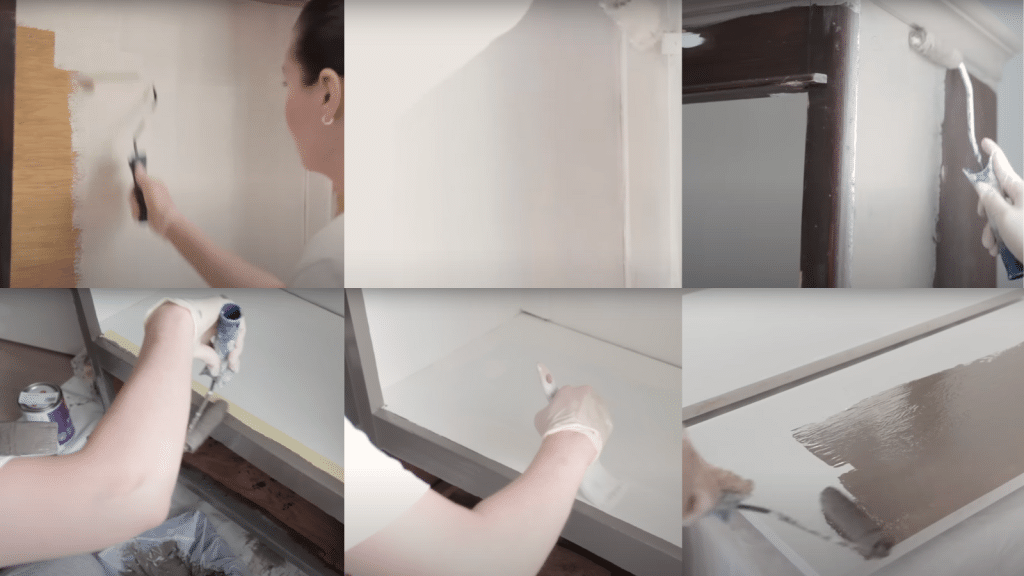
Once the shelves are ready, move on to painting the bookcase. If the inside of the bookcase has an unattractive orange woodgrain pattern, start by priming the inside with a white primer.
Apply about three coats for full coverage. Choose beige paint for the exterior. Start with a roller for large areas, then finish with a brush.
Use one coat of primer and two coats of paint. Lift shelves with wooden blocks to prevent damage—sand lightly between coats for smoothness.
Helpful Tips:
- Always sand between coats of primer and paint to ensure an even, smooth surface.
- Apply the primer in thin layers to avoid drips and allow each layer to dry completely.
Step 7: Repairing the Drawer
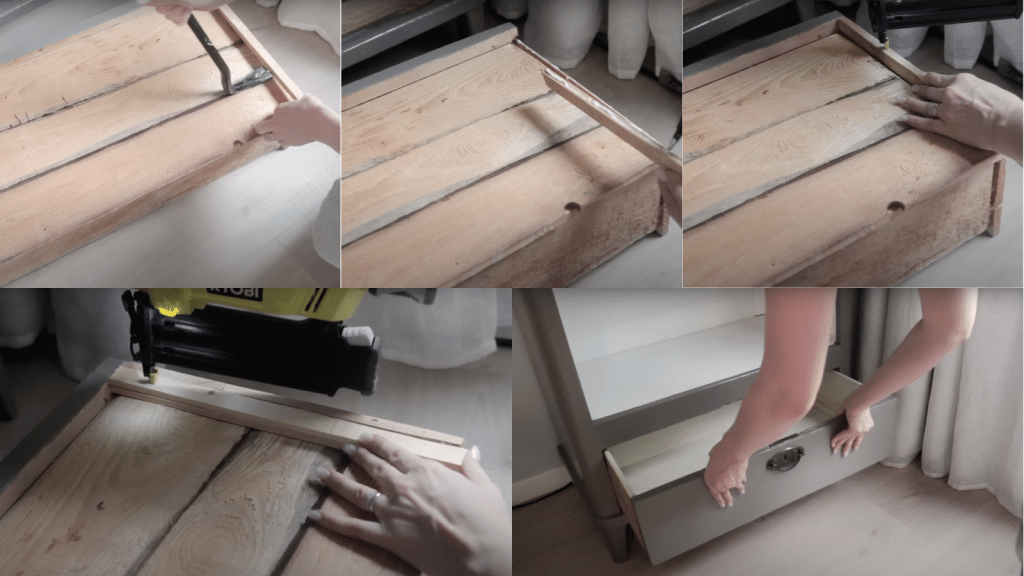
The drawer might have a broken piece of wood that needs fixing. Carefully remove the broken piece and reattach it in the right place with glue.
Add extra wooden blocks inside the drawer for support and stability, improving its long-term durability. Secure everything with nails for a sturdy repair.
Helpful Tips:
- For repairs like this, use clamps to hold the pieces in place while the glue dries.
- Constantly reinforce with nails or screws for extra strength when fixing furniture.
Step 8: The Final Touches
After finishing all the repairs and painting, reattach a metal piece to the bookcase. This metal piece was part of the bookcase’s original design when it was a wardrobe.
It adds a nice touch of history to the finished piece. Finally, test the new shelves and make sure everything fits properly and is secure. The bookcase will now be ready for use!
Helpful Tips:
- Double-check the stability of all parts before calling the project finished.
- Test the shelves by placing items on them to ensure they can hold weight properly.
Final Look Before vs After
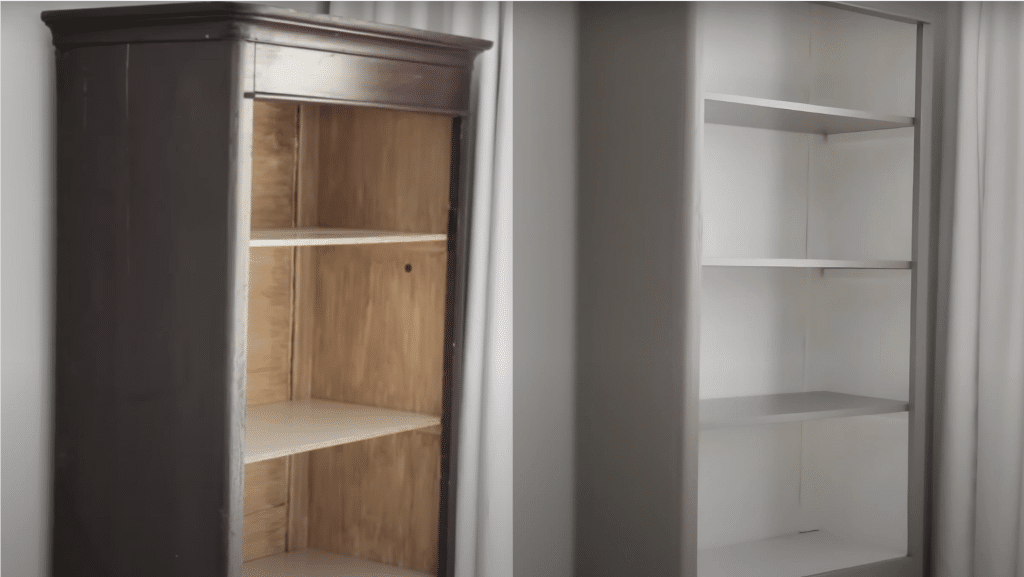
The bookcase makeover turned out beautifully! The new trim, stronger shelves, and fresh paint completely upgraded the piece.
It’s now a sturdy and stylish addition to any space, with the perfect blend of old character and new functionality. If you’re looking to update a piece of furniture, this project is a great way to breathe new life into it.
Watch How It’s Done: Bookcase Makeover Video Tutorial
For a complete step-by-step tutorial, check out this video by The Minimalist Maker.
Estimated Time and Cost Breakdown of The Makeover Process
Understand the time and costs before starting the makeover process. This breakdown clarifies the duration and expenses for each step.
By planning, you can ensure a smooth, successful project without any surprises along the way.
Time Breakdown
|
Total Time: Around 16-20 hours of work spread over 2-3 days, considering drying times.
Cost Breakdown
Before you begin the makeover, make sure you have the right tools for the job. These essential tools will help ensure your project goes smoothly and your bookcase is both sturdy and beautiful.
| Item | Estimated Cost (USD) |
|---|---|
| Pine Trim | $5 – $10 |
| Wood Filler | $5 – $7 |
| Japanese Saw | $10 – $15 |
| Glue (Wood or General) | $3 – $5 |
| Nails | $2 – $3 |
| Sandpaper | $2 – $4 |
| MDF (18mm) | $10 – $15 |
| Solid Wood Strips | $5 – $7 |
| Paint (Primer & Color) | $15 – $20 |
| Paint Roller & Brush | $5 – $7 |
| Hot Fluid Wooden Blocks | $3 – $5 |
| Screws | $3 – $5 |
| Drawer Repair (Wood, Glue, Nails) | $3 – $6 |
Total Cost: Around $68 – $98, depending on the quality of materials you choose.
Pro Tip: Buy trim slightly wider than needed and sand it down for a perfect custom fit
Common Mistakes to Avoid During Your Bookcase Makeover
Even with careful planning, certain pitfalls can derail your project. Avoid these frequent mistakes to ensure professional-looking results:
1. Skipping the Primer: Never paint directly over old wood or previous finishes. Primer ensures paint adhesion and prevents bleed-through from previous stains or colors.
2. Rushing Between Coats: Allow proper drying time between paint coats. Applying wet paint over tacky surfaces causes streaks, bubbles, and poor coverage.
3. Over-Filling Wood Defects: Use wood filler sparingly on character marks. Over-filling destroys the vintage charm that makes old furniture appealing.
4. Incorrect Measurements: Measure twice, cut once. Double-check shelf dimensions before cutting MDF, as mistakes waste materials and delay progress.
5. Using Wrong Sandpaper Grit: Start with coarser grits (120-150) for heavy work, then progress to finer grits (220-320) for smooth finishes. Skipping steps leaves visible scratches.
These simple precautions prevent hours of rework and ensure your bookcase makeover achieves professional quality results.
Conclusive Thoughts
Your bookcase makeover demands time and dedication, but delivers awe-inspiring results.
What began as a worn, neglected piece has transformed into a custom, substantial addition that perfectly reflects your personal style and craftsmanship skills.
This restoration project builds valuable abilities for future endeavors while providing the deep satisfaction that comes from creating something beautiful with your own hands.
Rather than contributing to landfill waste, you’ve extended the life of quality furniture in a way that benefits both your budget and the environment.
Your restored bookcase provides more than mere storage; it demonstrates what’s achievable when you recognize hidden value in items others might discard.
Share your furniture transformation story in the comments below!