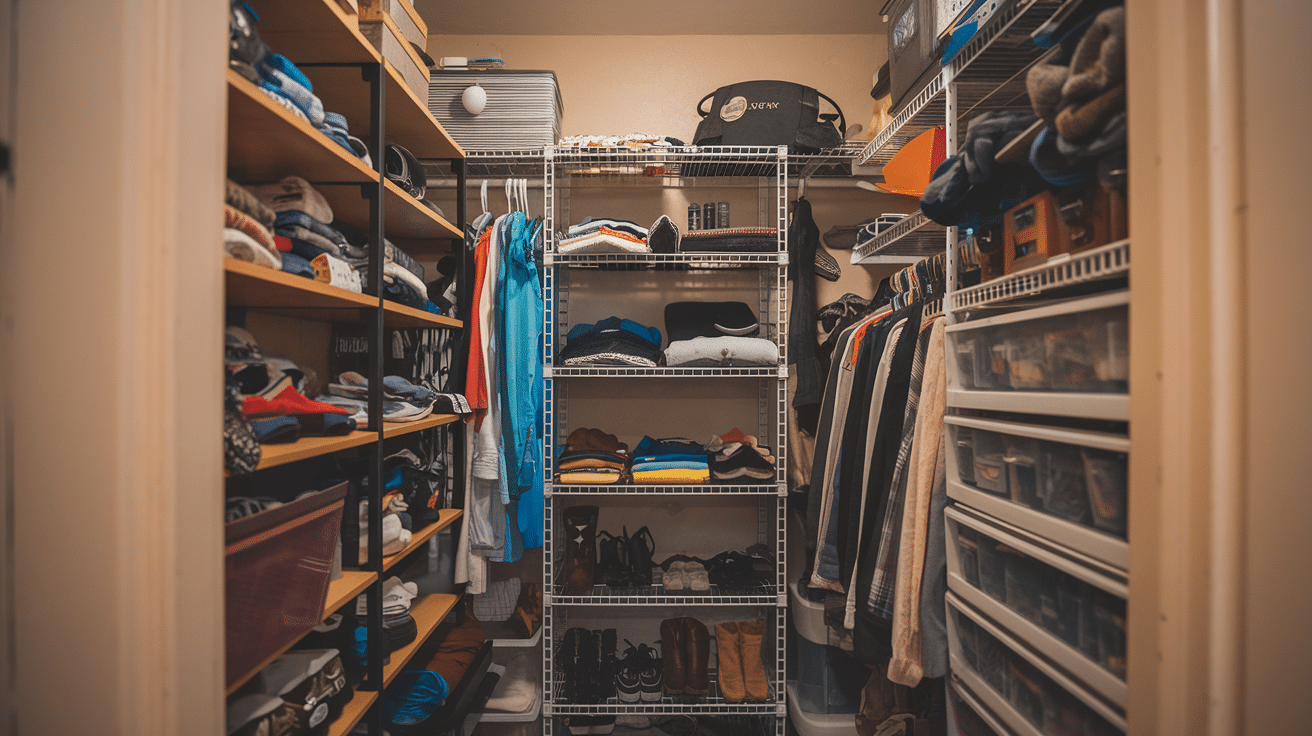

Tired of clothes piling up on your closet floor? Most people struggle with messy, cramped closets that waste valuable storage space. You toss sweaters on top of shoes, and finding anything becomes a daily hunt.
But what if you could double your closet storage in just one weekend? A simple DIY shelf can turn chaos into order, giving every item its proper place.
Building your own closet shelf is easier than you think. You don’t need advanced carpentry skills or expensive tools. With basic materials from any hardware store, you can create custom storage that fits your exact space and needs.
This guide will show you step-by-step how to build a sturdy closet shelf that maximizes your storage and keeps your clothes organized. From measuring your space to the final installation, we’ll cover everything you need to know.
Ready to recast your closet? Let’s get started.
Determine Your Storage Needs
Start by taking inventory of everything you plan to store on your new shelf. Look through your clothes, storage bins, shoes, linens, and seasonal items to understand what needs space.
Ask yourself whether you need more hanging room for dresses and coats or additional shelf space for folded sweaters and jeans.
- Measure your bulkiest items first: Large storage bins and thick comforters determine your minimum shelf spacing.
- Group similar items together: Stack folded t-shirts, organize shoe boxes, and bundle seasonal clothes to see actual storage needs.
- Consider weight distribution: Heavy items, such as books or storage containers, require sturdy bottom shelves, while lighter linens can be placed on top.
Grab a measuring tape and check the dimensions of your storage boxes, shoe organizers, and typical folded clothing stacks. This prevents building shelves that are too shallow or narrow.
Consider how often you use various items, placing everyday essentials at eye level while storing seasonal decorations or rarely used linens on higher shelves. A quick 10-minute assessment now saves hours of frustration later when everything fits perfectly in its designated spot.
Step-By-Step Installation Guide: Closet Shelf
Follow this simple step-by-step installation guide to build a sturdy and functional closet shelf, perfect for maximizing storage and organizing your belongings.
Tools Required
| Tools | Purpose |
|---|---|
| Measuring Tape | Measure Closet Dimensions and Materials |
| Level | Ensure Shelves Are Straight and Even |
| Saw (circular or Miter) | Cut Wood to Proper Lengths |
| Jigsaw | Cut Notches Around Trim and Baseboards |
| Nail Gun or Hammer | Attach Supports and Trim |
| Drill | Create Pilot Holes and Drive Screws |
| Painter’s Tape | Mark Shelf Placement on Walls |
Materials Required
| Materials | Quantity | Purpose |
|---|---|---|
| 3/4″ Plywood or Mdf Sheets | 1-2 Sheets | Main Shelf Material |
| 1×2 Lumber Boards | 10-15 Pieces | Shelf Supports and Trim |
| Wood Screws (2.5″) | 1 Box | Secure Supports to Wall |
| Wall Anchors | As Needed | Support Where No Studs Available |
| Finishing Nails | 1 Box | Attach Trim Pieces |
| Primer and Paint | 1 Quart Each | Finish All Wood Surfaces |
| Wood Filler/caulk | 1 Tube | Fill Gaps and Imperfections |
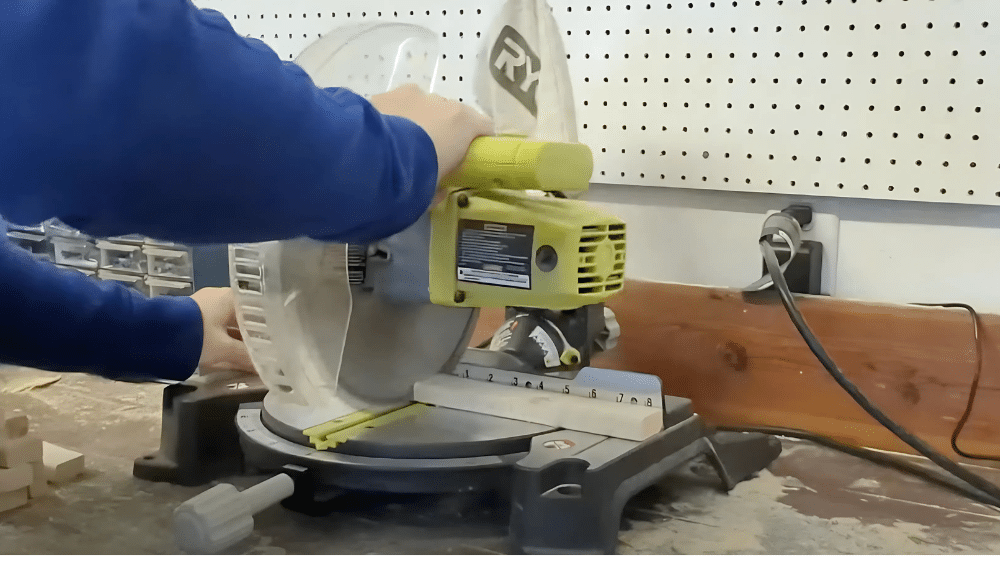
Step 1: Cut and Prepare Materials
Start by using painter’s tape to mark where you want each shelf on your closet walls. This simple trick helps you visualize the final layout and ensure your items will fit properly.
Take careful measurements of width, depth, and height for each shelf position since most closets aren’t perfectly square.
- Cut all materials to size – cut plywood shelves to fit each measured location, and cut 1×2 support boards 1/2 inch shorter than your planned shelf depth.
- Sand, prime, and paint everything – Smooth all wood pieces first, apply primer before painting, then paint all pieces before installation to save time and ensure even coverage.
Pro Tip: Label each shelf and its corresponding location with masking tape to prevent mix-ups during installation.
Step 2: Install Wall Supports
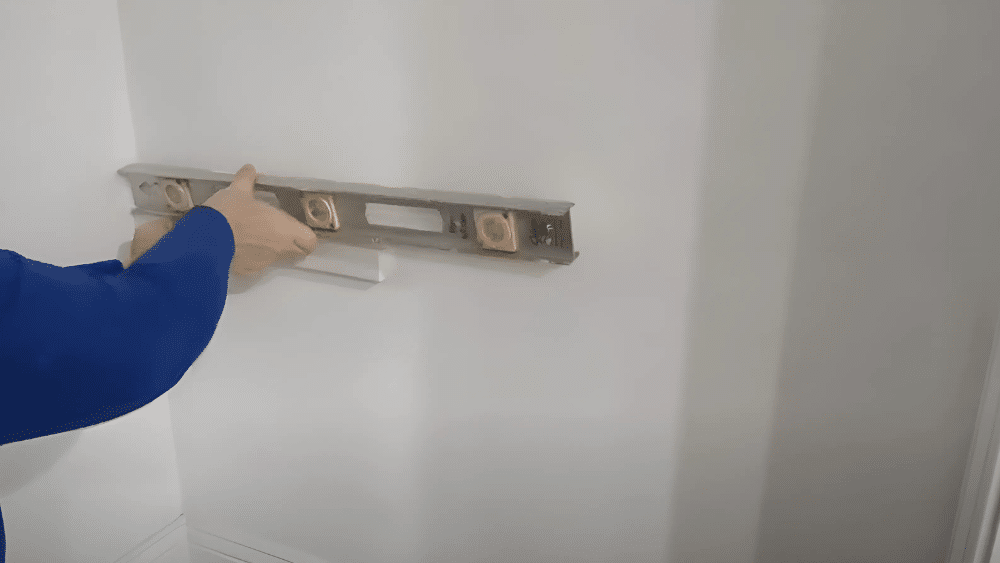
Mount your 1×2 support boards to the closet walls using screws driven into wall studs whenever possible. For areas without studs, use heavy-duty wall anchors rated for the weight you’ll store.
Keep your level handy and regularly check to make sure all supports are perfectly aligned.
- Locate Wall Studs with A Stud Finder – Mark Their Positions Before Drilling.
- Use 2.5-Inch Screws for Stud Mounting – Choose Appropriate Anchors for Hollow Areas.
- Check Level Frequently – Even Small Variations Will Show when Shelves Are Installed.
Pro Tip: install Supports Slightly High Rather than Low – You Can Always Sand Them Down, but Adding Height Later Is Much Harder.
Step 3: Cut and Install Shelves
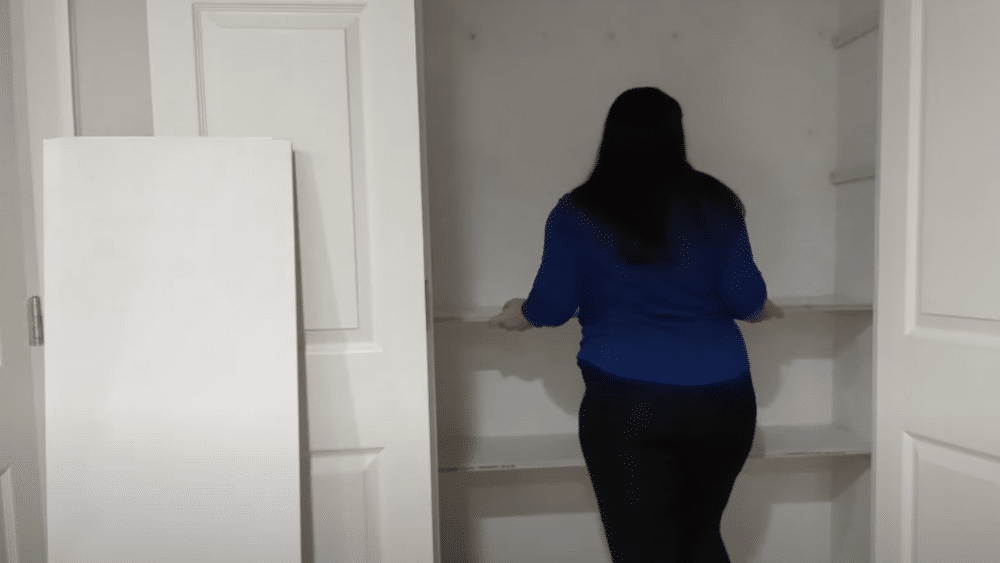
Trim small diagonal cuts off the back corners of each shelf to help them slide into place more easily.
Most closet corners aren’t perfectly square, so these small notches prevent binding during installation. Test fit each shelf before final placement to ensure smooth installation.
- Make Small Corner Notches – Cut 1/4 Inch Triangles from Back Corners.
- Test Fit Before Final Installation – Make Sure Shelves Slide In Easily.
- Install the heaviest items on lower shelves to plan weight distribution from the start.
Pro tip: If a shelf doesn’t fit easily, trim a little more off the corners instead of forcing it into place.
Step 4: Add Middle Support Posts
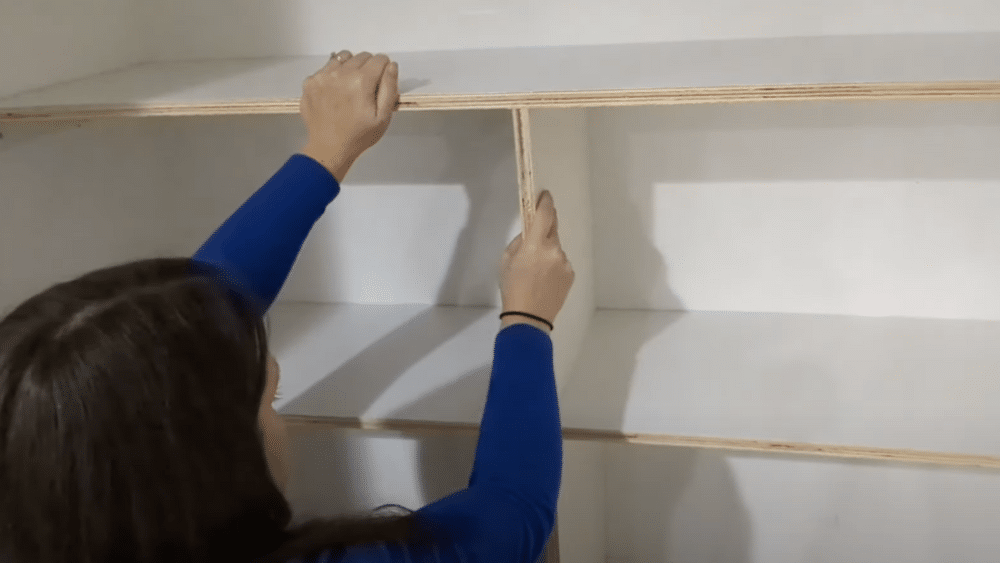
Install vertical support posts for shelves wider than 4 feet to prevent sagging over time.
Cut these supports from your leftover wood scraps so they are exactly the right height between shelves. These posts slide into place and are secured with a few nails from above.
- Cut supports to exact height by measuring between each shelf pair individually.
- Use wood scraps whenever you can – this saves money and cuts down on waste.
- Secure from above with nails – Drive finishing nails through the shelf into the support.
Pro Tip: Make supports Slightly Tight-Fitting – They’ll wedge in place and provide better support than loose-fitting pieces.
Step 5: Install Front Trim
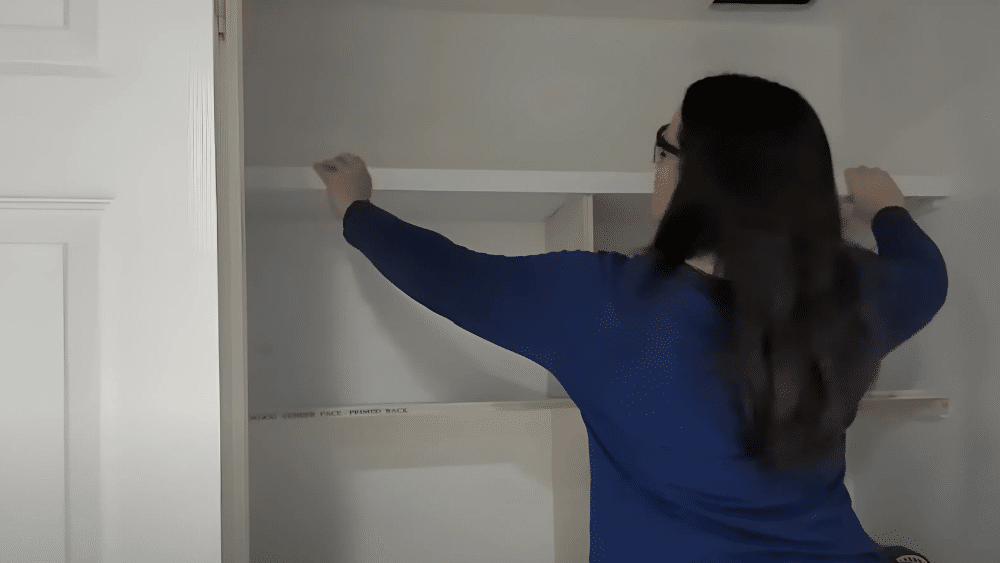
Add 1×2 boards to the front edges of your shelves for a built-in bookcase look. Start with the top horizontal piece, then install the vertical middle support, and finish with the remaining horizontal pieces.
This order prevents measurement errors and produces clean, professional-looking joints.
- Install the top trim piece first — this sets your baseline for all the other pieces.
- Add vertical middle support next – measure and cut to fit between the top and bottom.
- Finish with the remaining horizontal pieces – Cut each to fit the remaining spaces.
Pro Tip: Pre-drill nail holes in the trim pieces to prevent splitting, especially near the ends of boards.
Step 6: Final Touches and Organization
Fill any small gaps or nail holes with wood filler, then sand smooth once it’s dry.
Touch up paint where needed to achieve a seamless, professional look. Organize your storage system with labeled bins or containers to keep everything orderly and easy to locate.
- Fill holes and gaps with wood filler – sand smooth when dry for seamless repairs.
- Touch Up Paint as Needed – Use a Small Brush for Precision Work.
- Add labeled storage containers – this keeps the system organized in the long term.
Pro Tip: Take photos of your organized shelves so family members know exactly where everything belongs.
Video Tutorial
For a Visual Tutorial, Refer to This Video By lovely Etc.
DIY Closet Cost Breakdown
This table outlines the essential materials and their costs for building a DIY closet, helping you plan your project efficiently while keeping expenses in check.
| Item | Price Range | Description |
|---|---|---|
| Basic Shelf Boards | $10-25 per closet | MDF or plywood offer affordable options, with pine boards being slightly more expensive for a natural wood finish. |
| Support Brackets | $3-10 each | Simple L-brackets are budget-friendly, while heavy-duty floating shelf brackets offer a sleeker, more modern look. |
| Paint and Primer | $10-20 total | One quart typically covers 2-3 closets, making it a cost-effective finishing option. |
| Hardware and Fasteners | $5-15 | Screws, anchors, and nails are affordable yet essential for installation. |
| Optional Trim Materials | $15-30 | 1×2 boards for front-facing trim give a custom, built-in appearance at minimal additional cost. |
Essential Maintenance Tips for Long-Lasting DIY Closet Shelves
Proper upkeep ensures your DIY closet shelves remain both functional and visually appealing for years. Here’s how to keep them in top shape:
- Paint Touch-Ups: Refresh high-traffic areas every 2-3 years, particularly the edges and corners that experience the most contact.
- Caulk Inspection and Renewal: Annually check for gaps between shelves and walls and replace any cracked or pulled-away caulk for a neat finish.
- Hardware Tightening: Inspect and tighten all screws, brackets, and supports every six months to prevent loosening from regular use and weight loads.
- Deep Cleaning: Twice a year, remove all items from the shelves, clean them, and check for any damage or wear.
- Weight Distribution Checks: Monitor for shelf sagging, especially on longer spans, and reinforce with additional support if necessary.
Conclusion
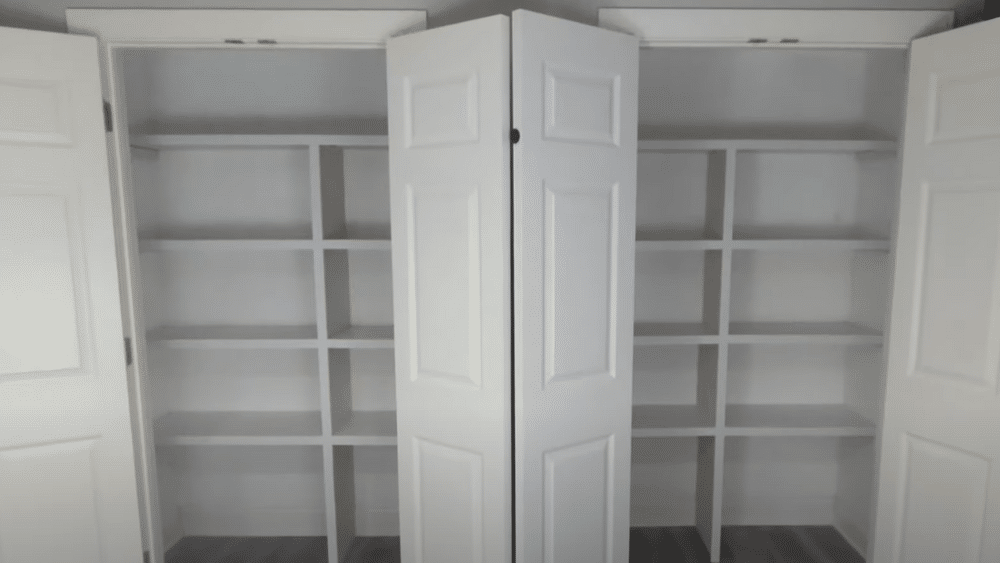
Creating your own closet shelves turns cluttered areas into organized storage tailored to your needs.
You’ve learned how to assess your storage needs, choose the right materials, and install sturdy shelves that will last for years.
The step-by-step process might seem complex at first, but with basic tools and careful planning, you can create custom storage for a fraction of the cost of pre-made organizers.
Your newly organized closet will save you time every day and add value to your home. No more digging through piles of clothes or losing items in the back of deep shelves. With proper maintenance, these DIY shelves will serve your family well for years to come.
Prepared to start your next closet project?