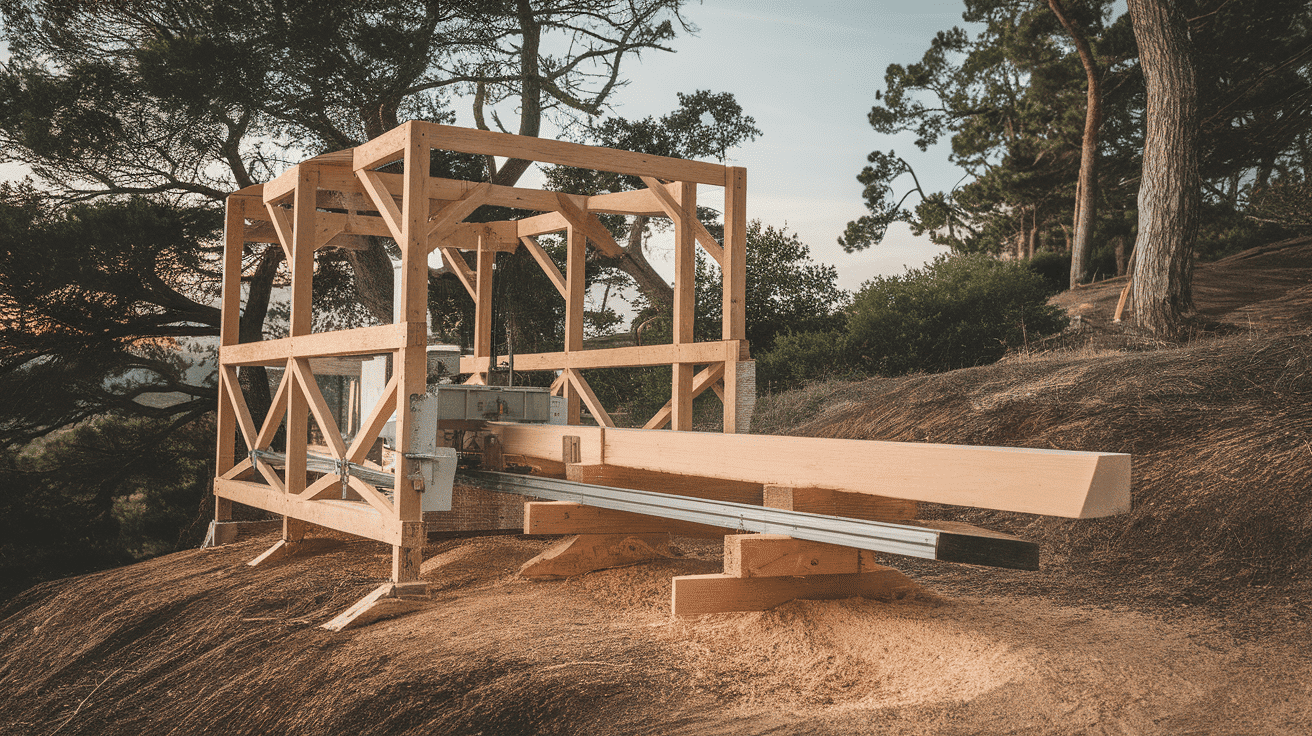
Making your own lumber can save you money, but lumber mills cost thousands of dollars. You might feel stuck between paying high prices for cut wood or buying costly equipment.
I felt the same way until I built my sawmill at home. With basic tools and materials, I cut my costs by 70% and gained the freedom to make custom cuts whenever needed.
In this guide, I’ll walk you through the whole process of building a safe, working sawmill.
You’ll learn which materials work best, how to set up the frame properly, and tips to keep everything running smoothly.
By the end, you’ll have all the know-how to create your affordable sawmill.
Why Build Your Own Sawmill?
Building your own sawmill offers immediate financial benefits and long-term savings. Commercial sawmills charge premium prices for custom cuts, often $3 to $ 5 per board foot for specialty dimensions.
With a DIY sawmill, you control every aspect, from selecting logs to determining the exact board thickness and length. This independence means no more waiting for deliveries or settling for standard sizes that don’t match your project needs.
The satisfaction of creating functional lumber with your own hands goes beyond cost savings. You’ll develop valuable woodworking skills while producing high-quality materials for decks, furniture, or construction projects.
If you have access to fallen trees or raw logs, you can turn waste into valuable building materials. Many sawmill owners report saving 60-80% on lumber costs within the first year, making the investment worthwhile for regular woodworkers.
Step-by-Step Process to Make a DIY Sawmill
Building a homemade sawmill sounds hard, but it’s actually quite simple. With just a few common parts and basic tools, you can turn logs into usable boards right in your backyard. This guide will show you exactly how to build one without breaking the bank.
Gather Materials and Tools
Tools Needed
| Tool | Purpose |
|---|---|
| Circular saw with chainsaw attachment (beam saw) | For cutting through the logs |
| Drill and drill bits | For drilling holes for bolts |
| Saw (for cutting wood) | For cutting wood to the required sizes |
| Screwdriver (or impact driver) | For driving screws into wood |
| Clamp | To hold pieces in place during assembly |
| Wrench | For tightening bolts |
| Measuring tape | For accurate measurements |
| Level | To ensure parts are aligned properly |
| Sawhorses | For holding the setup during assembly |
Materials Needed
| Material | Purpose |
|---|---|
| Two 2x10s, 6 feet long | For constructing the frame and towers |
| Laminated panel | For creating the guide track |
| 2×4 | For reinforcing the slide |
| 3/8-inch bolts | For attaching the base plate and parts |
| 3/8-inch screws | For securing parts of the frame |
| Auxiliary blocks | For securing the slide in place |
| Carriage bolts (optional) | For better stability of the base plate |
These items create the foundation of your sawmill and determine its cutting quality, so don’t skimp on materials.
Pro tip: Choose pressure-treated lumber if you plan to store your sawmill outdoors. This will prevent rot and extend the life of your sawmill by several years.
Step 1: Create the Base Frame
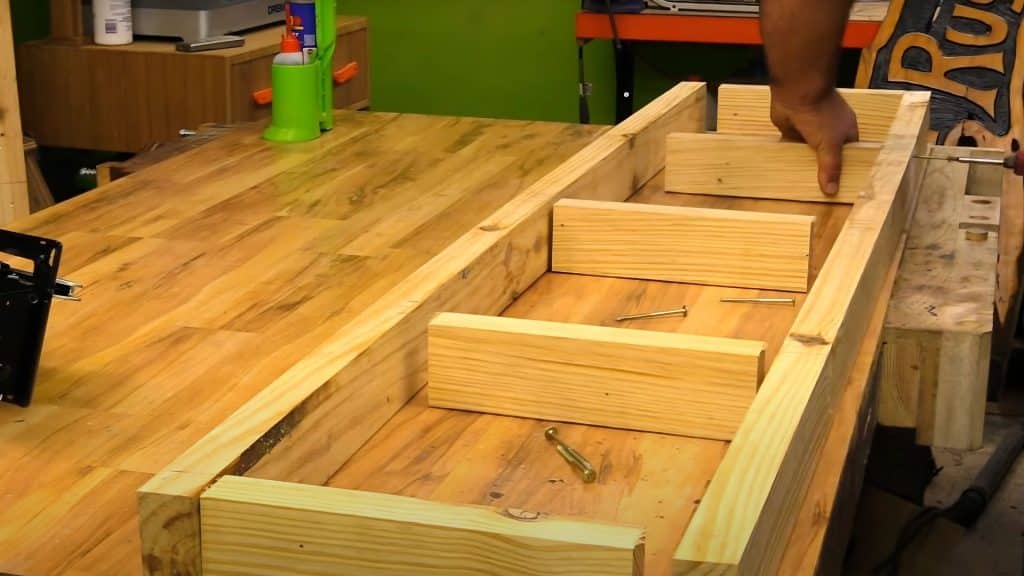
Measure and cut your first 2×10 into multiple 2¾-inch wide sections to create the main frame base. Use your circular saw with a straight-edge guide for accurate cuts.
Next, cut the second 2×10 into two 17¾-inch length pieces to form the vertical side towers. Position these towers on the frame with overhangs on both sides to create a stable base that won’t tip during use.
Pro tip: Pre-drill all screw holes using a bit slightly smaller than your screws. Check each corner with a speed square before final tightening to ensure your frame is perfectly square for accurate cuts.
Step 2: Creating the Track and Guide System
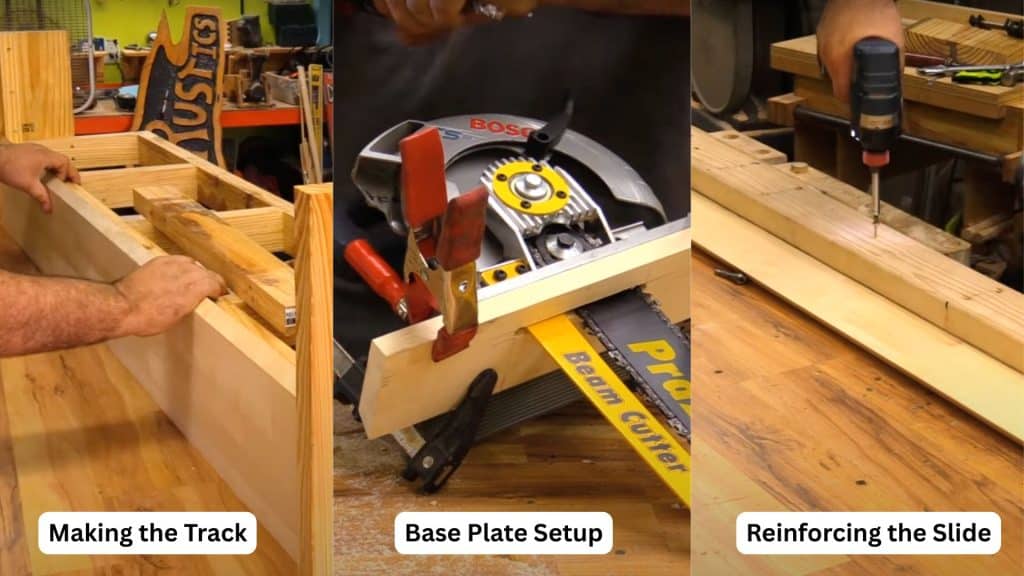
Cut your laminated panel at a 15-20 degree angle to create the guide track. Make it ¼-inch narrower than the tower distance for smooth height adjustments. Attach a second piece to create a channel for the saw base. Sand edges with 120-grit then 220-grit sandpaper, and apply paste wax to both surfaces.
Draw the blade outline on your base plate and cut the opening with a jigsaw after drilling a starter hole. Secure the plate with four carriage bolts at the corners and add a wood block at the bottom to prevent wobbling.
Attach a 2×4 along the slide’s back edge using screws at 6-inch intervals. Add triangular wood blocks at stress points using two bolts per block. Apply wood glue to all contact surfaces before assembly.
Pro tip: Use lock washers or thread-locking compound on bolts to prevent vibration loosening.
Step 3: Complete the Final Assembly
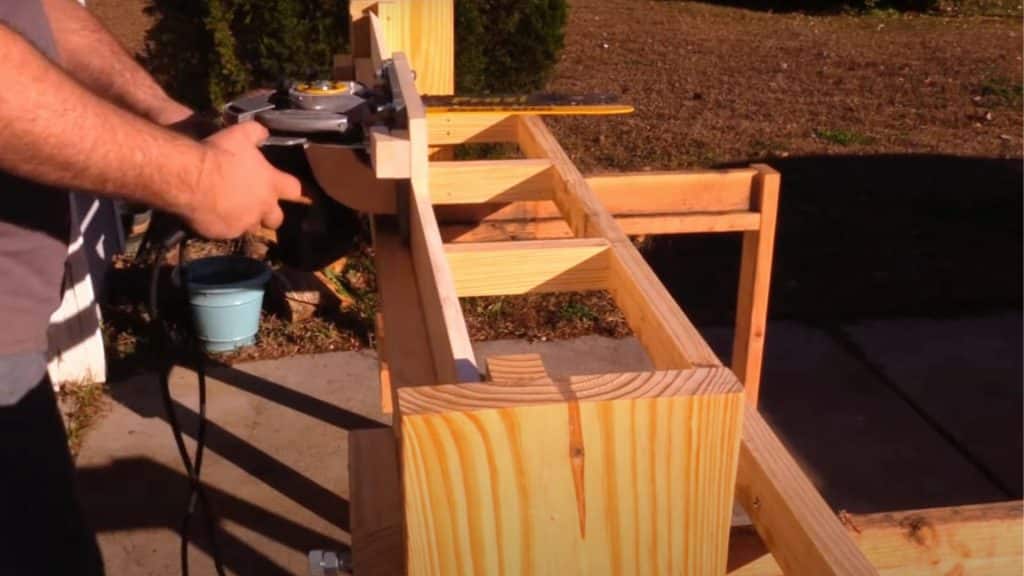
Place the fully built guide system onto your main frame, checking alignment from multiple angles. Secure it with bolts through pre-drilled holes in both components. Use a permanent marker to add 2-inch increment marks along the back side of the frame for quick height adjustments.
Support the entire setup on 3-legged sawhorses placed at both ends and the middle for maximum stability during your first test cuts.
Pro tip: Apply two coats of exterior-grade clear polyurethane to all wooden parts, allowing full drying time between coats. This protection extends the life of your sawmill and helps the slide move more smoothly in humid conditions.
Step 4: Test Your Sawmill
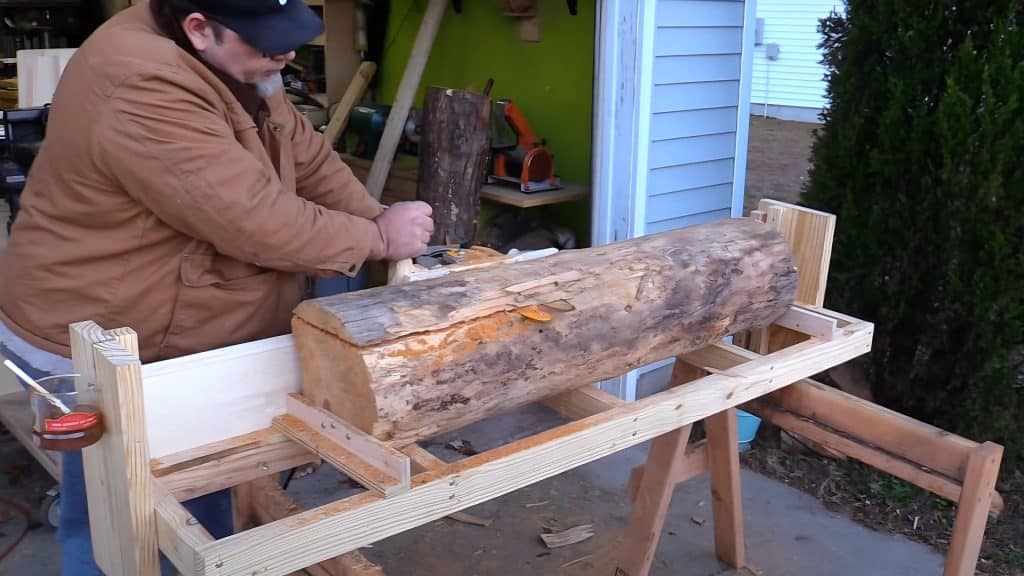
Select a few 2-year-old pine logs for testing. These are ideal because they’re partially seasoned but not fully hardened. Remove any loose bark before placing it on the mill.
Since most chainsaw attachments lack automatic oilers, keep a squeeze bottle of chainsaw bar oil handy and apply a few drops every 2-3 feet of cutting to maintain blade health and cutting efficiency.
Pro tip: Create a simple oil applicator from a plastic squeeze bottle with a small hole in the cap. This allows precise application while cutting. Apply oil more frequently when cutting hardwoods like oak or maple, which create more friction and heat during cutting.
Step 5: Assess Cutting Performance
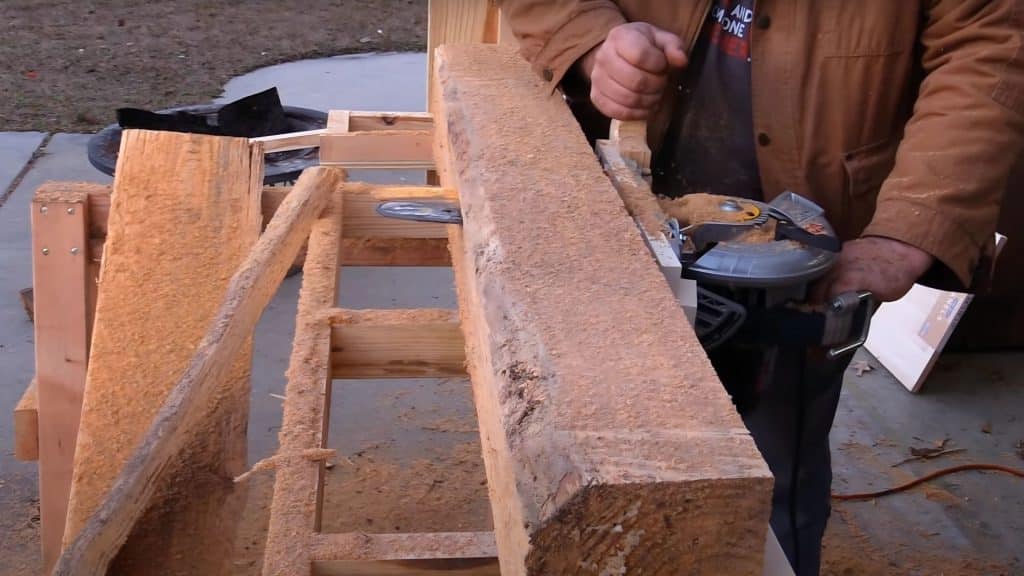
Start your first test cut at a slow, steady pace, observing how the saw handles different wood densities. You’ll notice it cuts slower through dried or rotted sections but moves smoothly through fresh center wood.
Make a complete cut through an 8-10 inch diameter log, then inspect the boards for smoothness and consistent thickness. Based on these results, adjust your technique.
Pro tip: Begin with smaller diameter logs (6-8 inches) until you’re comfortable with the operation and handling. Mark your intended cutting lines with brightly colored chalk for better visibility during cutting. Take photos of your first few cuts to track improvements in technique.
I’d like to acknowledge izzy swan for the insightful video, which was a key reference in putting this guide together.
Easy-to-Carry Design with New Handle
Adding a handle to your sawmill makes transport and operation much simpler. This upgrade provides improved grip control during cutting, enabling you to maneuver the sawmill with confidence throughout your workspace.
The handle also enhances safety by keeping your hands at a proper distance from the cutting area while maintaining complete control over the saw’s movement.
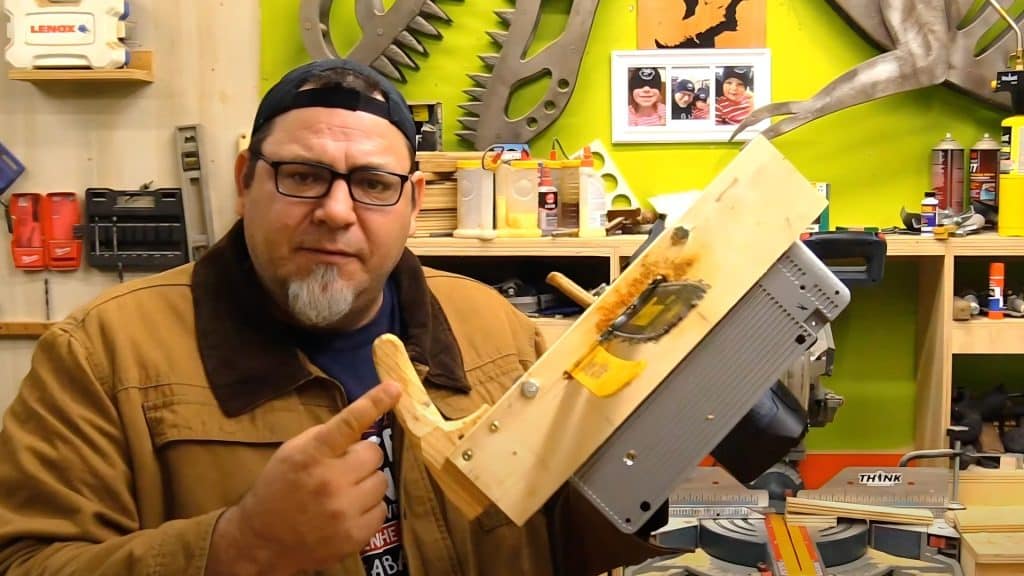
- Cut a 12-inch piece of hardwood for the handle and shape it for a comfortable grip.
- Attached to the base plate using two strong bolts for stability
- Positioned at a natural angle to reduce wrist strain during operation
- Provides much better control when pushing the saw through wood
- Improves safety by keeping hands at a proper distance from the cutting area
- Makes longer cutting sessions more comfortable with less hand fatigue
- Simple addition that greatly enhances the overall use of the sawmill
Safety Guidelines for Sawmill Operation
1. Before starting: Always wear proper protection (eyes, ears, hands) and check all connections for tightness. Secure loose clothing and long hair. Keep a fire extinguisher and first aid kit nearby and ready for use.
2. During Operation: Have a helper present for assistance and safety. Keep your hands at least 6 inches from the blade at all times. Maintain steady pressure without forcing the cut. Stop immediately if you hear unusual sounds or feel excessive vibration.
3. Blade Safety: Turn off and unplug the saw before making any blade adjustments. Inspect the blade for cracks, missing teeth, or damage before each use. Always let the blade reach full speed before cutting and wait for it to come to a complete stop before handling materials.
4. Work Area Safety: Keep children, pets, and visitors away from the cutting area. Ensure good lighting so that cutting lines are visible. Avoid wet conditions that create slip hazards. Store fuel and oil in proper containers away from heat and sparks.
Conclusion
You’ve now learned how to build a complete sawmill from simple, affordable materials. This project not only saves you money but also gives you full control over your lumber production. Remember to follow all safety steps, wear proper protection, work with a helper, and maintain your equipment.
What makes this project truly valuable is the freedom it offers. No more paying premium prices for custom cuts or waiting for lumber deliveries. Your sawmill puts lumber production directly in your hands.
Ready to start cutting your boards? Gather your materials, follow the steps outlined above, and begin building this weekend. If you’ve found this guide helpful, consider sharing your completed sawmill photos in the comments section below. Happy building!

