

Spending $5 on coffee every morning adds up fast – that’s over $1,800 a year just for your caffeine fix.
But what if I told you that creating your own coffee bar at home is simpler than you think? You don’t need fancy equipment or a huge budget to make barista-quality drinks.
With your own DIY coffee bar, you’ll save money, customize every detail to match your taste, and impress friends who visit. Plus, you’ll have that perfect cup ready the moment you wake up – no waiting in lines or dealing with rushed baristas.
I’ll show you exactly how to build a coffee bar that fits your space and budget, step by step. Let’s get started.
What Is a DIY Coffee Bar?
A DIY coffee bar is your personal coffee station set up at home. It’s a designated space where you keep all your coffee-making tools and supplies in one spot.
Think of it as your mini café corner. You choose the location, pick the equipment, and design it your way.
Your coffee bar can be simple or fancy. Some people use a small cart with a coffee maker and mugs. Others convert entire kitchen counters into full coffee stations.
Key elements include:
- Coffee maker or brewing device
- Storage for beans, mugs, and supplies
- Counter space for preparation
- Easy access to water and power outlets
The best part? You control every detail. Pick colors you love. Choose equipment that fits your budget. Make it work for your space.
Why Create a Coffee Bar at Home?
You’ll save serious money. Daily coffee shop visits cost $3 to $ 6 per drink. That adds up to hundreds or thousands yearly.
Convenience tops everything else. No more rushing to coffee shops or waiting in long lines. Your perfect cup is ready in minutes.
You get complete control over your drinks. Adjust strength, sweetness, and flavors exactly how you like them. Try new recipes without paying premium prices.
Your coffee bar becomes a social hub. Friends love visiting homes with great coffee setups. It’s a conversation starter and gathering spot.
Step-By-Step DIY Coffee Bar Build Guide
Tools Required
| Tool | Purpose |
|---|---|
| Table Saw | Cut lumber and remove rounded edges |
| Miter Saw | Cut boards to length and create notches |
| Drill/Driver | Attach screws and pre-drill holes |
| Clamps | Hold pieces during assembly |
| Measuring Tape | Measure all cuts and spacing |
| Pencil | Mark cut lines and measurements |
| Sander (or sanding block) | Smooth all surfaces |
Materials Needed
| Material | Purpose |
|---|---|
| 2×4 Lumber | Frame legs and support structure |
| 1×4 Lumber | Shelves and top surface |
| Wood Screws (2.5″) | Attach frame pieces |
| Wood Screws (1.25″) | Attach the top from underneath |
| Primer | Base coat for paint adhesion |
| Paint (Black) | Frame finish |
| Polyacrylic Finish | Top and shelf protection |
| Sandpaper 120-grit | Initial sanding |
| Sandpaper 220-grit | Final sanding between coats |
| Paint Brushes | Apply paint and finish |
Step 1: Plan Your Materials and Design
Gather scrap wood from previous projects or purchase new lumber. Plan a simple design with fridge space below and bar top above. Use 1x4s from previous builds and extra 2x4s. Measure the fridge first and plan for extra space on each side for easy removal when needed.
Budget: $0-50 (if using scrap wood) or $80-120 for new lumber
- 2x4s: $3-5 each
- 1x4s: $2-4 each
- Hardware: $15-25
Pro Tip: Measure your fridge first! Leave extra space (about 7/8 inch) on each side for easy removal if needed.
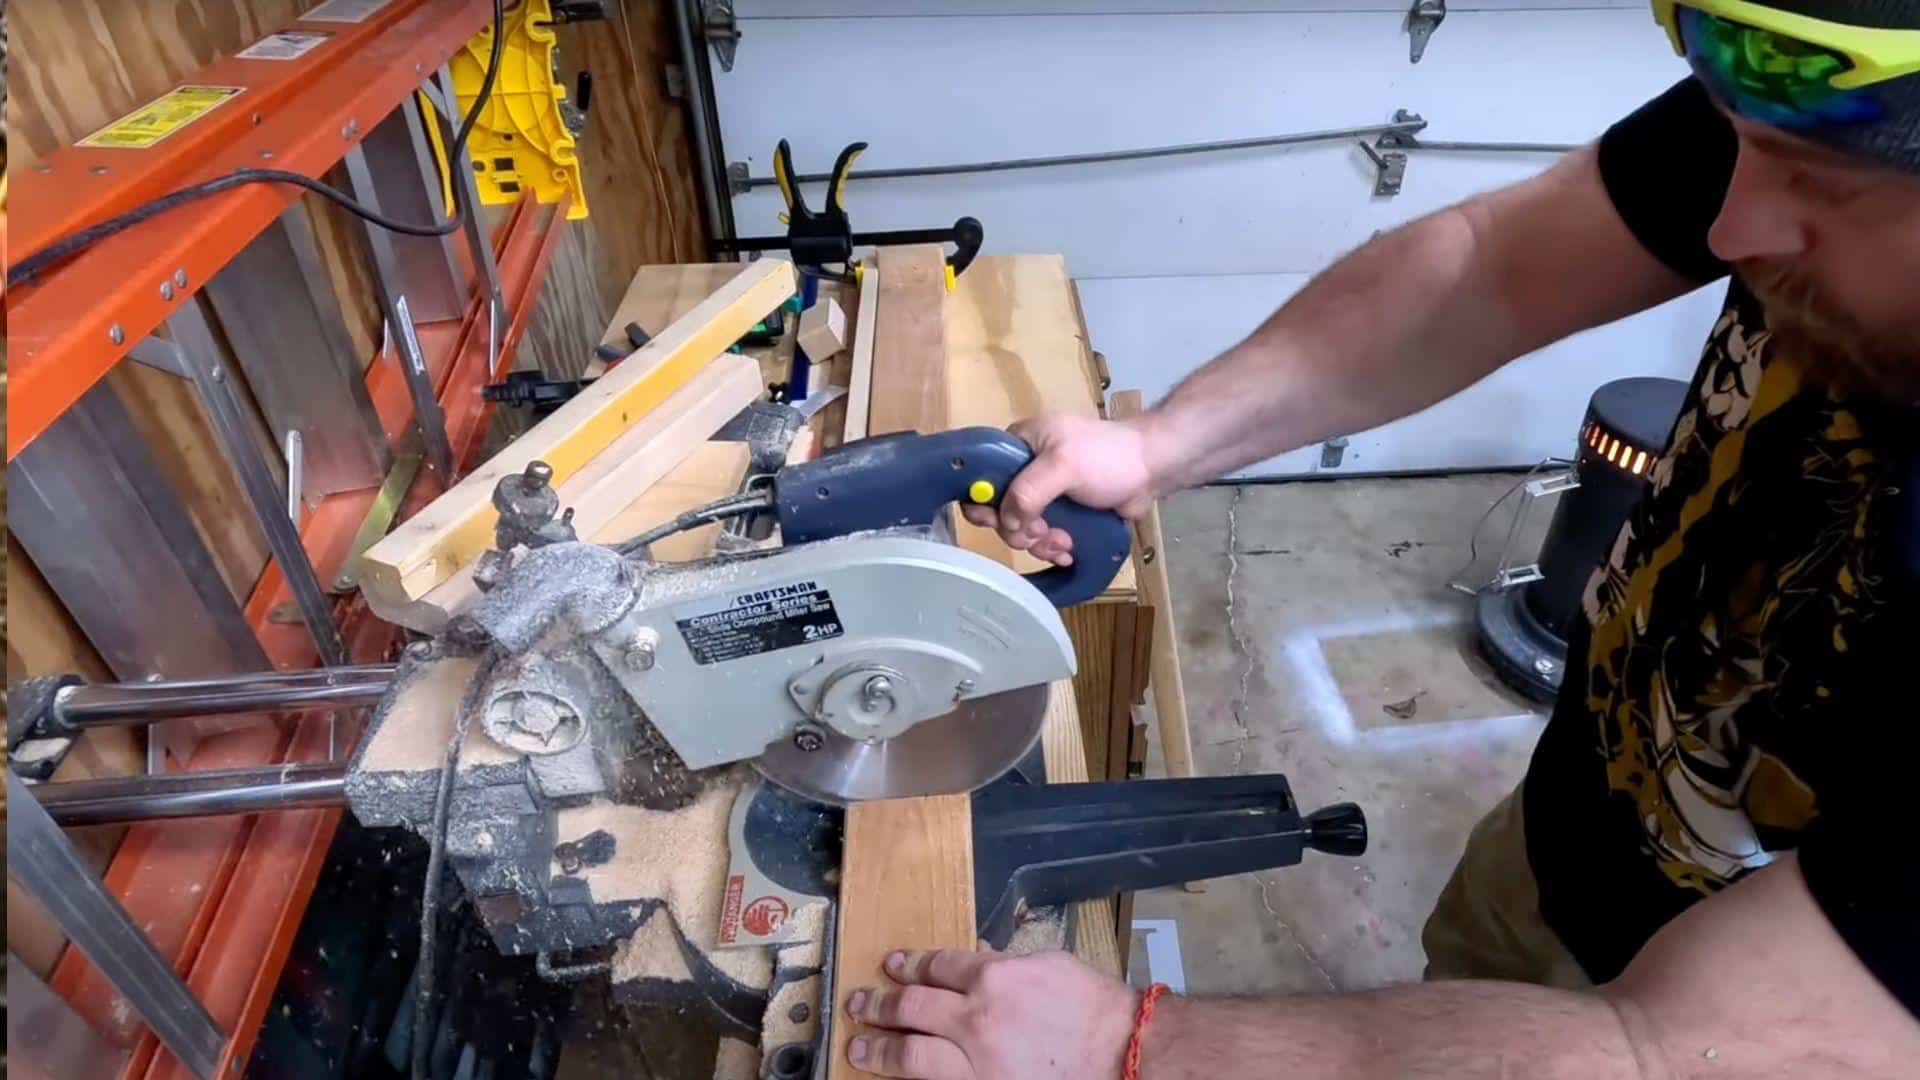
Step 2: Cut the Legs and Frame Pieces
Run the material through the table saw twice to remove rounded edges and cut the legs to the proper size. Position the legs on each side with a top piece connecting them. This creates the basic structure that will support the entire coffee bar frame.
Budget: $0 (using existing tools) or $20-30 for saw blade rental
Pro Tip: Keep one extra piece of scrap wood to test your cuts first. This saves you from wasting good material on mistakes.
Step 3: Build the Main Frame
Assemble the basic frame structure that supports everything. Include legs and frame pieces for two shelves underneath. Build the frame to accommodate the fridge space while providing solid support for the top surface and storage shelves.
Budget: $10-15 for screws and brackets
Pro Tip: Build on a flat surface to keep everything square. Use clamps to hold pieces while you screw them together.
Step 4: Sand Everything Down

Sand all pieces before assembly and painting to achieve a smooth finish. Start with coarser grit sandpaper and progress to finer grits. Sand all surfaces that will be visible in the final build to ensure paint adheres properly.
Budget: $5-10 for sandpaper (120 and 220 grit)
Pro Tip: Start with coarser grit (120) then move to finer (220). Always sand with the grain, not against it.
Step 5: Paint the Frame
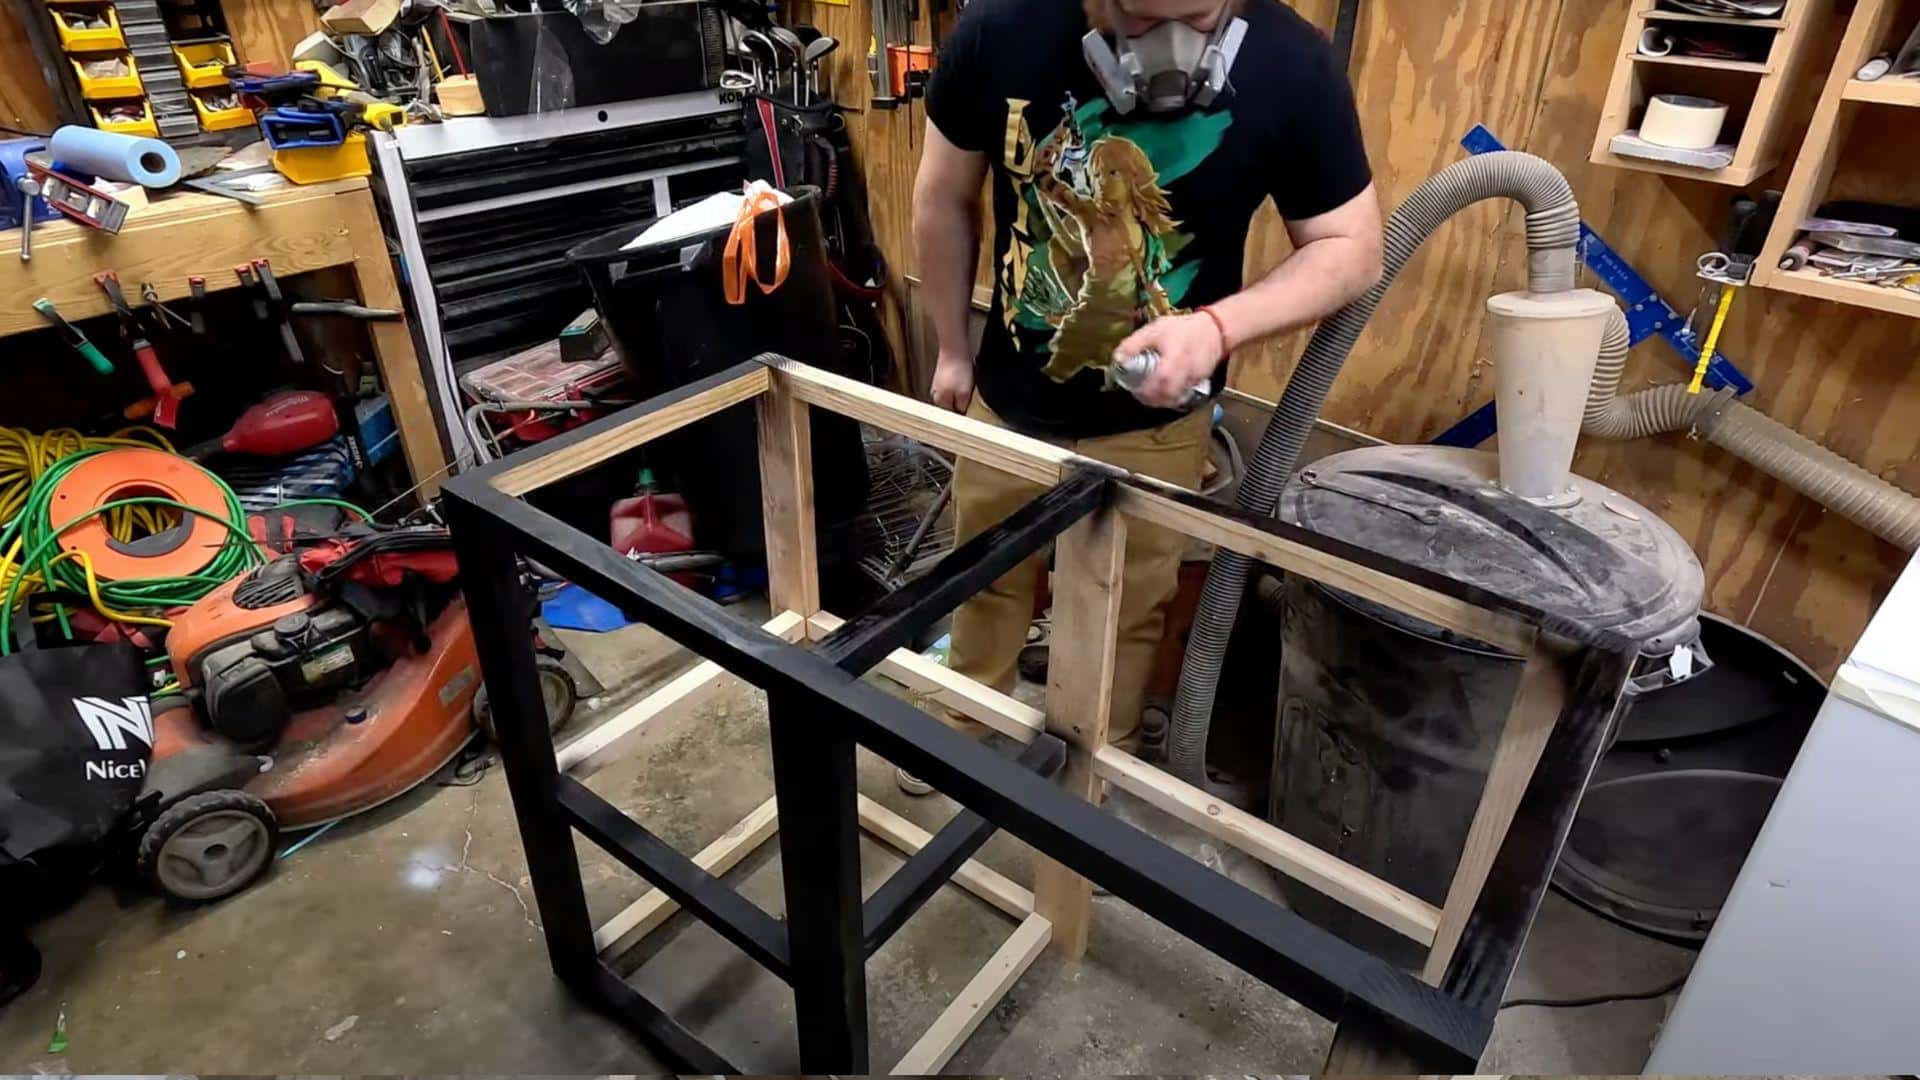
Paint the frame with the chosen color. Black works well for a modern look. Depending on available supplies, use regular paint or spray paint. Apply primer first for better adhesion and a longer-lasting finish. Allow proper drying time between coats.
Budget: $15-25 for paint and brushes
Pro Tip: Use primer first on raw wood. It helps paint stick better and last longer. Spray paint works great for small projects.
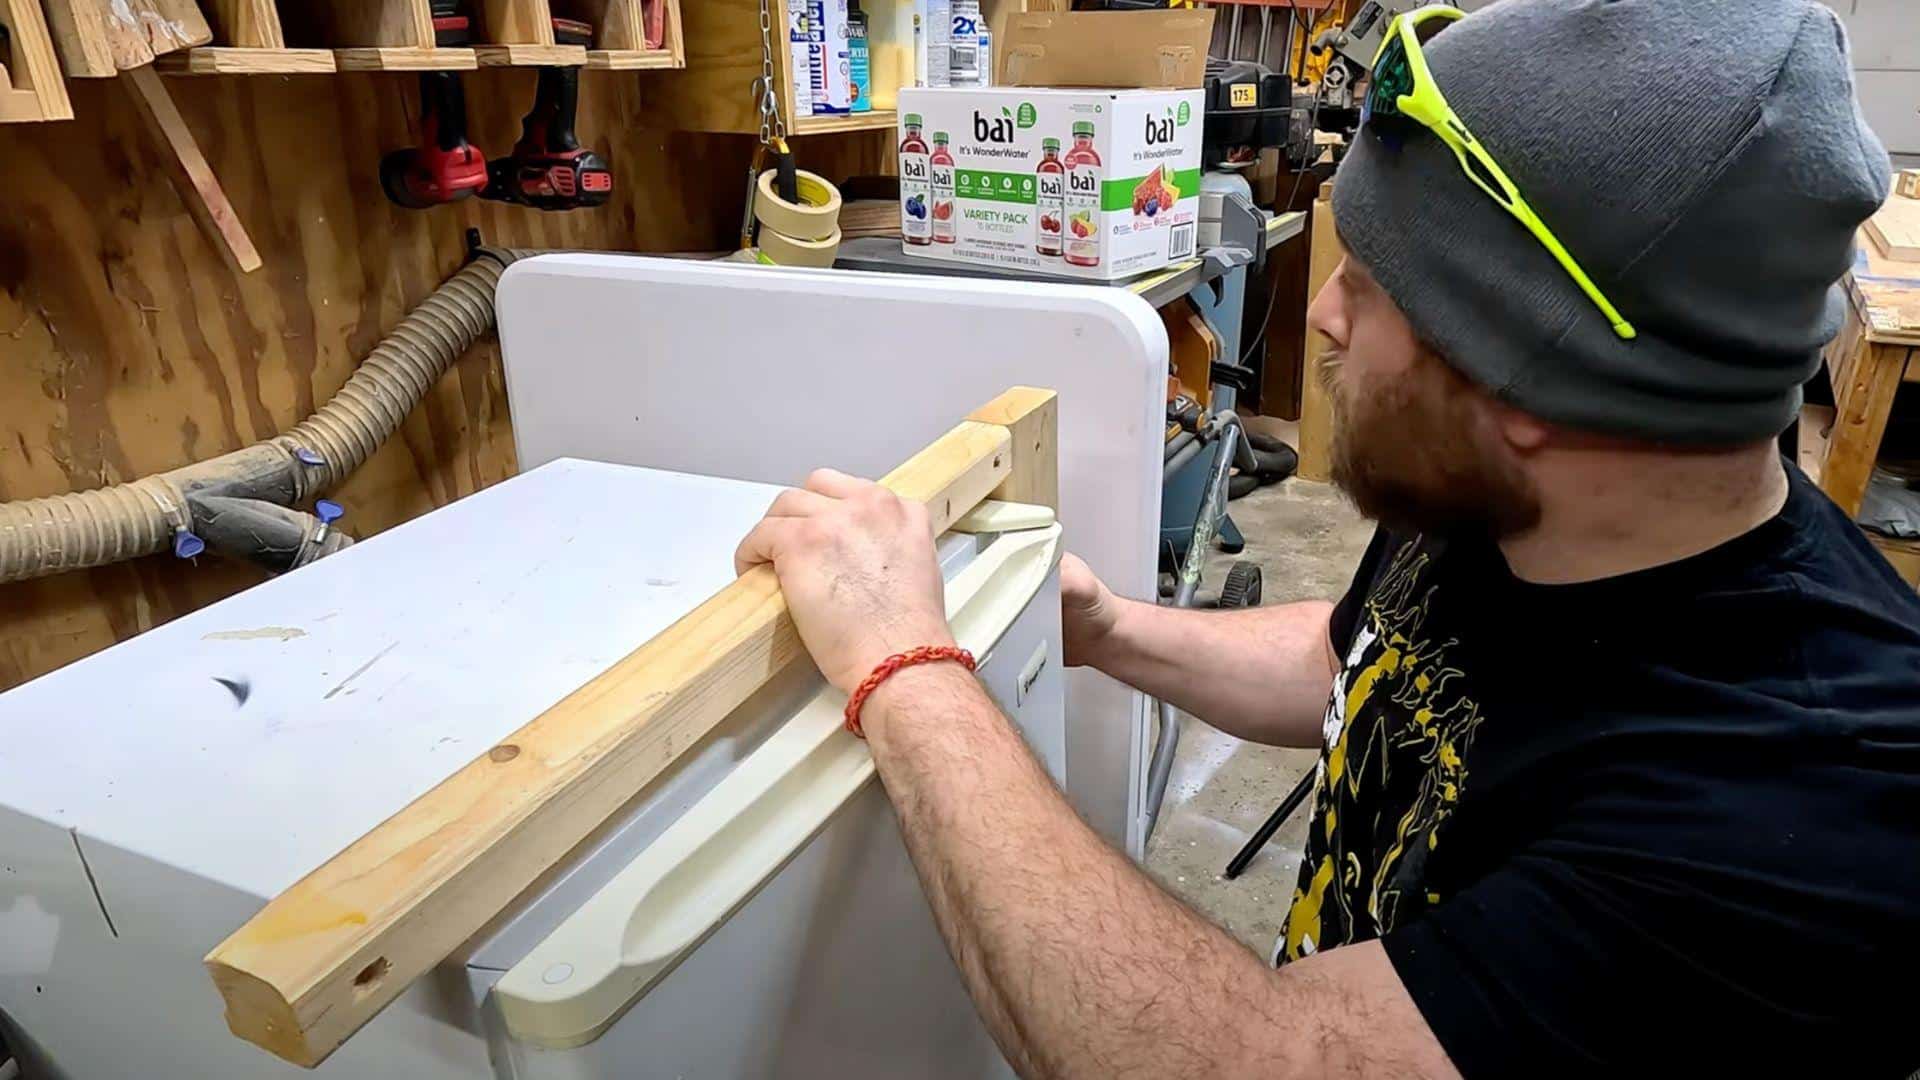
Step 6: Prepare the Top and Shelves
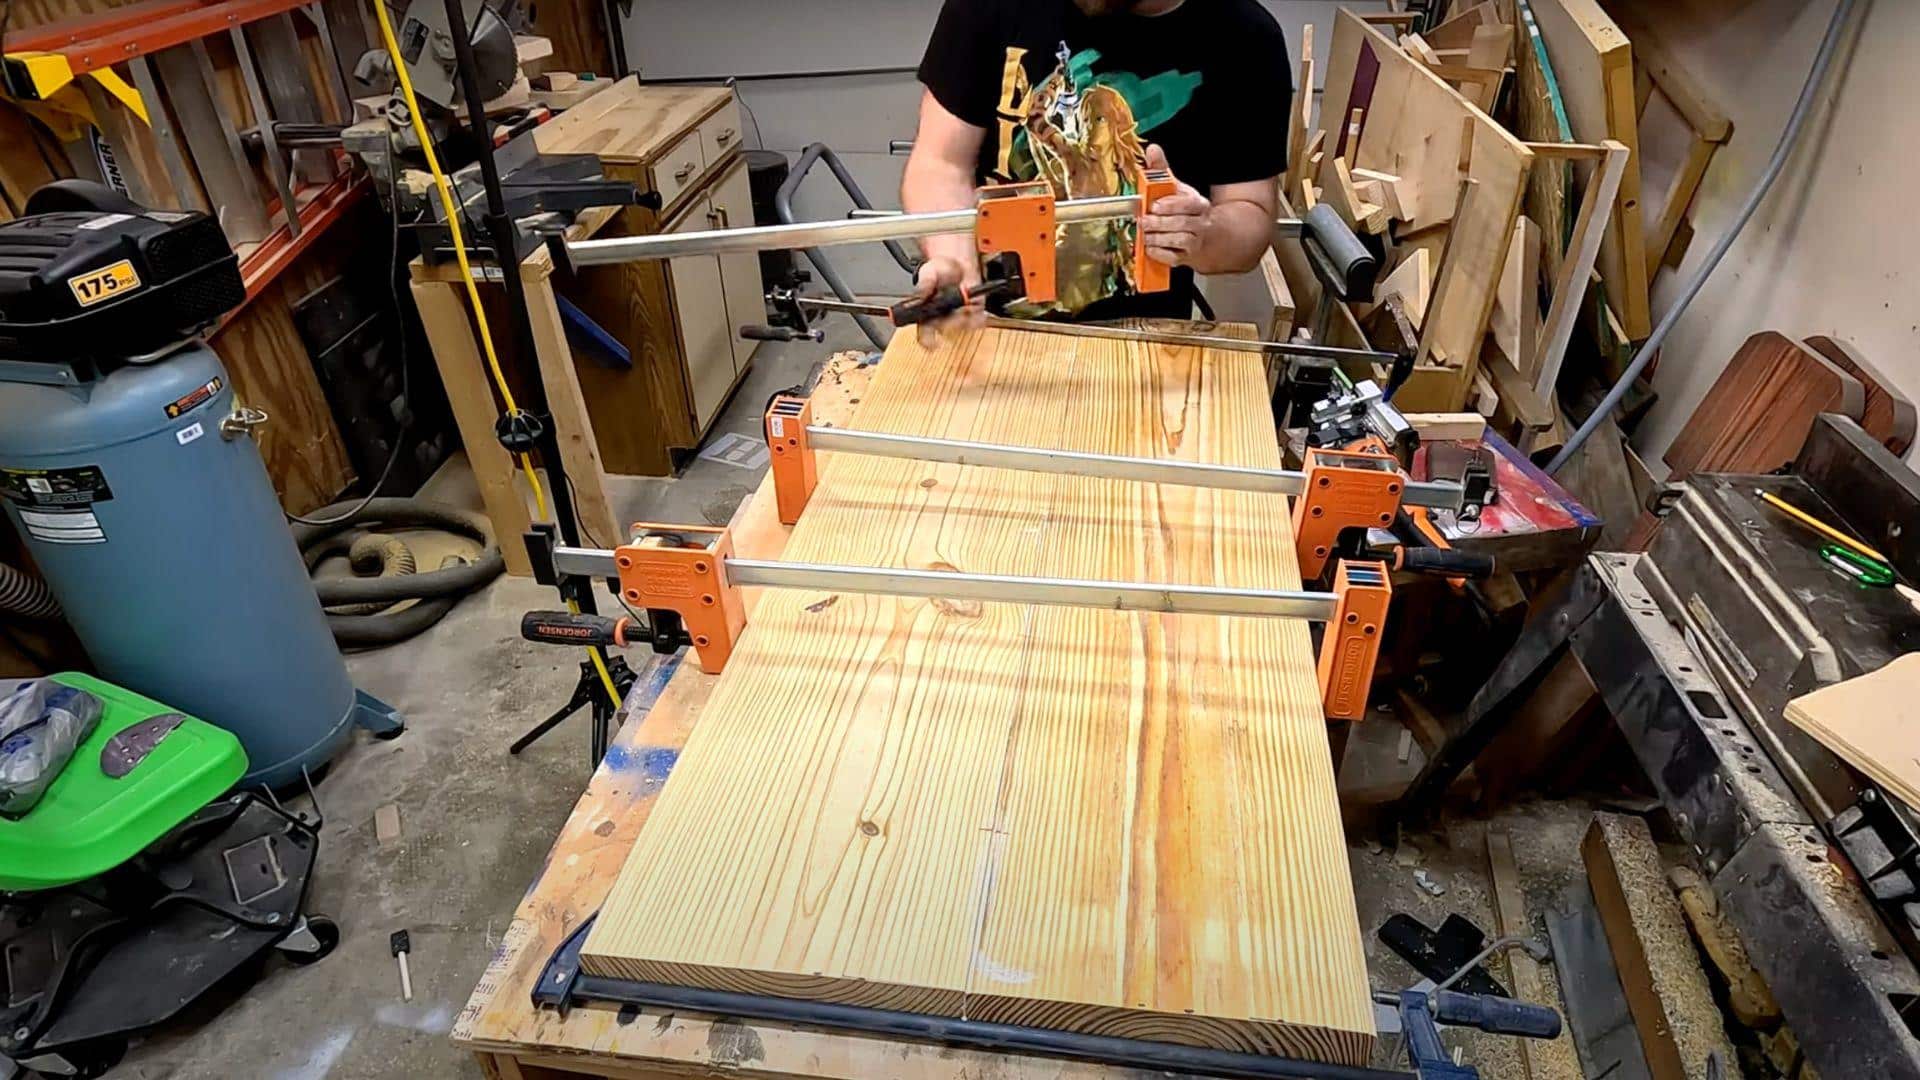
Work on the top and shelf pieces while the paint dries. Consider different finish options, such as torching for a natural look, staining, or leaving the wood in its natural state. Select a finish based on your desired appearance and the available materials. Test options on scrap wood first.
Budget: $10-20 for stain or torch fuel
Pro Tip: Test your finish choice on scrap wood first. What looks good in your head might not work in reality.
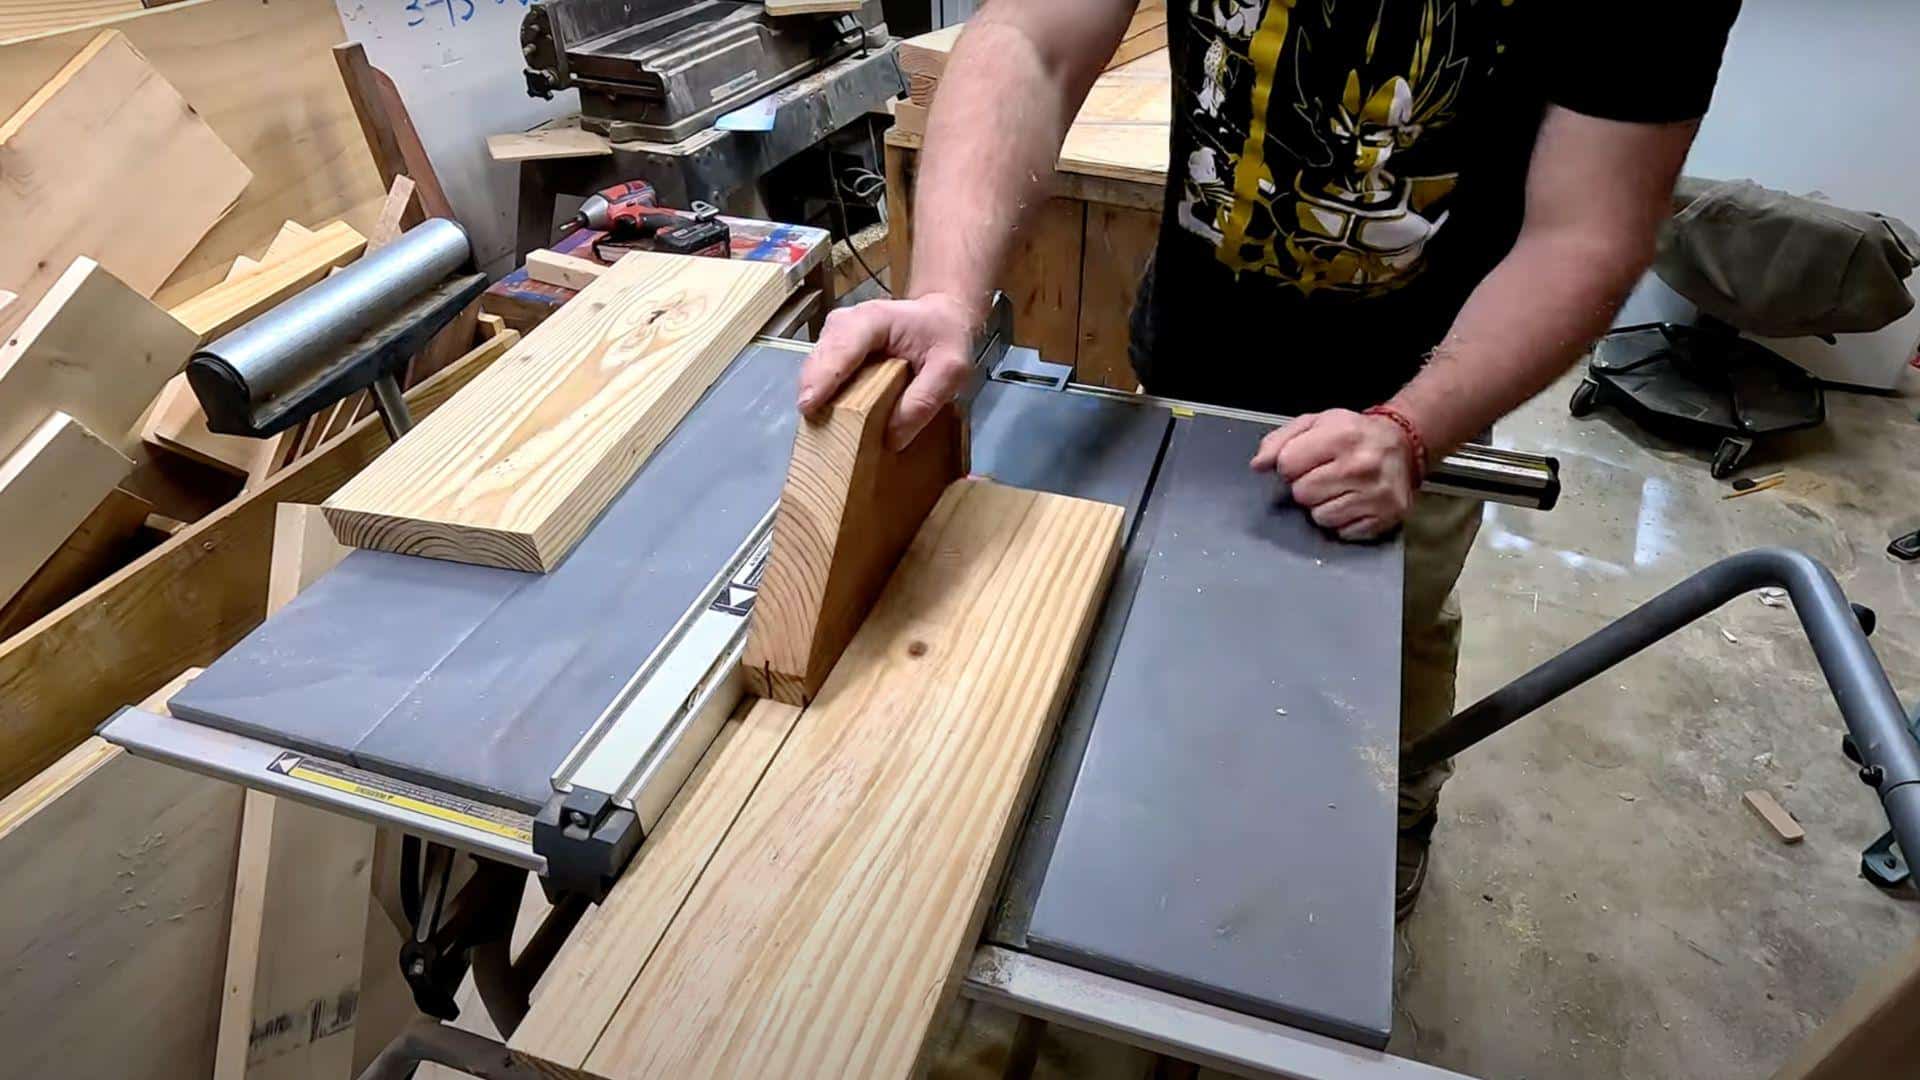
Step 7: Cut Shelf Boards with Notches
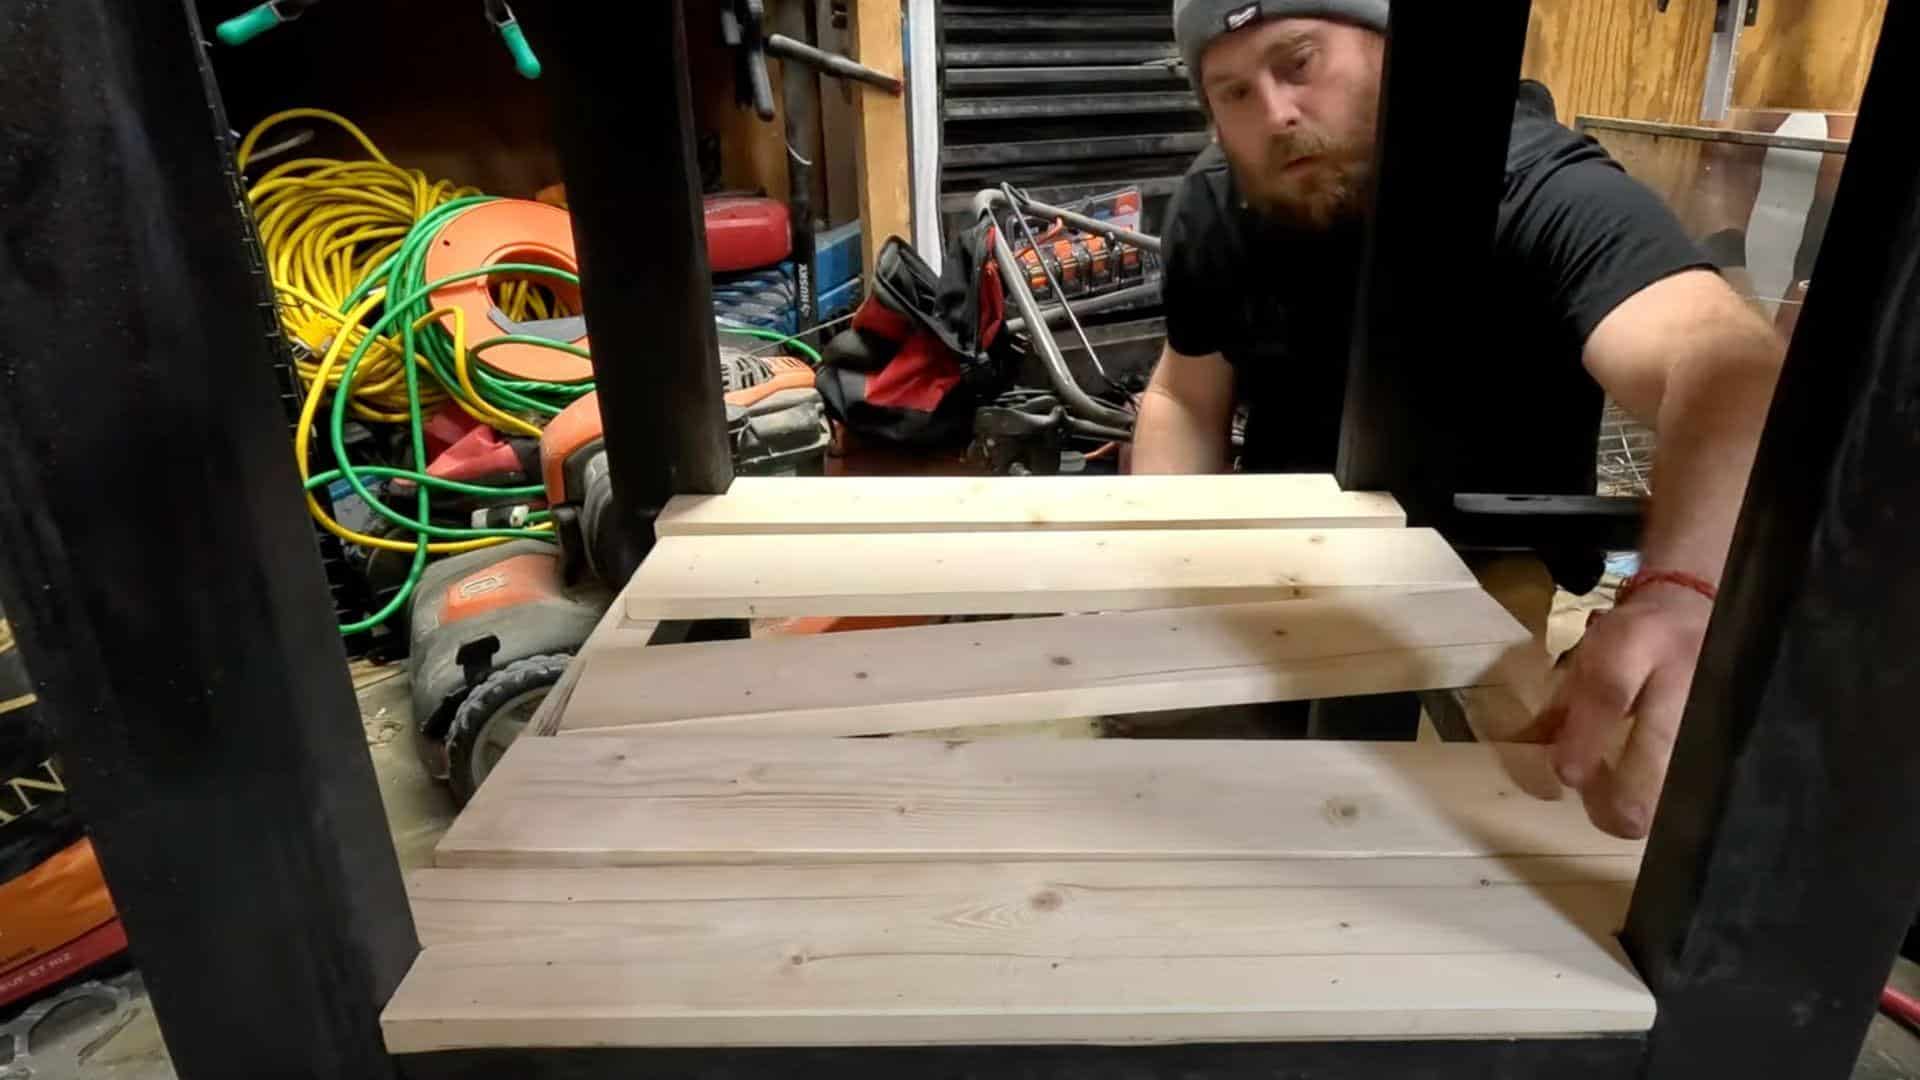
Cut boards for bottom shelves and create notches so they fit around 2×4 frame pieces. Use miter saw for clean cuts. Make notches slightly larger than frame pieces to allow for wood movement and easier assembly.
Budget: $0 (using scrap) or $15-25 for new boards
Pro Tip: Make your notches slightly larger than needed. Wood moves with humidity, and tight fits can cause problems later.
Step 8: Attach the Top
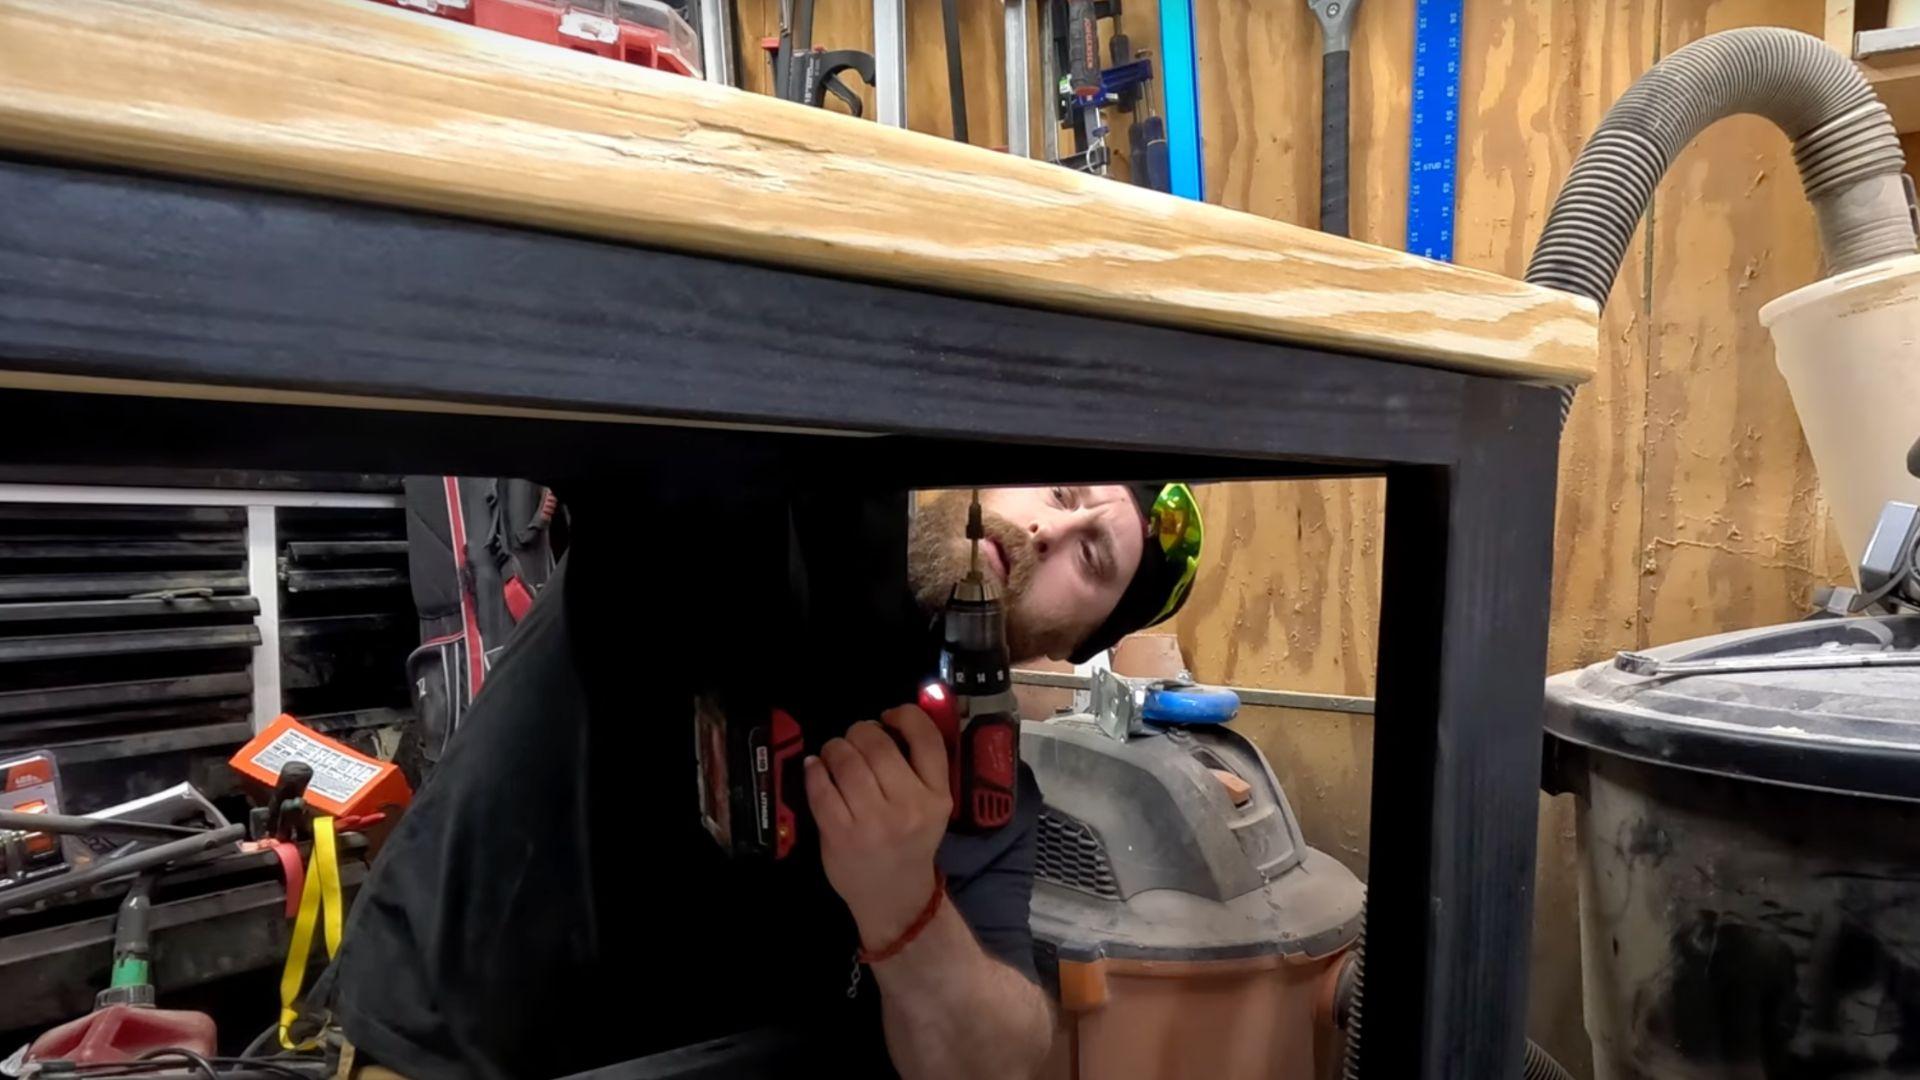
Fasten the top using counter-sunk screws from underneath. Create 7/8 inch overhang on each side for comfort and visual appeal. Keep the back flush against the wall for a clean appearance. Pre-drill holes to prevent wood splitting during assembly.
Budget: $5-8 for screws
Pro Tip: Counter-sinking screws from below keeps the top looking clean. Pre-drill holes to prevent wood splitting.
Step 9: Apply the Finish
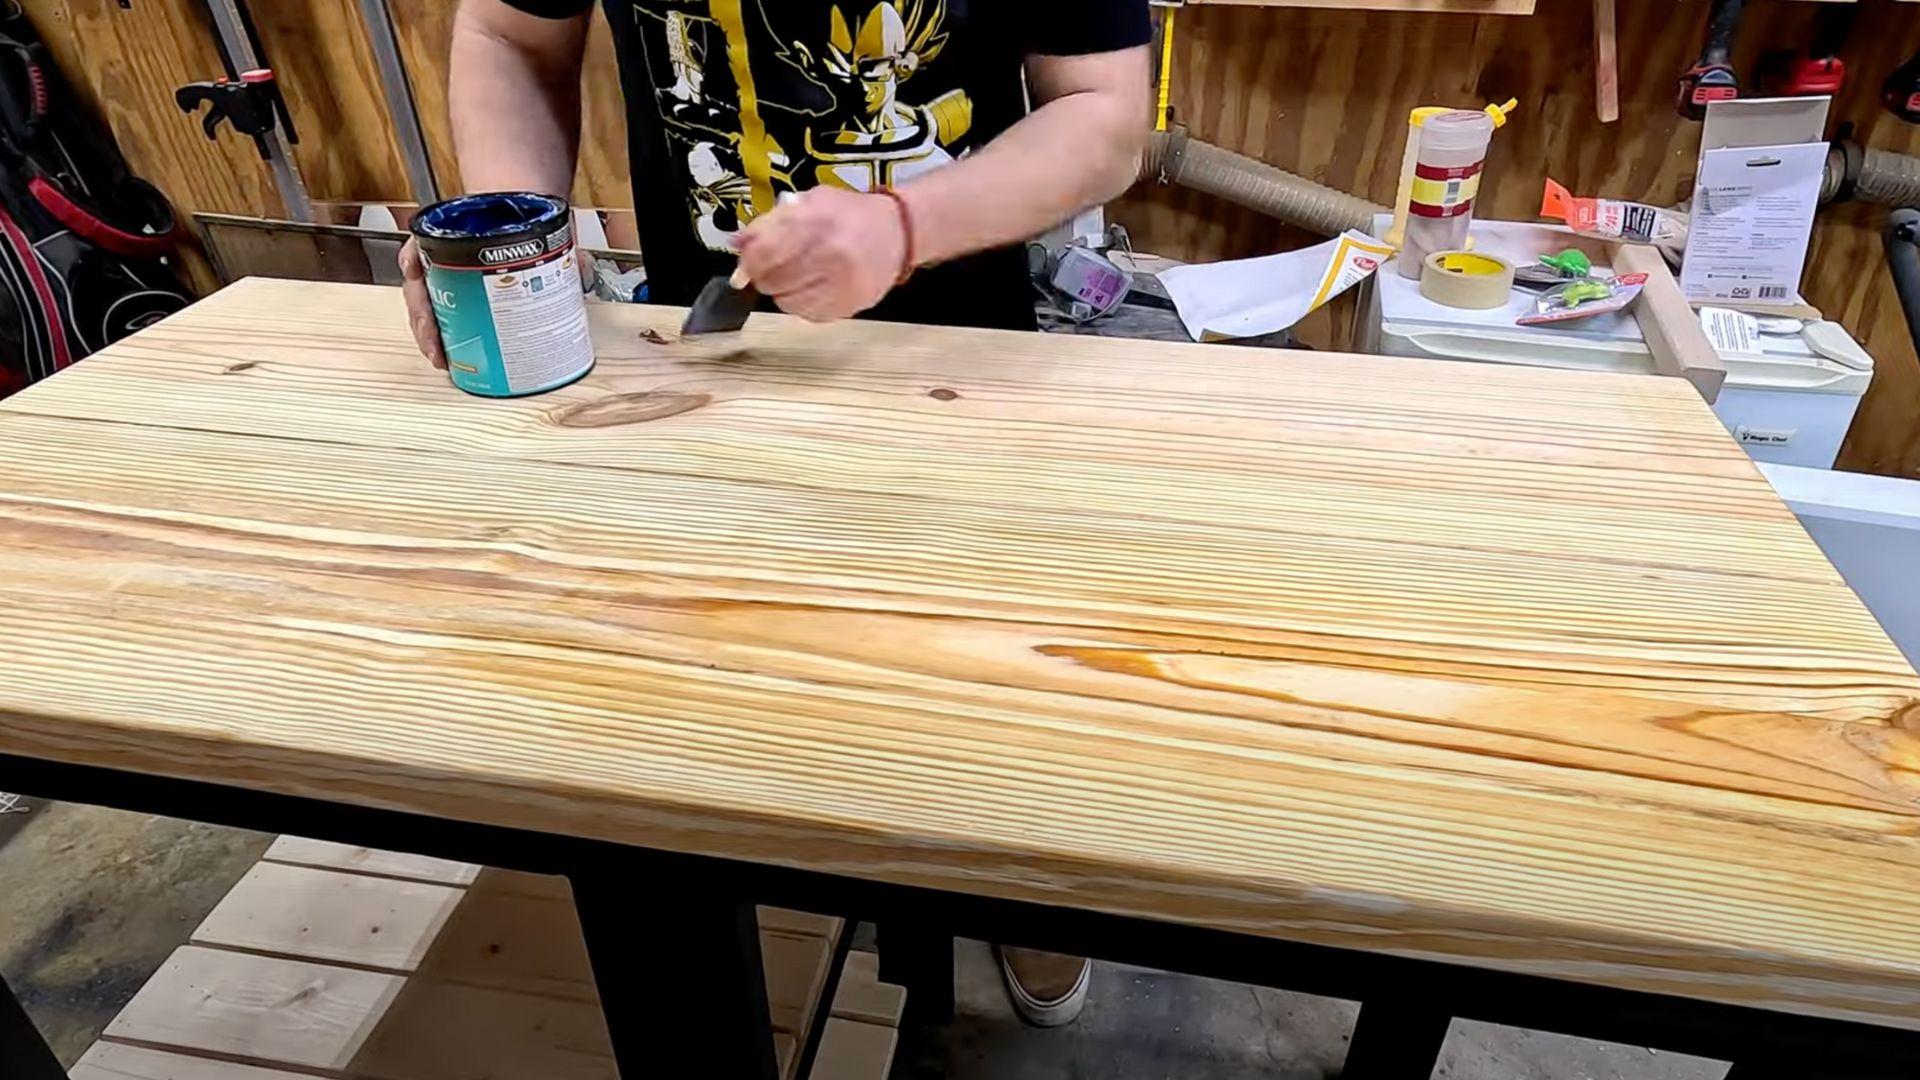
Apply a polyacrylic finish with a total of six coats for maximum protection. Sand lightly between coats with fine grit sandpaper. Allow proper drying time between applications. Six thin coats provide better protection than fewer thick coats for high-use surfaces.
Budget: $12-18 for polyacrylic finish
Pro Tip: Light sanding between coats (220 grit) helps each layer stick better. Six thin coats beat three thick ones every time.
Total Project Budget: $75-200, depending on the materials you already have
Video Tutorial
I want to acknowledge Wooden Essentials for the insightful video, which served as a key reference in compiling this guide.
DIY Coffee Bar Safety Measures
Follow these essential safety precautions to protect yourself while building your coffee bar and ensure a successful, injury-free project.
| Tool/Activity | Safety Measure | Purpose |
|---|---|---|
| Table Saw | Safety glasses, push sticks, and secure workpiece | Prevent eye injury and hand contact with the blade |
| Miter Saw | Safety glasses, let the blade stop before lifting | Prevent cuts and eye injuries |
| Drill/Driver | Safety glasses, secure workpiece | Prevent drill bit injuries and spinning material |
| Sanding | Dust mask, safety glasses | Protect lungs and eyes from wood dust |
| Painting/Finishing | Ventilation, gloves, and a dust mask | Avoid toxic fumes and skin contact |
| General Work | Work gloves, clean workspace, good lighting | Prevent splinters, trips, and accidents |
| Heavy Lifting | Get help, lift with legs | Prevent back injury |
| Electrical | Check cords, keep tools dry | Prevent electrocution |
Conclusion
Building your own DIY coffee bar isn’t just about saving money – it’s about creating something with your hands that you’ll use every single day. You now have all the steps, tools, and tips needed to make a coffee station that perfectly suits your space and budget.
This project teaches valuable woodworking skills while giving you a functional piece of furniture. Your friends will ask where you bought it, and you’ll feel good saying, “I made it myself.”
So what’s next? Head to your local lumber yard this weekend. Start with Step 1 and take your time with each phase. Remember, even beginners can successfully tackle this build.
Your morning coffee routine will never be the same. Ready to start building?