

Installing tiles on drywall may seem like a simple task, but many DIY enthusiasts struggle with this common home project.
When done wrongly, tiles can fall off, water can seep in, and walls can get damaged – problems no homeowner wants to face.
I know how hard it is to find clear answers about tiling on drywall. That’s why I’ve put together this guide based on years of hands-on work and research.
In this post, I’ll explain when you can safely tile on drywall, what types of drywall work best for tiling, how to prep your walls, and which rooms need extra care. I’ll also share useful tips to make your tiling project last.
Can You Tile Over Drywall?
Yes, you can tile over drywall, but not in every case. Drywall makes a good base for tiles in many parts of your home, such as kitchen backsplashes and dry bathroom walls. I’ve seen many fine tile jobs on drywall that have lasted for years without issues.
Key Requirements:
The main thing to know is that success depends on two key factors:
- The state of your drywall
- Where do you plan to put the tiles
Drywall must be firm, dry, and free from damage before you start. It also needs to be in a spot that won’t face lots of water or moisture daily.
When these basic needs are met, drywall can be a stable, cost-effective base for your tile project.
When Is Tiling Over Drywall Safe?
Tiling over drywall is a great option in areas of your home that remain mostly dry. Places like kitchens, living rooms, and hallways are perfect spots.
In these areas, drywall has plenty of strength to hold up tiles without issues. The end result looks clean and lasts a long time when done right.
Best Places for Drywall Tile Projects
- Kitchen backsplashes – The wall behind your sink or stove can look much better with tiles, and drywall makes a smooth, flat base
- Accent walls in dining rooms or living spaces where water exposure is minimal
- Fireplace surrounds that aren’t exposed to high heat
- Entryway feature walls where moisture isn’t a concern
- Dry bar areas where splashes are minimal and cleaned promptly
DIY Steps: How to Tile on Drywall
Follow these steps for a smooth tile installation on drywall. Like putting together a puzzle, each step matters for a perfect finish.
Tools and materials required:
| Tools Needed | Materials Needed |
|---|---|
| Tape measure | Tiles |
| Level | Thin-set mortar |
| Notched trowel | Grout |
| Tile cutter or wet saw | Tile spacers |
| Rubber float | Primer |
| Mixing bucket | Joint compound (for repairs) |
| Drill with mixing paddle | Sandpaper (medium grit) |
| Sponge | Sealer (for grout) |
| Safety glasses | Caulk (for edges) |
| Utility knife | Clean rags |
| Pencil | Masking tape |
| Square | Plastic sheeting (for protection) |
Step 1: Preparing the Surface
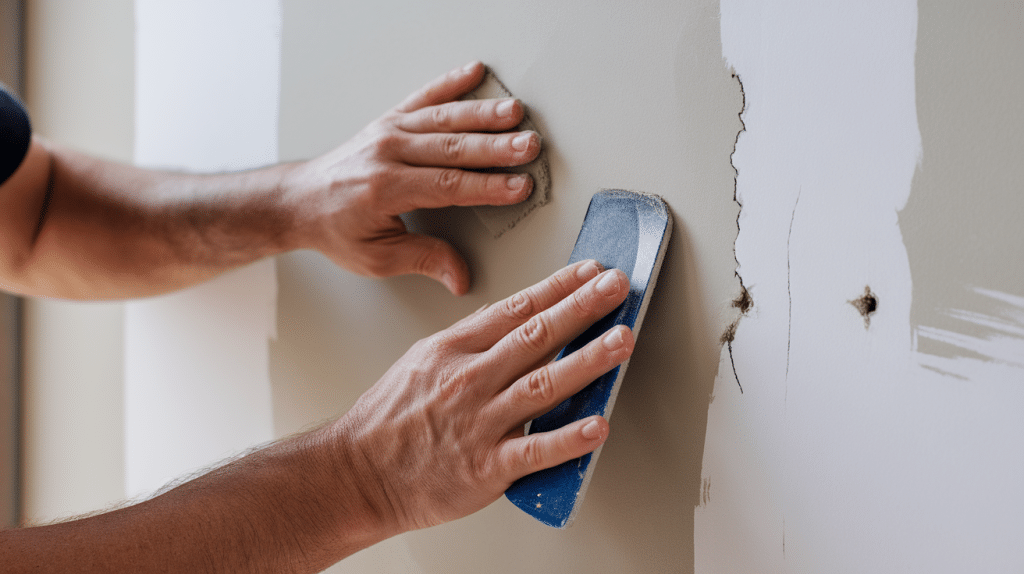
Good prep work is the secret to tiles that stay put on drywall. Before you start, check your walls for small cracks, dents, holes, and protruding screws or nails.
Fix problems with joint compound and let it dry completely. Then sand the whole area with medium-grit sandpaper until smooth. Your goal is a flat, even surface for better tile adhesion.
Step 2: Priming and Cleaning
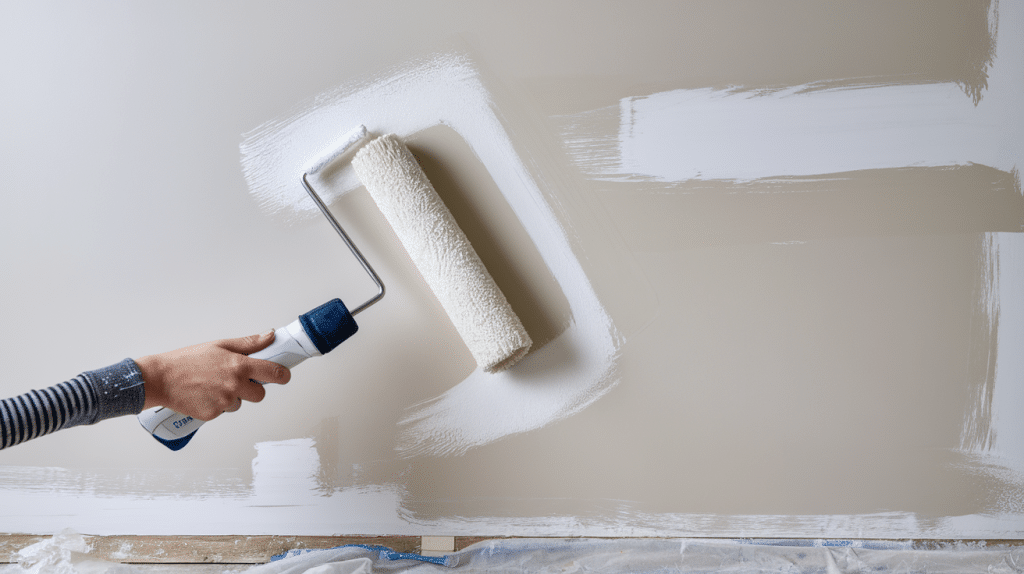
Once your surface is smooth, remove all dust with a vacuum or a damp cloth. Even tiny dust particles can prevent proper adhesion.
Apply a coat of tile-specific primer to seal the porous drywall, create a stronger bond with adhesive, prevent moisture issues, and keep tiles secure. Allow the primer to dry completely according to the manufacturer’s instructions before beginning your tile installation.
Step 3: Choosing the Right Adhesive
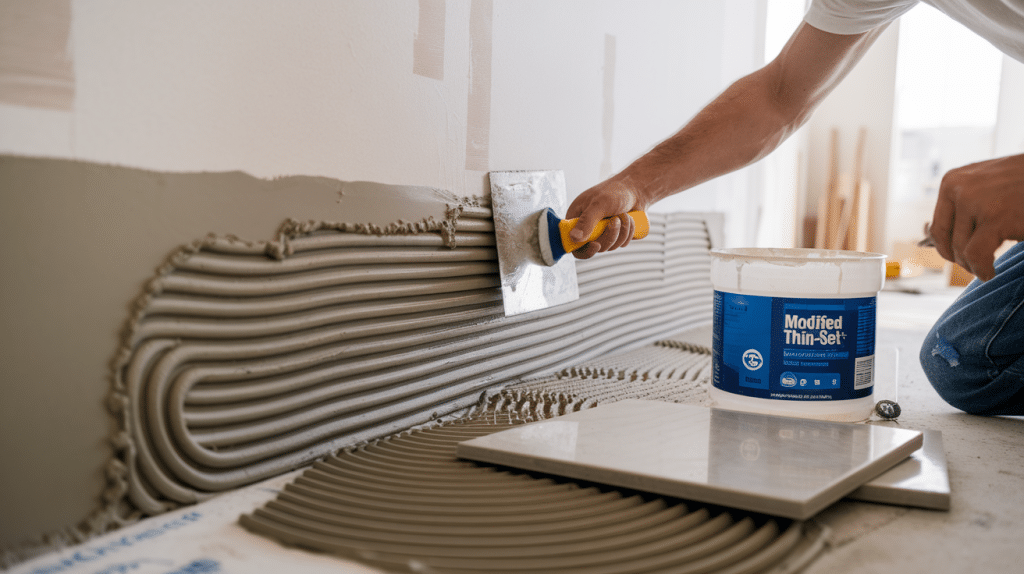
Thin-set mortar works best for attaching tiles to drywall. It creates a strong bond that lasts and doesn’t add much moisture to your wall. Look for modified thin-set, which has polymers for better adhesion.
Mastic adhesive might work for small projects like kitchen backsplashes, but avoid it in any place that might get damp. It takes longer to dry and can feed mold if it gets wet.
Step 4: Tile Selection
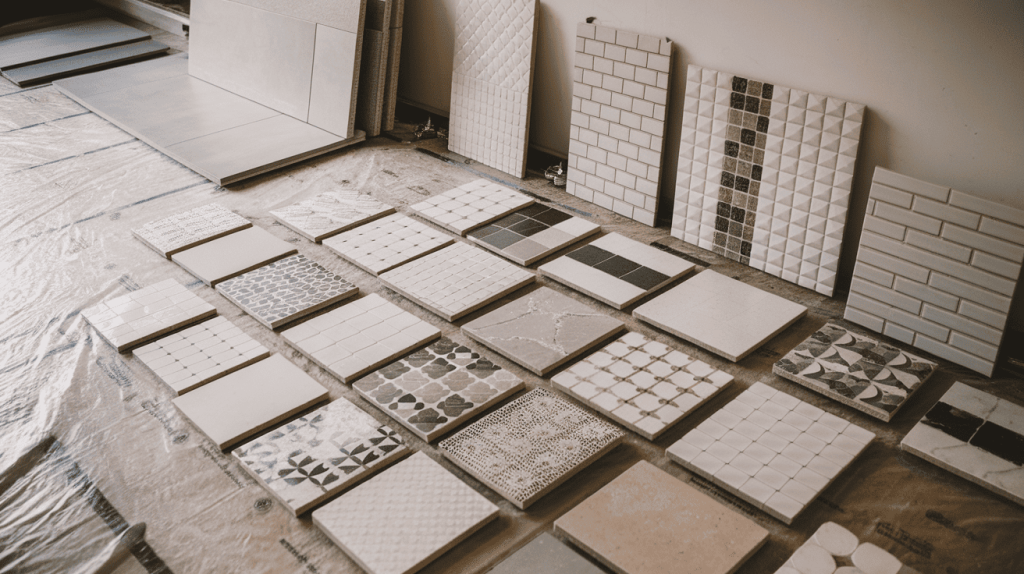
Not all tiles are good matches for drywall. Stick with lighter options that won’t pull on your wall over time. Small to medium ceramic tiles are perfect, and porcelain works well too if not too heavy.
Be careful with large-format tiles (larger than 12 inches). They may need extra support or a stronger backing material. Heavy natural stone tiles like marble or granite often need something stronger than standard drywall to support their weight.
Step 5 (Optional): Extra Support for Large Tiles
Large tiles can be applied to drywall, but they require special care. Tiles over 12 inches put more strain on walls because of their weight. When working with large tiles:
Check your drywall thickness first – 1/2 inch is the minimum for most tile jobs, but 5/8 inch offers better support for larger tiles. Consider adding a layer of 1/4-inch backer board over existing drywall for added strength.
You might need to add extra studs to your wall frame if you’re planning the project from scratch. Standard stud spacing (16 inches) may not provide enough support for heavy, large-format tiles.
Use a high-quality modified thin-set and apply it with a larger notched trowel to create a stronger bed. The right adhesive makes a big difference when working with heavier tiles.
Pro Tips for Tiling on Drywall
- Use a level to mark a straight line before starting – this prevents crooked tile rows
- Apply thin-set in small sections (2-3 sq ft) so it doesn’t dry before placing tiles
- Press tiles firmly with a slight twist to ensure good contact with the adhesive
- Let the adhesive dry completely (24+ hours) before grouting
- Use plastic spacers for even grout lines
- Work from the center outward for the most even-looking layout
- Keep a damp sponge handy to clean excess adhesive quickly
- For wall edges, use matching trim pieces rather than exposed tile edges
The Risks of Tiling on Wet Areas
Putting tiles on regular drywall in wet areas is asking for trouble. Places like showers, tub surrounds, and steam rooms pose serious risks because water inevitably finds its way behind tiles.
This trapped moisture creates a perfect storm of problems:
- Black mold growth behind your walls
- Drywall that crumbles and loses strength
- Tiles that crack or pop off the wall
- Damage that spreads to nearby wall sections
For these high-moisture areas, you need specialized materials like cement board, foam-core backer boards, or waterproof panels instead.
Conclusion
Tiling on drywall can be a great option when done right and in the right places. The key takeaway? Location matters most.
For dry areas like kitchen backsplashes or living room walls, properly prepared drywall makes an excellent tile base. For wet areas, always choose cement board instead.
Remember to prep thoroughly, choose the right adhesive, and select tiles that work with your wall type. These simple steps prevent the most common tiling problems.
What’s your next tile project? Whether you’re refreshing a kitchen backsplash or creating an accent wall, the right preparation will make all the difference.
Share your experience in the comments, or reach out with questions about your specific situation.
Happy tiling!
Frequently Asked Questions
Can you Tile Directly Over Drywall without Preparation?
No. Always clean the surface, repair damage, sand it smooth, and apply primer before tiling. These steps ensure tiles bond properly and stay put.
What Type of Drywall Is Best for Tiling?
Standard drywall works in dry areas. Use moisture-resistant green board for humid spaces. Wet areas like showers need cement board, not drywall.
Do I Need a Backer Board for Tiling Over Drywall?
Not for dry areas like backsplashes. But always use cement backer board in wet areas like showers and tub surrounds to prevent water damage.
How Can I Prevent Moisture Damage when Tiling Over Drywall?
Never tile over drywall in wet areas. Use cement board instead. In drier spaces, seal drywall with primer and use quality waterproof grout.