
Want to give your house more personality and style with a built-in fireplace? Building a DIY fireplace with custom-built-ins is simpler than you think. This project adds instant character to any room.
Many homes have empty walls that feel cold and unwelcoming. A built-in fireplace wall effectively solves this problem. You get storage, style, and a focal point all in one feature.
The best part? You don’t need professional carpentry skills to create stunning results. With basic tools and weekend time, you can build a fireplace wall that looks like it cost thousands.
This complete guide walks you through planning, building, and finishing your fireplace built-ins.
We’ll cover design options, technical tips, and step-by-step instructions. You’ll have everything needed to create your dream fireplace wall.
Where to Use Fireplaces for a Complete Home Makeover
Fireplaces enhance any space, not just living rooms. In the main living area, a fireplace wall creates a cozy focal point and architectural charm, centring the room and improving flow in open layouts.
Dining rooms gain warmth and drama, making meals feel special and encouraging guests to linger with style. Built-in fireplaces turn bedrooms into cozy retreats, bringing hotel-suite luxury, relaxation, and romantic ambiance.
In home offices or studies, fireplaces boost comfort and focus, while built-in shelves add useful storage for books or décor.
Basements or game rooms instantly become inviting, year-round spaces perfect for family time or entertaining.
Even entryways or wide halls benefit from compact fireplaces that offer a welcoming first impression and unique style.
Beyond heat, fireplaces define zones, provide storage, hide electronics, and elevate your home’s character and functionality. Thoughtful placement can truly change any room’s purpose and aesthetic.
Planning Your Fireplace Wall Design
Planning is the most crucial step in any DIY fireplace project. Getting this right saves you time, money, and frustration in the long run.
| Planning Factor | What to Consider |
|---|---|
| Wall Selection | Choose the main focal wall where people naturally look |
| Room Layout | Leave enough space for furniture and walking paths |
| Measurements | Height, width, and obstacles like outlets or vents |
| Family Needs | Storage requirements for books, games, and electronics |
| Ceiling Height | Tall ceilings offer more design options but need extra planning |
Choose the right wall for your DIY fireplace project. The best spot is usually the main focal wall where people naturally look when they enter the room. Avoid walls with lots of windows or doors.
Consider your room’s layout when planning your space. You want enough space for furniture and walking paths. A fireplace that’s too big can make a room feel cramped.
Pro Tip: Sketch your ideas on paper first and draw the wall to scale. Try different fireplace sizes before buying any materials. This simple step prevents costly mistakes during construction.
Fireplace Built-Ins: Step-by-Step Build Process
Follow these detailed steps to build your fireplace built-ins from start to finish. Each step builds on the previous one, so take your time and check your work as you go.
Step 1: Planning & Layout
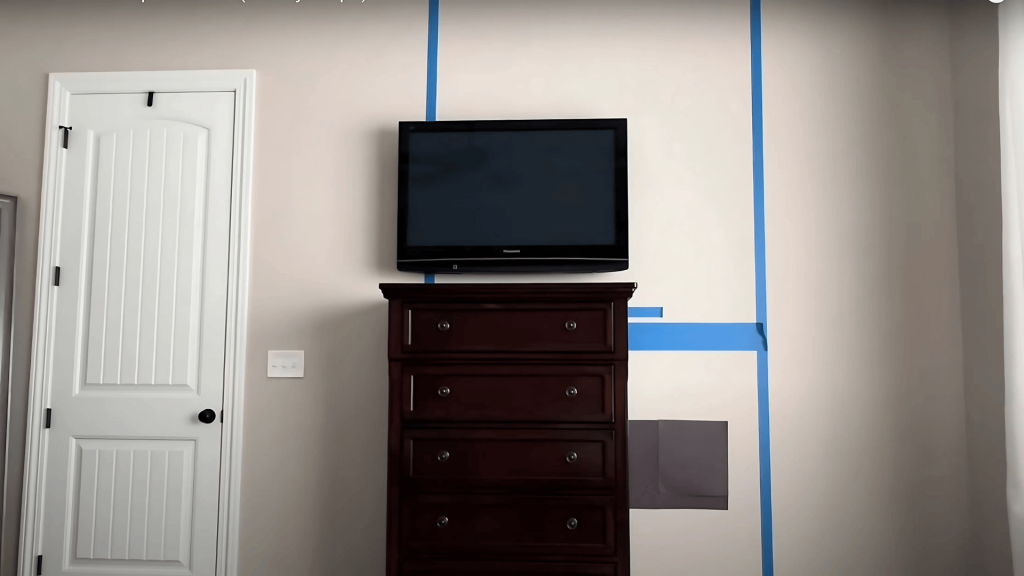
Start by preparing your wall and marking the exact placement for your fireplace frame. Clear away any furniture or wall decorations to create a spacious work area.
Use painter’s tape to outline the approximate size of your fireplace wall on the existing surface.
Mark the center point of your wall by measuring the total width and dividing by two. Use a stud finder to locate and mark all wall studs behind the area where your frame will be placed.
Double-check these measurements before moving to the next step.
Pro Tip: Use a laser level to ensure all your marks are perfectly straight and aligned. This saves time and prevents crooked installations later.
Step 2: Install Wall Anchors
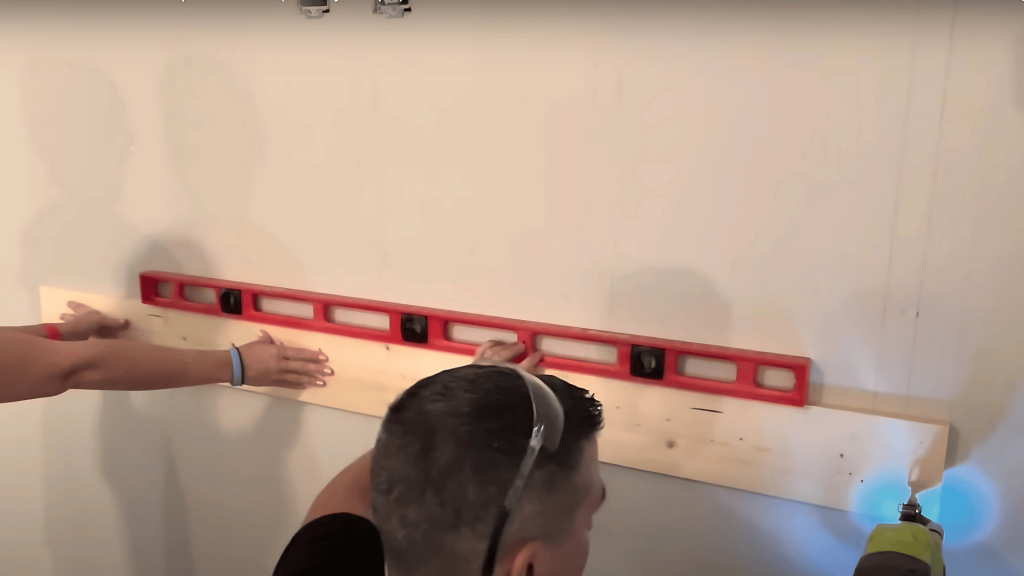
Cut four 1×6 boards to 67 inches wide for your wall anchor system; Mark vertical lines from floor to ceiling on each stud location you found earlier.
These boards will provide a solid mounting surface for your fireplace frame.
Use Bradnails to temporarily hold each 1×6 board in place, measuring to ensure they align with the center of each stud.
Once positioned correctly, drill two 3⅛-inch star-head screws per stud into each board. Remove the brad nails after the screws are securely in place.
Pro Tip: Pre-drill screw holes to prevent the wood from splitting. Use a drill bit slightly smaller than your screw diameter for the best hold.
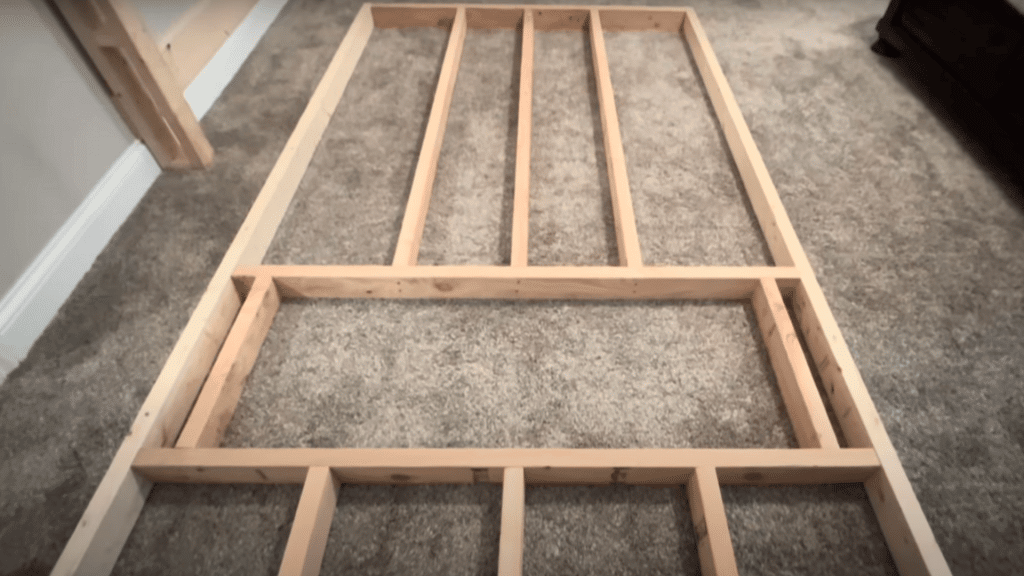
Step 3: Build Side Frames
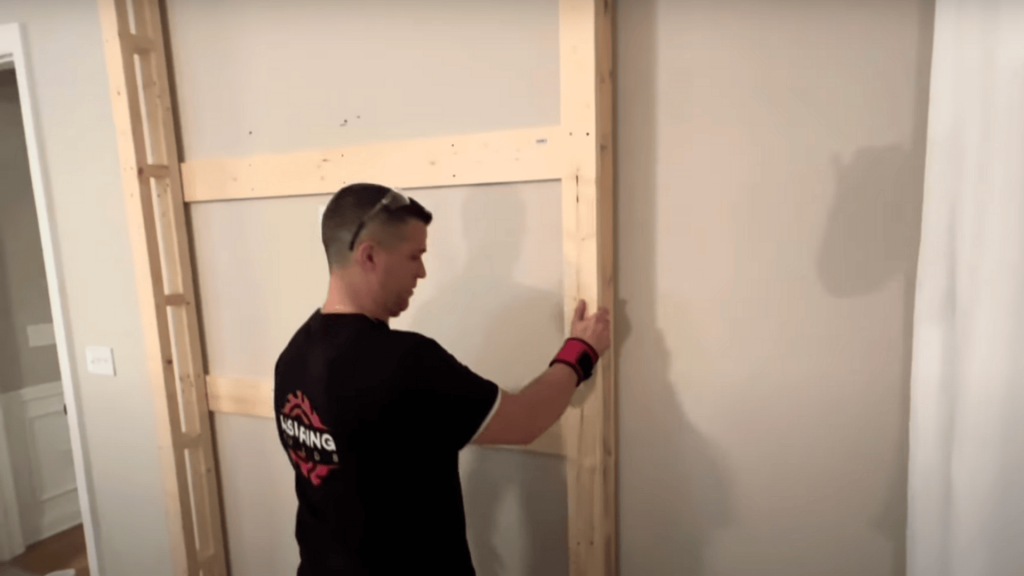
Attach two 2×4 boards vertically to create the side frames for your fireplace wall. These should be 9 feet tall to match standard ceiling height.
Cut seven 2×4 blocks to your desired depth and sandwich them between each vertical frame piece.
Use clamps to keep the blocks aligned evenly while you work. This creates a sturdy frame that can support the weight of your fireplace and built-in storage.
Secure the completed side frames to the installed 1×6 anchor boards using 3⅛-inch screws.
Pro Tip: Check that your frames are plumb and level before final attachment. A small error here becomes a big problem later in the build.
Step 4: Frame Fireplace Opening
Measure the rough opening requirements carefully according to the specifications of your replacement product. Frame the area around the fireplace using 2×4 lumber and 2½-inch screws for assembly.
Leave the exact opening size specified by your fireplace manufacturer.
Test-fit your fireplace unit into the frame before proceeding to this step. Adjust the height to about 19 inches from the floor for comfortable viewing and proper clearance.
Make any necessary adjustments now while access is still open.
Pro Tip: Always cut just beside your pencil line, not directly on it. This gives you room to make small adjustments for a perfect fit.
Step 5: Install Your Fireplace
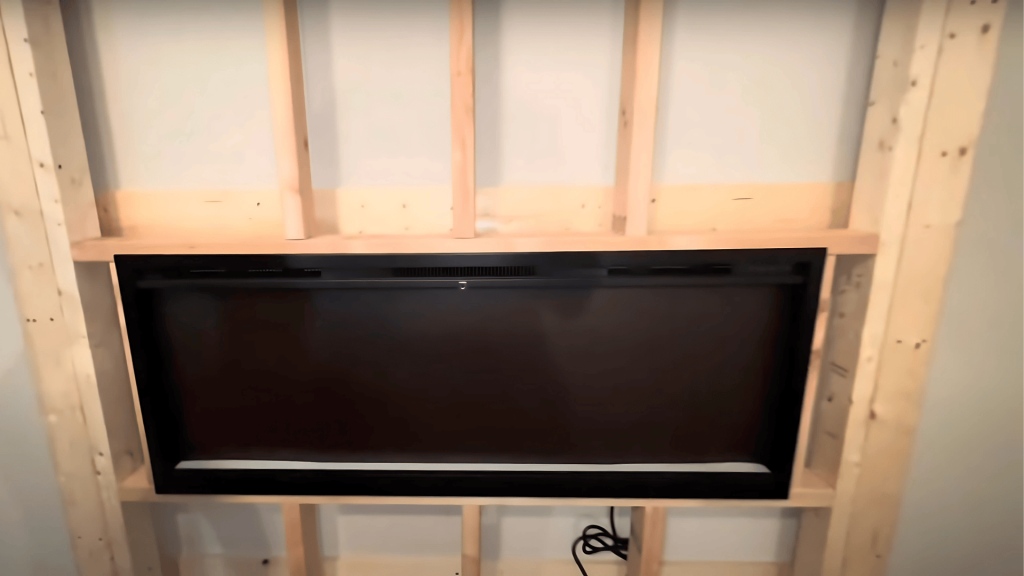
Remove the glass panel from your fireplace unit before installation to ensure safety and reduce weight. Take out the two screws from the top vent on both the left and right sides.
Tilt and lift the glass panel out carefully and store it in a safe location.
Remove the internal mounting brackets and save all screws for reinstallation later. Plug in your fireplace unit and test all functions before placing it in the frame.
Insert the fireplace into your framed opening and secure it with two screws per side through the provided mounting holes.
Pro Tip: Use a magnetic wristband to keep screws handy while you work. This simple tool saves lots of time during assembly and prevents lost hardware.
DIY Fireplace Inspiration Ideas
Get creative with your DIY fireplace design by exploring different styles and approaches. These popular ideas can spark your imagination and help you create a unique look for your space.
1. Rustic Wood and Stone Combination
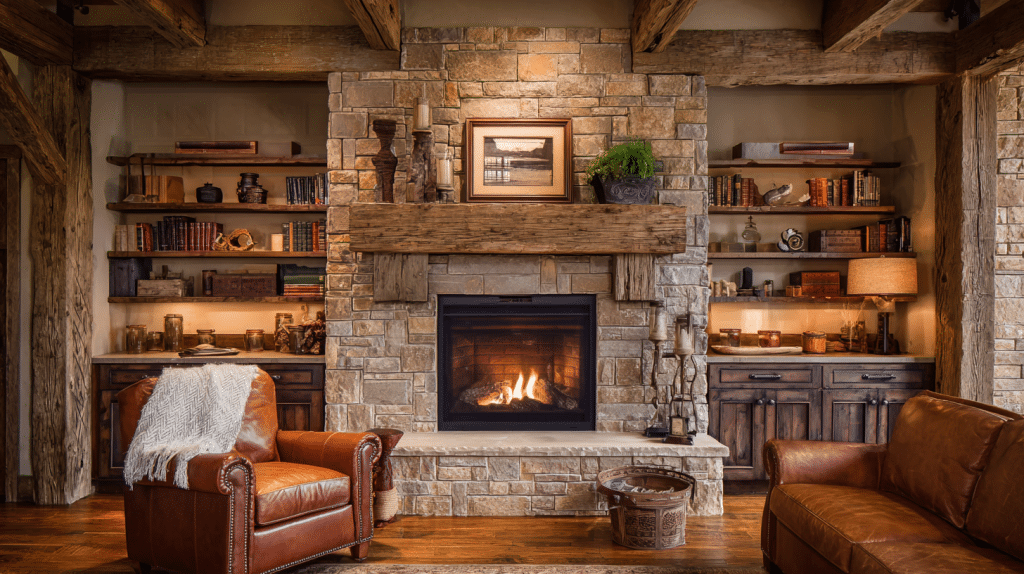
Mix natural wood shelving with stone or brick around the fireplace opening. This creates a cozy cabin feel that works well in both traditional and farmhouse-style rooms.
Use reclaimed wood for shelves to add character and warmth to your built-in fireplace wall.
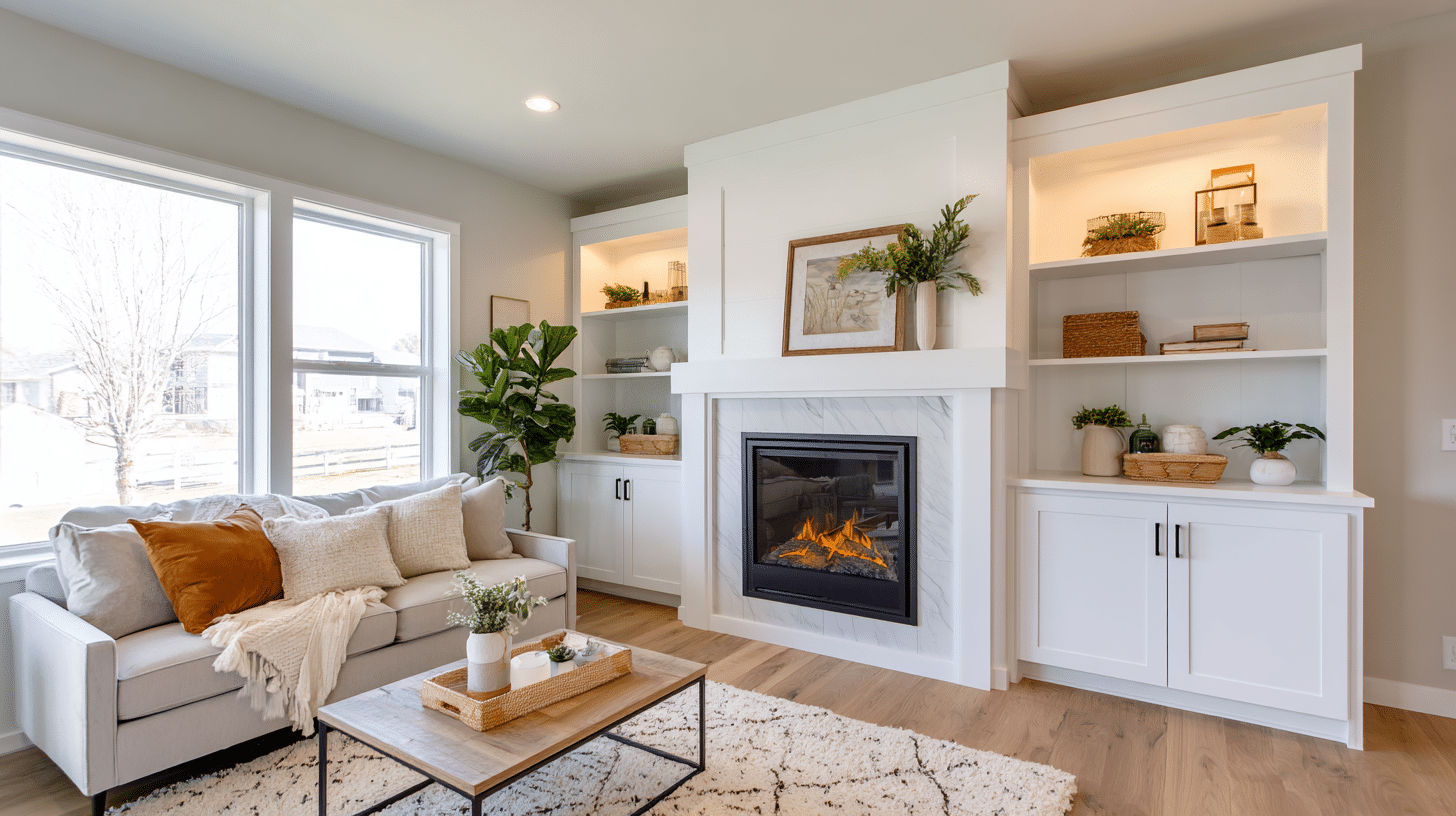
2. Floor-to-Ceiling White Built-ins
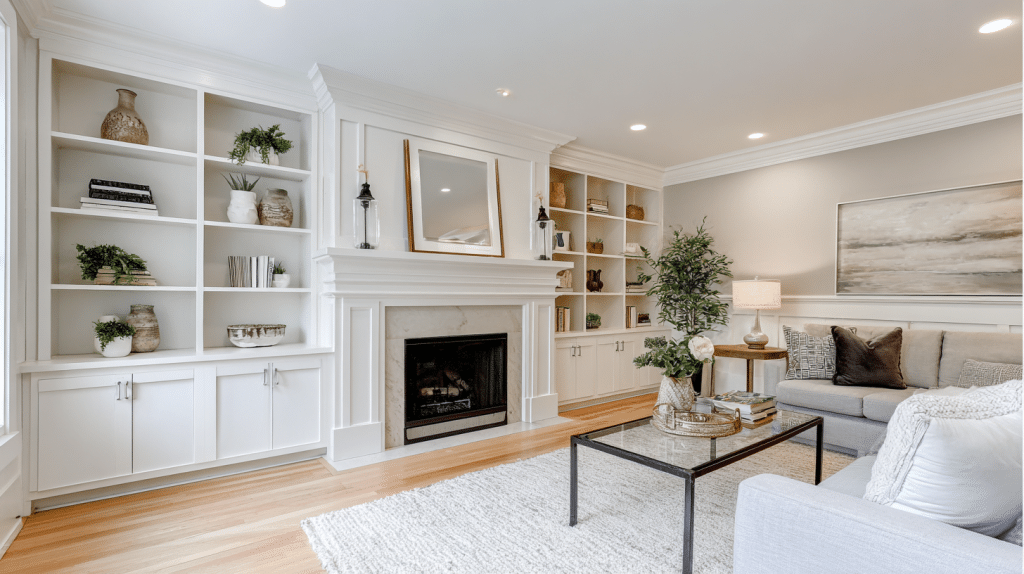
Paint everything white for a clean, classic look that makes your room feel larger.
White built-ins work with any decor style, allowing your books and decorations to become the focal point of color. Add crown molding at the top for a custom, high-end appearance.
3. Dark Accent Wall with Light Cabinets
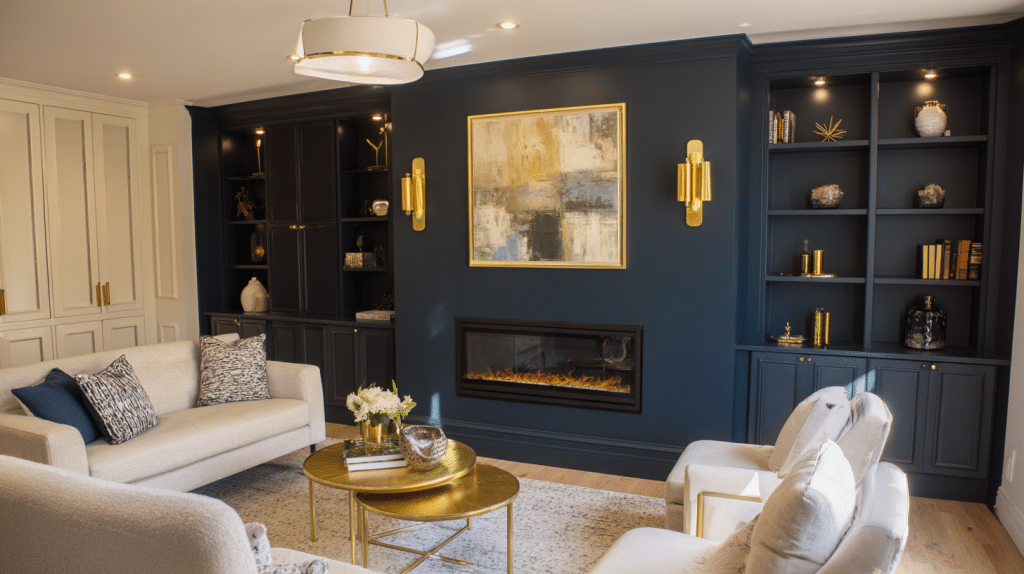
Paint the fireplace wall a dark color, such as navy or charcoal, and then use light-colored cabinets for contrast.
This creates a bold focal point while keeping storage areas bright and functional. The dark background makes your fireplace insert stand out beautifully.
4. Open Shelving with Hidden Storage
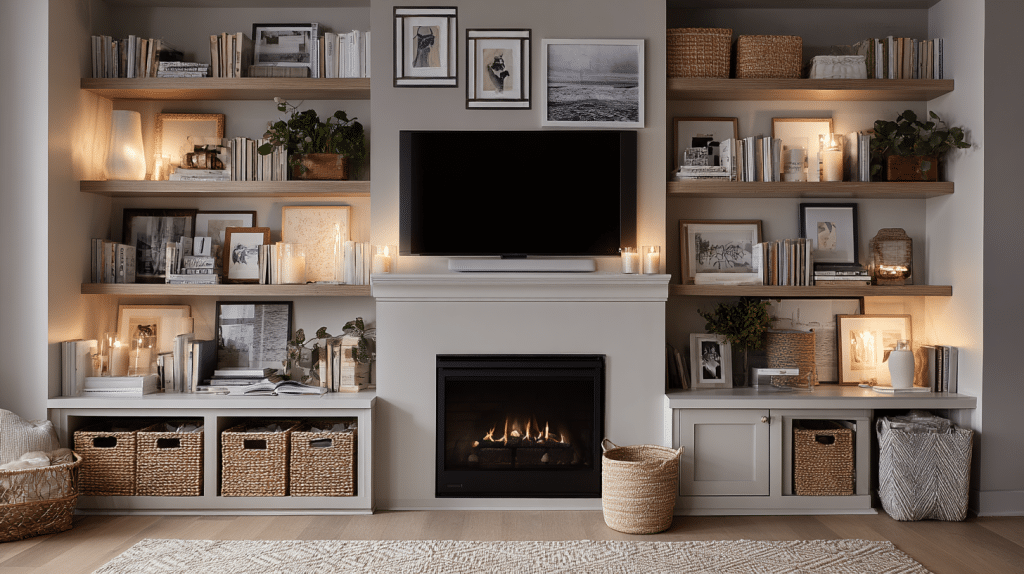
Combine open shelves for display with closed cabinets below for hiding clutter. This gives you the best of both worlds – pretty display space and practical storage.
Use baskets or bins on open shelves to keep things organized and tidy.
5. Built-in Entertainment Center
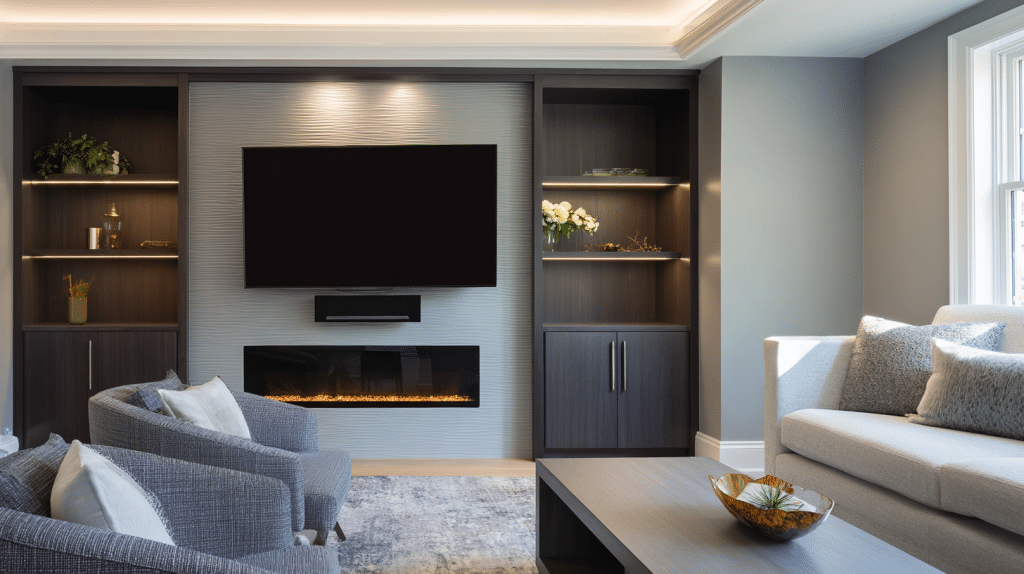
Design your fireplace built-ins to include space for your TV and media equipment. Mount the TV above the fireplace or build it into one side of the wall unit.
Include cord management and ventilation for electronics in your planning.
6. Reading Nook with Window Seat
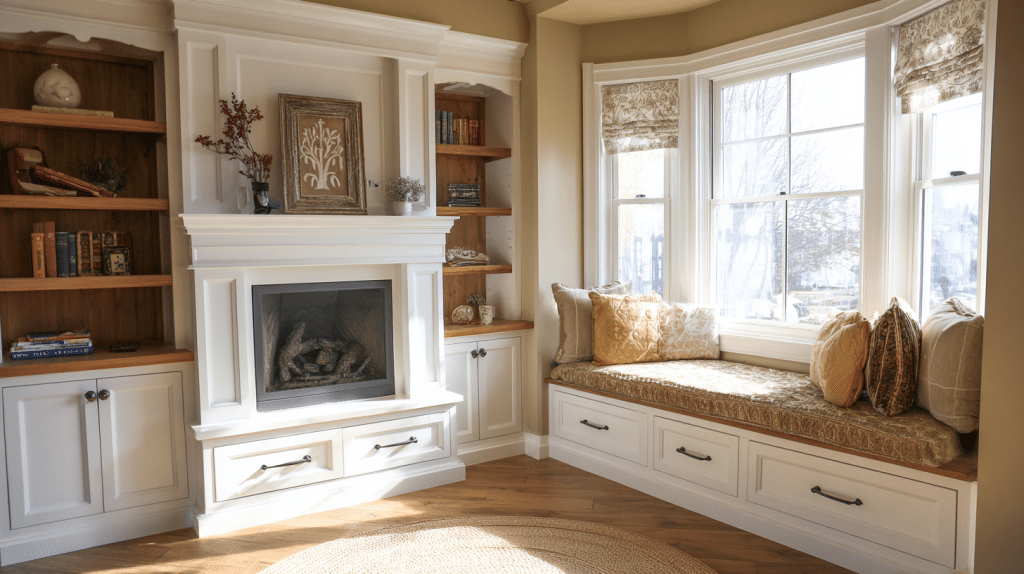
Add a comfortable window seat with storage underneath as part of your built-in design. Include built-in lighting and nearby bookshelves to create the perfect reading spot.
Soft cushions and throw pillows make this area inviting for the whole family.
7. Modern Minimalist Design
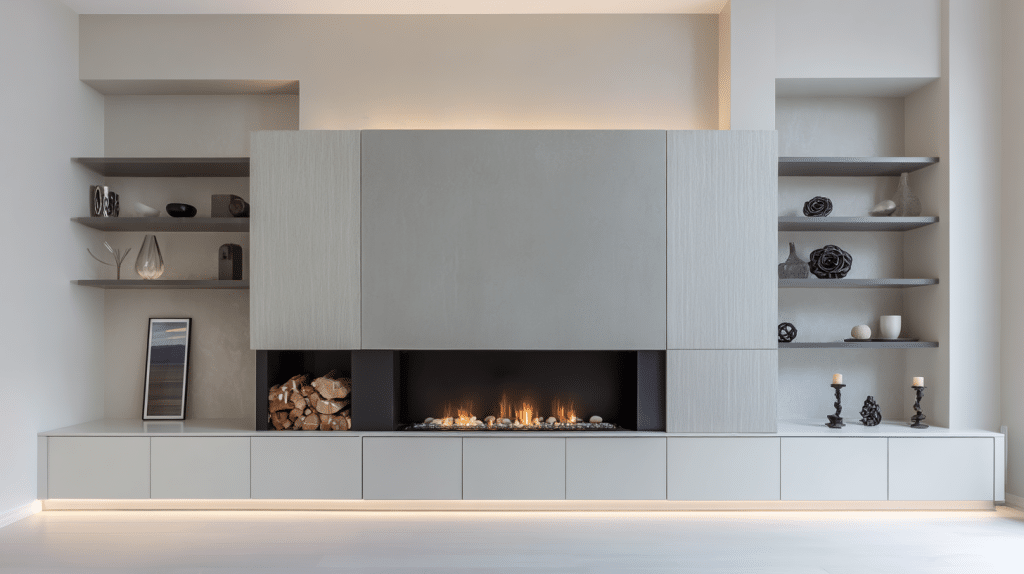
Keep lines clean and straightforward with handle-free cabinets and floating shelves. Use neutral colors and minimal decorative elements for a sleek, contemporary look.
This style works exceptionally well in open floor plans and modern homes.
Built-In Fireplace Wall Design Options
The placement of your fireplace significantly influences the overall look and function of your room. Here are three popular approaches that work well in different spaces and meet various needs.
1. Between Windows
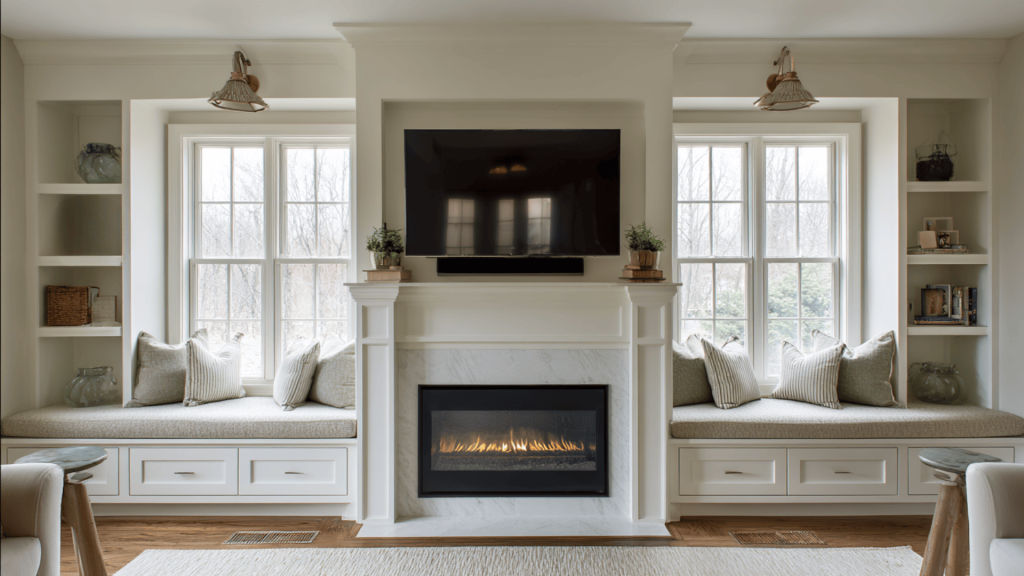
This balanced approach works well when you have evenly spaced windows on your chosen wall.
Placing your built-in fireplace wall between two windows creates a balanced look. The natural light from both sides highlights your fireplace during the day. This works well in rooms with multiple windows.
You can add bench seating under the windows for extra function. Kids love window seats for reading, and adults use them for storage. The fireplace becomes the centerpiece between these cozy spots.
2. Using a Blank Wall
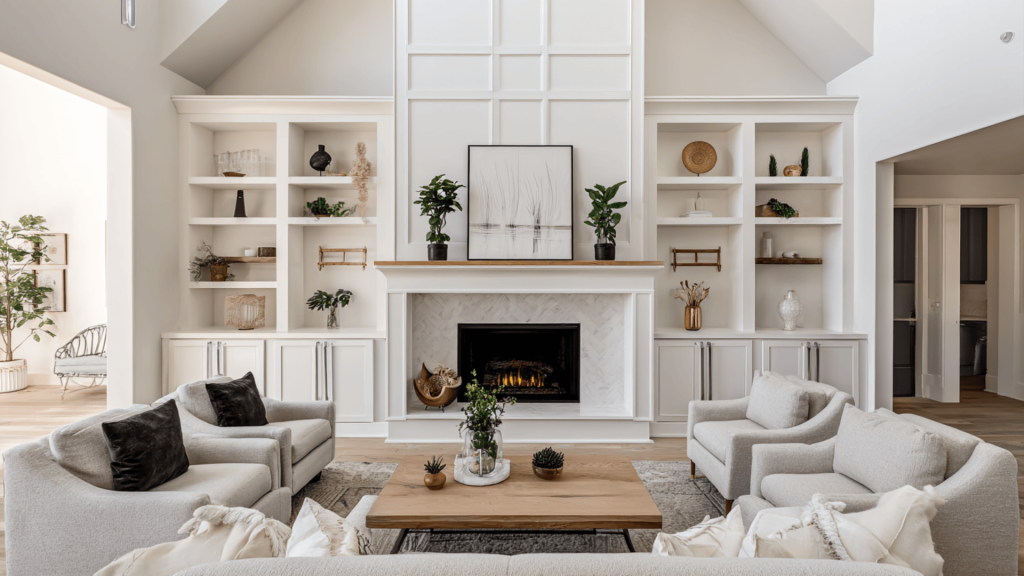
Large empty walls offer the most flexibility for your fireplace and storage design.
Large empty walls are perfect for complete fireplace built-in projects. You can create floor-to-ceiling storage that features both open shelves and closed cabinets. This provides ample storage for books, games, and household items.
Start with base cabinets for hidden storage. Add open shelves above for books and decor. The fireplace is placed in the center as the main focal point.
3. Creating Intentional Asymmetry
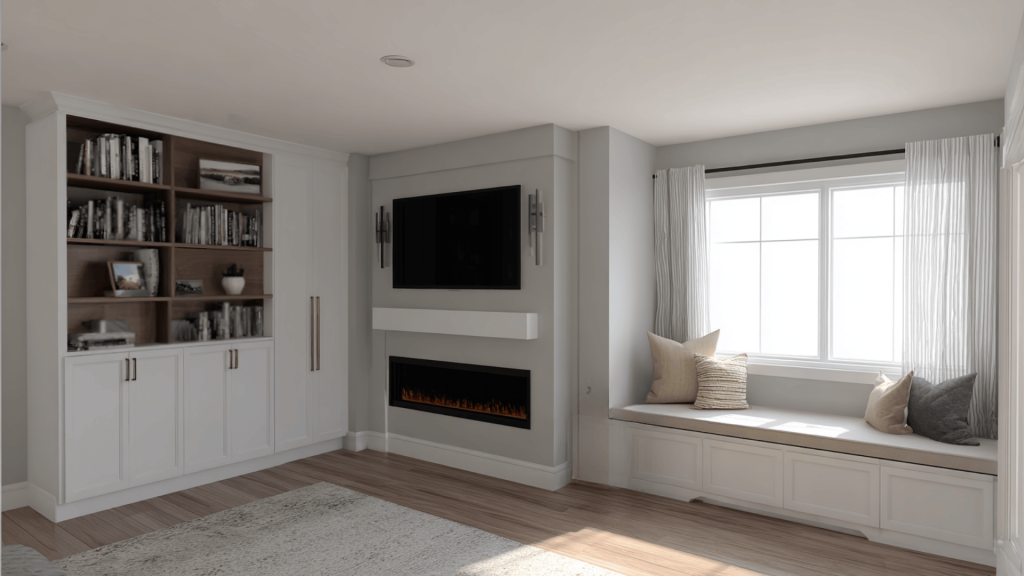
Uneven layouts can look planned and stylish when done thoughtfully.
Not every fireplace needs to be perfectly centered. You can balance a window on one side with built-in storage on the other. This creates visual interest while solving storage problems.
Try a bench seat on one side and tall shelving on the other. Mix closed cabinets with open shelves for optimal functionality. The key is making the layout look planned, not accidental.
Technical Planning Considerations
Making the right technical choices upfront will save you headaches and money during your build.
Choosing Your Fireplace Type
Electric units offer the best combination of cost, safety, and DIY-friendly installation.
- Electric inserts – Best choice for most DIY projects, cost less than gas units, and install simply with just a standard electrical outlet
- Gas fireplaces – Need professional installation and special venting, and require permits in most areas
- Electric efficiency – Run more efficiently and safely, plus you can control them with a remote
Interior vs Exterior Wall Placement
Wall location affects installation complexity and permit requirements for your project.
- Interior walls – Simpler for DIY projects with no outdoor venting or weather protection concerns, the framing process is more straightforward.
- Exterior walls – Work but need extra planning, might require permits for venting and additional insulation
- Building codes – Most electric fireplaces work on any wall type, but always check your local codes first
Budget and DIY Strategy
Smart planning helps you balance costs while deciding which tasks to tackle yourself.
- Material costs – Electric fireplace inserts range from $200 to $2000, plus lumber, drywall, and finishing materials.
- DIY vs professional – Most people handle framing and carpentry, but consider hiring help for electrical work
- Detailed planning – Draw exact measurements to prevent costly mistakes and get an accurate material estimate.
Built-In Fireplace Wall Maintenance and Care
Proper maintenance keeps your fireplace and built-ins looking great for years to come. Follow these simple care routines to protect your investment.
| Component | Maintenance Task | Frequency |
|---|---|---|
| Electric Fireplace | Dust the glass and air vents | Monthly |
| Built-in Shelves | Dust and polish wood surfaces | Weekly |
| Cabinet Doors | Check hinges and tighten screws | Every 6 months |
| Painted Surfaces | Wipe down with a damp cloth | As needed |
| Safety Area | Keep flammable items clear of the fireplace | Always |
Clean your electric fireplace insert according to the manufacturer’s instructions. Most units just need an occasional dusting of the glass and air vents. Keep the area around your fireplace clear of flammable items.
Dust built-in shelves regularly to keep them looking good. Use furniture polish on wood surfaces to maintain the finish. Wipe down painted surfaces with a damp cloth.
Conclusion
Building your DIY fireplace with built-in fireplace features transforms any living room into a warm, inviting gathering space. This project combines style, function, and value in one major upgrade.
Remember, every expert was once a beginner who took that first step.
Take your time with planning and preparation. Good planning prevents the most common problems and creates better results. Your family will enjoy this feature for years to come.
Start your project when you have time to focus on it correctly. Rush jobs often need expensive fixes later. With careful work, you’ll create a fireplace wall that looks professionally built.
Have questions about your specific space or want to share your fireplace project progress? Drop a comment below; we love seeing your DIY successes and helping solve any challenges you encounter along the way!