
Creating beautiful landscape borders can be expensive when you hire professionals. Most homeowners spend hundreds or even thousands of dollars on edging that could easily be done as a weekend project.
You want your yard to look polished and well-maintained, but the costs keep adding up.
Here’s the good news: you can create professional-looking concrete edging yourself with basic tools and materials. This DIY approach will save you money while giving you complete control over the design and placement.
In this guide, you’ll learn exactly how to plan, build, and install concrete edging that will last for years. We’ll cover everything from measuring and layout to mixing concrete and finishing touches so that you can transform your landscape on a budget.
Why Choose Concrete Edging for Your Landscape
Concrete edging offers several advantages over other border materials. It provides a clean, permanent solution that won’t shift or deteriorate like plastic or metal alternatives.
The durability of concrete means your edging will withstand weather, lawn equipment, and foot traffic for decades. Unlike wood edging that rots or plastic that cracks, concrete maintains its shape and appearance year after year.
Cost-effectiveness is another major benefit. While the initial material cost is reasonable, the long-term value is excellent since you won’t need replacements or frequent repairs.
Step-by-Step Guide to DIY Concrete Edging
Follow these simple steps to create durable, professional-looking concrete edging that enhances your landscape and stands the test of time.
Tools and Materials Needed
| Category | Items | Purpose |
|---|---|---|
| Planning Tools | String/stakes, garden hose, measuring tape | Layout marking and accurate measurements |
| Cutting Tools | Circular saw, ¼” & ½” plywood sheets | Cutting and shaping forms |
| Construction Tools | Trenching shovel, hammer, drill (+90° attachment), clamps | Building and securing forms |
| Materials | 12″ stakes, concrete mix, gravel, edging tool | Building the edging structure |
| Safety & Finishing | Tarps, pliers, optional sealer | Protection, cleanup, and long-term durability |
Step 1: Planning and Layout Design
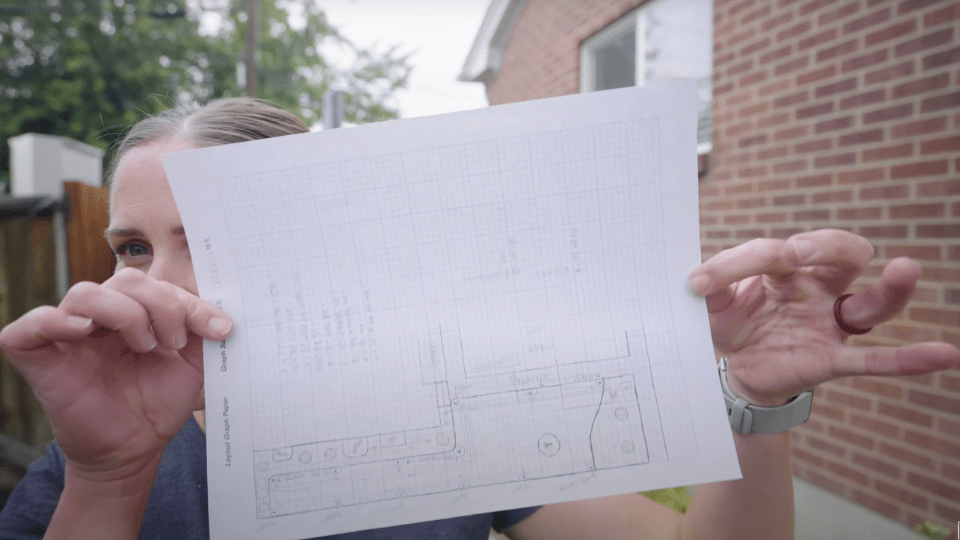
Start by creating a detailed plan on paper that shows exactly where your concrete border will be located. This planning phase prevents costly mistakes and ensures you have enough materials.
Use a string with wooden stakes to lay out your design in the actual area. You can also use a garden hose as an alternative method to visualize curves and angles before committing to the layout.
Materials Needed in This Step:
- String and wooden stakes
- Garden hose (optional)
- Measuring tape
- Paper and pencil for planning
Instructions: Mark one side of your layout first, then add a gap before placing the second string line. This gap represents your edging width plus the thickness of your form material. For 4-inch edging using quarter-inch boards, make your gap 4.25 inches. For half-inch boards, add 4.5 inches total.
Step 2: Preparing the Form Materials
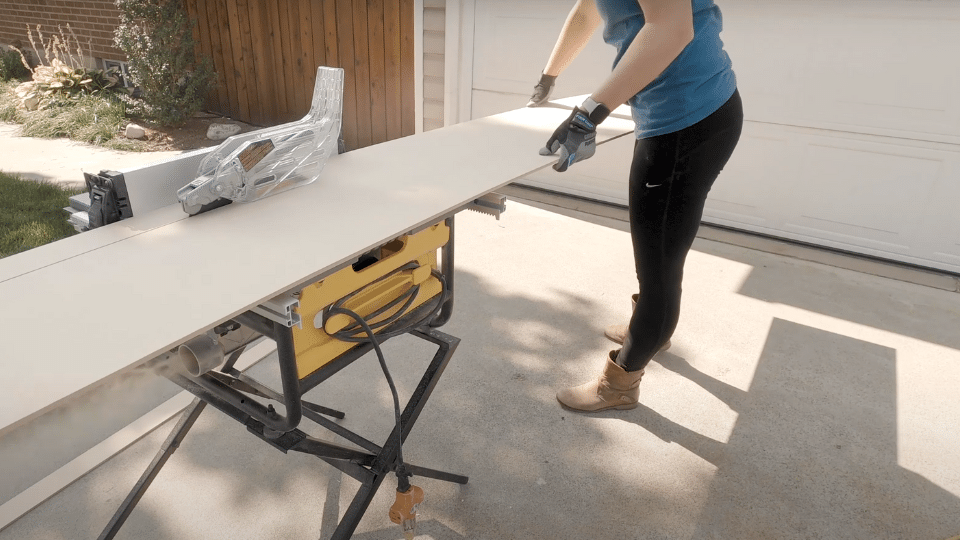
Cut your plywood sheets into strips that will create the concrete forms. Quarter-inch sheets work well for curved areas, while half-inch material provides better stability for straight sections.
A standard sheet will give you twelve 8-foot strips when cut into 3-inch and 7-inch pieces. This accounts for the blade width during cutting and maximizes your material usage.
Materials Needed in This Step:
- Quarter-inch plywood sheets
- Half-inch plywood sheets
- Circular saw with rip cut attachment
- Safety equipment
Instructions: Use a circular saw with a rip cut to ensure straight, clean cuts. Create a spacing template using one of your wooden stakes. This template should equal your desired edging width plus your board thickness to maintain consistent spacing throughout the project.
Step 3: Excavating the Trench
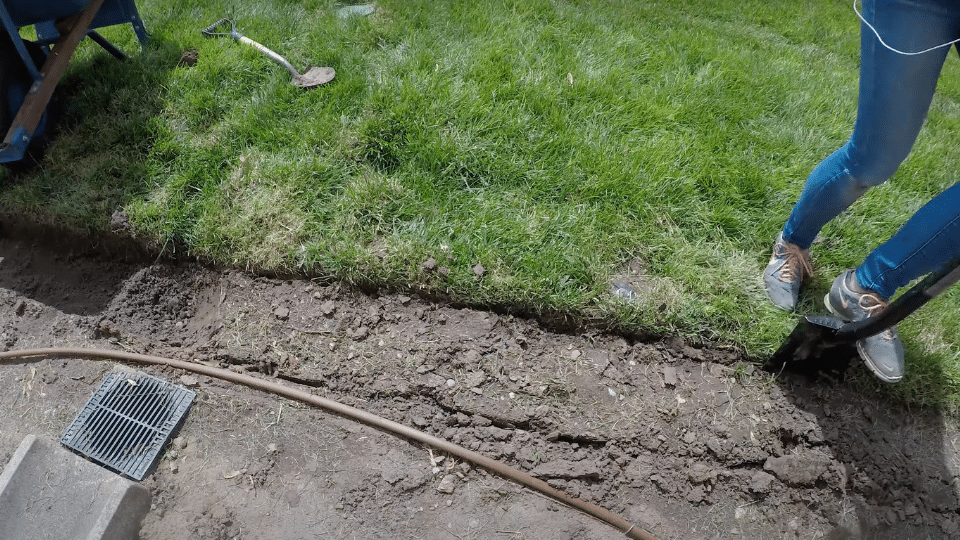
Dig along both the inside and outside of your border layout using a trenching shovel. The trench should be 4 inches deep with vertical sides rather than angled ones.
Remove all dirt and grass from inside the marked area. Keep the excavated soil nearby as you’ll need it later for backfilling around the finished edging.
Materials Needed in This Step:
- Trenching shovel
- A regular shovel for cleanup
- A wheelbarrow or tarp for soil storage
Instructions: Make the trench sides as vertical as possible to ensure clean edges on your finished concrete. Remove any roots or debris that could interfere with the concrete pour. Save the removed soil in a convenient location for later use in the finishing process.
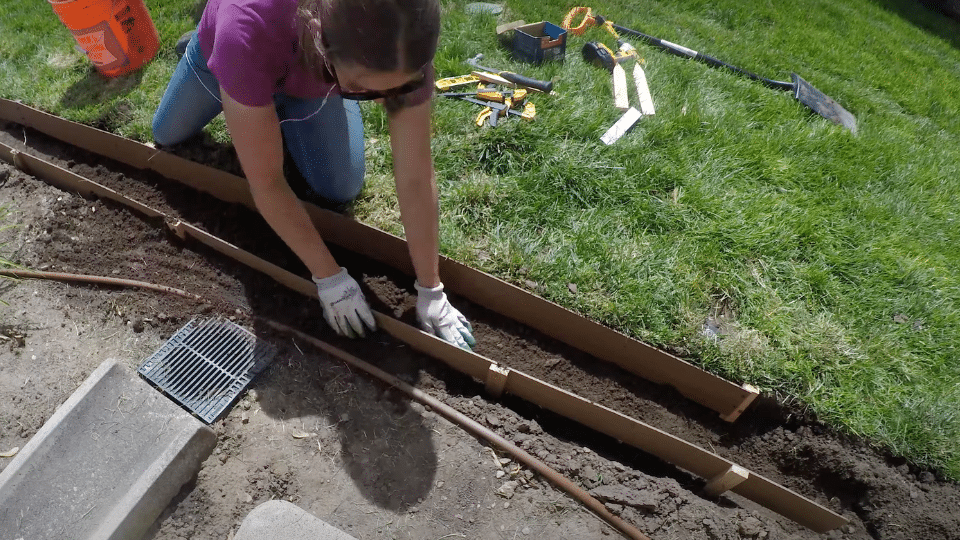
Step 4: Installing the Concrete Forms
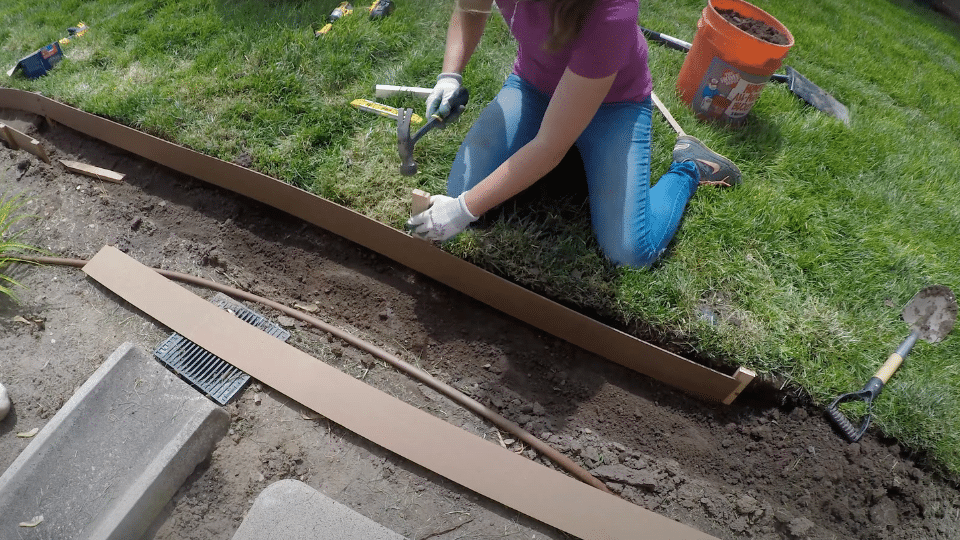
Place 12-inch stakes at the beginning of your trench and hammer them until the tops are level with the ground. Position your first wood strip in the trench and clamp it to the stake.
Secure each board with two screws – one at the top and one at the bottom. Use a 90-degree drill attachment to make screw placement easier in tight spaces.
Materials Needed in This Step:
- 12-inch wooden stakes
- Pre-cut wood strips
- Clamps
- Drill with screws
- 90-degree drill attachment
- Hammer
Instructions: Space stakes every foot for quarter-inch strips or every two feet for half-inch material. Place stakes where boards meet in the middle so you can attach the next board to the same stake. Use your spacing template to position the opposite side forms accurately.
Step 5: Base Preparation and Concrete Mixing
Pack dirt firmly inside the completed form, then add a half-inch layer of gravel. This base provides drainage and prevents settling that could crack your edging.
Mix your concrete according to package instructions. For larger projects, consider renting a mixer, but smaller jobs can be mixed in a barrel or plastic tub.
Materials Needed in This Step:
- Gravel for base layer
- Concrete mix bags
- Mixing container or barrel
- Water for mixing
- Shovel or hoe for mixing
Instructions: Achieve the proper concrete consistency by following the manufacturer’s mixing ratios exactly. The concrete should hold together when squeezed, but not be too wet or too dry. Work in manageable batches to prevent the concrete from setting before you can finish it properly.
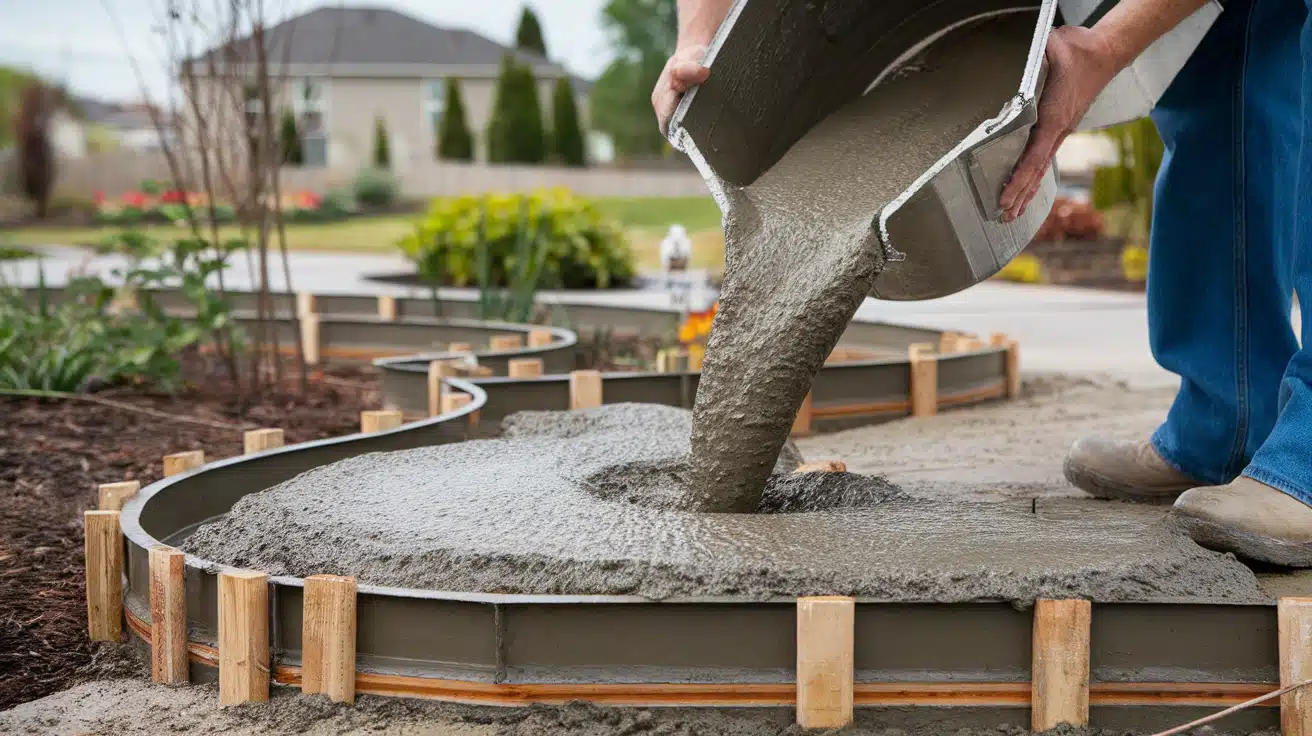
Step 6: Pouring and Finishing the Concrete
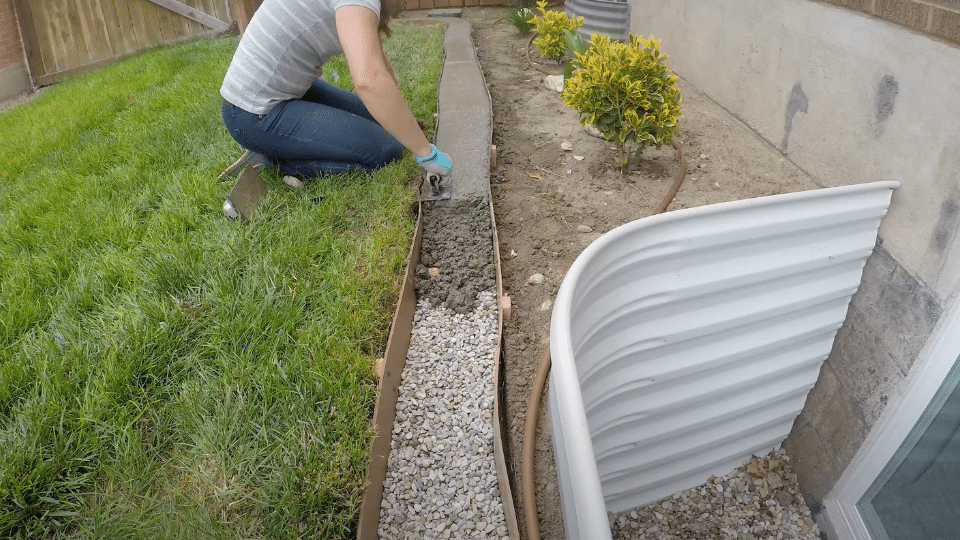
Pour the mixed concrete into your forms, working it into all edges and corners. Level the concrete with the top of your forms using a screed or straight board.
Use a concrete edging tool to create a slightly rounded top edge. Add control joints every 3-4 feet by creating cuts about one inch deep.
Materials Needed in This Step:
- Mixed concrete
- Concrete edging tool
- Screed or straight board
- Joint tool or trowel
Instructions: Work the concrete thoroughly to eliminate air bubbles and ensure it fills all spaces. The rounded edge not only looks professional but also prevents chipping. Control joints allow the concrete to crack in predetermined locations rather than randomly.
Step 7: Curing and Form Removal
Allow the concrete to cure according to package directions, typically 3 days for full strength. Keep the concrete slightly damp during curing or apply sealer as recommended.
Cover with tarps if rain or sprinkler water might hit the curing concrete. After curing, remove the forms carefully, using pliers to pull up the stakes.
Materials Needed in This Step:
- Tarps for weather protection
- Pliers for stake removal
- Sealer (if required)
- Spray bottle for keeping concrete damp
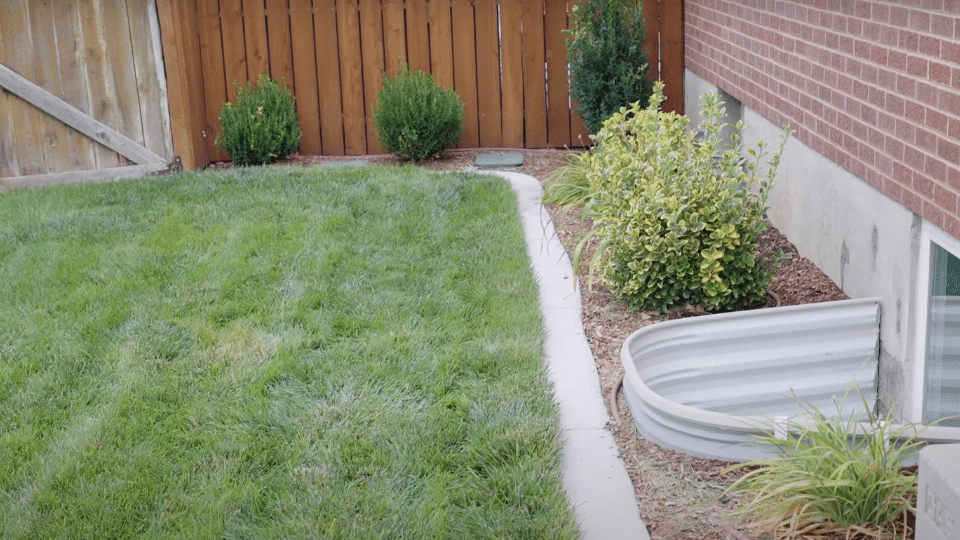
Instructions: Proper curing is crucial for long-lasting edging. Remove forms only when concrete has reached sufficient strength. Fill in around the finished edging with the soil you saved earlier, creating a smooth transition to your landscape.
Video Tutorial
Special thanks to TwoFeetFirst for providing valuable insights in their video, which I referenced while creating this guide.
Maintenance Tips for Long-Lasting Concrete Edging
Keep your concrete edging looking great and performing well for years with these easy maintenance tips.
1. Regular Cleaning and Inspection
Inspect your concrete edging periodically for signs of cracking or settling. Small issues caught early are easier and cheaper to repair than major problems.
Clean the surface with water and a stiff brush to remove dirt and algae. This keeps it looking good and helps you spot potential problems quickly.
2. Sealing for Weather Protection
Apply concrete sealer every 2-3 years to protect against freeze-thaw cycles. Select a sealer suitable for your local climate conditions.
In harsh winter areas, sealing prevents water from freezing in cracks and causing damage due to expansion. Apply during dry, moderate weather for best results.
3. Proper Drainage Maintenance
Ensure water drains away from your edging rather than pooling against it. Standing water can compromise the foundation and lead to settlement.
Maintain balanced soil levels on both sides. Uneven soil creates pressure that can cause edging to become misaligned over time.
4. Joint Maintenance and Crack Repair
Monitor control joints and keep them clean of debris. These joints handle normal expansion and contraction of the concrete.
Small cracks along joints are normal. However, cracks elsewhere may indicate settling issues that need attention and proper crack filler repair.
5. Seasonal Care Considerations
Spring: Check for winter damage and clean the surface. This is ideal timing for sealer application if needed.
Summer: Adjust sprinklers to avoid constantly soaking the edging. Fall: Clean gutters and remove debris that could trap moisture.
Avoid These DIY Concrete Edging Pitfalls
| Mistake | Why It’s Problematic | Better Approach |
|---|---|---|
| Inadequate planning | Leads to material waste and poor results | Create detailed layout plans first |
| Wrong form spacing | Causes bowing or weak sections | Follow recommended stake spacing |
| Poor concrete mixing | Results in weak, cracking edging | Follow package ratios exactly |
| Insufficient base prep | Causes settling and cracking | Always use a proper gravel base |
| Skipping control joints | Creates random cracking | Add joints every 3-4 feet |
| Rushing the curing process | Weakens the final strength | Allow full cure time |
| Ignoring drainage issues | Leads to undermining | Plan for proper water flow |
| Using inadequate forms | Causes wavy, unprofessional results | Use proper thickness materials |
Cost-Effective Tips for Your DIY Project
Consider purchasing materials in bulk if you’re doing a large project. Many suppliers offer discounts for larger quantities of concrete and lumber.
Borrow or rent specialized tools rather than buying them if you’ll only use them once. This includes concrete mixers, specialized saws, or finishing tools.
Plan your project timing to take advantage of seasonal sales on materials. Late fall and winter often offer better prices on outdoor project supplies.
Alternative Design Options for Concrete Edging
- Curved vs. Straight Lines: Straight lines work well for formal landscapes, but curved designs soften harsh angles and create more natural-looking borders.
- Varying Heights: Higher sections serve as raised bed borders while lower areas provide subtle definition throughout different landscape zones.
- Textured Finishes: Brush the concrete surface while it is workable to create attractive patterns that add visual interest and hide minor imperfections.
Conclusion
Creating your own concrete edging changes your landscape while saving significant money compared to professional installation. This project gives you complete control over design, timing, and quality while building valuable DIY skills.
The key to success lies in careful planning, proper preparation, and attention to detail during each step. Take your time with layout and form installation, as these foundation steps determine your final results.
Your new concrete edging will provide decades of maintenance-free service when installed correctly. The clean lines and professional appearance will add both curb appeal and property value to your home.
Remember that patience during the curing process ensures maximum strength and longevity.
With proper care and occasional maintenance, your DIY concrete edging will continue looking great for years to come, proving that quality landscaping improvements don’t always require professional contractors.