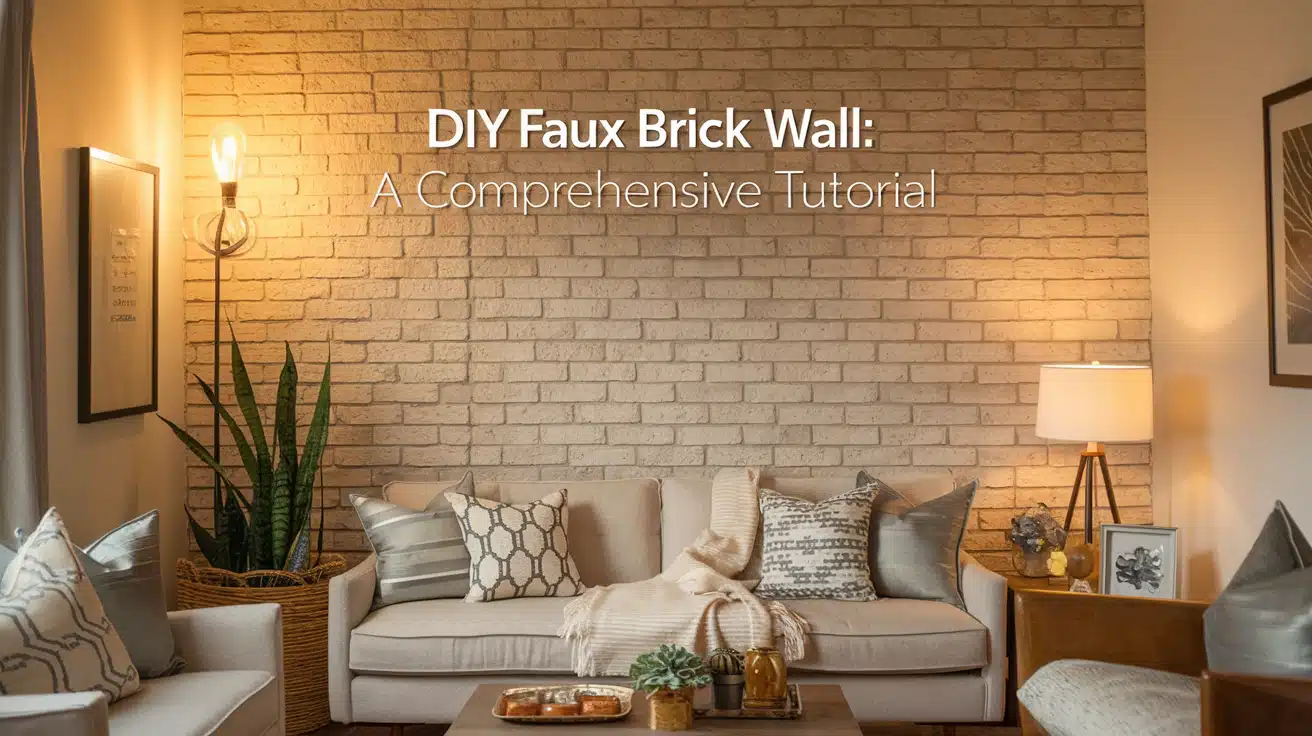
Want to add character to your plain walls?
I know the feeling – those blank walls can make any room feel cold and boring.
Plus, real brick walls cost thousands of dollars, and most landlords won’t let you make big changes.
But here’s some good news: I found a way to create a stunning faux brick wall that looks just like the real thing.
In this step-by-step guide, I’ll show you how to make a faux brick wall that will impress your friends and family.
The best part? You can do it over a weekend, and it won’t break the bank. Let me walk you through the whole process.
Understanding Faux Brick Wall Options
1. Faux Brick Panels
- Made from PVC, polyurethane, or foam.
- Offers realistic texture, depth, and durability.
2. Faux Brick Wallpaper
- Printed designs that mimic brick.
- Budget-friendly and easy to install but lacks depth.
3. Painted Brick Stencils
- Use stencils to paint a brick effect.
- Fully customizable and long-lasting.
Choosing the Right Option
- Cost: Wallpaper is the cheapest; stencils cost more in paint; panels are pricier but more durable.
- Durability: The panels’ handle wears best, followed by stencils. Wallpaper is the least durable.
- Visual Impact: Panels add depth, wallpaper suits small spaces, and stencils offer unique looks.
Materials and Tools You’ll Need
| Category | Items |
|---|---|
| Materials | Faux brick panels or wallpaper Adhesive or mortar Paint and primer (if customizing) Grout or caulk for joints Sealant for protection |
| Tools | Measuring tape Utility knife or saw Paintbrush or roller Level and pencil Trowel (if using mortar) |
| Optional Extras | Sandpaper (for smoothing edges) Stencils (if painting brick patterns) Sponges or rags (for cleaning up excess grout or paint) |
Step-by-Step Guide to Creating a Faux Brick Wall
Step 1: Prepare Your Wall
Start with a clean wall and paint it a basic gray. This gray will serve as your foundation and eventually show through as the grout color between your bricks.
Make sure to let this base coat dry fully before proceeding. Good prep work here will make all the difference in your final result.
Step 2: Mark Your Brick Pattern
Take your ruler and start making marks down your wall at 9-centimeter intervals. These will guide your horizontal lines.
Then, mark 24-centimeter spaces across the wall for your brick lengths. On every other row, start with a 12-centimeter mark to create that offset pattern that’s typical of real brick walls.
These measurements aren’t set in stone – you can adjust them based on the look you want, but these sizes work well for most spaces.
Step 3: Create Your Grid
Get your masking tape or duct tape ready.
Before putting it on the wall, take a knife and carefully cut along the edges of the tape to create slight unevenness. This will help make your faux bricks look more natural.
Then, start placing the tape horizontally along your marked lines.
While not essential, a laser level helps keep everything straight. Most hardware stores sell affordable laser levels.
Add vertical tape pieces between the horizontal lines. Leave the ends of the tape sticking out slightly – this will make removal much easier later.
Step 4: Apply the Filler
Purchase a medium-textured wall filler from your local hardware store. Using a palette knife, spread the filler across the entire wall.
Don’t worry about making it perfectly smooth—in fact, some unevenness adds to the natural look. Keep the layer thin enough that tape removal won’t be difficult later.
While the filler is still wet, you can create extra texture by lightly stroking it with your palette knife. Make sure to cover all areas evenly, including around the edges of the tape.
Step 5: Remove the Tape
This crucial step should be done while the filler is still slightly wet. Begin by pulling away the horizontal tape pieces at an angle.
As you remove the horizontal pieces, they’ll help pull away the vertical pieces, too. Work steadily, but don’t rush—clean removal will give you crisp lines between your faux bricks.
If you find any rough edges, you can touch them up later.
Step 6: Paint the Base
Once your filler has dried completely, paint the entire wall with your chosen grout color. This step unifies the surface and creates a clean foundation for adding the brick color.
Let this layer dry fully before moving to the next step. The time you spend waiting here will pay off in the final result.
Step 7: Add Brick Color
Mix your brick-colored paint with water to thin it slightly. Instead of using a brush, apply the paint with a sponge. This creates a more natural, mottled look that mimics real brick.
Dab the paint onto each brick section, being careful not to get too much in the grout lines. If you do get paint in the grout lines, quickly wipe it away with a clean cloth.
The sponge technique might take longer than using a brush, but the results are worth the extra time.
Step 8: Add Detail
Mix small amounts of white and black paint with water for the final touches. Using a clean sponge, randomly apply tiny amounts of these colors to the bricks.
Keep it subtle – less is more here. These small details add depth and make your faux bricks look more realistic.
Use a clean cloth to blend the colors gently where needed. Step back often to examine your work from a distance—this helps you see how it all comes together.
Watch this detailed YouTube video by Once Upon a Wall – Harry Anstice – Decorator for a step-by-step guide to creating your own stunning faux brick wall!
Creative Ways to Use a Faux Brick Wall
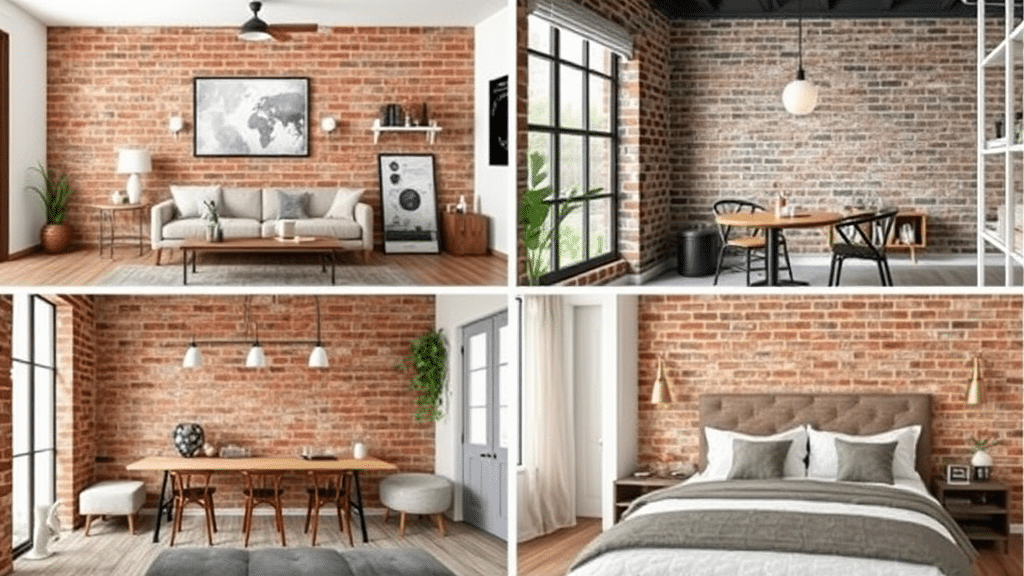
1. Accent Walls in Living Spaces
A faux brick wall can transform your plain living room into a cozy spot. Put it behind your sofa to create a main point of interest.
Paint it warm red for a classic look, or try white for a modern feel. I’ve seen how a single wall treatment can make the whole room feel different.
Add some pictures or wall lights to make it stand out more.
2. Headboard Backdrops in Bedrooms
Make your bed the star of your room. With a faux brick wall behind it, your bed becomes the star of your room. The wall acts like a natural headboard.
You can keep it low, just above where a regular headboard would end, or raise it all the way up.
Some of my clients paint it in soft grays or browns to create a calm, perfect-for-sleep feeling or sleep.
3. Kitchen Backsplash Ideas
Using faux brick as your kitchen backsplash can save you money on expensive tiles. To protect it from water and cooking splashes, choose a tough sealant.
You can make it match your kitchen’s style—choose red brick for a country kitchen or white for a clean, modern look. The textured surface adds interest without being too busy.
4. Transforming Outdoor Spaces with Faux Bricks
Faux brick walls can give your patio or porch a new look. Make sure to use materials rated for outdoor use and add a good sealer to protect against rain.
The wall can help define seating areas or create a nice backdrop for your plants. It costs much less than real brick but gives that same cozy outdoor room feeling.
Maintenance and Longevity Tips
Keeping Your Faux Brick Wall Clean
- Use a soft microfiber cloth or feather duster weekly to remove dust—work from top to bottom.
- Mix mild soap with warm water for deeper cleaning. Avoid fancy cleaning products.
- Never use rough brushes or abrasive tools – they’ll damage your wall.
- Keep water use minimal. A slightly damp cloth works best.
- Clean grooves between bricks with a soft brush to remove settled dust.
How to Touch Up Paint or Grout
- Save and label your original paint colors for future fixes.
- For brick touch-ups, thin paint with water and apply with a small sponge.
- Fix grout lines using a thin artist’s brush with gray paint.
- Take photos of your finished wall as a reference for future touch-ups.
- Address any peeling or damage quickly to prevent spreading.
Conclusion
Creating a faux brick wall brings a special touch to any room without the cost and work of real bricks.
By following these steps, from prepping your wall to adding final touches, you can make a wall that looks just like the real thing.
Whether you choose to install it in your living room, bedroom, or kitchen, the effect can change the way your space feels.
Remember, the key to success is taking your time with each step, especially when laying out your pattern and applying the filler.
With basic care—just dust regularly and fix small issues quickly—your faux brick wall can last for years.
With some creativity in styling and the right mix of materials, your faux brick wall can become your room’s finest feature.
