

A router sled is a vital tool for any woodworker working with large slabs that won’t fit through a planer.
This simple yet effective jig enables you to flatten oversized pieces of wood, resulting in perfectly smooth surfaces for tabletops, benches, and other large woodworking projects.
Building your own router sled is a cost-effective option that can be customized to fit your specific needs and workspace.
When working with live-edge slabs, reclaimed wood, or any large piece that requires flattening, a router sled provides the precision and control needed to achieve professional results.
This guide will walk you through the entire process, from gathering materials to finishing your first slab, ensuring you have all the knowledge needed to create this invaluable workshop tool.
Why Build a Router Sled?
Building a router sled solves several common woodworking challenges while providing significant advantages over alternative methods.
Understanding these benefits will help you appreciate why this simple jig has become indispensable for serious woodworkers.
When your wood pieces are too wide for your planer, a router sled becomes invaluable, allowing you to work on pieces of virtually any size, limited only by your workspace and the length of your sled rails.
Unlike hand planing, a router sled provides consistent results across the entire surface, letting you control the depth of cut precisely to ensure even material removal and a perfectly flat finished surface.
This level of control and versatility makes the router sled an essential tool for any serious woodworker working with large slabs and aiming for professional-quality results.
Essential Materials and Tools
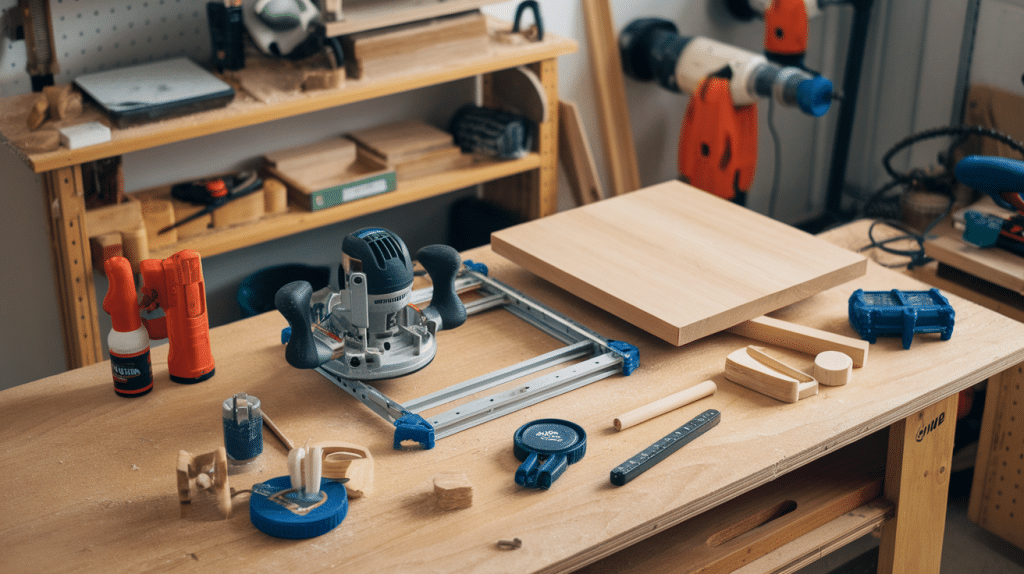
Gathering the right materials and tools before starting your router sled build ensures a smooth construction process and professional results.
Materials List
The materials needed for this router sled build are straightforward and readily available at most home improvement stores or lumber yards.
| Material | Purpose | Notes |
|---|---|---|
| 3/4″ plywood (or MDF/melamine) | Base and rails construction | Provides a stable, flat surface |
| Router | Power tool for flattening | Your existing router will work perfectly |
| Kreg jig | Creating pocket hole connections | Ensures strong, hidden joints |
| Wood screws | Fastening components | Choose an appropriate length for the material thickness |
| Wood glue | Additional joint strength | Reinforces screw connections |
| Sanding materials | Surface smoothing | Various grits for different stages |
| Paste wax | Smooth sled operation | Reduces friction during use |
| Router bit | Cutting tool | A larger diameter bit is preferred for efficiency |
Required Tools
Most of the tools needed for this project are standard workshop equipment that experienced woodworkers typically have on hand.
| Tool | Primary Use | Additional Notes |
|---|---|---|
| Jigsaw | Cutting router channel | Ensures clean, precise cuts |
| Drill | Pilot holes and pocket holes | Essential for assembly |
| Measuring tools | Accurate dimensions | Tape measure and square required |
| Clamps | Holding pieces during assembly | Multiple clamps recommended |
| Safety equipment | Personal protection | Dust mask, safety glasses, and hearing protection |
Step-by-Step Build Process
The construction process follows a logical sequence that builds complexity gradually, starting with basic measurements and progressing to final assembly.
Step 1: Planning and Measuring

Start by measuring the base of your router to determine the sled dimensions. Add 1.5 inches on each side for the rails and an extra 1/8 inch for smooth movement.
A typical sled measures approximately 48 inches in length, but adjust it based on your typical project sizes and available workspace.
Key Points:
- Measure your router base first to ensure a proper fit
- Allow extra space for rails and smooth movement
- Customize the length based on your typical project needs
Step 2: Cutting the Base
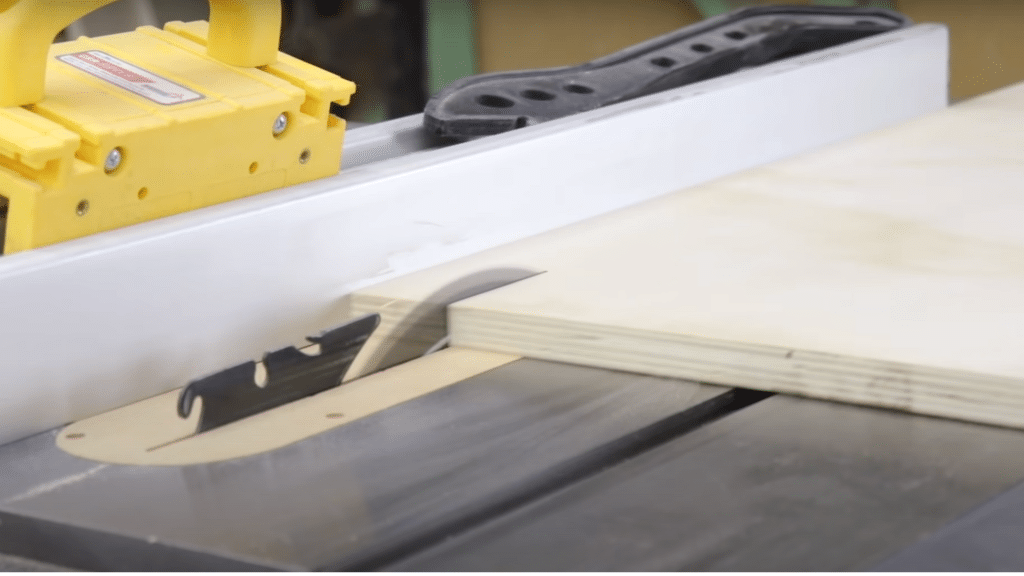
Cut your plywood base to the planned dimensions. Sand the surface smooth to ensure your router will glide easily. A soft base is crucial for achieving professional results and preventing snags during operation.
Key Points:
- Cut plywood to the exact planned dimensions
- Sand the surface completely smooth before assembly
- Smooth base prevents router snags and ensures quality results
Step 3: Creating the Rail System
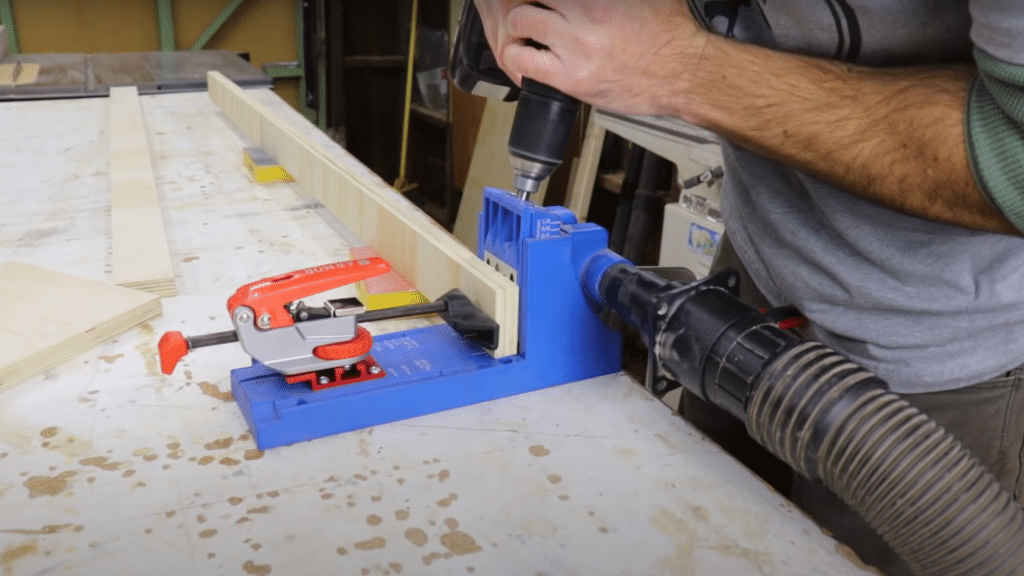
Cut two strips of plywood approximately 2 inches wide to form the rails. These rails will guide your router in straight lines across the slab. Use your Kreg jig to create pocket holes for secure attachment to the base.
Key Points:
- Cut rails to a consistent 2-inch width for stability
- Use a Kreg jig for strong, hidden pocket hole connections
- Rails must be perfectly straight for accurate routing
Step 4: Router Channel Creation
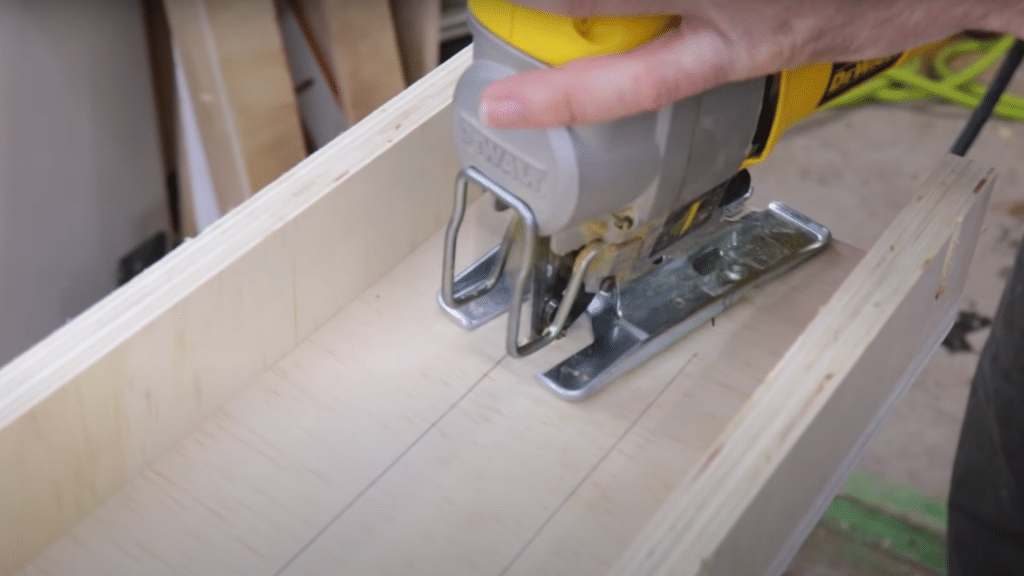
Mark the path where your router bit will travel and drill a pilot hole. Use a jigsaw to carefully cut out the channel, ensuring clean, straight edges.
The channel should be wide enough for your router bit with slight clearance on each side.
Key Points:
- Mark the router bit path accurately before cutting
- Drill a pilot hole first to prevent wood splitting
- Channel needs clearance, but shouldn’t be oversized
Step 5: Assembly and Finishing
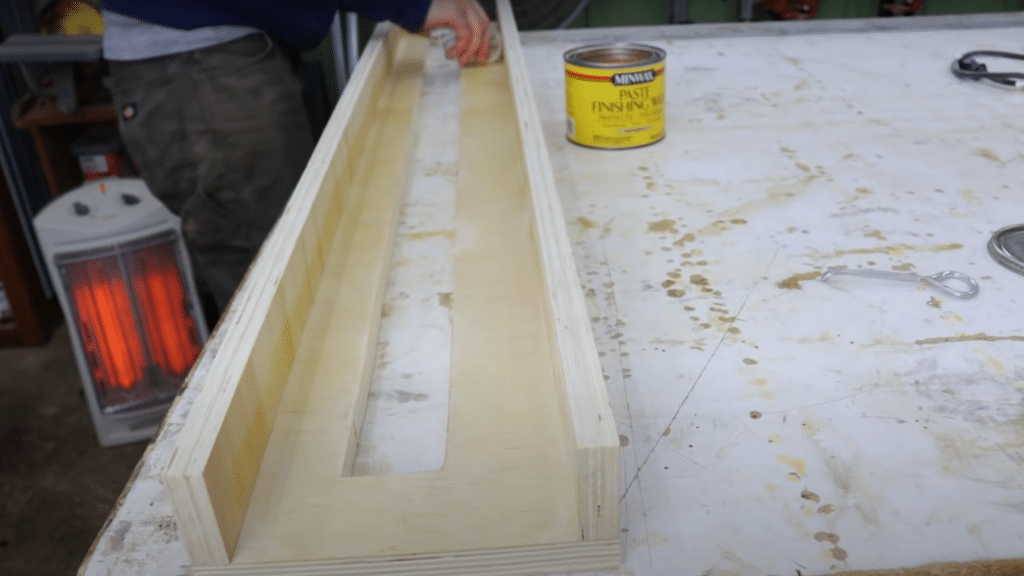
Attach the rails to the base using wood glue and screws through the pocket holes. Check that everything is square and secure. Sand the entire sled smooth and apply a thin coat of paste wax to reduce friction during use.
Key Points:
- Use both wood glue and screws for maximum strength
- Verify everything is square before final assembly
- Apply paste wax for smooth operation and reduced friction
Video Tutorial
A special thanks to Walkers Woodworks & DIY for sharing this detailed router shed tutorial, which inspired this step-by-step guide.
Pro Tips for Success
Success with your router sled depends on following proper techniques and maintaining good habits throughout the process. These essential tips will help you achieve professional results while staying safe and extending the life of your equipment.
- Safety First: Always wear dust masks, safety glasses, and hearing protection, as router sleds generate significant dust and noise levels that can cause long-term health damage.
- Grain Direction Matters: Route in the direction of the router bit’s spin to minimize tear-out, paying special attention to grain patterns in figured or challenging wood species.
- Patience Pays Off: Take your time with each pass to avoid mistakes, tear-out, and uneven surfaces that require additional work to correct.
- Maintenance and Storage: Keep your sled clean, store it flat to prevent warping, and reapply paste wax periodically for smooth operation and long-term performance.
Troubleshooting Common Issues
Even with careful planning and execution, you may encounter challenges when using your router sled for the first time.
Most problems have simple solutions that can be quickly identified and resolved with basic adjustments to your technique or equipment.
Understanding these common issues and their fixes will help you maintain consistent results and avoid frustration during your flattening projects.
Inconsistent results often stem from setup issues rather than technique problems, so verify your sled construction and workpiece support before adjusting your routing approach.
Regular maintenance prevents binding issues and ensures smooth operation throughout your project.
Start Building Your Router Sled Today
Building a router sled is a rewarding project that significantly enhances your woodworking capabilities.
This versatile tool opens up possibilities for working with large slabs, creating professional-quality results that would be difficult to achieve by hand.
The investment in materials and time pays dividends in the quality of your finished projects and the satisfaction of creating smooth, flat surfaces from rough lumber.
The confidence gained from successfully building and using your jig often inspires woodworkers to tackle more challenging projects and develop new techniques.
Share your build progress and results with fellow woodworkers, and don’t hesitate to experiment with modifications that suit your specific workshop needs.