
Welcome to all crafty readers seeking affordable home decor solutions! The inspiration for this project came from admiring stylish, tiered trays in boutique stores, which had hefty price tags that made me rethink my decorating budget.
Instead of spending a fortune on fancy displays, I found an excellent way to create something equally beautiful using simple finds from Dollar Tree.
The best part is that you can customize colours, textures, and finishes to match your existing decor perfectly.
The magic happens when you combine creativity with strategic shopping, proving that impressive results don’t require premium prices.
Get ready to learn how everyday dollar store items can become the foundation for an attractive tiered tray that will impress guests and satisfy your crafting spirit without breaking the bank.
Why This Project Works So Well
This approach succeeds because it combines strategic material selection with proven crafting techniques.
The dollar store provides all the structural components you need, while simple modifications turn basic items into sophisticated display pieces.
The beauty of this method lies in its accessibility – anyone can master these techniques regardless of their crafting experience.
Each step builds upon the previous one, creating a logical progression that prevents mistakes and ensures success. The materials are forgiving to work with, allowing for adjustments and corrections as needed.
Most importantly, the finished product has the weight and stability of professionally made pieces, giving you confidence in both its appearance and durability.
Materials You’ll Need
Gathering the right supplies sets the foundation for your project’s success, and the good news is that everything can be found at your local Dollar Tree for maximum affordability.
This thoughtfully selected list includes structural materials like burner covers and candlesticks, decorative elements like wooden beads, and finishing supplies, including paints and adhesives.
|
Material |
Description / Notes |
|
Burner Covers (2 sets) |
Two large and two small burner covers were found at Dollar Tree. |
|
B7000 Glue |
Strong adhesive; E6000 can be used as an alternative. |
|
Wooden Beads |
Enough to cover the rims of both burner covers; holes should face up. |
|
Candlestick Holders |
Various sizes and styles from Dollar Tree can be used to create tiered support. |
|
Dollar Tree Jenga Blocks |
For reinforcing and stabilizing the base around the candlestick. |
|
Dollar Tree Clamps |
Convenient for holding glued pieces securely while they dry. |
|
Dixie Belle Chalk Paint (Yellow) |
The base paint color that sticks well to metal surfaces. |
|
White Acrylic Paint |
Any brand is used for the top textured layer. |
|
Salt Wash |
Adds texture to paint; baking soda is an easy substitute. |
|
Small & Medium Paint Brushes |
For precise coverage and texture pouncing. |
Step-by-Step DIY Tiered Tray Guide
This comprehensive tutorial guides you through creating a stylish tiered display using affordable dollar-store materials and straightforward crafting techniques.
Follow along as we turn budget-friendly finds into a lovely, functional tray perfect for seasonal decorating and everyday styling.
Step 1: Preparing the Burner Covers
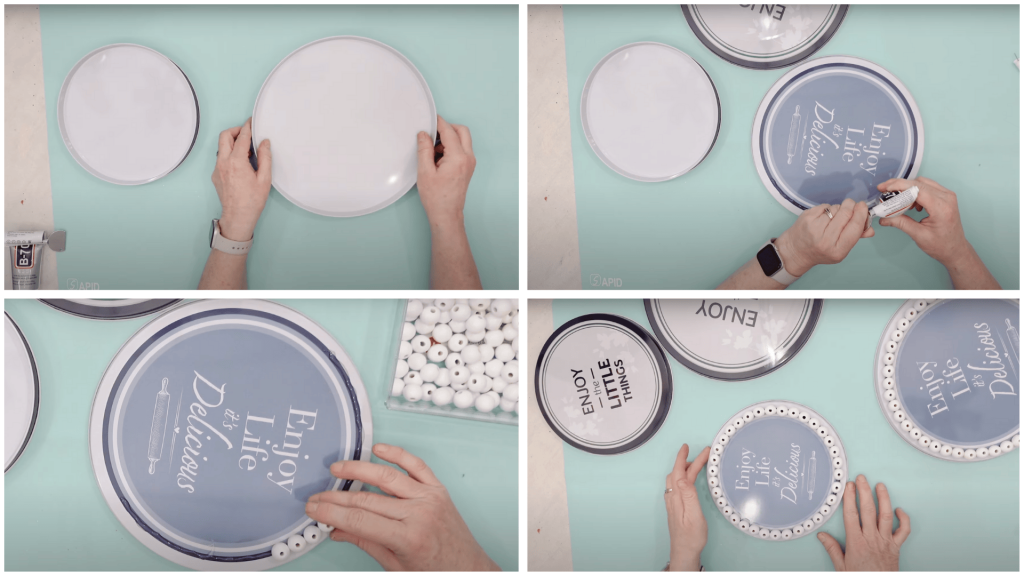
The foundation of your tiered tray begins with properly preparing the burner covers, which will serve as your stylish display platforms.
The wooden beads create a decorative rim that transforms ordinary burner covers into refined tray layers.
Taking time to align everything perfectly during this stage ensures a polished result that rivals expensive store-bought alternatives.
- Pair covers correctly: two large covers together, two small covers together
- Apply B7000 glue generously around the entire edge of one cover in each pair
- Place wooden beads along the glue line with holes facing upward
- Adjust bead positioning carefully to eliminate gaps between beads
- Press each bead firmly into the glue for secure attachment
Step 2: Securing Beads and Assembling Layers

The double-gluing technique ensures your decorative beads remain permanently attached through regular use and handling.
The stacking process transforms individual covers into unified tray layers that can support various decorative items without flexing.
Using clamps during this stage prevents gaps from forming and ensures uniform pressure distribution across all glued surfaces.
- Apply a second generous layer of B7000 glue on top of dried beads
- Stack burner covers to form unified tray layers (large on large, small on small)
- Press the covers together firmly to establish strong initial bonding
- Use clamps around edges to maintain consistent pressure while curing
- Allow assembled layers to cure completely before handling further
Step 3: Choosing and Attaching Candlestick Holders
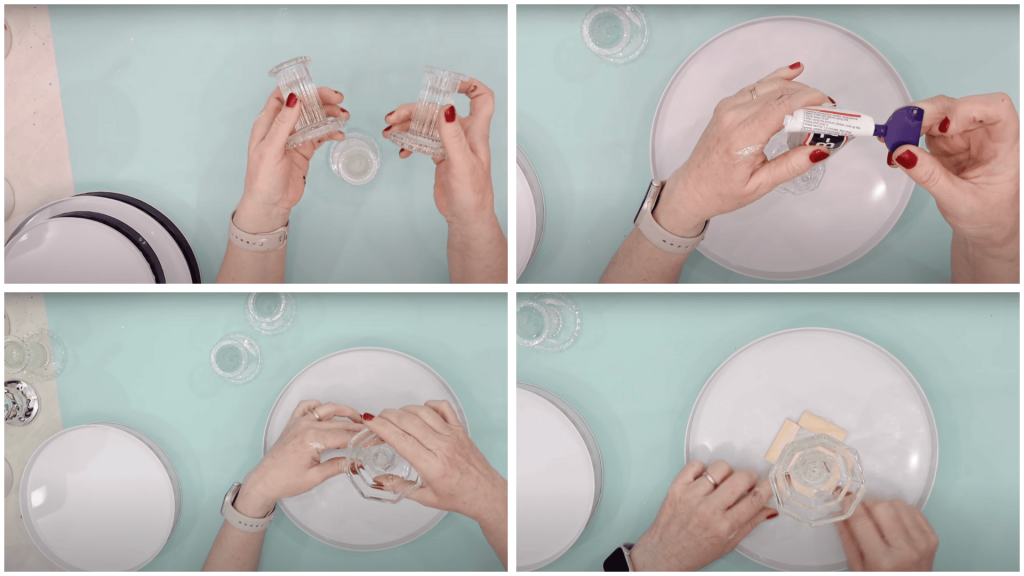
The candlestick selection process allows for creative expression while establishing the structural foundation of your multi-level display.
Different height combinations create visual interest and provide varied display levels for decorative items of various sizes.
The Jenga block reinforcement system adds stability while creating an interesting geometric element around the base.
- Experiment with various candlestick height and style combinations
- Select an arrangement that provides good visual balance and stability
- Apply B7000 glue to the candlestick base and position it on the bottom tier center
- Surround the candlestick base with Jenga blocks for added reinforcement
- Use clamps to maintain pressure on all connections while the glue cures
Step 4: Painting the Tray
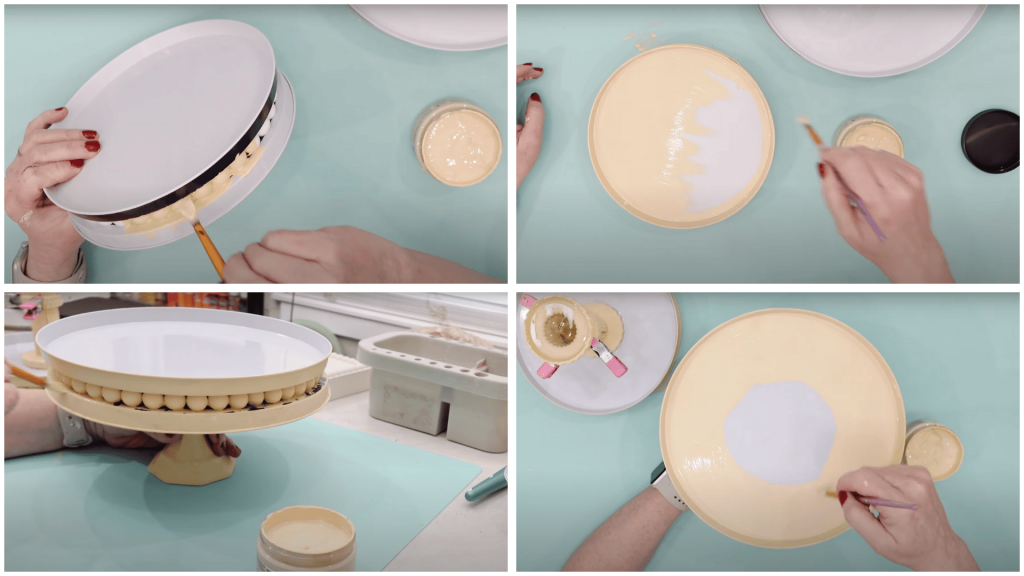
The painting process enhances your assembled tray from a collection of separate components into a unified, professional-looking piece.
Yellow chalk paint offers excellent coverage on metal surfaces, eliminating the need for primer and making this step efficient and straightforward.
Working paint into the bead crevices ensures complete coverage and creates subtle shadow effects that improve the dimensional appearance.
- Apply Dixie Belle yellow chalk paint evenly across all surfaces
- Work paint thoroughly into crevices between beads using a brush
- Use steady, methodical brush strokes to avoid drips and missed spots
- Leave small center areas on each tier unpainted for future adhesion
- Allow the paint to dry completely between coats if additional coverage needed
Step 5: Adding Texture for a Distressed Look
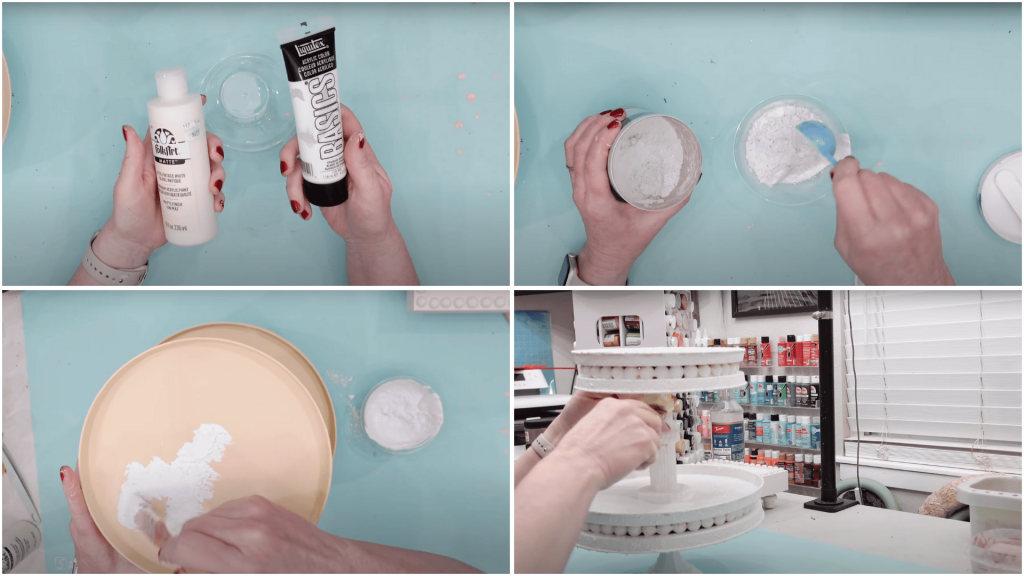
The texturing process enhances your painted tray from a simple craft project into a refined piece that resembles expensive antique furniture.
By mixing white acrylic paint with salt wash and applying it with a dabbing technique, you’ll create natural-looking variations that add depth and visual interest.
This layered approach allows the yellow base coat to peek through in places, creating the weathered patina that makes handmade pieces so appealing.
- Mix white acrylic paint with salt wash or baking soda
- Use the dabbing technique to apply the mixture onto the yellow surface
- Allow the yellow base to show through for a layered, aged effect
- Work in small sections for better control
- Build up texture gradually rather than applying heavily at once
Step 6: Ensuring Durability and Readying for Display
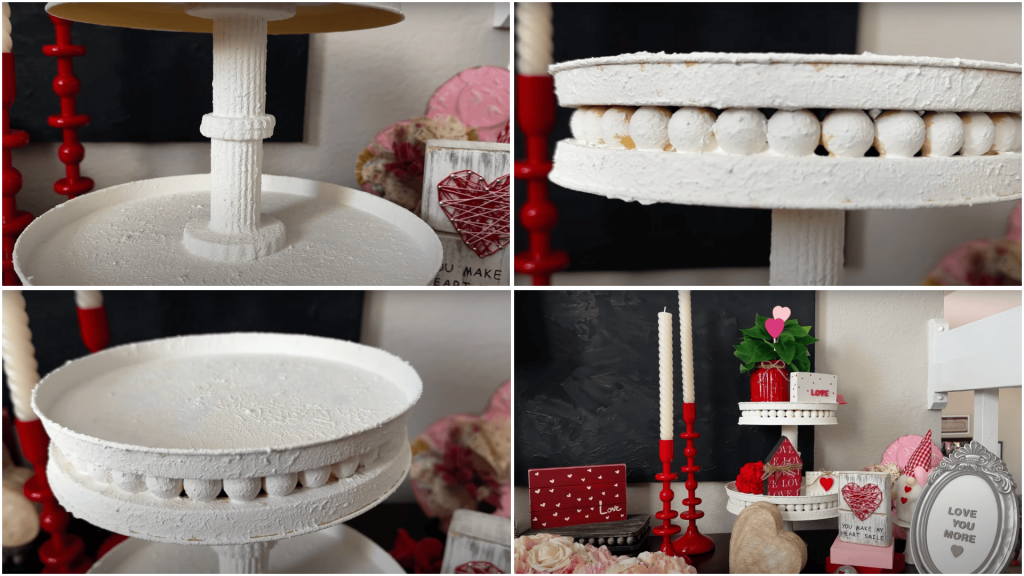
This crucial step involves thorough drying time, stability testing, and balance checking to ensure your tray can handle regular decorative items without stress or wobbling.
Quality control at this stage prevents future issues and allows you to make any necessary adjustments while materials are still workable.
Adding initial seasonal decorations, such as Valentine’s pieces, immediately showcases your tray’s versatility and decorative potential, transforming it from a craft project into a functional home decor centerpiece.
- Let everything dry completely before handling.
- Check the sturdiness and balance of all connections
- Test weight capacity with items similar to planned displays
- Add seasonal decor like Valentine’s pieces to show versatility
- Make minor adjustments while materials are still workable
Video Tutorial
A special thanks to DIY Diva for sharing this incredible tiered tray tutorial that inspired this step-by-step guide.
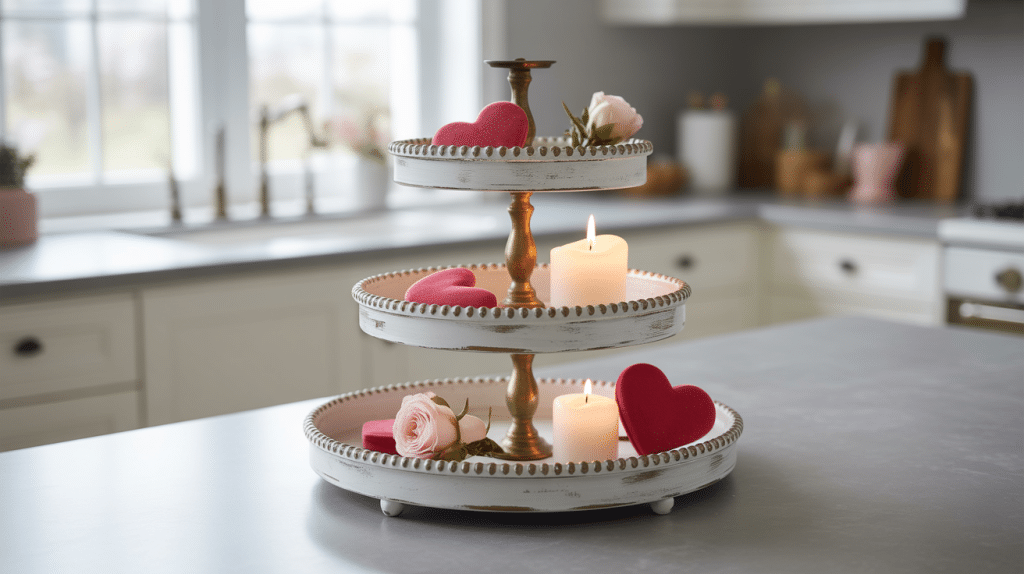
How to Style Your Tiered Tray
Master the art of arranging your handmade tiered tray with these simple styling techniques that will make your display look professionally curated and visually appealing.
Seasonal Rotation & Themes
Change decorative elements regularly to match holidays and seasons, keeping your display fresh and relevant.
Update your decorative elements regularly to reflect holidays and seasons, maintaining a fresh and current display that evolves with the calendar year.
Creating Visual Interest
Add candles of varying heights to create a warm ambiance and vertical interest across your tiers. Include mini figurines – seasonal characters or year-round favorites – to add personality and charm to your arrangement.
Design Principles
Group items in odd numbers (3 or 5) to create a pleasing visual balance that naturally draws the eye. Vary heights and textures by mixing different-sized items for appealing, lively compositions.
Tips & Tricks for Customizing Your DIY Tiered Tray
Why does B7000 work so well?
B7000 glue provides excellent holding power while remaining flexible enough to accommodate minor movements without cracking.
Unlike rigid adhesives that become brittle, B7000 maintains its elasticity, adapting to temperature changes and regular handling.
Color & Style Variations
- Soft pastels for spring themes
- Rich jewel tones for refined fall displays
- Crisp whites for modern minimalist looks
- Metallic accents for glamorous styles
- Weathered finishes for rustic farmhouse looks
Size & Customization Options
- Use different burner cover combinations for varying sizes
- Adjust candlestick heights to fit specific spaces
- Try different bead styles, colours, or shapes
- Create themed variations for different rooms or seasons
- Maintain the core budget-friendly approach while personalizing
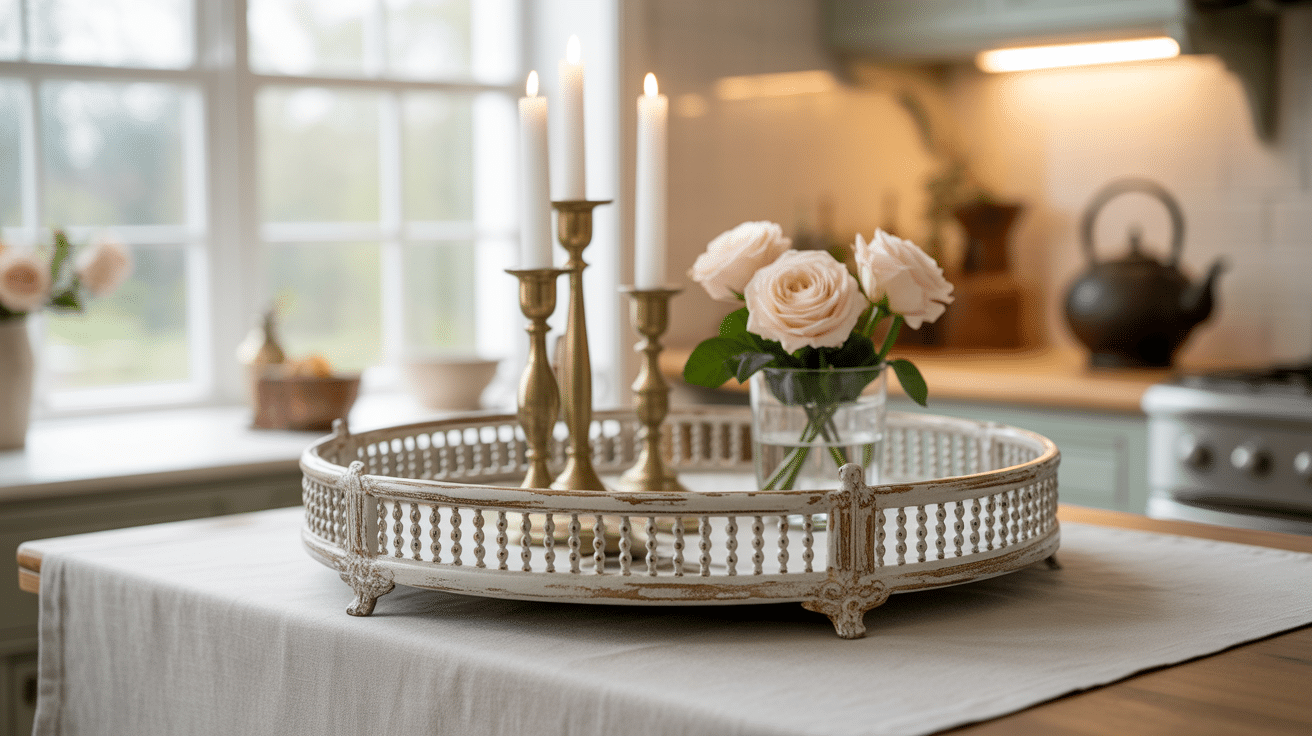
Showcasing Your Completed DIY Tiered Tray
Your completed tiered tray showcases the remarkable transformation that is possible when creativity meets affordability.
The textured paint finish adds professional-quality depth that rivals expensive boutique pieces, while the decorative bead trim catches the light beautifully and provides stylish detailing.
What Makes Your Tray Special:
- Charming candlestick combinations reflect your personal style
- The multi-level design offers plenty of space for seasonal displays
- Natural texturing variations ensure a beautiful handmade character
- Sturdy construction supports regular use over time
- Friends will assume it costs much more than your minimal investment
This project demonstrates that strategic shopping at dollar stores, combined with creative techniques, can produce refined home decor that appears custom-made rather than budget-friendly.
Create Beautiful Home Decor on Any Budget
This budget-friendly crafting project demonstrates that beautiful home decor doesn’t require costly materials – just creativity, patience, and smart dollar store shopping.
The methods you’ve mastered can be applied to numerous other cost-effective decorating projects throughout your home.
Take on this simple weekend project and enjoy the satisfaction of DIY success while trying more seasonal decorating concepts that respect your budget.
Your Dollar Tree approach makes it so accessible – I’m going to try this weekend. Thanks for showing that you don’t need to spend a lot to create something beautiful for your home!
Have you tried any other Dollar Tree DIY projects? I’d love to hear what worked best for you. Please share your experiences in the comments below!
Check out our other DIY Projects for more help!