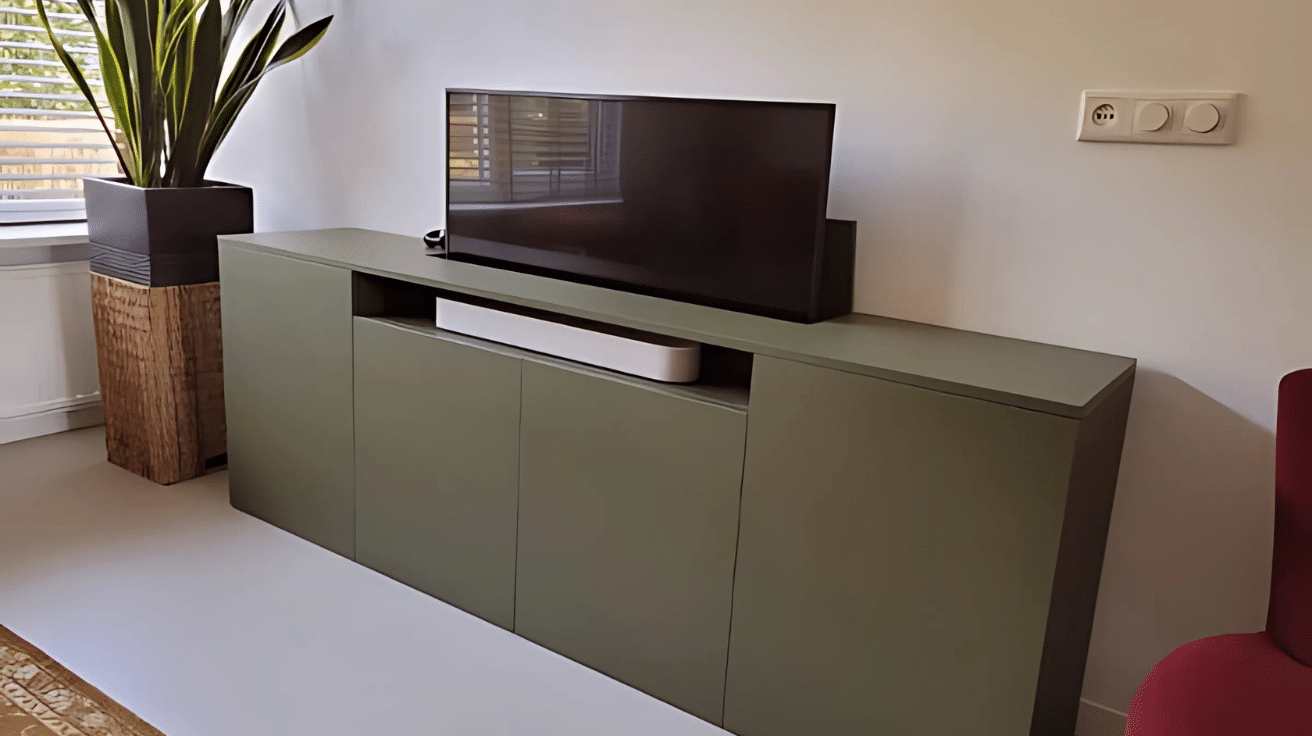
Are you sick of your TV taking up space on the floor and making the room look messy? It’s time to build a TV lift cabinet!
This awesome DIY project lets you hide your TV when you’re not watching it, giving you more space to move around and keeping your room neat.
Plus, it’s way cooler than just putting your TV on a stand. With some wood, a few simple tools, and a TV lift, you’ll create a cabinet that hides your TV with a simple push of a button.
No fancy skills are required—follow the steps, and you’ll have a stylish piece of furniture in no time.
So, if you want to impress your friends, free up some floor space, and add a little magic to your room, this is the project for you! Ready to get started? Let’s do this!
Tools and Materials You Will Need
Before starting, it’s important to gather all the necessary tools and materials to ensure you have everything you need for the task ahead. These are the tools and materials you will need for DIY TV lift cabinet:
| Tools | Materials |
|---|---|
| Drill | ¾ inch plywood |
| Screwdriver | 2×3 lumber (for the frame) |
| Saw (chop saw, table saw) | Pine boards (for trim) |
| Sandpaper or orbital sander | TV lift mechanism (purchased) |
| Measuring tape | Wood glue |
| Clamps | Screws (2½ or 3 inches) |
| Paint sprayer (optional) | Paint (semi-gloss or your choice) |
| Power strip (for cables) |
Step-by-Step Guide for DIY TV Lift Cabinet
Now that you’re ready to get started, let’s break it down step by step and turn that TV lift dream into a reality! Follow these easy steps to build your hidden TV cabinet, and soon you’ll be enjoying a cleaner, more organized space.
Step 1: Modify the TV Lift Mechanism
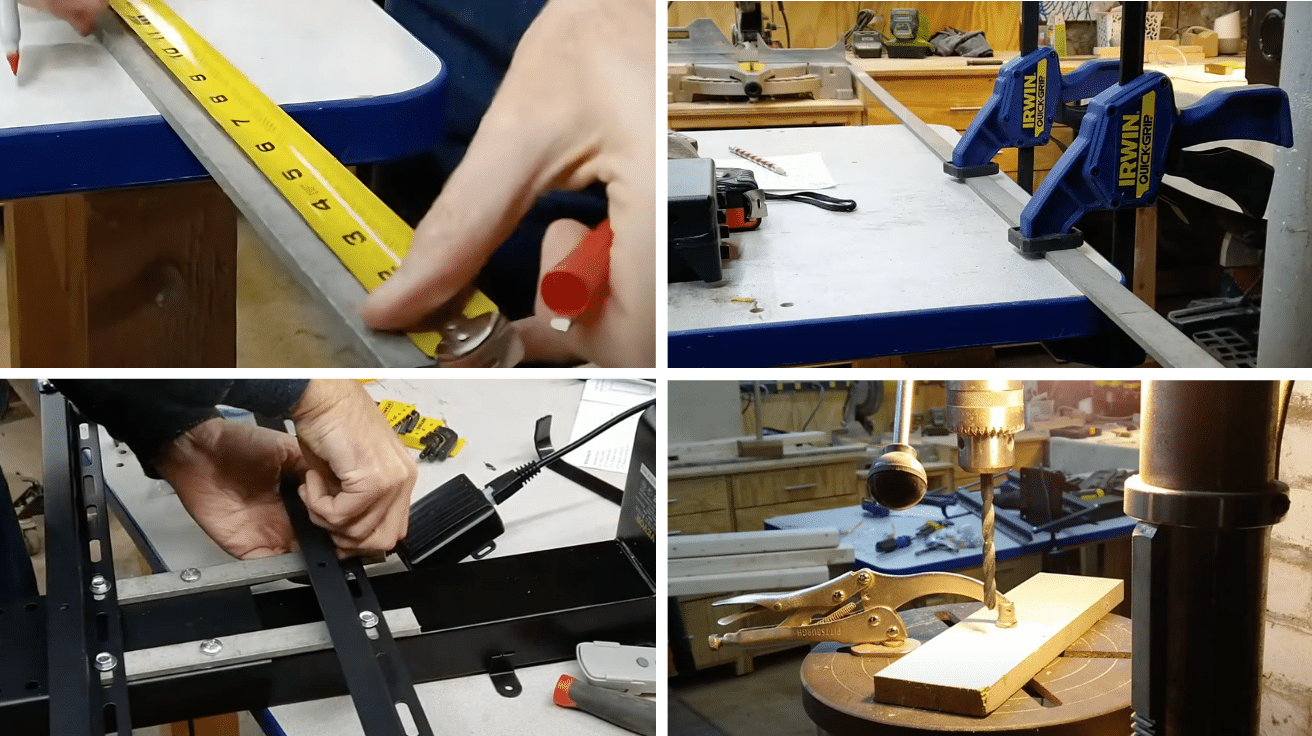
Start by adjusting the TV lift mechanism you bought. The one you chose may not drop the TV as low as you’d like, so you can modify it by adding some aluminum bars to the rails, which will drop the TV by about 4 inches.
-
Cut the Aluminum Bar: Use a saw to cut the aluminum bar to the right length.
-
Attach the Bar: Attach the aluminum bar to the lift’s rails. This simple modification will lower your TV lift to the desired level.
Step 2: Building the Cabinet Frame
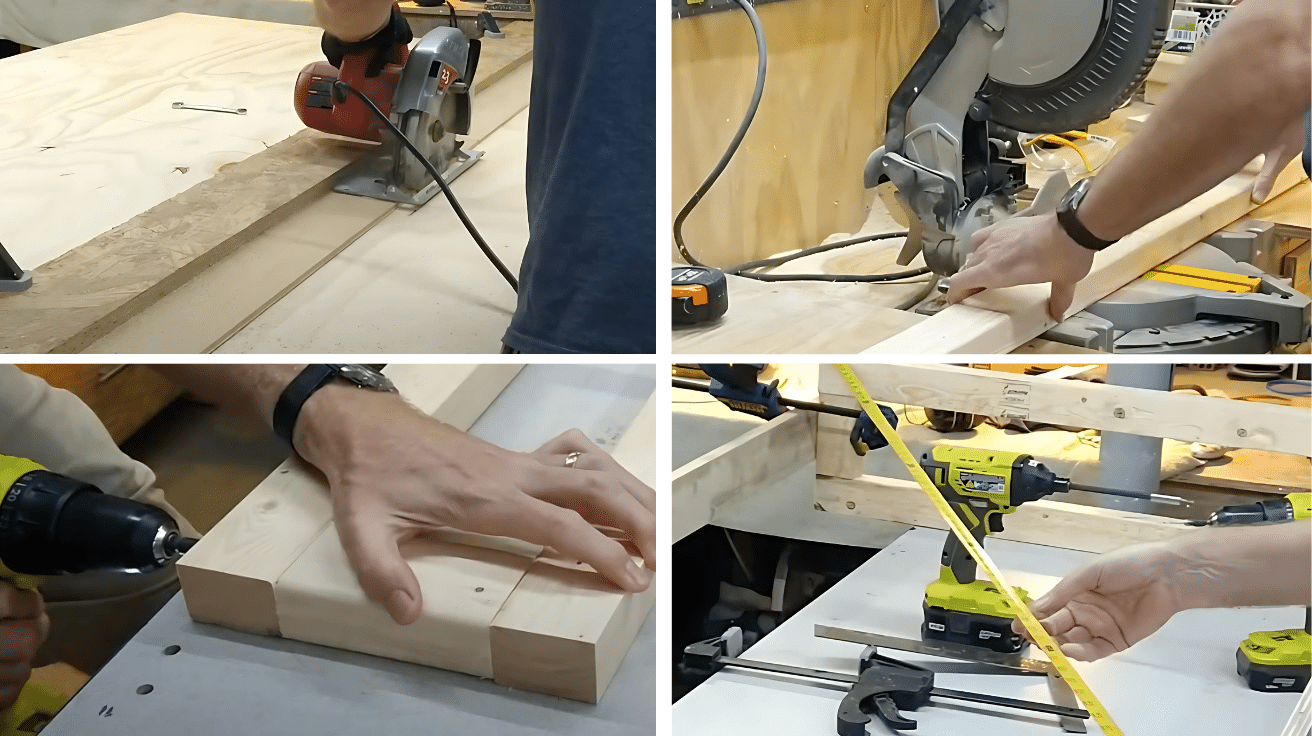
The main structure of the cabinet will be made from plywood and 2×3 lumber. You’ll want to make sure it’s sturdy and well-constructed to hold the weight of the TV and lift mechanism.
-
Cut the Lumber: Cut your 2×3 pieces to size for the four main rails.
-
Assemble the Frame: Using screws and wood glue, assemble the frame of the cabinet. Be sure to check the diagonals for square alignment as you go.
Step 3: Attach the Panels
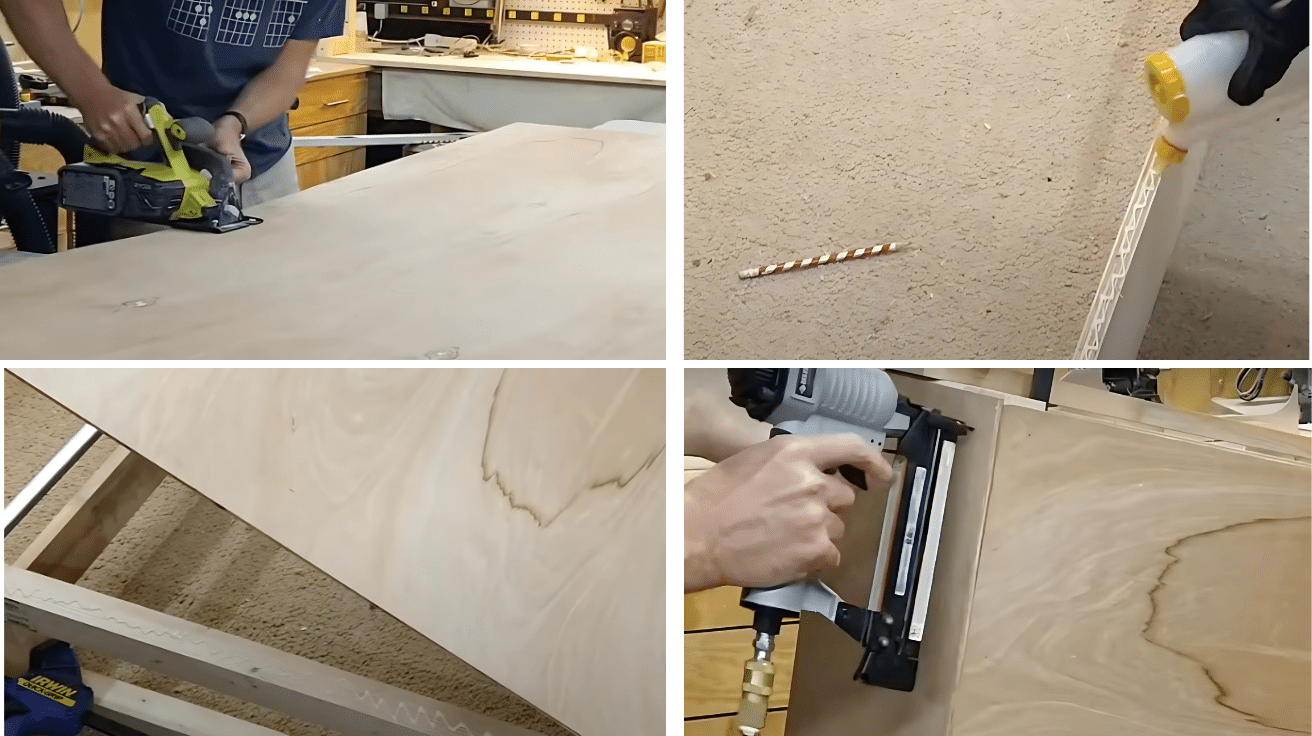
Once the frame is ready, you can add the sides and the front panels. This is where you’ll start to see the cabinet take shape.
-
Cut the Panels: Use a saw to cut the Luan panels to fit the sides and the front of the cabinet.
-
Glue and Secure: Apply wood glue to the edges of the panels, then use brads to attach them to the frame. Make sure everything is aligned properly.
Step 4: Adding Trim
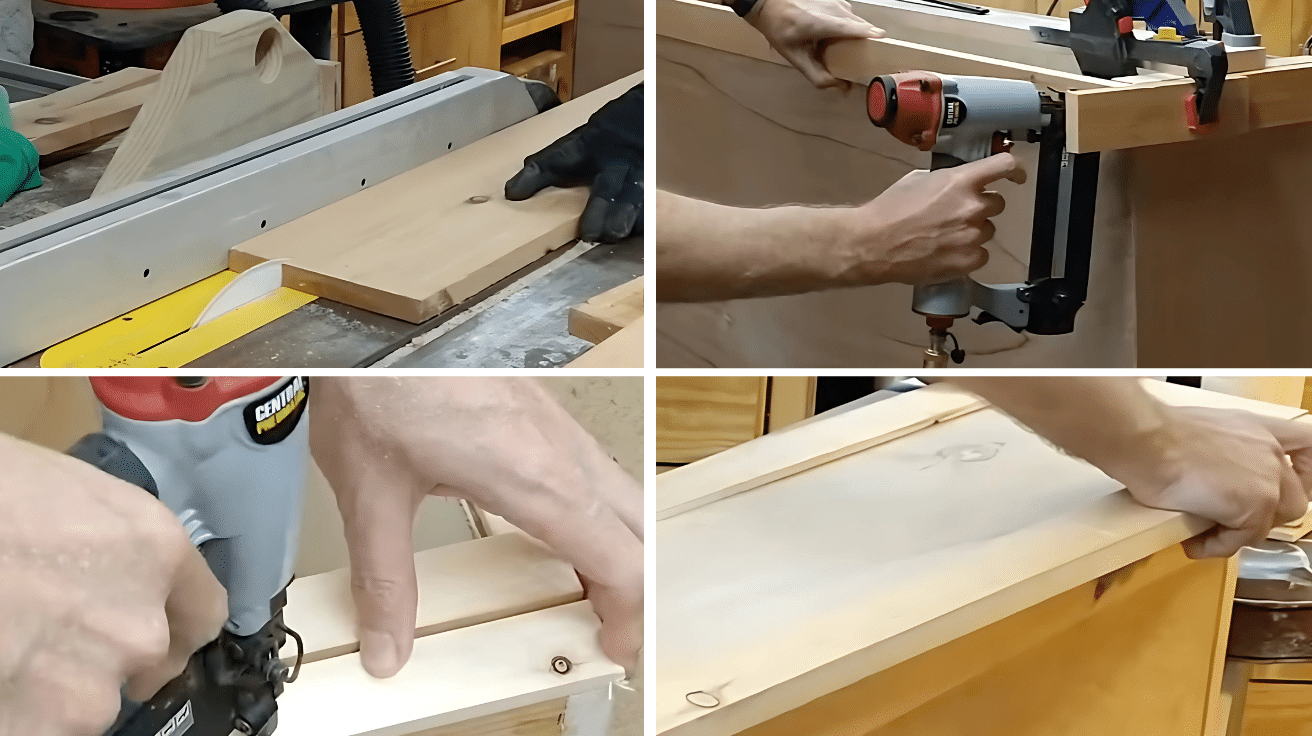
Trim not only adds style but also increases the structural integrity of the cabinet.
-
Cut the Pine Boards: Rip the pine boards into strips about 2½ inches wide.
-
Attach the Trim: Use longer brad nails to attach the trim to the cabinet’s edges, making it look more finished.
Step 5: Prepare the Lid
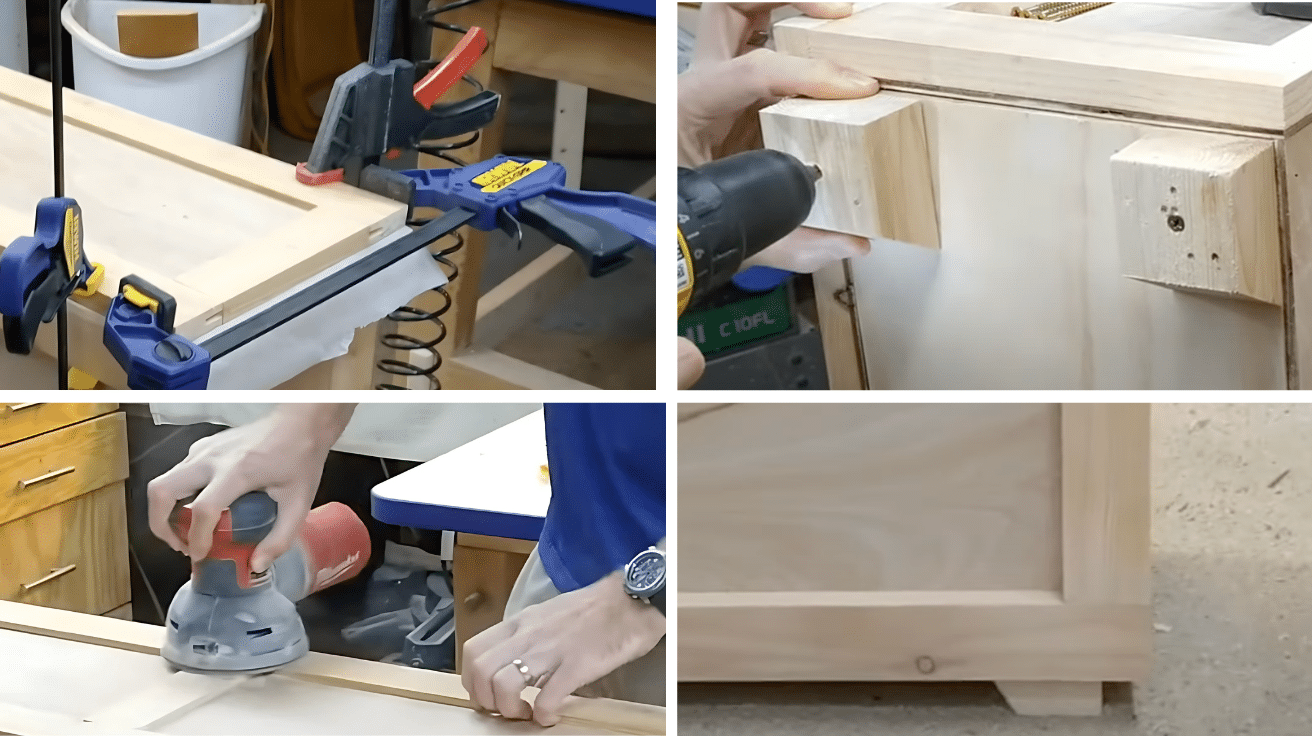
The lid will need to open automatically when the TV lifts and close when it’s hidden. Cut channels in the pine blocks to create a slot for the lid to slide smoothly.
-
Cut and Attach the Channels: Cut channels in the pine blocks to fit the lid’s plywood. Attach the blocks to the lid and ensure that it slides open and closes easily.
Step 6: Sand and Paint
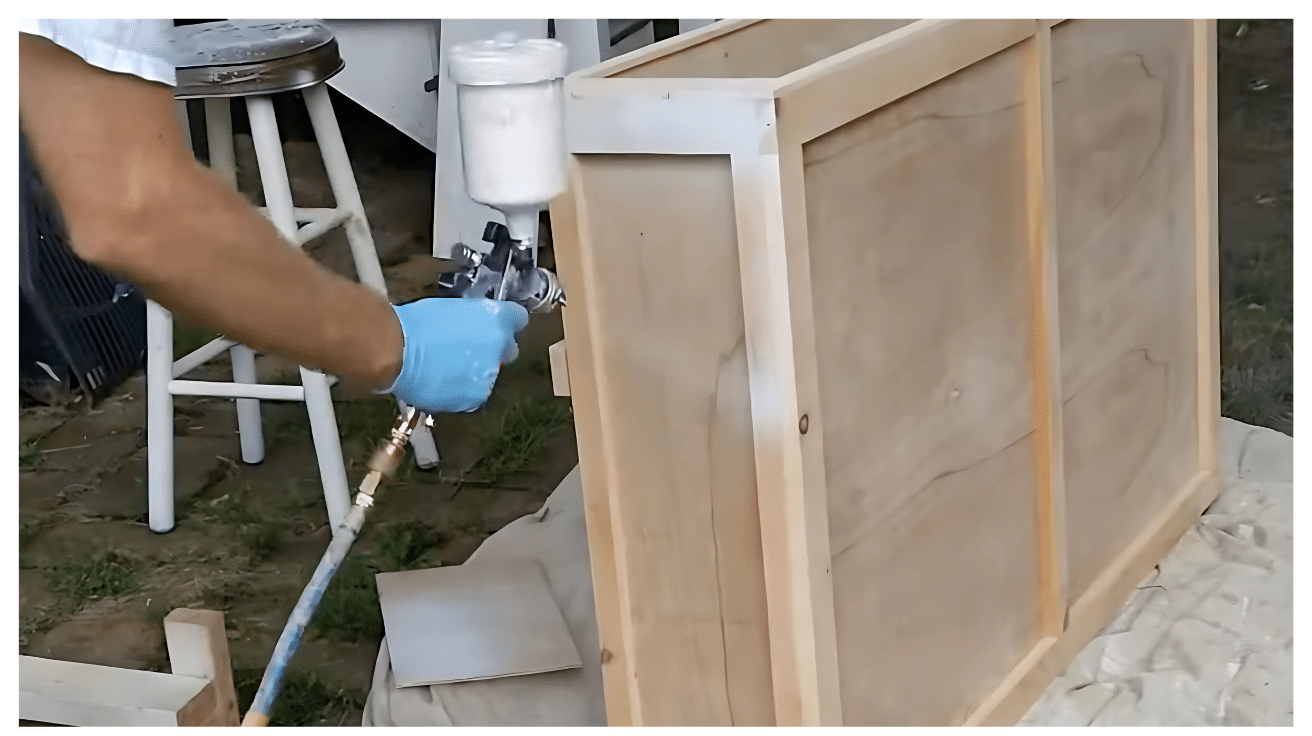
Once the main construction is done, sand the edges to smooth out rough areas. Paint or stain the cabinet to match your room’s decor.
-
Sanding: Sand the entire piece to a smooth finish.
-
Painting: For a clean look, apply several coats of semi-gloss white paint (or any color you prefer). You’ll need 4–5 coats to cover the pine knots.
Step 7: Install the TV Lift Mechanism
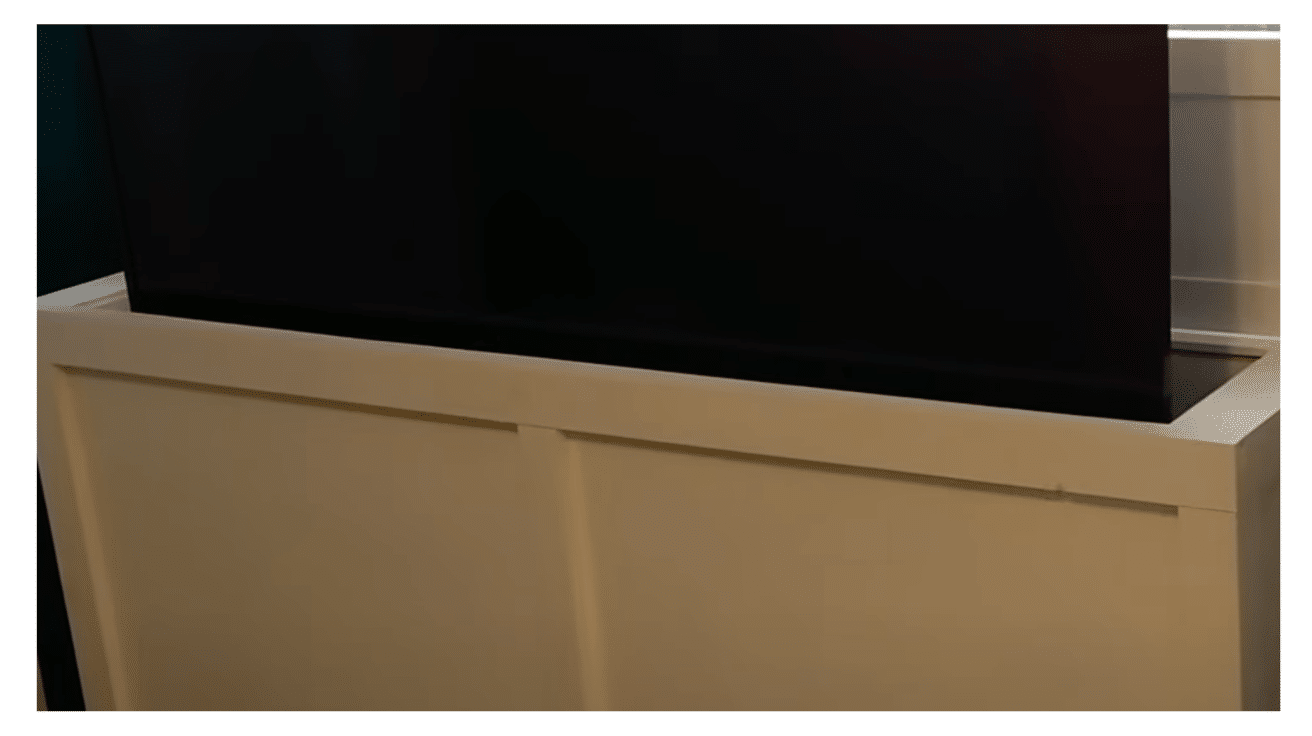
Now that the cabinet is built and painted, it’s time to install the TV lift mechanism.
-
Position the Lift: Place the lift mechanism inside the cabinet, following the manufacturer’s instructions.
-
Connect Cables: Make sure to leave enough room for the TV cables (power and coaxial) and the power strip.
Video Tutorial
Check out this detailed video tutorial on YouTube that walks you through every part of making your TV lift cabinet by Sawdust Workshop.
Finishing Touches for TV Cabinet
Now that the hard work is done, it’s time to add the final details that will make your DIY TV lift cabinet truly shine. A little paint or stain can change the cabinet’s look and give it a polished finish.
-
Natural & Rustic: For a cozy, warm feel, leave the wood unpainted or apply a light wood stain.
-
Clean & Modern: Use a sleek matte or satin paint in neutral tones for a contemporary vibe.
-
Bold Statement: Want your TV lift to be a showstopper? Try dark or metallic colors like black or gold to give it a stylish, standout look.
These finishing touches will make your TV lift cabinet not only functional but also a beautiful addition to your space. You’re almost done—just a few coats, and your project will be complete!
Important Safety Precautions to Consider
Before jumping into your DIY TV lift project, it’s important to keep safety in mind. Here are some key precautions to ensure everything goes smoothly:
-
Wear Safety Glasses: Protect your eyes when cutting, drilling, or sanding.
-
Keep Fingers Clear: Always keep your hands away from moving parts like saw blades and drill bits.
-
Use Clamps: Secure wood pieces with clamps to keep them steady while working.
-
Work in a Well-Ventilated Area: If you’re painting or staining, make sure your workspace has good airflow.
-
Double-check the Lift Mechanism: Make sure the TV lift is securely installed before using it.
-
Store Small Hardware Safely: Keep screws, nails, and other small parts away from kids and pets during the project.
Taking these precautions will help keep your DIY project fun and accident-free!
Wrapping Up Your Diy Tv Lift Cabinet
And just like that, your DIY TV lift cabinet is ready to go! Not only does it free up space in your room, but it also adds a cool factor that will impress your friends and family.
With the push of a button, your TV magically appears or hides away, making your room look tidier and more organized. Plus, you saved money by building it yourself—score!
You can choose from a natural wood look, a sleek modern vibe, or something bold to match your style. So, what are you waiting for? Grab those tools, follow the steps, and create a stylish, hidden TV lift that makes your room even cooler!
This project proves that a little creativity and elbow grease can go a long way. Enjoy your new TV lift, and show it off to everyone who visits!
