
Builder-grade homes often leave homeowners feeling stuck with plain, boring walls that lack character and style. You stare at those flat drywall surfaces and wonder how to make your space look more upscale without breaking the bank.
The good news is that you can completely change the look of any room with a simple DIY wall molding project.
This guide will show you exactly how to create beautiful wall panels using affordable materials from your local home improvement store.
You’ll learn to measure, cut, and install molding that makes your walls look like they belong in a high-end custom home.
By the time you finish this project, your plain builder-grade room will have the sophisticated look you’ve always wanted.
Why Wall Molding Makes Such a Big Difference
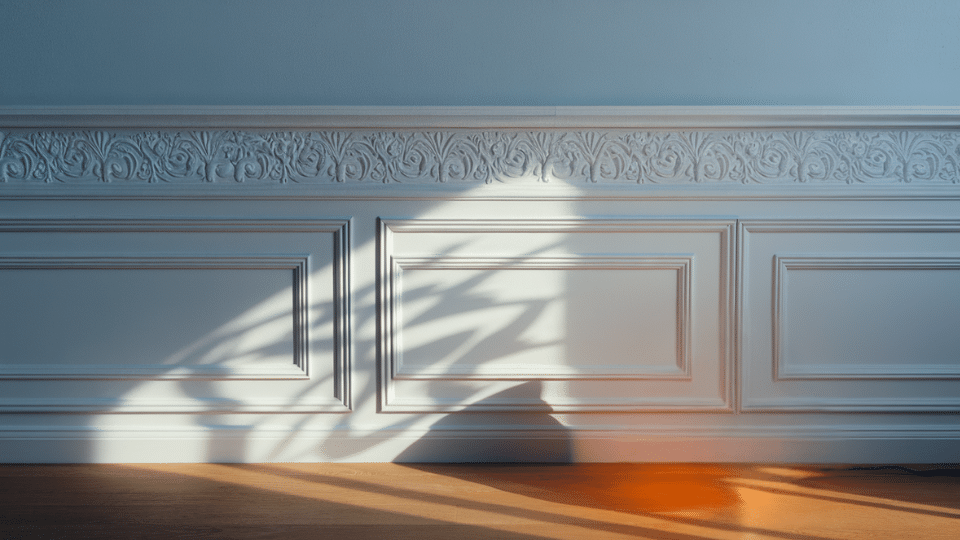
Wall molding has been used for centuries to add visual interest and sophistication to interior spaces. When you add molding to your walls, you create depth and texture that instantly makes a room feel more expensive and well-designed.
The technique demonstrated in this guide employs a symmetrical multi-rectangular pattern that replicates the appearance of traditional wainscoting or panel walls.
This pattern works exceptionally well in living rooms, dining rooms, and bedrooms where you want to create a focal wall or add interest to the entire room.
Builder-grade homes typically have very plain walls with minimal architectural details. Adding wall molding is one of the most cost-effective ways to give your home custom-built character without major renovation work.
Step-by-Step: How to Install DIY Wall Molding
Follow this clear, beginner-friendly guide to install DIY wall molding and add elegant detail to any space with ease.
Tools and Materials Needed
| Tools Required | Materials Needed |
|---|---|
| Measuring tape | Pre-primed molding strips |
| Level | Alpaca gray paint |
| Nail gun or hammer | Metallic glaze |
| Pencil | Finish nails |
| Saw | Wall appliques (optional) |
| Paintbrush | Sandpaper |
| Paint roller | Wood filler |
Step 1: Planning and Measuring Your Pattern

Before you start cutting any molding, plan your design and take precise measurements carefully. This step determines the level of professionalism in your finished project.
Begin by determining the size and spacing of your rectangles. For most rooms, rectangles that are 24-36 inches wide work well. Ensure that you account for the width of your molding strips when calculating spacing.
Materials needed in this step:
- Measuring tape
- Pencil
- Level
- Calculator
Instructions: Measure the wall height and width to determine how many rectangles will fit. Mark the center point of your wall and work outward to ensure symmetry. Use your level to draw light pencil lines where each piece of molding will go.
Step 2: Cutting Your Molding to Size

Once you have your measurements, it’s time to cut all your molding pieces. Take your time with this step because accurate cuts make the installation much easier.
You’ll need both horizontal and vertical pieces for each rectangle. Cut all pieces slightly longer than needed, then trim to exact size during installation. This gives you room to make minor adjustments if your measurements are slightly off.
Materials needed in this step:
- Pre-primed molding
- Saw (miter saw works best)
- Sandpaper
- Safety glasses
Instructions: Cut all horizontal pieces first, then cut vertical pieces. Sand any rough edges smooth. Test fit a few pieces on the wall before cutting all your molding. Label piece with painter’s tape to indicate its location during installation.
Step 3: Installing the Molding Framework
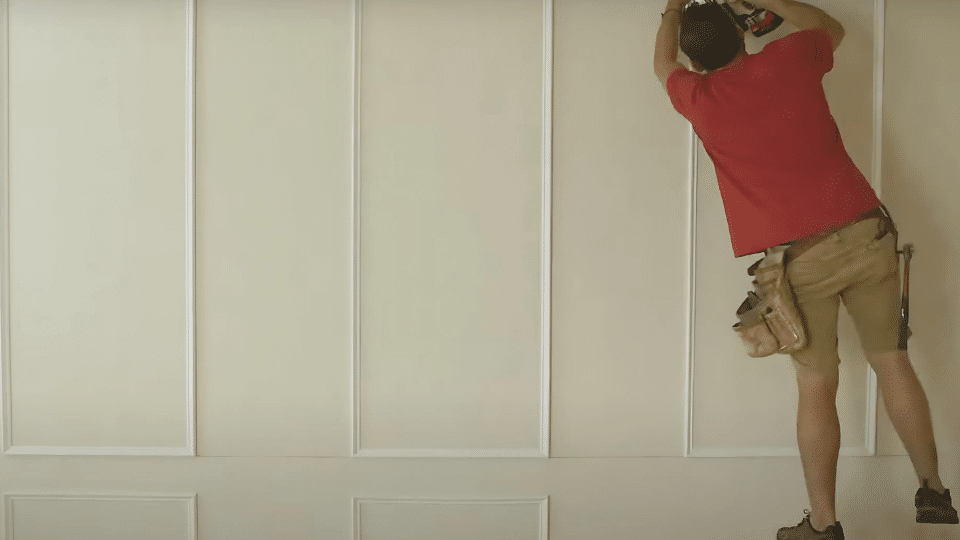
Now comes the fun part – actually putting your molding on the walls. Start with the outer frame of each rectangle, then add any interior details.
Work systematically from one side of the wall to the other. This helps ensure your pattern stays consistent and level across the entire wall. Use your pencil lines as guides, but don’t hesitate to make minor adjustments as you work.
Materials needed in this step:
- Cut molding pieces
- Nail gun or hammer
- Finish nails
- Wood filler
- Level
Instructions: Start by installing the outer perimeter of each rectangle. Use your nail gun to attach molding directly to the wall studs when possible. Fill nail holes with wood filler and let dry.
Step 4: Adding Finishing Touches
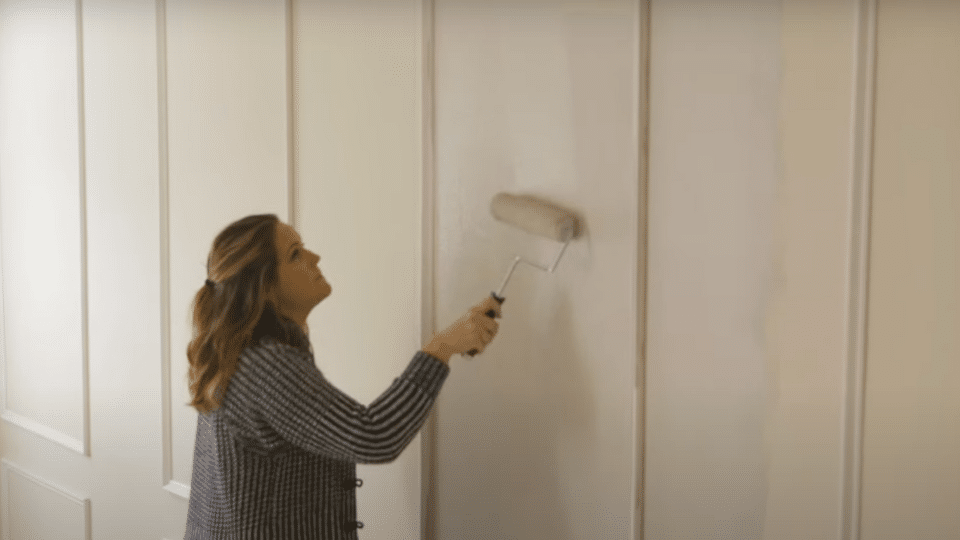
The final step involves painting your molding and adding any decorative elements. This is where your project truly comes together and begins to look professional.
Paint both the walls and the molding the same color for a cohesive look. Adding metallic glaze to just the molding creates a subtle contrast that makes the molding pop without being too bold.
Materials needed in this step:
- Alpaca gray paint
- Metallic glaze
- Paint brushes
- Paint roller
- Wall appliques (optional)
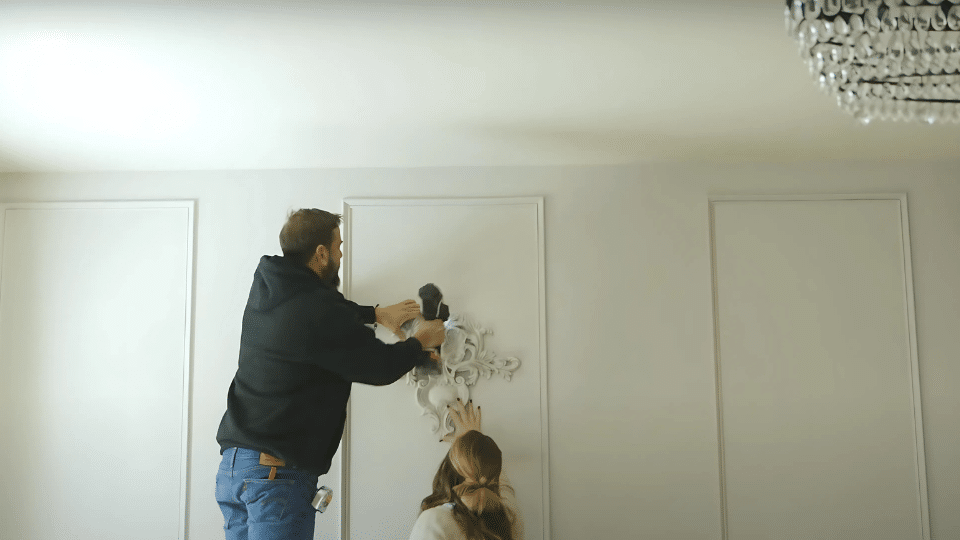
Instructions: Paint the entire wall and molding with your base color first. Once dry, apply metallic glaze to just the molding using a small brush. Install any decorative appliques in the center of select rectangles.
Step 5: Final Details and Touch-ups
After your paint and glaze have dried completely, take a moment to inspect for any areas that require touch-ups. This attention to detail separates amateur DIY work from professional-looking results.
Inspect all corners and joints to ensure they’re clean and well-finished. Apply caulk where the molding meets the wall to fill any gaps. Touch up paint as needed.
Materials needed in this step:
- Paintable caulk
- Touch-up paint
- Small brush
- Clean cloth
Instructions: Caulk any gaps between molding and wall with paintable caulk. Smooth with your finger for a clean finish. Touch up any nail holes or imperfections with paint. Clean up any glaze drips or smudges.
Video Tutorial
Special thanks to Lowe’s Home Improvement for providing valuable insights in their video, which I referenced while creating this guide.
How to Maintain and Protect Your DIY Wall Molding
Learn simple techniques to keep your DIY wall molding looking sharp, clean, and damage-free for years to come.
1. Regular Cleaning Methods
Dust your molding monthly with a soft cloth or vacuum brush attachment to prevent buildup. For deeper cleaning, use a damp cloth with a mild soap solution. Pay special attention to corners where dust tends to accumulate.
Wipe down metallic glazed areas gently to avoid removing the finish. If the glaze starts to wear in high-traffic areas, you can touch it up with the same product you used initially.
2. Paint Touch-up Schedule
Plan to touch up your molding paint every 2-3 years, or sooner if you notice scuffs and scratches. Keep leftover paint in a sealed container for easy touch-ups. High-traffic areas, such as hallways and children’s rooms, may require more frequent touch-ups. Consider using semi-gloss paint in these areas for easier cleaning and better durability.
3. Protecting Your Investment
Install chair rails or other protective molding in areas where furniture might bump against your wall treatment. This prevents damage and keeps your molding looking perfect longer.
Be careful when moving furniture or hanging artwork near your molding walls. Use furniture pads and take extra care to avoid scratches and dents.
4. Seasonal Maintenance Checks
Check your molding seasonally for any issues that need attention. Look for gaps that may have opened due to settling, loose pieces, or areas where the paint is wearing thin.
Address small problems promptly before they escalate into larger issues. A little caulk or touch-up paint applied promptly can prevent more extensive repairs later.
Watch for any signs of moisture damage, especially in bathrooms or basements where humidity levels fluctuate.
5. Long-term Care Planning
Keep detailed records of the materials you used, including paint colors and product names. This makes future maintenance much easier when you need to match finishes.
Plan for eventual repainting as part of your home maintenance schedule. Most wall treatments need refreshing every 5-7 years to maintain their appearance.
Design Variations for Different Rooms
- Traditional Wainscoting Style – Install molding only on the bottom third of walls for classic wainscoting appeal.
- Modern Geometric Patterns – Create contemporary looks using different-sized rectangles and squares.
- Full Wall Coverage – Extend molding patterns to entire walls for dramatic, luxurious effects.
- Picture Frame Molding – Use single rectangles around artwork or mirrors to create a simple accent wall.
- Vertical Panel Design – Install tall, narrow rectangles to create the illusion of higher ceilings.
- Board and Batten Style – Combine horizontal rails with vertical slats for farmhouse charm.
- Coffered Ceiling Effect – Create grid patterns on ceilings for sophisticated overhead interest.
- Two-Tone Split Design – Use molding to separate different paint colors on the same wall.
DIY Wall Molding Mistakes
| Mistake | Why It’s Problematic | How to Avoid |
|---|---|---|
| Skipping the planning phase | Results in uneven spacing and poor proportions | Always measure twice and create a detailed plan |
| Using cheap molding | Warps easily and doesn’t hold paint well | Invest in quality pre-primed molding |
| Ignoring wall studs | Molding may sag or fall off over time | Use a stud finder and nail into studs when possible |
| Rushing the paint job | Creates visible brush marks and uneven coverage | Take time for proper prep and multiple thin coats |
| Not checking for level | Creates a sloppy, unprofessional appearance | Use a level frequently throughout the installation |
| Forgetting to fill nail holes | Visible holes ruin the finished appearance | Fill all holes and sand smooth before painting |
Conclusion
Creating beautiful wall molding in your builder-grade home is easier than you might think. With basic tools, quality materials, and careful planning, you can completely change the look of any room in just a weekend.
The key to success lies in taking your time with measurements and the installation process. Each step builds on the previous one, so patience and attention to detail yield professional-looking results that you’ll enjoy for years to come.
This project demonstrates that you don’t need expensive renovations to give your home a custom and upscale look.
Simple molding installation can add thousands of dollars in perceived value to your home while giving you the satisfaction of completing a beautiful DIY project.
Start with one accent wall and expand your skills from there – you’ll be amazed at the difference this simple upgrade makes in your space.