
Water stains on your ceiling can turn your peaceful home into a source of constant worry.
Most homeowners miss the early warning signs of ceiling leaks until significant damage has already occurred, resulting in thousands of dollars in expenses.
But what if I told you there are simple ways to spot these problems before they become costly disasters?
In this guide, I’ll walk you through practical methods for checking for ceiling leaks using tools you likely already have at home.
You’ll learn how to identify problem areas, understand the meaning of different stains, and know when to call for help versus handling it yourself.
Let’s start by examining your ceiling the right way – it takes just 15 minutes and could save you from major headaches down the road.
Why It’s Important to Identify Ceiling Leaks Early?
Catching ceiling leaks early saves you thousands of dollars. Small leaks cost under $200 to fix. Wait too long, and you’ll face $2,000 to $10,000 in repairs.
Water damage can spread quickly throughout your home’s structure. It creates mold within 24-48 hours, causing health issues such as breathing problems and headaches.
Moisture weakens ceiling joists and can cause sagging or structural damage. Insurance companies often won’t cover long-term leak damage, considering it a result of maintenance neglect.
Check your ceiling monthly. A quick inspection prevents major headaches later.
Signs You Might Have a Ceiling Leak
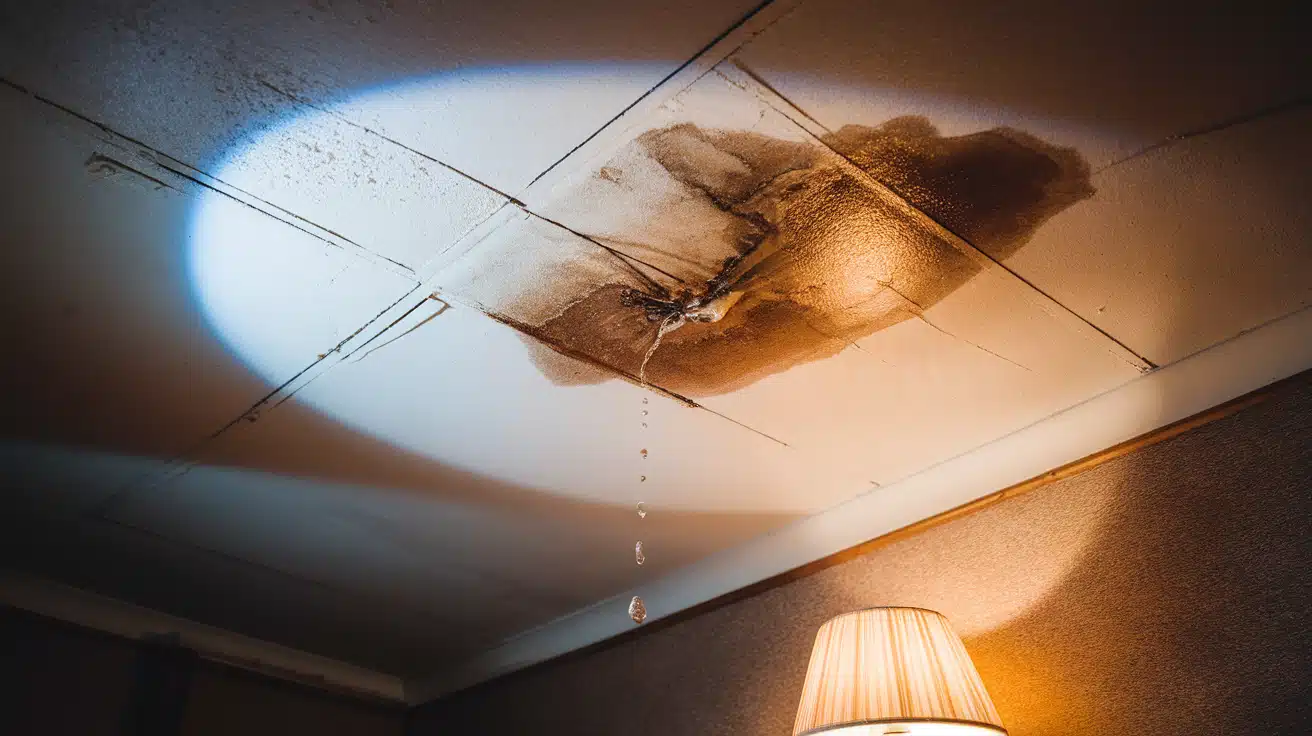
1. Water Stains or Discoloration: Yellow or brown rings appearing on your ceiling are classic signs of water damage, often forming circular patterns around light fixtures or vents.
These dark spots typically grow larger over time, with fresh stains appearing wet and darker than older, dried ones that have set into the material.
2. Peeling Paint or Wallpaper: When moisture penetrates ceiling surfaces, paint begins chipping and falling away, creating bubbling or blistering effects.
Wallpaper edges begin to curl and pull away from the surface, often leaving behind a white, flaky residue where the paint has deteriorated due to water exposure.
3. Dripping Water or Puddles: Active water intrusion creates visible drips from ceiling joints, corners, or seams, resulting in puddles forming on the floors below.
These wet spots tend to reappear even after cleaning, and you may hear dripping sounds during rainstorms or throughout the night when the house is quiet.
4. Musty Odors: A persistent, damp, moldy smell in certain rooms indicates moisture buildup, with stronger odors typically concentrated near ceiling areas.
These smells intensify during humid weather and create a lingering moisture scent that persists even when surfaces appear dry to the touch.
5. Sagging Ceiling Sections: Water-damaged drywall begins bulging downward in affected spots, causing ceiling tiles to drop or warp noticeably.
You’ll notice visible bowing along ceiling lines, and these areas feel soft when gently pressed upward, indicating structural compromise from prolonged moisture exposure.
6. Temperature Changes in Rooms: Rooms with ceiling leaks often experience unusual temperature fluctuations, feeling colder in winter or warmer in summer due to compromised insulation.
You may notice drafts coming from ceiling areas or increased energy bills as your HVAC system works harder to maintain consistent temperatures.
7. Visible Mold Growth: Black, green, or white fuzzy patches appear on ceiling surfaces, particularly in corners or around fixtures where moisture accumulates.
This mold growth spreads rapidly in humid conditions and poses significant health risks, particularly for individuals with respiratory sensitivities or allergies.
Pro Tip: Check these areas monthly, especially after heavy rain or snow. Early detection prevents costly repairs
5 Common Causes of Ceiling Leaks

1. Roof Damage or Missing Shingles
Cracked, loose, or missing shingles allow rainwater to seep through your roof; wind damage and age cause shingles to curl or break. Even small gaps allow water to reach your ceiling over time.
2. Plumbing Issues Above the Ceiling
Burst pipes, loose joints, or worn-out seals in bathrooms and kitchens create leaks. Water travels along pipes and drips through ceiling cracks. Old plumbing connections often fail without warning signs.
3. HVAC System Condensation
Air conditioning units and heating systems produce moisture that can overflow. Blocked drain pans or clogged condensate lines cause water buildup. This excess moisture drips down through the ceiling vents and fixtures.
4. Clogged Gutters or Downspouts
Blocked gutters force water to overflow and seep under the roof edges. Leaves, debris, and ice dams prevent proper drainage, allowing water to back up and seep through roof materials into your home.
5. Poor Sealing Around Vents or Skylights
Cracked caulk or worn weatherstripping around roof openings allows water to enter. Skylights, chimneys, and exhaust vents need regular maintenance. Even tiny gaps can cause significant water damage during storms.
How to Inspect for A Ceiling Leak?
Step 1: Visual Inspection Indoors
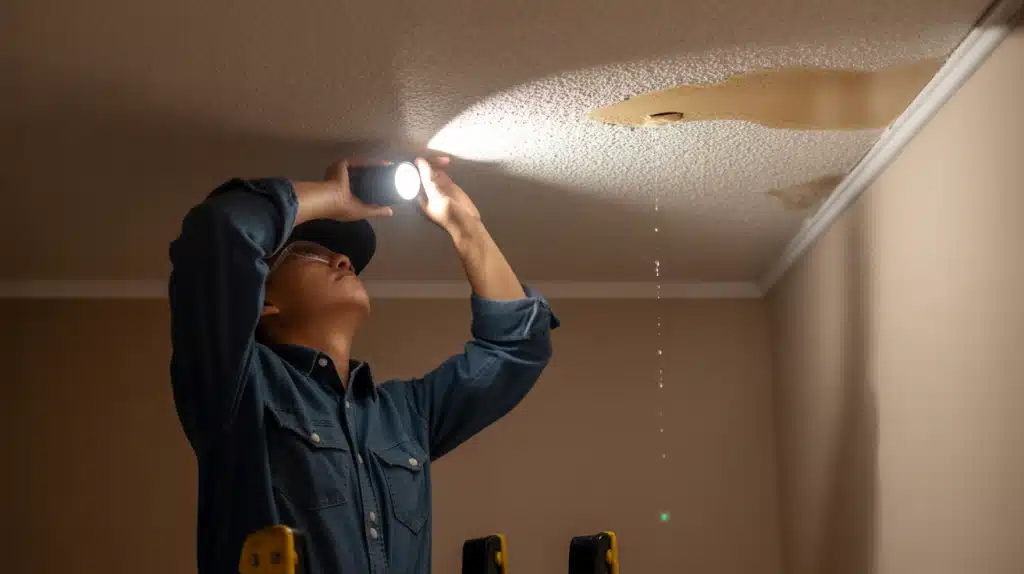
Carefully examine your ceiling for water stains, brown spots, or peeling paint that indicate moisture damage. Pay special attention to areas around light fixtures, vents, and corners where leaks commonly begin.
Use a bright flashlight to illuminate dark areas and see details clearly. Take clear photos of any suspicious spots you find so you can monitor them over time and track whether the damage is getting worse or spreading to new areas.
Step 2: Check the Attic or Crawl Space
Enter your attic during daylight hours with a powerful flashlight for the best visibility. Look carefully for wet or discolored insulation, dark water stains on wooden beams, or fresh water droplets hanging from rafters.
Focus your search on the area directly above where you noticed the ceiling problems. Touch surfaces gently to feel for dampness, and look for any spots where daylight is visible through cracks or holes in the roof structure.
Step 3: Examine the Roof and Exterior
Walk completely around your house and carefully inspect the roof from ground level. Look for missing, cracked, curled, or damaged shingles that could allow water entry.
Check gutters and downspouts for clogs, damage, or improper drainage. Pay close attention to areas around chimneys, vents, skylights, and other roof penetrations for loose or deteriorated sealing. Use binoculars if your roof is too high to see details clearly from the ground.
Step 4: Test Suspected Plumbing Fixtures
Systematically turn on faucets, showers, and flush toilets in all rooms located above the ceiling leak. Run water continuously for 10-15 minutes while having someone stationed below to watch the ceiling carefully.
Look for new drips, wet spots, or expanding stains during the test. Test each plumbing fixture individually rather than all at once so you can identify exactly which one might be causing the water damage problem.
Step 5: Use a Moisture Meter
Purchase or rent a digital moisture meter from your local hardware store for accurate detection. Press the device firmly against different sections of your ceiling to detect hidden moisture that isn’t visible yet.
The meter will produce audible beeps or display high numerical readings in areas where moisture is present. This tool helps you discover developing leaks before visible damage appears on your ceiling surface, allowing for earlier intervention.
Preventative Measures
- Inspect your roof twice yearly – Check for broken or damaged shingles and replace them immediately to prevent water infiltration.
- Maintain proper attic conditions – Install adequate insulation and ventilation to prevent moisture buildup and ice dam formation.
- Schedule annual plumbing inspections – Have a professional check your plumbing system yearly to identify and address potential issues before they escalate.
- Clean gutters regularly – Clear gutters twice per year to prevent water overflow that can damage your foundation and cause structural problems.
- Get professional roof assessments – Have a qualified roofer inspect your entire roofing system every 3-5 years for a comprehensive evaluation.
Conclusion
Your ceiling holds clues that can save you thousands of dollars in repairs. By spending just 15 minutes each month checking for water stains, peeling paint, and musty odors, you’re protecting your home’s value and your family’s health.
Remember, small leaks that cost $200 to fix today become $10,000 disasters tomorrow. The simple inspection steps I’ve shared – from visual checks to moisture meter testing – give you the power to catch problems before they spiral out of control.
So what’s your next step? Grab a flashlight this weekend and examine your ceiling using these methods. Take photos of any suspicious areas you find. If you spot active leaks or structural damage, call a professional immediately.
Your home is your biggest investment – protect it with regular ceiling inspections. Start this month and make it a habit.
Frequently Asked Questions
What Does Water Damage to A Ceiling Look Like?
Water damage shows as yellow or brown stains, peeling paint, sagging spots, and dark rings. You may notice bubbling paint or soft areas that feel damp.
How Do I Know if My Ceiling Needs to Be Replaced?
Replace your ceiling if it sags badly, has large damaged areas, feels soft when touched, or shows widespread mold growth.
When Should I Be Concerned About the Ceiling?
Be concerned when you see active dripping, sagging areas, large water stains, musty smells, or soft spots that feel wet when touched.