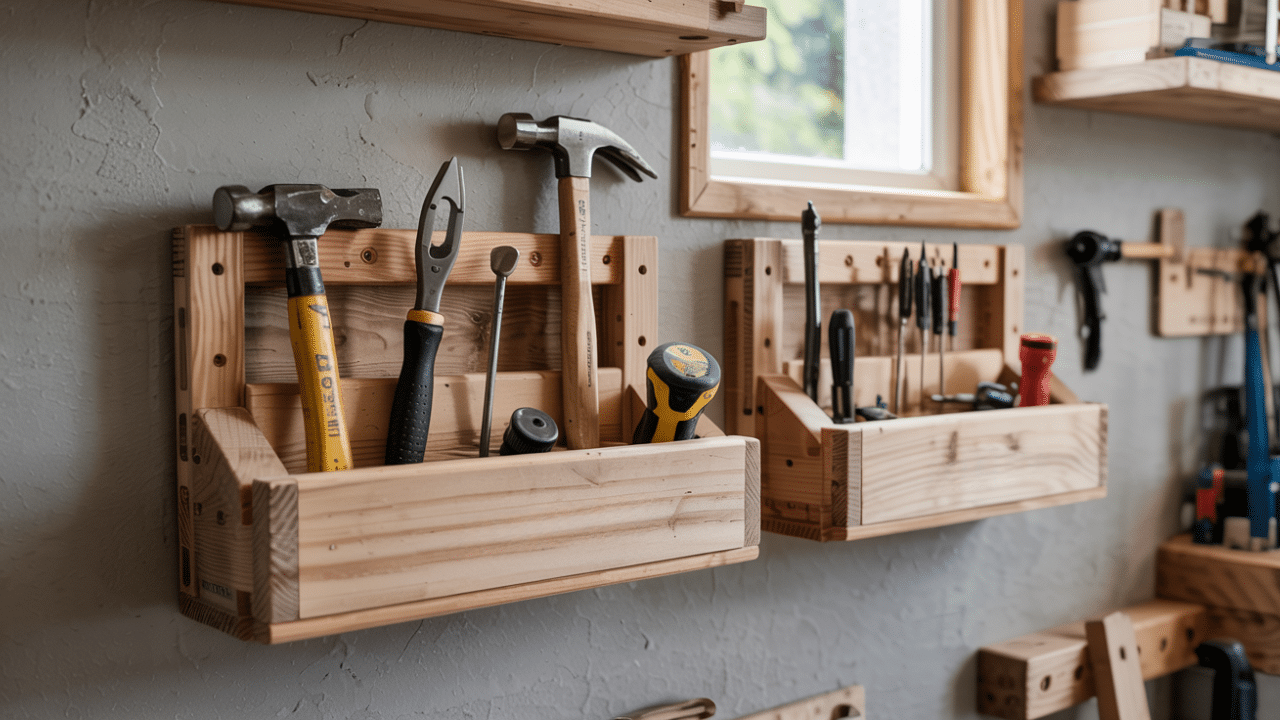

French cleats are a simple but strong way to hang heavy or awkward items on walls. They use two wooden strips cut at an angle that lock together securely.
Getting the right size and angle for these cleats is very important. If the cleats are too thin or the angle is off, they won’t hold well and could cause things to fall.
This blog covers the standard thickness, width, length, and bevel angle of French cleats. It also explains how to cut them correctly and how to choose the right size based on what you’re hanging.
With the right dimensions, your French cleats will hold tight and last a long time. Keep reading to get clear, easy tips for making your own perfect French cleat system.
What is a French Cleat?
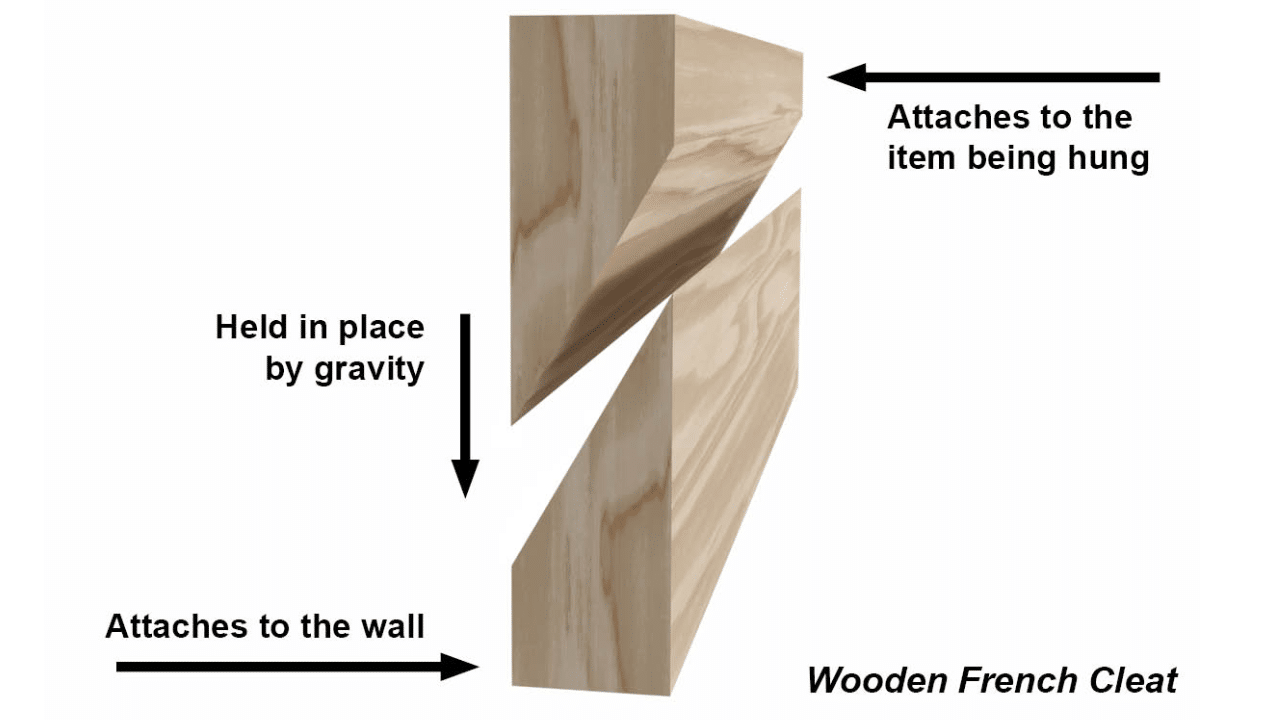
A French cleat is a simple but strong way to hang things on a wall. It uses two wooden strips cut with mattching angles, usually 45 degrees.
One strip is attached to the wall, and the other is attached to the item you want to hang. When you place the item on the wall, the two angled pieces lock together, holding the item securely.
Correct dimensions are very important. If the cleats are too thin, narrow, or cut at the wrong angle, they won’t fit tightly and could slip.
Proper size and angle ensure a strong hold, making the system safe to use.
Using the right dimensions helps the cleat carry heavy loads without failing, keeping your items and walls safe.
Standard French Cleat Dimensions
Understanding the typical thickness, width, and length of French cleats is key to creating a strong, reliable hanging system that fits well with your project needs and materials.
| Dimension | Typical Size | Common Uses |
|---|---|---|
| Thickness | 3/4 inch (19 mm) | Used for general-purpose cleats in workshops, garages, and cabinetry due to its good strength. |
| Width | 1.5 to 3 inches (38–76 mm) | Narrow widths for hanging small tools or light frames; wider widths for cabinets or heavy items. |
| Length | 24 to 48 inches (60–120 cm) | Shorter lengths for small shelves or picture frames; longer lengths for larger cabinets or panels. |
Geometry of French Cleats: Bevel Angle and Its Impact
The bevel angle is a key part of French cleat design that affects how well the cleats fit together and hold weight.
Most Common Bevel Angle: 45 Degrees
This is the standard because it offers a perfect balance between strong holding power and easy hanging or removal.
Other Angle Variations: 30° and 60°
- A 30-degree bevel provides a gentler slope, making it easier to remove heavy items but with slightly less grip.
- A 60-degree bevel creates a steeper angle, increasing holding strength but making hanging and removal a bit more difficult.
Impact on Strength and Compatibility
- The bevel angle controls how tightly the two cleats lock together, directly affecting stability and load capacity.
- Matching angles is essential; different bevels won’t fit properly together, causing poor support.
Tips for Measuring and Cutting the Bevel Accurately
Accurate measurement and precise cutting of the bevel angle are essential to ensure the French cleats fit together securely and provide strong, reliable support.
- Use a table saw or miter saw set precisely to the chosen bevel angle.
- Double-check measurements before cutting to ensure a snug, safe fit.
- Consistent, accurate cuts help the cleats hold securely and last longer.
Choosing Dimensions Based on Project Needs and Load
For light loads, such as picture frames or small shelves, French cleats about 3/4 inch thick and 1.5 inches wide are sufficient.
For medium loads, like tool racks or larger shelves, wider cleats between 2 and 2.5 inches provide better stability.
Heavy loads, such as cabinets or large workshop tools, require cleats that are thicker and wider, up to 3 inches wide and made from strong hardwood to ensure maximum strength and safety.
Step-by-Step DIY Guide to Installing a French Cleat
French cleats are an easy and strong way to hang cabinets or shelves securely on your wall. This guide breaks down how to make and install a French cleat system, just like shown in the PopWood Shop video.
Materials and Tools Required
Before you start, gather these essentials:
| Materials | Tools |
|---|---|
| Scrap plywood (3/4 inch thick) | Table saw or miter saw (with bevel adjust) |
| Screws for mounting cleats | Measuring tape and pencil |
| Hand plane or sandpaper | |
| Push stick (for safety during cutting) |
5 Steps from the Video
Step 1: Set the Saw Blade and Mark the Cut
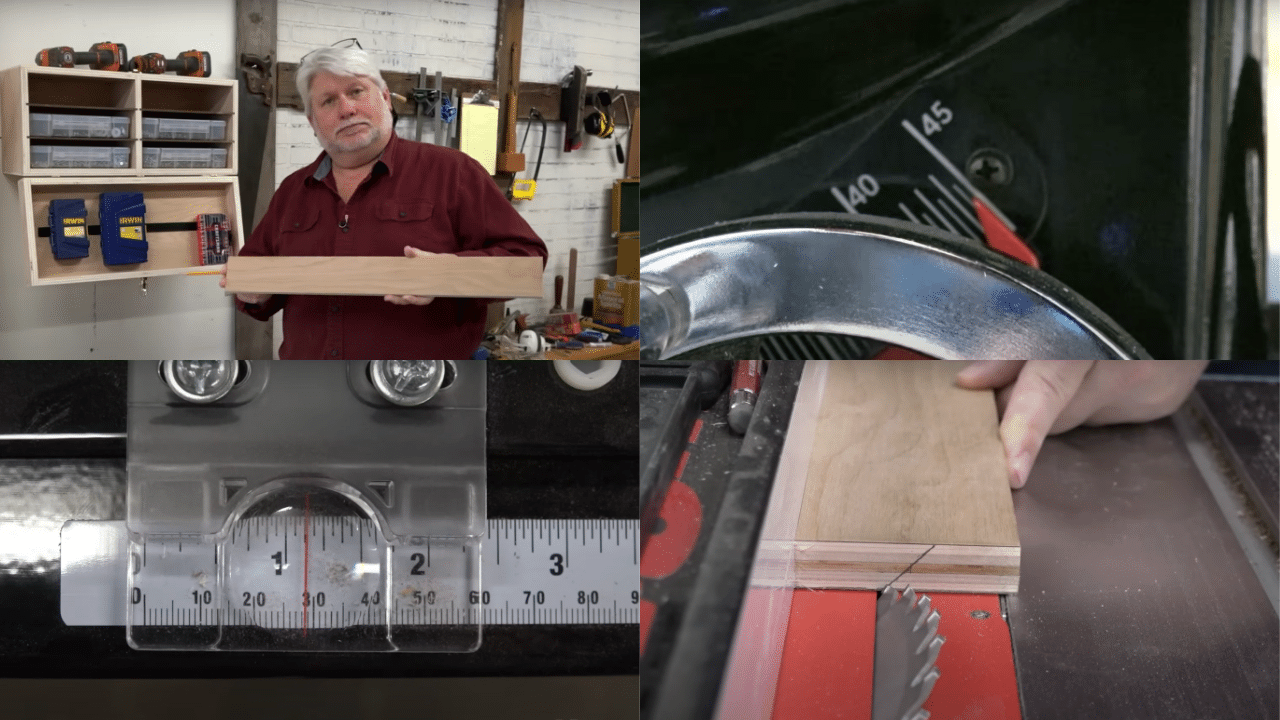
Adjust your saw blade to a 45-degree angle, this is key to making the angled edges of the cleat. Then mark a line near the center of your plywood piece for the cut.
The exact center may not be half the width because of the bevel.
- Set the blade height just above the wood surface.
- Use a pencil to draw your cutting line.
- Always use a push stick to keep fingers safe while cutting.
Tip: Be precise but don’t stress about a perfect 45°; close is fine and still works well.
Step 2: Make the Bevel Cut

Run the plywood through the saw along the marked line, cutting the 45-degree bevel. The cut creates two matching angled pieces that will lock together.
- Push the plywood slowly for a clean cut.
- Keep hands clear using the push stick.
- After cutting, check for any rough edges or leftover material.
Tip: Use a hand plane or sandpaper to smooth out any leftover uneven parts after the cut.
Step 3: Prepare the Cabinet Back and Cleat
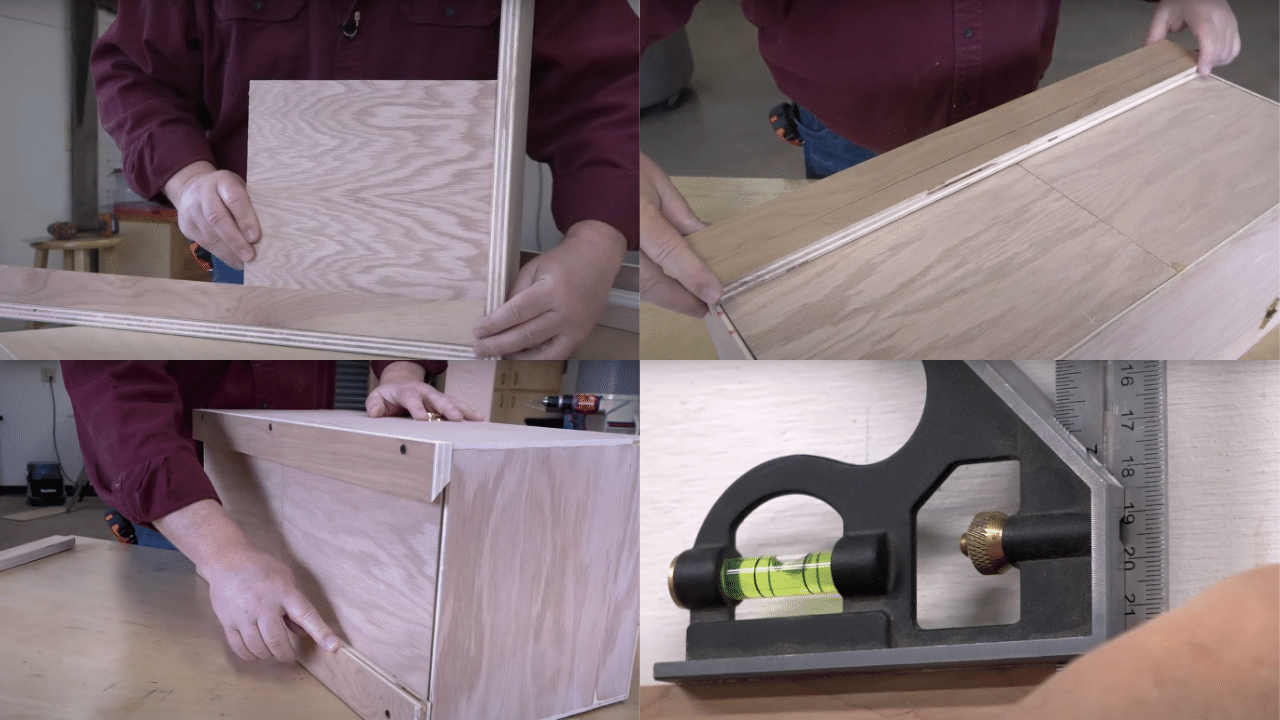
For a flush fit, plan ahead by setting the cabinet back 3/4 inch in from the edge.
This allows the French cleat to fit behind the cabinet, hiding the cleat and giving a clean look. If the back is flush with the wall, attach the cleat directly to it.
- Position the cleat with the angled side facing outward.
- Make sure the cleat is mounted securely to the cabinet.
- Add a second board behind the cleat to keep even thickness top to bottom.
Tip: Mount the cleat on the cabinet with the angle facing the right way to create a groove that locks with the wall cleat.
Step 4: Attach the Cleat to the Wall
Find your wall studs and screw the matching cleat strip with the angled edge facing up and away from the wall. This cleat will hold the cabinet securely.
- Use one screw in the center first to help level the cleat.
- Adjust the cleat to make sure it’s perfectly level.
- Secure the ends with additional screws once leveled.
Tip: Starting with one screw makes it easier to adjust and get the perfect level before tightening fully.
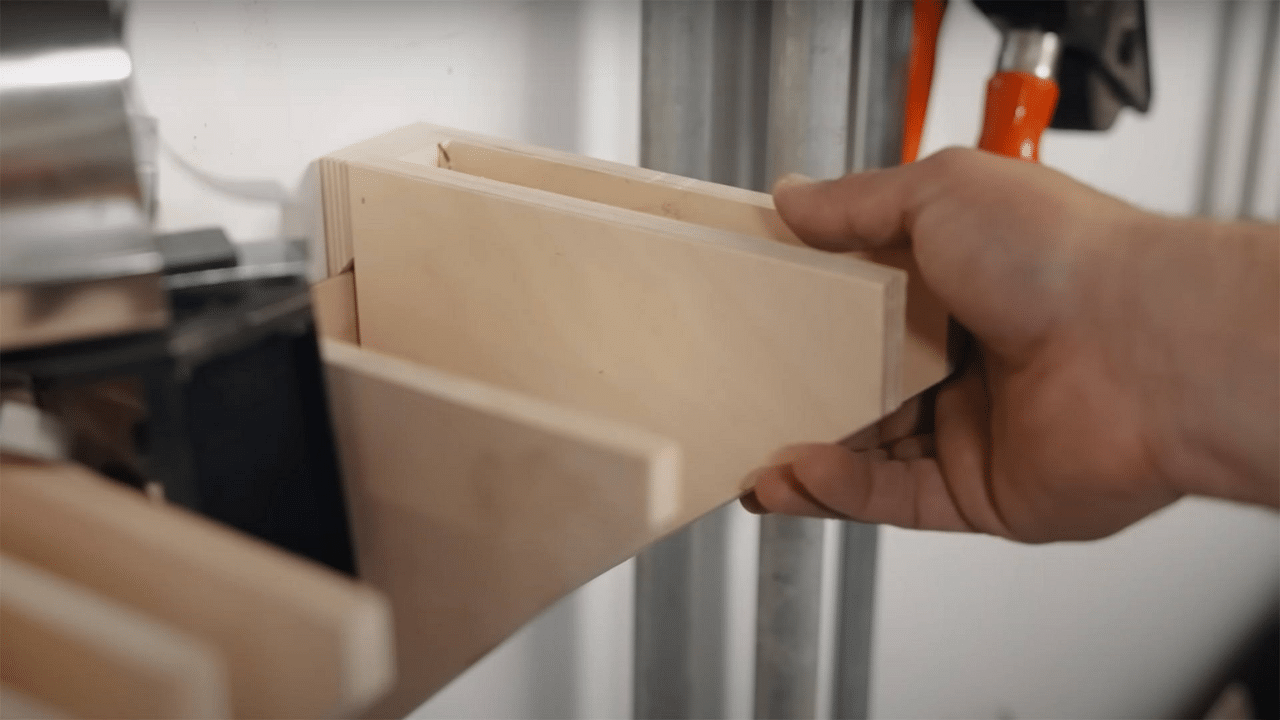
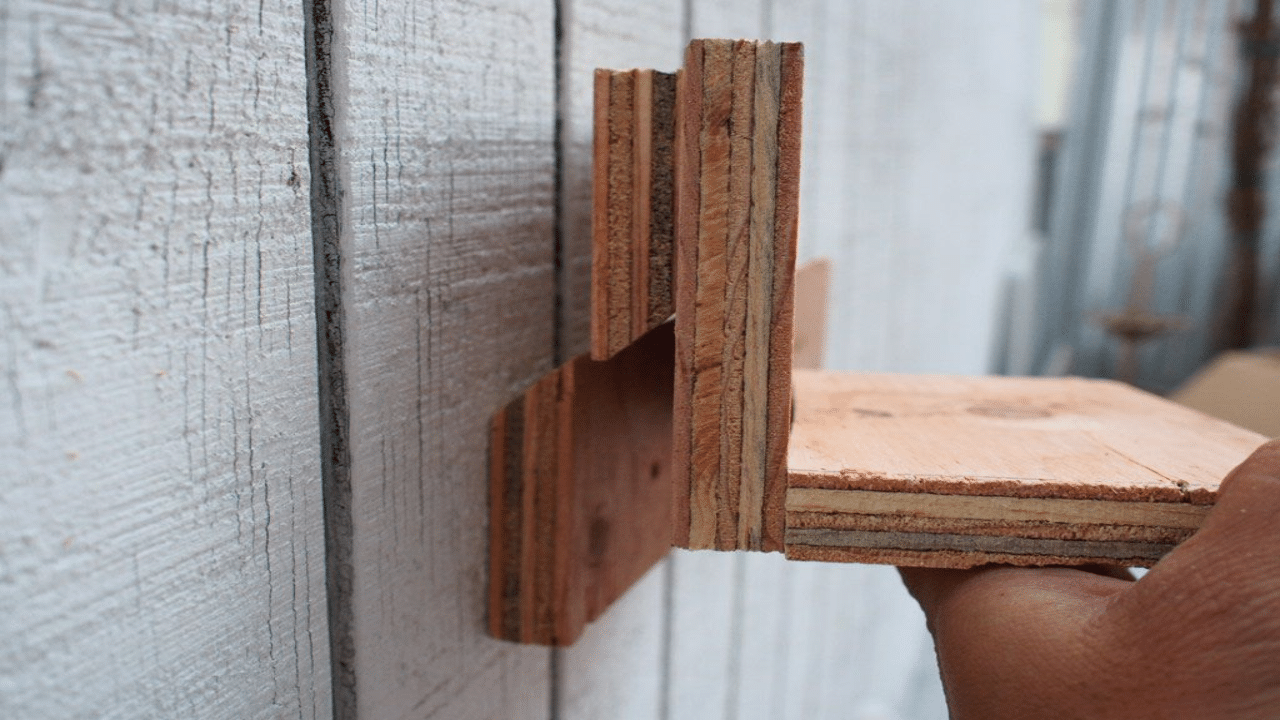
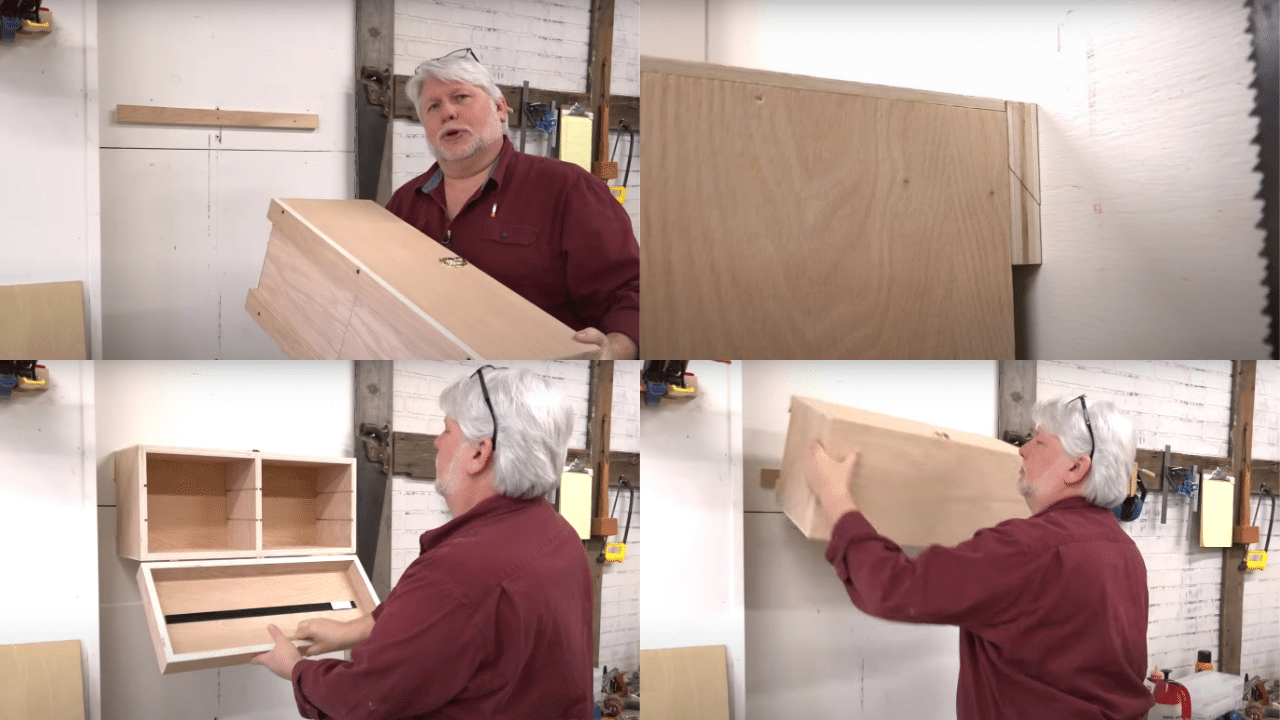
Step 5: Hang and Secure the Cabinet
Lift your cabinet, hook the cabinet cleat over the wall cleat, and drop it into place. The angled boards lock tightly for strong support.
- Make sure the cabinet sits flush against the wall.
- Check the level one last time.
- The system allows easy removal if you need to take the cabinet down and re-hang later.
Tip: French cleats offer a sturdy but removable mounting solution, perfect for flexible workshop setups.
Video Tutorial
Check out the complete step-by-step tutorial at @PopularWoodorking
How Dimension Adjustments Improve Load Capacity
Increasing the width and thickness of a cleat adds more surface area and material to carry weight.
This reduces the risk of the cleat bending or failing under heavy loads, making the system safer and more durable.
Choosing the right dimensions based on your project and load will ensure your French cleat system is both safe and long-lasting.
| Project | Typical Thickness | Typical Width | Typical Length | Material |
|---|---|---|---|---|
| Cabinets | 3/4 inch | 3 inches | ~36 inches | Plywood/Hardwood |
| Tool Racks | 3/4 inch | 1.5–2 inches | Varies | Plywood/Softwood/Hardwood |
| Heavy Storage | 3/4 inch+ | 3 inches+ | As needed | Hardwood |
Common Dimension-Related Mistakes and How to Avoid Them
Getting French cleat dimensions wrong can lead to poor fit, weak support, and safety risks. Here are some common mistakes and simple ways to fix them for a strong, reliable system.
Mistake: Using Non-Standard Bevel Angles
- Problem: Causes the cleats to fit too loosely or too tightly, making hanging unstable or difficult.
- Solution: Always cut bevels at the standard 45 degrees unless a specific project calls for a different angle. Use precise tools like a miter saw set to the exact angle.
Mistake: Choosing Cleats That Are Too Thin or Narrow
- Problem: Thin or narrow cleats reduce holding power and may bend or break under weight.
- Solution: Use at least 3/4-inch thick cleats and choose widths of 1.5 inches or more based on the load size.
Mistake: Using Incorrect Lengths
- Problem: Cleats that are too short may not reach studs properly, causing weak wall support; too-long cleats can be hard to install.
- Solution: Measure your wall studs and item size carefully. Use cleats long enough to span multiple studs (usually 24–48 inches) for better support.
Hanging It All Together
Choosing the right dimensions and angle for French cleats matters a lot.
Using the standard 3/4-inch thickness, the right width, and a 45-degree bevel angle will give you the strongest hold. Cutting the bevel carefully ensures the cleats fit snugly and work well together.
Adjusting the size based on the weight of your item keeps everything safe and stable. Avoiding common mistakes like wrong angles or too-thin cleats helps prevent accidents.
Have questions or want to share your own tips? Leave a comment below and join the conversation!