

Looking for the right sandpaper for your drywall project?
Many DIYers waste time and money using the wrong grit, leaving their walls rough and uneven. The truth is, picking the correct sandpaper can make the difference between a smooth finish and a patchy mess.
With the right sanding methods, you’ll cut your work time in half and get results that look professional.
This guide walks you through the best sandpaper grits for drywall, how to choose based on your project stage, and simple steps to get that perfect smooth wall.
Skip the trial and error, read on to find out exactly what the pros use on their drywall projects.
What are Sandpaper Grits?
Sandpaper grit numbers show how rough or smooth the paper is. Lower numbers mean bigger particles that remove material faster.
The grit number tells you how many sand particles fit in one square inch. A 60-grit has larger, more spaced grains than a 220-grit.
Coarse grits (40-60) cut quickly but can damage drywall if you press too hard.
Medium grits (80-120) smooth surfaces after using coarse papers. Most drywall work starts with these.
Fine grits (150-180) create smooth surfaces before painting. They leave fewer scratches.
Very fine grits (220-240) give the smoothest finish possible. Use these for walls that need a flawless finish.
Picking the right grit saves time and gives better results.
Recommended Grits for Drywall Sanding Stages
The sanding process works in stages, each requiring a specific grit for the best results.
1. Initial Sanding (After First Coat of Joint Compound)
When you finish applying the first coat of joint compound, let it dry fully. Then, grab 80-100 grit sandpaper for this first round. This medium grit helps knock down high spots and blend the edges without tearing the paper face of the drywall.
Avoid pressing too hard during this stage. The goal is to level the surface, not dig into it. Make wide, light passes over the joints and seams.
2. Intermediate Sanding (Between Coats)
After the second coat of compound, switch to 120-150 grit sandpaper. This finer grit removes small flaws while preserving your work from the previous steps.
Focus on making the transitions between the wall and compound zones smooth. This middle stage builds the foundation for a flat, even wall.
3. Final Sanding (Before Painting)
For the last sanding before paint, use 180-220 grit sandpaper. This fine grit creates the smooth finish that makes paint look its best.
Take your time on this final pass. Run your hand over the wall to feel for rough spots as you go. Good lighting helps spot issues—hold a work light at an angle to see tiny bumps or dips.
Each stage builds on the last, creating walls that look smooth and feel flat when finished.
Tools for Effective Drywall Sanding
Choose the right tools to make your drywall sanding faster, cleaner, and more exact.
1. Sanding Sponges
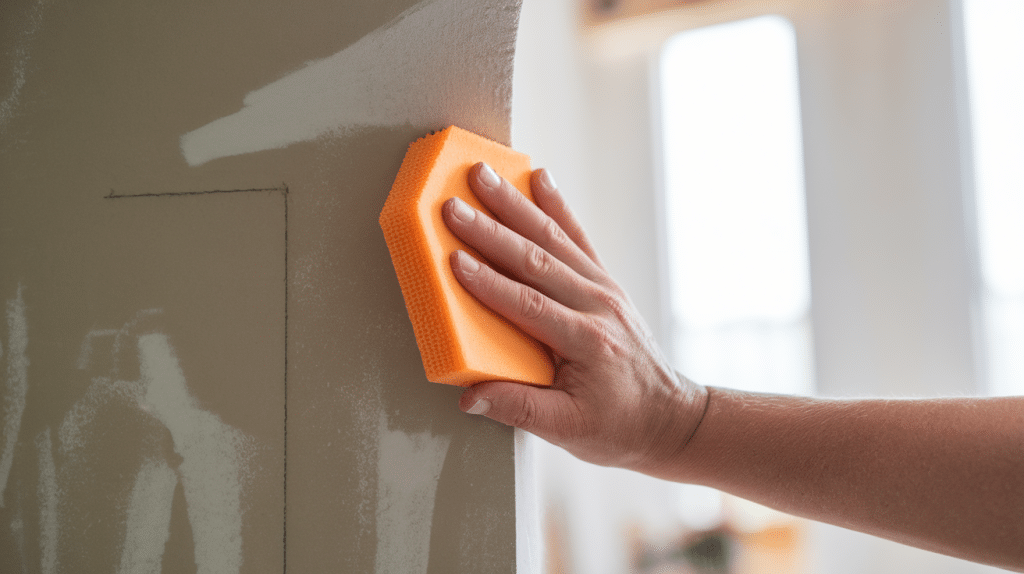
Sanding sponges fit your hand perfectly and bend to match wall contours. They shine in tight spots where flat sanders can’t reach.
These tools have grit on all sides, letting you sand at different angles. When one side wears out, simply rotate to a fresh surface.
- Great for inside corners and small patches
- Gentle on your hands during long projects
- Last longer than paper sheets for detail work
Unique Selling Point: Sanding sponges get into corners that would otherwise need hand-finishing with knives.
2. Pole Sanders
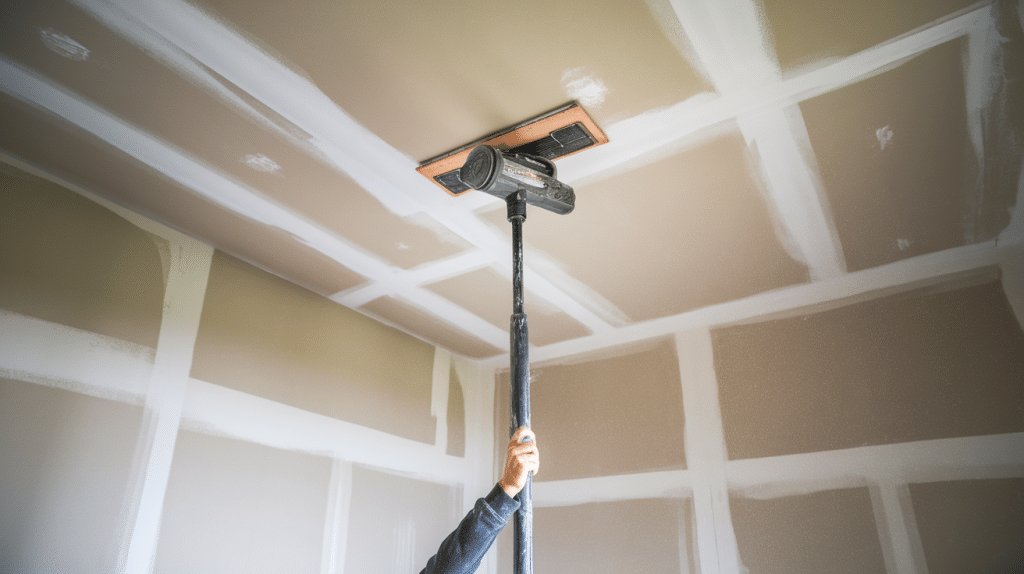
Pole sanders extend your reach without ladders. The swivel head design keeps the sanding pad flat against walls and ceilings.
Most models let you attach a vacuum hose to pull dust away as you work. This keeps the air clearer and reduces cleanup time.
- Saves your arms and back on big projects
- Covers large areas quickly and evenly
- Adjustable pole length for different heights
Unique Selling Point: Pole sanders cut ceiling work time in half while keeping your feet safely on the ground.
3. Sanding Screens
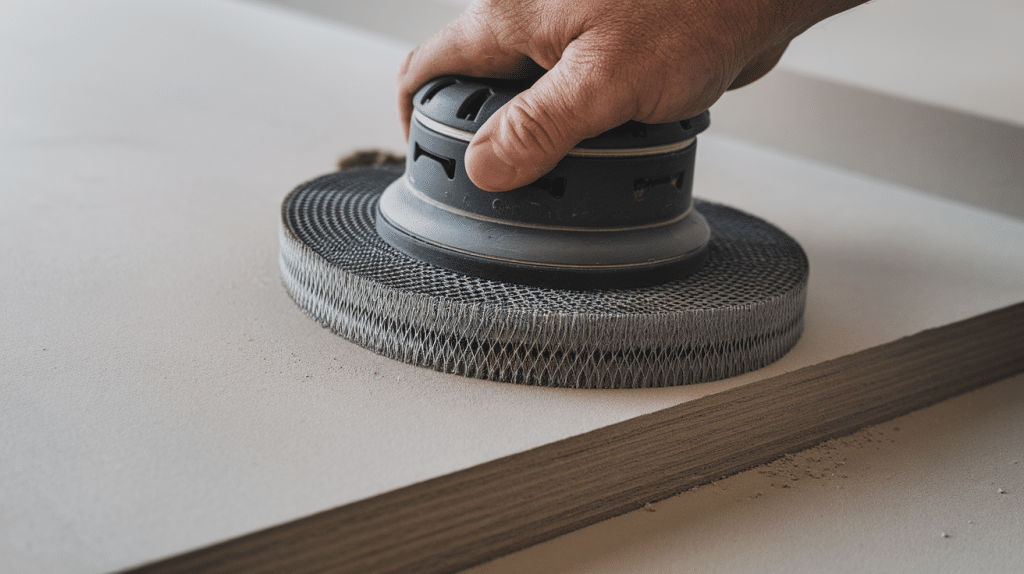
Sanding screens allow dust to pass through the mesh pattern. This prevents clogging that slows down regular sandpaper.
The open design makes screens washable and reusable for several projects. Rinse them clean when they load up with dust.
- Cut cleaning time between sanding sessions
- Work well with wet-sanding methods
- Stay sharp longer than paper options
Unique Selling Point: Screens create less airborne dust, making them ideal for occupied homes during repairs.
4. Hand Sanders
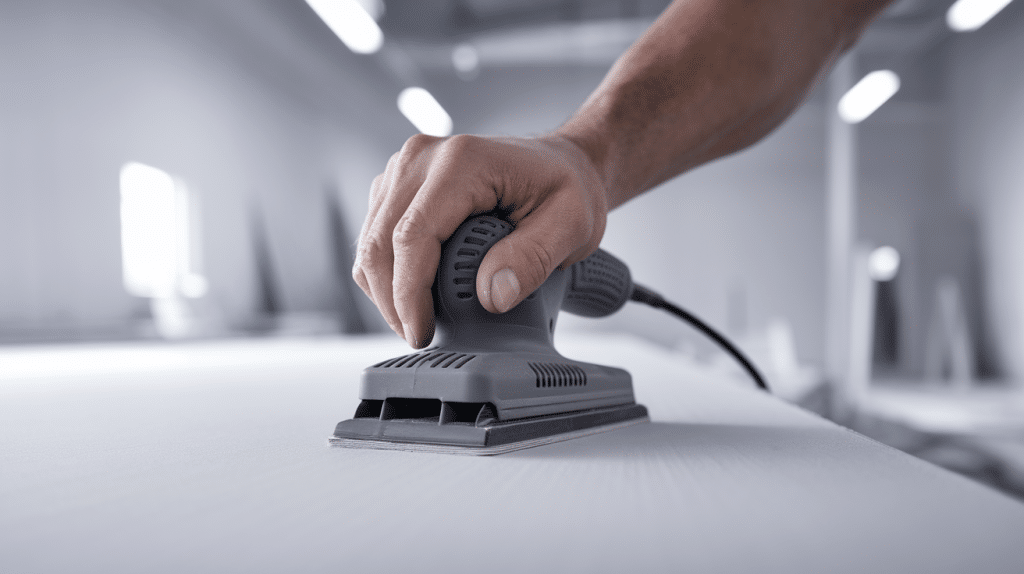
Hand sanders give you direct control over pressure and movement. The flat base keeps large areas level while you work.
Many models come with quick-change systems for swapping grits without tools. This speeds up your workflow as you progress.
- Perfect for medium-sized wall sections
- Firm enough for even pressure application
- Comfortable grip reduces hand fatigue
Unique Selling Point: Hand sanders offer the perfect balance between speed and control for most drywall projects.
Selecting Sandpaper Based on Drywall Condition
Choose your starting grit based on your specific drywall project type.
1. New Drywall Installations
Start with 100 grit sandpaper to shape joint compound and remove high spots without damaging drywall paper.
Once major areas feel level, switch to 150 grit for a smooth, paint-ready surface.
- Use a bright light at a low angle to spot uneven areas
- Work in broad, even strokes across all seams
- Sand in circles to prevent flat spots or lines
2. Minor Repairs and Touch-Ups
Begin with 120-150 grit to blend patch edges into existing walls.
Focus on feathering edges outward from the repair to create invisible transitions.
- Extend sanding 2-3 inches beyond the actual patch
- Use light pressure to avoid creating depressions
- Test smoothness with closed eyes using fingertips
3. Achieving a Smooth Finish
Finish all drywall work with 180-220 grit for paint-perfect surfaces.
This fine grit removes tiny scratches and creates an even base for paint.
- Pay extra attention to wall edges and fixture areas
- Wipe walls with a slightly damp cloth after sanding
- Allow complete drying before final inspection
Best Practices for Drywall Sanding
Wear a dust mask, safety glasses, and gloves to protect your lungs, eyes, and skin from fine dust particles that can cause health issues.
Sand in circular motions with light pressure rather than pushing hard in straight lines, which prevents gouges and keeps the surface even.
Use a bright work light held at an angle to spot bumps, ridges, and low spots that might not be visible with overhead lighting.
Clean walls with a dry microfiber cloth between grits to remove dust that can scratch the surface and clog your sandpaper.
Keep your sandpaper clean and replace it when it becomes dull, dirty, or worn, as this will take longer and yield worse results than fresh sheets.
Common Mistakes to Avoid
1. Over-sanding: Pressing too hard or sanding too long in one spot thins the drywall paper, creating visible depression that shows through paint.
2. Skipping grit levels: Jumping from coarse to very fine grits leaves scratches that become visible after painting when light hits the wall at an angle.
3. Rushing the final stage: Hurrying through the fine-grit sanding phase saves minutes but costs hours in fixing paint issues later.
4. Using water to wipe down unprimed drywall: Dampening unpainted drywall raises the paper fibers, creating a fuzzy texture that ruins smooth finishes.
5. Sanding with worn-out paper: Continuing to use dull sandpaper takes twice as long and creates an uneven surface with swirl marks and scratches.
Conclusion
Picking the right sandpaper grit for drywall can make or break your project. Start with medium grits (80-100) for initial sanding, use 120-150 grits between coats, and finish with fine grits (180-220) before painting.
Remember to use light, circular motions and the proper tools for each job. Sanding sponges work best for corners, while pole sanders save time on large surfaces.
Always wear safety gear, check your work with good lighting, and clean between sanding steps. Avoid common mistakes like skipping grit levels or using worn-out paper.
With these tips in mind, you’ll achieve smooth, paint-ready walls that look professional. What’s your next drywall project? Let us know in the comments below!