
Your roof has dark spots and raised areas. Insurance adjusters and contractors give different opinions about what caused them.
One says hail damage means full replacement coverage. Another claims it’s just blistering that voids your warranty. This confusion costs homeowners thousands in wrong decisions.
Knowing the difference protects your wallet and home. Hail damage gets insurance coverage for repairs or replacement. Blistering often means paying out of pocket. Making the wrong call leads to denied claims or unnecessary expenses.
This guide shows you exactly how to identify hail damage versus blistering. You’ll learn what causes each problem, how to spot the signs, and when to call professionals. Read on to become your roof’s best advocate.
What Causes Roof Damage (The Basics)
Before examining your roof, understand what creates different damage patterns. Weather events and manufacturing issues leave distinct marks on shingles. Each type requires different responses from homeowners and insurance companies.
Your roof faces two main damage sources:
- External impacts: Hail, falling branches, or debris hitting shingles from outside
- Internal defects: Trapped moisture or gases expanding inside shingle layers
- Installation errors: Poor techniques that accelerate both types of damage
The damage type determines who pays for repairs. Insurance covers storm damage but not manufacturing defects or normal wear. This difference makes accurate identification worth thousands of dollars.
Most confusion happens because both damages create similar-looking spots at first glance. The key lies in understanding how each problem develops and what signs to check.
What is Hail Damage?
Hail damage occurs when ice balls strike your roof during storms. These impacts create specific patterns that trained eyes recognize immediately. The damage occurs in seconds but can affect your roof for years without proper repairs.
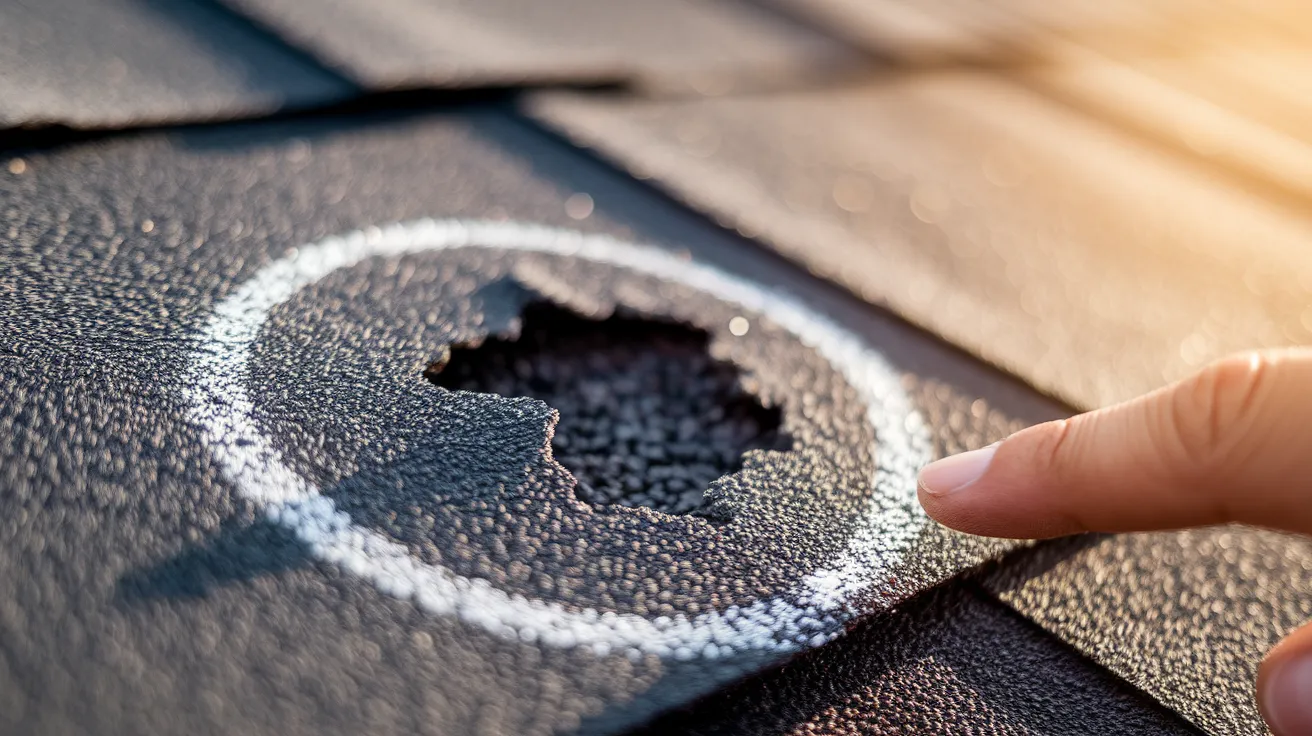
Hailstones hit shingles with enough force to knock off protective granules and crack the asphalt mat underneath. This exposes your roof’s waterproof layers to sun and rain damage. Even small hail causes problems over time.
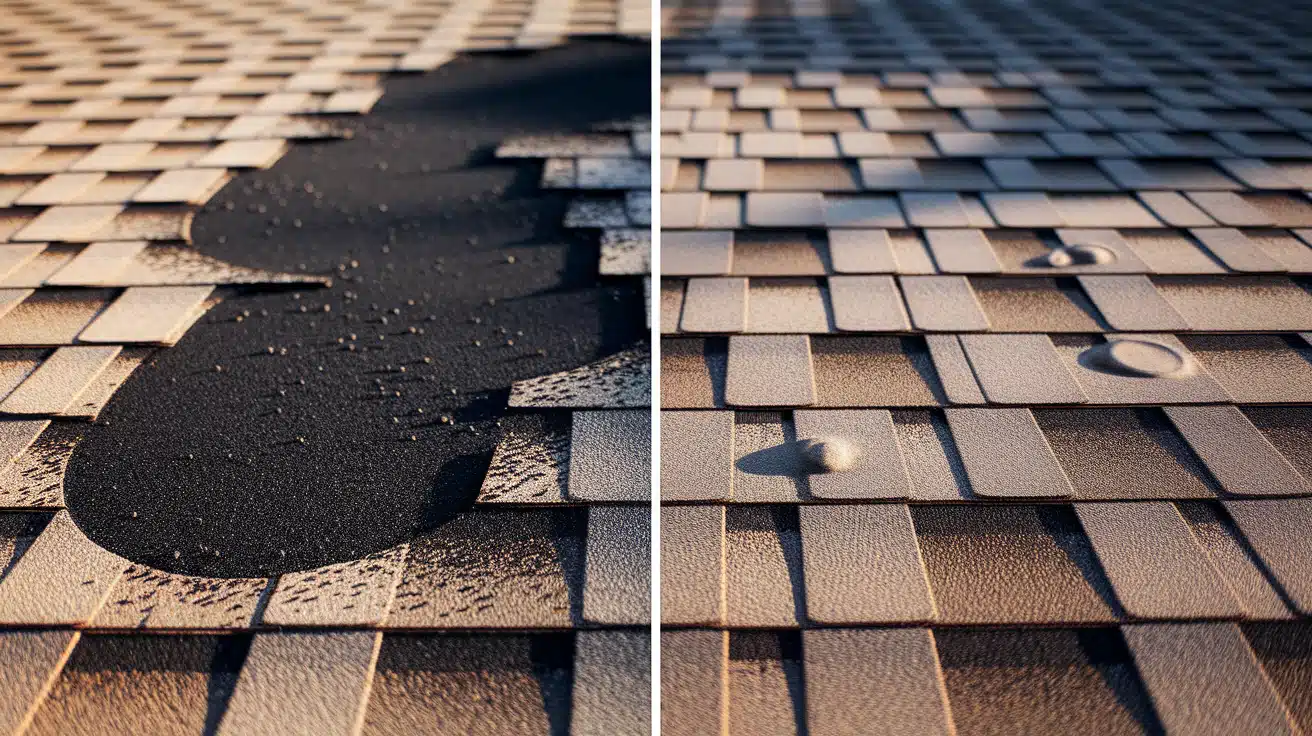
The impact creates a “bruise” on your shingle. Fresh damage feels soft when pressed gently. The mat shows through where the granules got knocked away. Multiple hits create random patterns across your roof’s surface.
How It Causes Damage
- Impact breaks protective seal: Hailstones crush the granule layer that shields asphalt from UV rays
- Creates water entry points: Each dent becomes a spot where rain penetrates shingle layers
- Accelerates deterioration: Exposed mat material breaks down 5x faster under sunlight
- Weakens surrounding area: Impact stress creates micro-cracks extending beyond visible damage
- Compounds over time: Small unrepaired dents grow into major leaks within 6-12 months
Pros and Cons
| Pros | Cons |
|---|---|
| Insurance typically covers repairs | Damage spreads if ignored |
| Clear evidence supports claims | Missing damage voids coverage |
| Professional repairs prevent leaks | Multiple impacts weaken entire roof |
| Random patterns prove storm cause | Small hail creates subtle marks |
| Fresh damage easier to document | Old damage harder to prove |
What is Blistering?
Blistering happens when moisture or gases get trapped in shingles during manufacturing. Heat from your roof makes these pockets expand and push up through the surface. The bubbles pop eventually, leaving crater-like holes.
Poor manufacturing quality or improper storage creates most blistering problems. Moisture sneaks between shingle layers before installation. Summer heat activates these hidden defects months or years later.
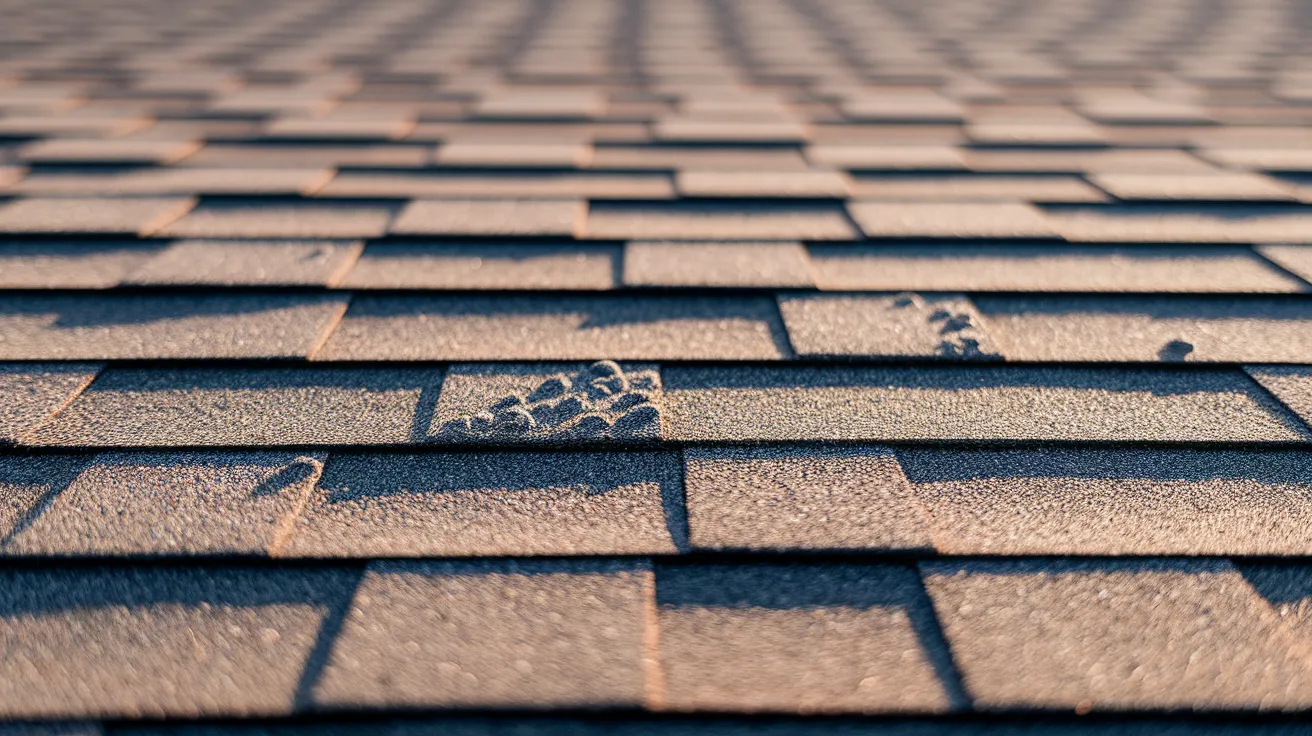
Blisters start small but grow with temperature changes. They cluster in specific areas rather than spreading randomly. The damage looks similar to hail impacts after blisters pop, causing identification confusion.
How It Causes Damage
- Trapped moisture expands: Heat makes water vapor push through shingle layers from inside
- Breaks adhesive bonds: Expanding gases separate shingle layers and destroy structural integrity
- Creates weak spots: Each blister thins the shingle material to half normal thickness
- Pops under pressure: Foot traffic or thermal stress ruptures blisters into open craters
- Spreads to neighbors: Heat damage affects surrounding shingles through shared adhesive strips
Pros and Cons
| Pros | Cons |
|---|---|
| Some manufacturers honor warranties | Insurance rarely covers blistering |
| Pattern indicates installation date | Spreads to nearby shingles |
| Proves defective materials | Hard to prove after time passes |
| Concentrated areas easier to patch | Voids warranties if mishandled |
| Less structural damage than hail | Accelerates shingle deterioration |
Hail Damage vs. Blistering: Key Differences
Understanding these differences saves money and frustration. Insurance companies look for specific signs before approving claims. Contractors check these same indicators when bidding repairs.
The main difference lies in cause and appearance. Hail creates random impact patterns from external force. Blistering develops from internal pressure without any impact.
Your inspection should focus on pattern, location, and timing. These factors tell the complete story of your roof damage.
Detailed Comparison Table: Hail Damage vs Blistering
| Feature | Hail Damage | Blistering |
|---|---|---|
| Cause | Ice ball impacts during storms | Trapped moisture/gas expanding from heat |
| Appearance | Circular dents with fractured granules | Raised bubbles or popped craters |
| Pattern | Random across entire roof | Concentrated on hot zones |
| Location | All roof surfaces exposed to sky | South slopes and poor ventilation areas |
| Timing | Appears immediately after storm | Develops slowly over time |
| Feel | Soft, bruised sensation | Raised before popping, then hollow |
| Granule Loss | Concentrated at impact center | Scattered when blister pops |
| Mat Exposure | Black circle at impact point | Irregular shape when opened |
| Supporting Evidence | Dented gutters, AC units, cars | High attic temperatures, poor airflow |
| Insurance Coverage | Usually covered | Rarely covered |
| Professional Opinion | Easy to document | Requires expertise |
| Repair Urgency | Immediate to prevent leaks | Can plan around budget |
How to Inspect Your Roof Safely

Never inspect during storms or on wet surfaces. Your safety matters more than quick damage assessment. Wait for dry conditions and use proper equipment.
1. Ground-Level Inspection First
Start with binoculars from your yard:
- Check all visible roof sections
- Note damage patterns and locations
- Count approximate impact spots
- photograph evidence from ground
- Mark damaged areas on simple sketch
2. Close-Up Inspection Steps
If you must climb up:
- Use sturdy ladder on level ground
- Wear non-slip shoes with good grip
- Bring chalk to mark damage spots
- Take photos of each damaged area
- Measure impacts with ruler or coin
- Document everything with notes
3. What to Look For
Hail damage signs:
- Round impact marks
- Missing granules in circles
- Soft spots when pressed
- Random distribution
- Multiple sizes present
Blistering signs:
- Raised bubbles intact
- Popped blisters with smooth edges
- Clusters in same area
- Similar sizes throughout
- Appear on hot-facing slopes
When to Call a Professional?
Call licensed contractors after major storms or when you spot potential damage. Their reports carry weight with insurance companies.
- Choosing Licensed Contractors: Look for state licensing, insurance, and manufacturer certifications. Get multiple estimates. Avoid door-to-door storm chasers.
- Professional Assessment Process: Inspectors perform complete roof walks, measure damage, test impact areas, and check your attic. They provide detailed reports with repair recommendations.
- Documentation for Insurance: Professionals create damage maps, calculate percentages, and correlate findings with weather data. Insurance adjusters trust these reports over homeowner photos.
- Insurance Considerations: Insurance covers hail damage but rarely covers blistering. Understanding this difference prevents claim denials.
- How Insurers Evaluate Damage: Adjusters verify impact patterns match storm dates. They test damage age and check surrounding properties. Fresh hail damage feels soft when pressed.
- Filing Successful Claims: Report damage immediately. Document everything. Meet adjusters during inspection. Never downplay damage or admit neglect. Keep maintenance records showing regular upkeep. This proves you protected your roof properly.
- Role of Maintenance Records:Save installation invoices, inspection reports, and repair receipts. Good maintenance history supports legitimate claims. Public adjusters help when initial claims get denied.
Conclusion
Identifying hail damage versus blistering protects your home and finances. Hail creates random circular impacts covered by insurance. Blistering develops slowly from heat and poor ventilation without coverage.
Safe inspection from the ground reveals most issues. Check soft metals for supporting evidence. Document everything with photos and notes. Professional assessment provides insurance-ready reports when damage exists.
Don’t delay inspection after storms. Insurance companies enforce claim deadlines. Blistering problems worsen without ventilation fixes. Either issue leads to expensive water damage if ignored.
What damage signs have you noticed on your roof? Share your experience in the comments below. Your story might help another homeowner avoid costly mistakes.
Frequently Asked Questions
Can Hail Damage and Blistering Occur Together?
Yes, roofs can have both problems simultaneously. Hail strikes existing blisters, making damage assessment complex. Professional inspectors identify each type separately for accurate insurance claims and repair planning.
How Long Do I Have to File a Hail Damage Claim?
Most insurance policies allow one year from the storm date. Some restrict claims to six months. Check your policy’s specific deadlines. Document damage immediately even if filing later.
Will Painting Over Blisters Fix the Problem?
No, painting hides damage without fixing causes. Blisters continue growing beneath coatings. Address ventilation issues first. Then replace damaged shingles properly. Cosmetic fixes waste money and time.