

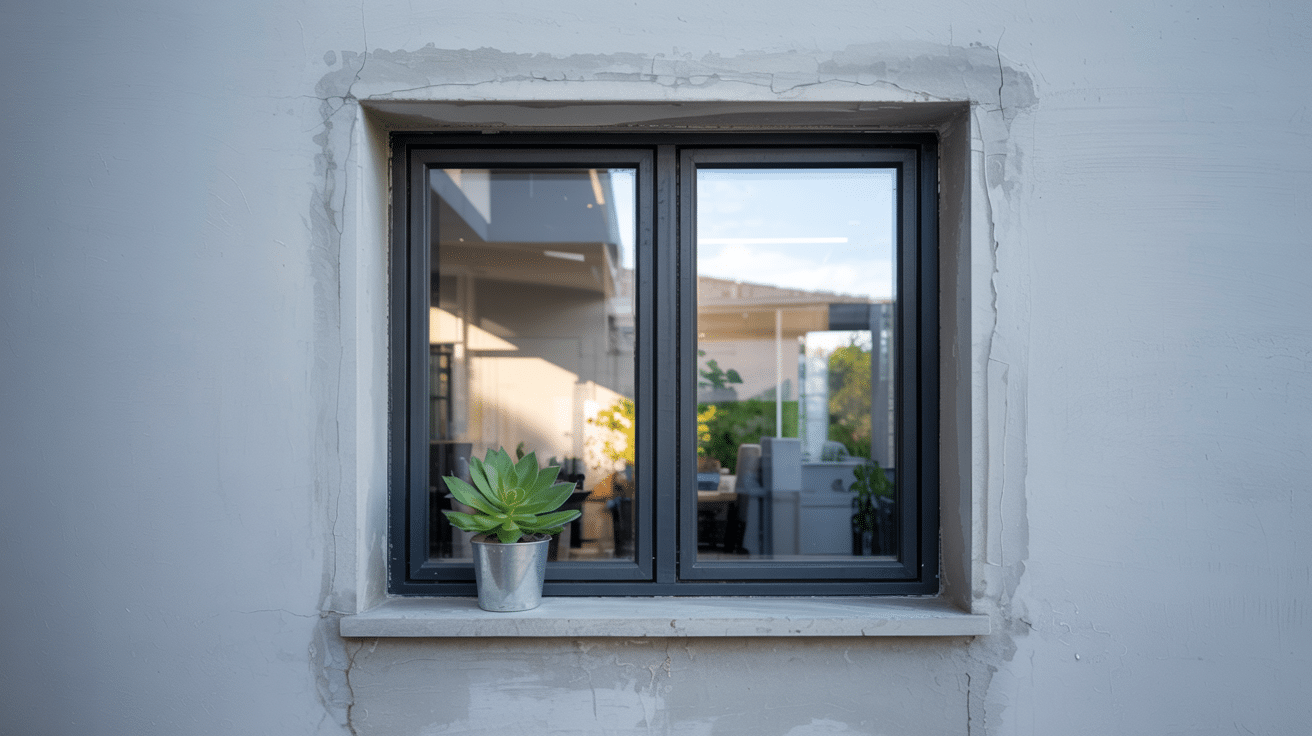
Replacing a window may seem like a big job, but knowing how long it takes can make planning easier.
Most window replacements take about one to threehours each. Bigger or more complex windows might take longer.
Sometimes, if a whole house needs new windows, the work can stretch over several days. The time depends on many things, the window style, the frame material, and even the weather.
This guide breaks down how long window installations usually take and what can affect the timing. It also shares tips on how to get ready for the job and how rushing might change your costs.
What is Window Installation and Replacement?
Window installation means putting in new windows during the building of a house or a major renovation.
This usually happens when the window openings are fresh, and there is no old window to remove. The window fits into a clean, prepared space in the wall.
Window replacement, on the other hand, involves removing old or damaged windows and installing new ones in the same openings.
This can be trickier because installers have to carefully take out the old window without damaging the surrounding wall or trim.
Typical Time Required to Install or Replace a Window
Understanding the typical time needed for window installation or replacement helps homeowners plan their projects efficiently and avoid surprises.
| Window Type / Project | Average Time per Window | Notes |
|---|---|---|
| Standard Window Replacement | 1 to 3 hours | Includes removal, installation, sealing, and cleanup. |
| Full Home Window Replacement | Several days to 1-2 weeks | Depends on the number of windows and project complexity. |
| Single-Hung / Double-Hung Windows Installation | 1 to 2 hours | Usually quicker due to simpler design and fewer parts. |
| Casement / Sliding Windows Installation | 2 to 3 hours | Takes longer due to additional hardware and sealing needs. |
| Bay / Bow Windows Installation | Several hours to a full day | Larger and more complex often require custom fitting. |
| New Construction Window Installation | Under 1 hour | Faster since no removal is needed and openings are prepared. |
How to Prepare for Your Window Installation to Save Time
To help your window installation go smoothly and quickly, it’s important to prepare your home before the installers arrive.
Start by clearing the workspace around each window, removing furniture, curtains, and any obstacles both inside and outside your home to give installers easy access.
Make sure windows are accessible from all sides, including exterior areas like decks or bushes that might get in the way.
Taking these simple steps can save time, reduce disruptions, and help ensure your new windows are installed without delays.
How to Replace or Install a Window Yourself: Step-by-Step Guide
Replacing old windows can boost your home’s value and lower your energy bills, especially when upgrading from single-pane to double-pane windows.
The good news? It’s not too hard to do yourself if you follow the right steps.
Let’s walk through how to remove an old window and install a new one properly, avoiding common mistakes along the way.
Tools and Materials You’ll Need
Before you start, make sure you have:
| Tools | Materials |
|---|---|
| Pry bar | New replacement window |
| Nippers or nail puller | PVC stops (for trim protection) |
| Gloves | Caulk and caulking gun |
| Level | Low-expansion spray foam insulation |
| Drill and drill bits | Galvanized or panhead screws |
| Tape measure | Weather-resistant trim or molding |
| Utility knife | Paint and paintbrush (for touch-ups) |
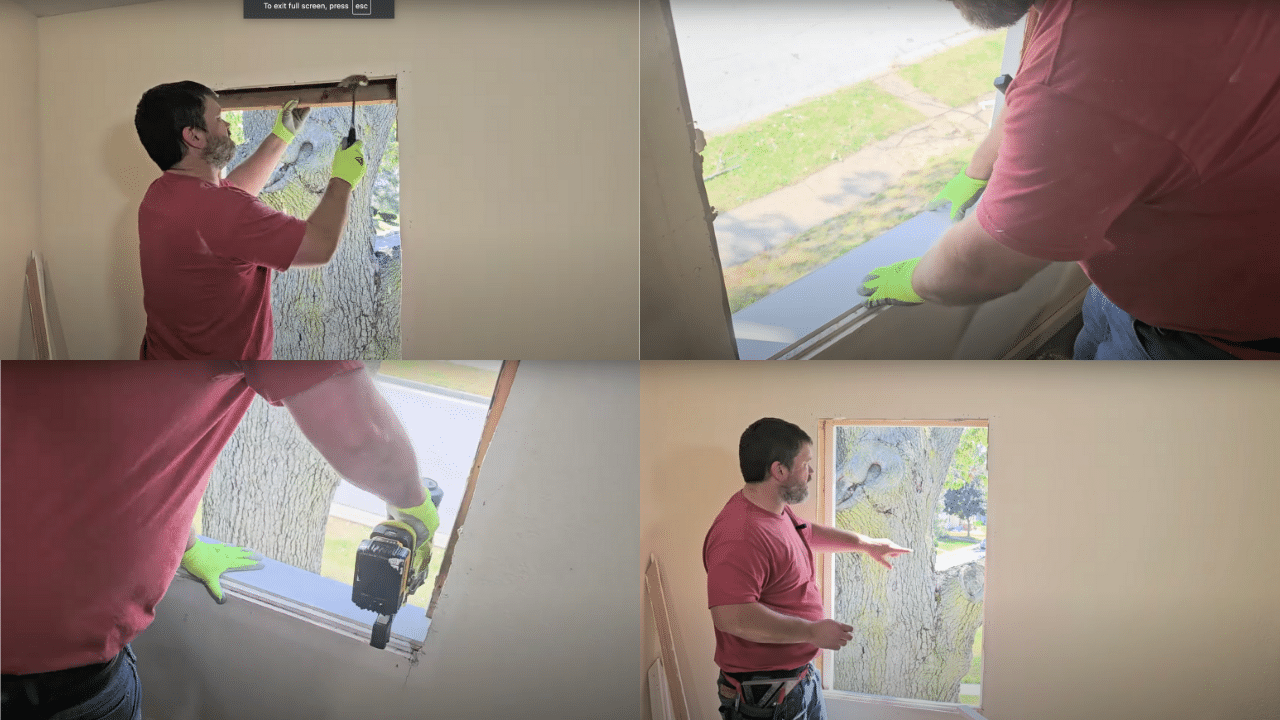
Step 1: Remove the Old Window and Trim

Carefully take off the window trim and stops to avoid damaging your walls or trim that you want to keep. Remove any nails or screws holding the old window in place.
- Score around the trim edges to protect the paint
- Use a pry bar gently to remove the trim
- Pull out nails with nippers or a claw hammer
Tip: Take your time removing trim slowly to avoid unnecessary wall repairs later.
Step 2: Prepare the Window Opening
Clean the opening thoroughly and install PVC stops if needed to protect against moisture and rot. Ensure the opening is ready for the new window frame.
- Remove any debris or old caulk
- Install new stops or repair existing ones
- Check for any damage that needs fixing before installation
Tip: Adding PVC stops extends the life of your window frame by preventing water damage.
Step 3: Dry Fit and Level the New Window
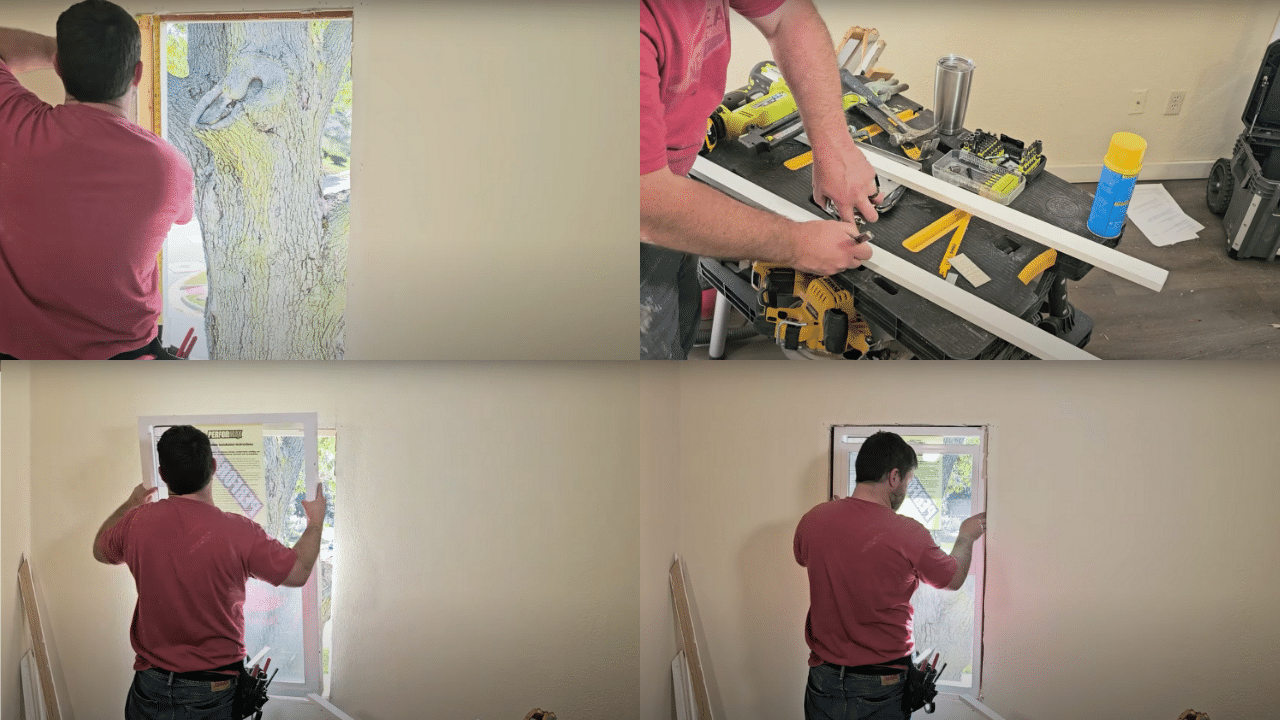
Place the new window into the opening without fastening it. Use a level to check that it sits flat and adjust with shims to make it square and plumb.
- Place the window on the sill and check the level front to back
- Use shims on the sides to make the window plumb
- Check that the window opens and closes freely
Tip: Proper leveling now prevents drafts and operational issues later.
Step 4: Secure the Window in Place
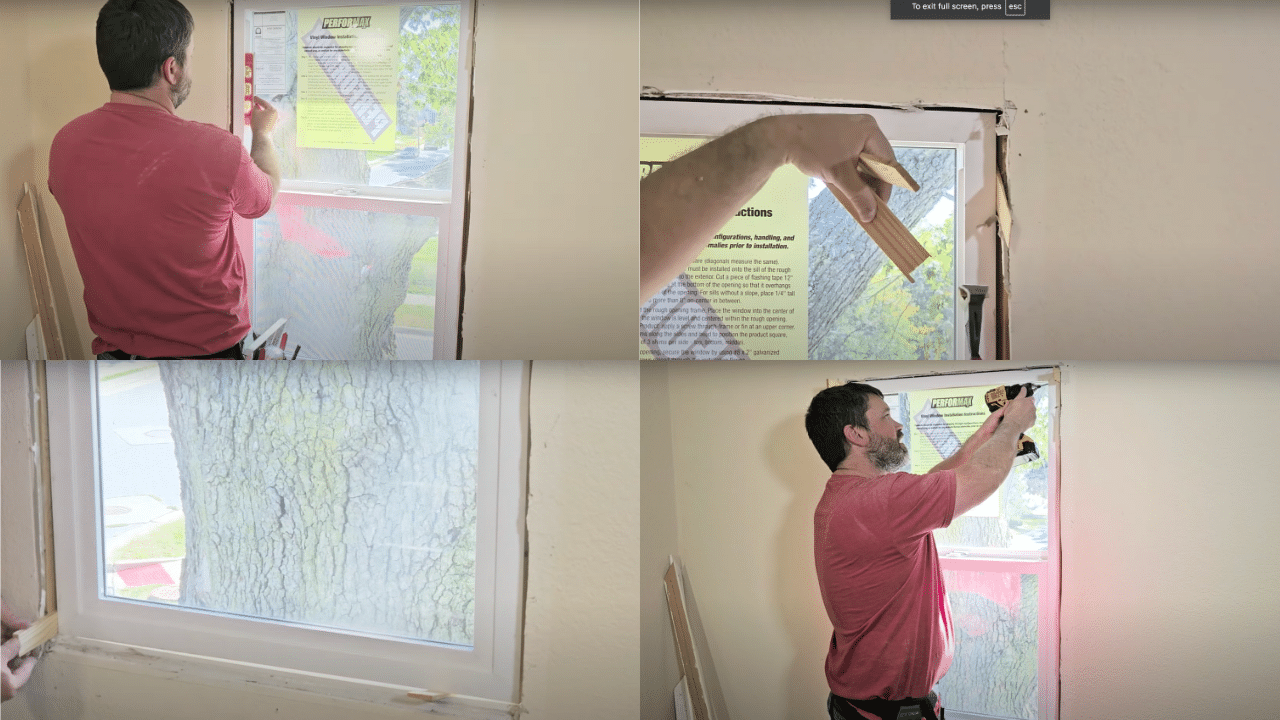
Once the window is perfectly positioned, drill pilot holes if needed and fasten it securely with screws through the frame into the studs.
- Use screws appropriate for exterior use (galvanized or panhead)
- Fasten the top, bottom, and sides evenly
- Recheck that the window opens and closes smoothly after securing
Tip: Don’t overtighten screws to avoid warping the frame.
Step 5: Insulate and Seal
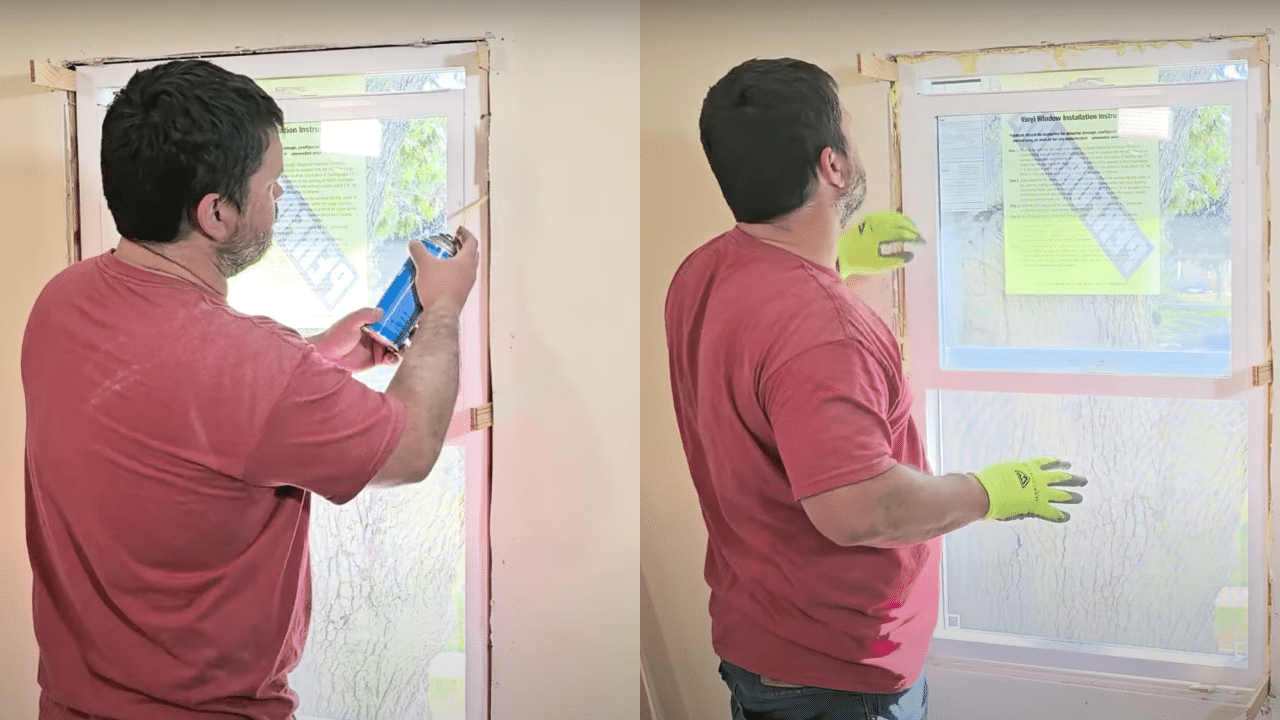
Fill the gap between the window and the opening with low-expansion spray foam or insulation to block drafts. Finish by caulking around trim and stops for a weather-tight seal.
- Apply spray foam lightly to avoid window distortion
- Caulk all edges inside and outside the window
- Let foam and caulk dry fully before finishing trim or painting
Tip: Use low-expansion foam designed for windows to protect your window’s shape.
Now that your window is installed and sealed, you can frame around it however you like. Add interior or exterior trim, paint, and any finishing touches to complete the look and protect your investment.
Now, its all up to your choice!
Important Safety Precautions
- Always check your window’s operation before fully securing it.
- Take your time with leveling and shimming; it makes all the difference.
- Use proper safety gear like gloves and eye protection.
- If this sounds like too much, consider hiring a professional to avoid costly mistakes.
Video Tutorial
You can watch detailed step-by-step instructions in these videos by HomeRepairClub
Factors That Affect Window Installation Time
Several things can change how long it takes to install or replace a window, including:
- Window size and style complexity: Bigger or more intricate windows need extra time to fit and seal correctly.
- Frame material: Wood frames usually require more prep and finishing compared to vinyl or aluminum.
- Condition of existing frame and wall: If the old frame or surrounding wall is damaged, repairs will add to the installation time.
- Number of windows being replaced: Replacing multiple windows at once can extend the overall project but may save time per window.
- Installer skill and experience: Skilled professionals generally complete the job faster and with fewer mistakes.
- Weather and season: Bad weather can delay outdoor work and slow down installation.
- Custom windows vs standard sizes: Custom-sized windows often take longer to install because of extra fitting adjustments.
Does Faster Installation Mean Higher Expense?
When it comes to window installation, time really is money, sometimes quite literally. If you’re in a hurry to get those new windows in, expect to pay a bit more.
Fast-tracking your project often means calling in extra hands or bumping your job up the schedule, which can add a premium to labor costs.
Expedited installations can cost an extra $100 to $300 per window, depending on your material and location. Think of it like express shipping for your home makeover, it gets the job done sooner but at a price.
Summing Up Your Window Installation Timeline
Window installation times vary, but most single window replacements take a few hours. Larger projects take longer, and the type of window matters too.
Many factors can slow or speed up the job, like the material, the old frame’s condition, and the number of windows being done.
Feel free to share your window installation stories or questions in the comments below; it helps everyone learn and prepare better!
Want more helpful home improvement tips? Check out our other blogs like this for easy DIY guides and expert advice!