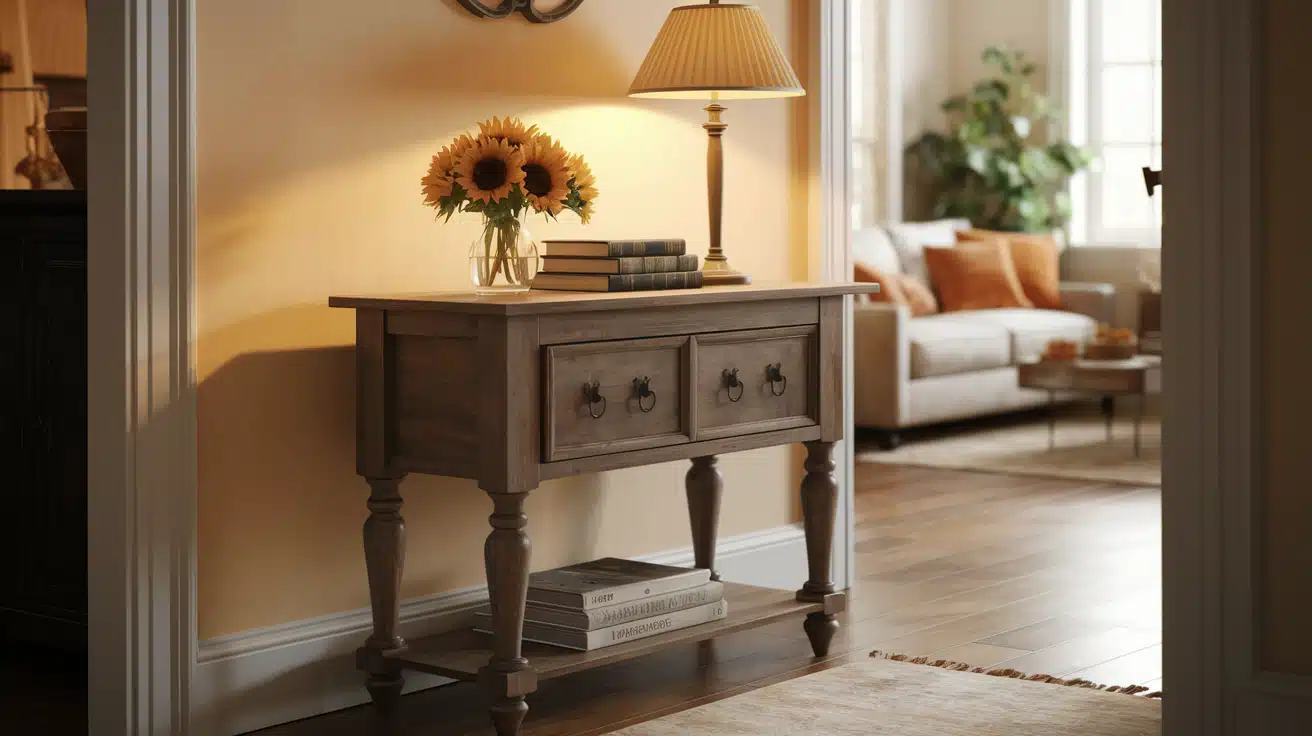

Tired of seeing $600+ entry tables that look exactly like something you could build yourself?
Most people feel frustrated when shopping for console tables. The prices hurt your wallet, but the quality often disappoints. That’s when building your own becomes the wise choice.
Here’s what changes everything. For around $200 in materials and one weekend, you can create a solid wood entry table that looks like it cost three times more.
No advanced skills needed, just basic cuts, some glue, and simple finishing techniques. You’ll get exactly the size and style you want while saving hundreds of dollars.
Ready to build furniture that rivals expensive store-bought pieces? This step-by-step guide offers a clear and detailed explanation of how to proceed.
What Is a DIY Entry Table?
A DIY entry table is a handmade console piece you build yourself for your home’s entrance or hallway. This furniture project combines basic woodworking skills with affordable materials to create a functional and stylish piece.
Why It’s Worth DIYing an Entry Table?
-
Customization Option
Select wood, size, trim, and finish to match your space and style perfectly. Whether you prefer rustic charm or modern minimalism, it’s all up to you. -
Beginner-Friendly Process
You don’t need to be a seasoned woodworker. This project involves simple cuts, gluing, screwing, and basic finishing, making it ideal for DIYers at any level. - Superior Quality Control
Choose solid wood instead of settling for particleboard or thin veneers. Control every joint, screw, and finish detail for furniture built to last. - Perfect Custom Fit
Retail tables come in standard sizes that rarely match your space perfectly. Build exactly the width, height, and depth your entryway needs.
Step-by-Step Guide DIY Entry Table
Build your DIY entry table step-by-step with precision cuts, assemble, trim, and finish to create a sturdy, stylish piece that fits your space and budget.
Materials Needed:
| Material | Purpose |
|---|---|
| 1 x 10 x 8 board | Serves as the main tabletop surface. |
| Four 4×4 posts | Function as the table legs for support. |
| Two additional 1×10 boards | Create side panels to cover the leg posts. |
| Two 1×6 boards | From the decorative angled trim design on the front. |
| Wood glue | Bonds all wooden pieces together permanently. |
| 3-inch wood screws | Secure the legs firmly to the tabletop. |
| 1¼-inch brad nails | Attach panels and trim pieces without splitting. |
| Wood filler | Fills screw holes and nail holes for smooth finish. |
| 120-grit sandpaper | Provides initial sanding to remove rough spots. |
| 220-grit sanding mesh | Creates a final smooth surface for staining. |
| Pre-stain wood conditioner | Prepares wood for even stain absorption. |
| Wood stain | Colors the wood to the desired finish. |
| Polyacrylic topcoat | Protects and seals the finished table surface. |
Tools Required:
| Tool | Function |
|---|---|
| Saw | Cuts all lumber pieces to the required dimensions. |
| Countersink drill bit | Creates recessed holes so screws sit flush. |
| Brad nailer | Drives small nails quickly and precisely. |
| Orbital sander | Smooths all surfaces efficiently and evenly. |
| Power drill | Drives screws and creates pilot holes. |
| Measuring tape | Measures and marks accurate cutting dimensions. |
Step 1: Cut Main Pieces
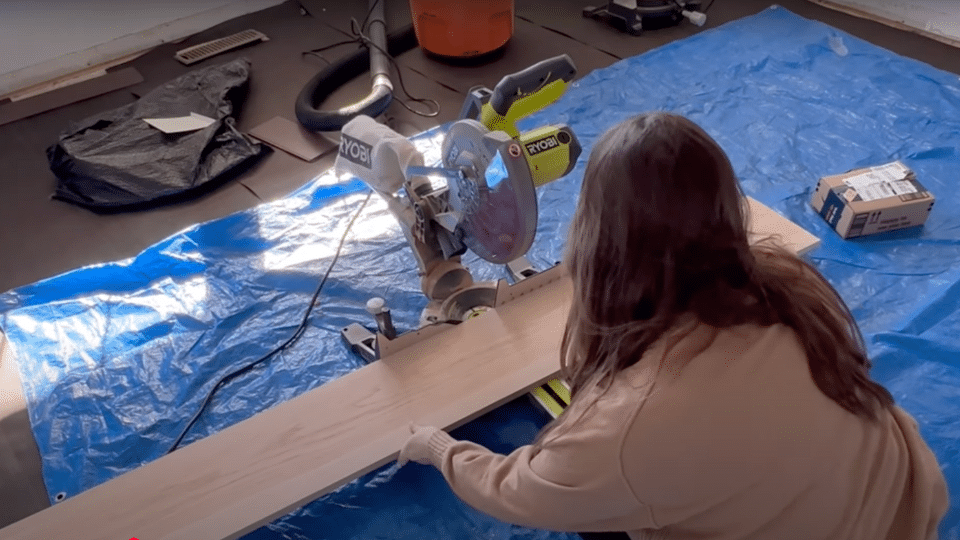
Cut the 1x10x8 board to the desired table length (40 inches works well for small spaces). Cut four 4×4 posts to your preferred height (30 inches is standard for console tables).
Always use untreated 4x4s for indoor furniture, as treated lumber contains chemicals that are unsafe for homes.
Budget Tip: Red Oak costs more but lasts longer. Select Pine offers similar results at half the price for budget-conscious builders.
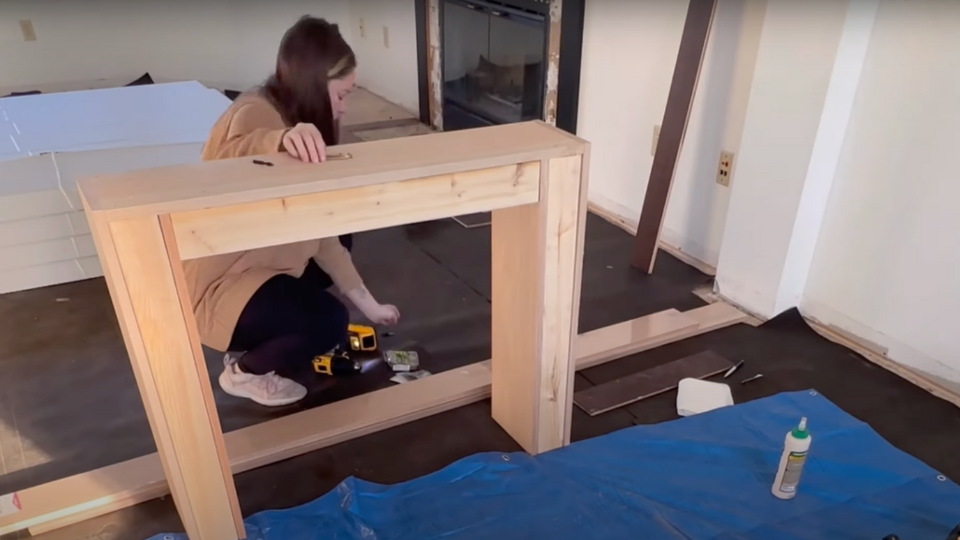
Step 2: Attach Legs to Tabletop
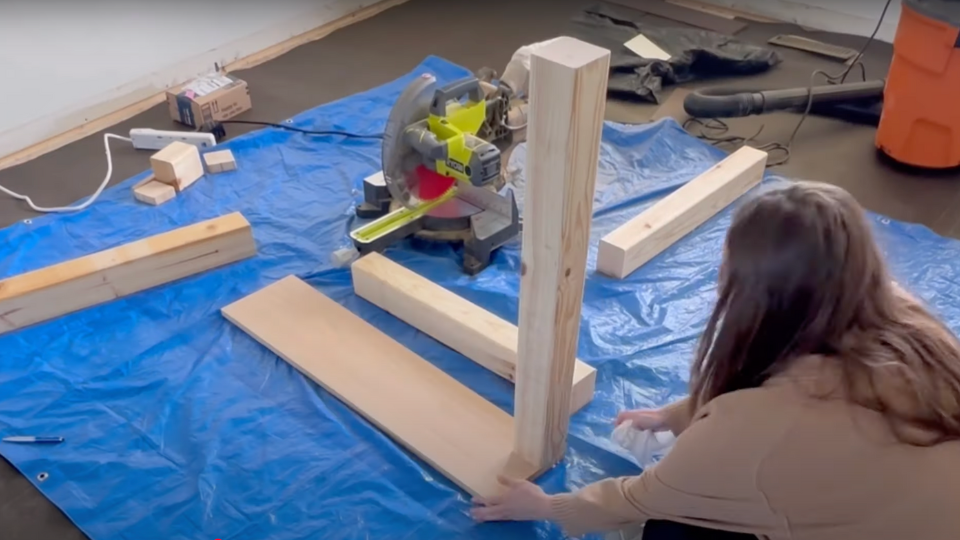
Place the tabletop smooth-side down and glue the four 4×4 legs to the rougher side. Line up legs flush with the table edges for easier trim installation later.
Let the glue cure for 5-6 hours, then flip it carefully and secure with 3-inch screws using a countersink bit.
Safety Note: Always have two people flip the table to prevent injury and maintain leg alignment during the process.
Step 3: Add Side Panels
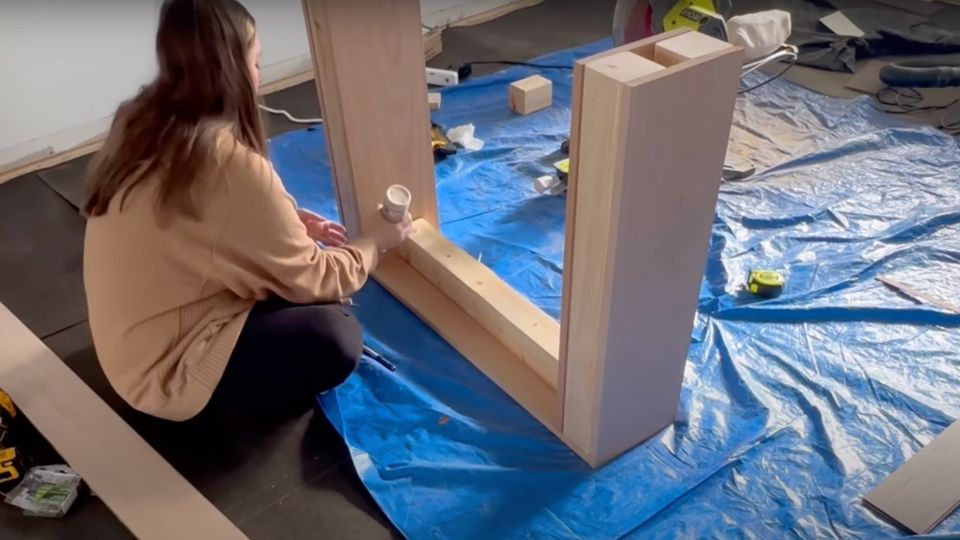
Cut two 1×10 pieces to match the height of your table’s outside edge. Apply wood glue to leg sides and attach these panels using your brad nailer with 1¼-inch nails. Shoot nails straight, not at angles, to prevent them from popping out of the sides.
Time Saver: Pre-cut all panels before starting assembly to maintain workflow and prevent glue from drying during cutting breaks.
Step 4: Install Interior Support
Cut interior 1×10 pieces (approximately ¾ inch shorter than the exterior pieces) and attach them inside.
Add a 4×4 support brace across the front interior to prevent bowing of the tabletop and provide a surface for the front trim. Secure everything with glue and brad nails.
Quality Check: Test table stability by gently pressing corners. Any wobbling indicates loose connections that need additional securing.
Step 5: Finish and Protect
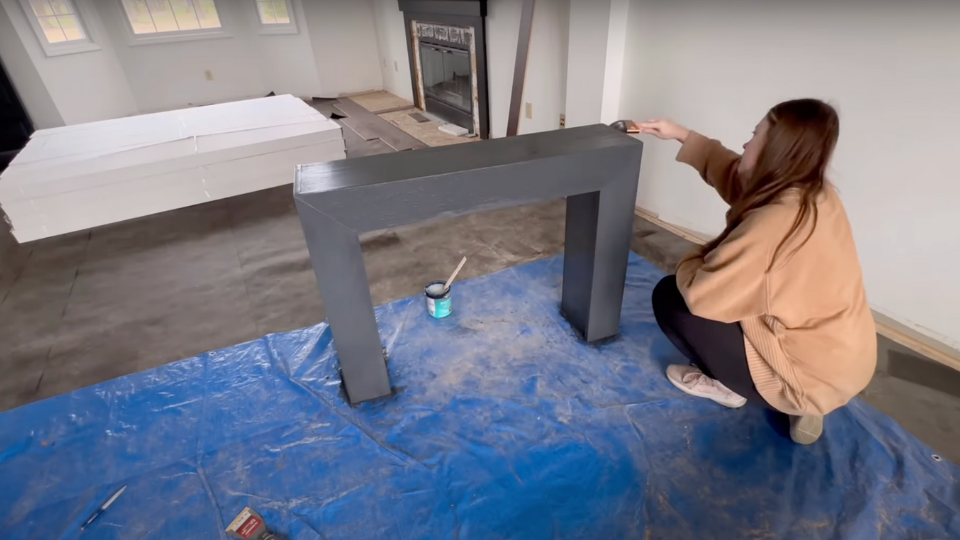
Fill all screw and nail holes with wood filler. Sand progressively with 120-grit then 220-grit paper until smooth.
Apply pre-stain conditioner, followed by your chosen stain color. Finish with polyacrylic topcoat for protection. Allow 24 hours drying time between major steps.
Expert Insight: Water-based stains dry faster and have less odor, making them ideal for indoor projects with limited ventilation.
Video Tutorial
Special thanks to Peony and Honey for providing valuable insights in their video, which I referenced while creating this guide.
Entry Table Placement & Styling Tips
A DIY entry table is both functional and stylish, enhancing your space while setting the tone for your home, wherever you place it or style it for the season.
| Location | Why It’s Ideal | Styling Tip |
|---|---|---|
| Front Entryway | Welcomes guests and defines the entrance | Add a mirror, a small tray for keys, and a vase with fresh flowers |
| Hallway Corner | Maximizes narrow, underused spaces | Use slim décor like a lamp, books, and a framed quote |
| Living Room Entrance | Creates a transition between rooms | Add seasonal garland, candles, or family photos |
| Behind a Couch | Functions as both décor and storage | Use baskets below, and style with plants or stacked books |
| Mudroom or Side Entrance | Provides a landing spot for essentials | Include hooks above, a bench beside, and a bowl for loose items |
From giving a warm welcome to offering organized storage, your DIY entry table can serve multiple purposes throughout the year.
Customization & Upgrades for DIY Entry Table
Upgrade your DIY entry table with creative upgrades, add storage, trim, hardware, and custom finishes to make it both functional and uniquely yours.
1. Add Functional Storage Options
Redesign the basic console table into a storage powerhouse by adding drawers or shelves.
Install pull-out drawers under the tabletop for keys, mail, and small items. Add an open shelf between the legs for books or decorative boxes.
Consider building hidden compartments behind the front panel for valuable items.
2. Upgrade with Decorative Trim & Molding
Give your entry table a high-end look by adding decorative elements. Crown molding along the top creates a finished, built-in appearance.
X-brace details between the legs add farmhouse charm and visual interest. Fluted columns or rope molding on the legs create texture and depth.
3. Personalize with Hardware & Fixtures
Small hardware changes create a big visual impact on your console table. Add decorative corner brackets in bronze or black iron for industrial style.
Install unique drawer pulls if you add storage compartments. Consider adding metal accents, such as decorative bolts or corner guards, for a modern look.
4. Modify with Paint, Stain, or Two-Tone Finishes
Color choices can completely change your table’s personality and style. Bold paint colors, such as navy blue or forest green, create dramatic focal points.
Rustic stains in weathered gray or barnwood brown add farmhouse appeal. Two-tone finishes feature painted bases paired with stained tops, creating visual contrast.
Conclusion
Building your DIY entry table changes both your space and your wallet. For just $200 in materials, you’ve created a solid wood piece that rivals furniture costing three times more.
The satisfaction of completing this project goes beyond money saved; you’ve built something perfectly fitted to your home with your own hands.
This beginner-friendly project proves that quality furniture doesn’t require years of woodworking experience or expensive tools. Basic cuts, simple assembly, and straightforward finishing techniques deliver professional results that guests will admire.
Your new DIY entry table serves as more than furniture; it’s proof that you can create beautiful, functional pieces without breaking the budget. Ready to tackle your next furniture project?
Start planning your next build and keep altering your home one piece at a time.
Frequently Asked Questions
What Can I Use Instead of a Console Table?
Use a narrow bookshelf, a floating shelf, a small dresser, a bench with storage, or wall-mounted hooks with a small basket underneath.
What Is a Good Height for An Entryway Table?
Standard console table height is 28-32 inches. This matches most sofa backs and works well for keys, mail, and decorative items.
How Far Should the Table Be Off the Wall?
Place your console table 6-12 inches from the wall. This allows space for lamps, artwork, and easy cleaning behind the table.