

Tired of paying hundreds for professional slab flattening services every time you work with rough lumber?
I used to think router sleds were only for experienced woodworkers with fancy shops. Then I realized you can build one using simple materials from any hardware store for under $100.
This homemade tool will flatten live-edge slabs, smooth reclaimed wood, and handle boards too wide for your planer. You’ll save money on every project while getting professional results in your own workshop. No more sending slabs out for milling or struggling with uneven surfaces.
I’ll walk you through each step of building your own router sled, from creating the brackets to setting up the rail system.
Let’s get started.
What is a Router Sled?
A router sled is a woodworking tool that helps flatten large wood slabs and boards. It works like a guide system that moves your router in straight, controlled passes across rough lumber. The sled keeps your router at the same height while you work, creating a perfectly flat surface.
The system consists of two main parts: rails that sit on either side of your workpiece, and a platform that holds your router. The router platform slides along these rails, letting you make smooth, even cuts across the entire width of your slab.
Key Benefits
- Handles large slabs that won’t fit through a planer
- Creates perfectly flat surfaces for tabletops and counters
- Works with rough lumber straight from the sawmill
- Saves money compared to hiring professional milling services
- Adjustable height lets you remove just the right amount of material
Common Uses
- Flattening live-edge slabs for tables
- Smoothing reclaimed barn wood
- Preparing thick boards for furniture projects
- Creating level surfaces on irregular lumber
This tool is perfect for woodworkers who work with natural slabs or oversized boards that regular shop tools can’t handle.
How to Build a Router Sled for Slab Flattening?
Building your own router sled can save you money and provide a tool that lasts for years. This guide shows you exactly how to create a slab flattener using simple materials from your local hardware store.
Tools Required
| Tool | Purpose |
|---|---|
| Dremel Rotary Tool | Cut and shape L-brackets |
| Table Saw | Cut acrylic to size |
| Crosscut Sled | Safe acrylic cutting |
| Drill Press | Drill precise holes |
| Hole Saw (2.5 inch) | Cut router bit opening |
| Router | Main flattening tool |
| Clamps (Multiple) | Secure rails and work pieces |
| Sandpaper | Smooth cut edges |
Materials Required
| Material | Purpose |
|---|---|
| L-Brackets | Router mounting brackets |
| Small Screws and Nuts | Connect brackets |
| Clear Acrylic Sheet | Router base material |
| Bearing Blocks | Smooth rail movement |
| Metal Rails | Sled track system |
| Quarter-inch Grommets | Mounting protection |
| Stainless Steel Screws (3/4″) | Secure router to base |
| 2×4 Lumber | Rail mounting blocks |
| Deck Screws | Attach rails to lumber |
| MDF Sheet (3/4″) | Workpiece support |
| Router Flattening Bit | Slab smoothing |
Step 1: Create Router Base Brackets
Start by finding L-brackets in the strong tie section of your local hardware store. Connect two L-brackets together using small screws and nuts. Use a Dremel tool to cut and shape the brackets to fit your router’s bearing blocks.
Mark the hole patterns by tracing your router base onto paper, then transfer these marks to your brackets. Drill the holes carefully to match your router’s mounting pattern.
Safety Tip: Always wear safety glasses when using power tools like the Dremel. Secure your work piece in a vise before cutting or drilling.
Step 2: Prepare the Acrylic Base Material
Choose a piece of clear acrylic that’s large enough for your router base. Keep the protective paper film on while working – this lets you draw and mark directly on the surface.
Use your table saw to cut the acrylic to size, treating it just like wood. The acrylic cuts smoothly and gives you better visibility than wood when working on slabs later.
Safety Tip: Use a fine-tooth blade when cutting acrylic to prevent cracking. Support the material properly to avoid kickback on the table saw.
Step 3: Mark and Drill All Mounting Holes
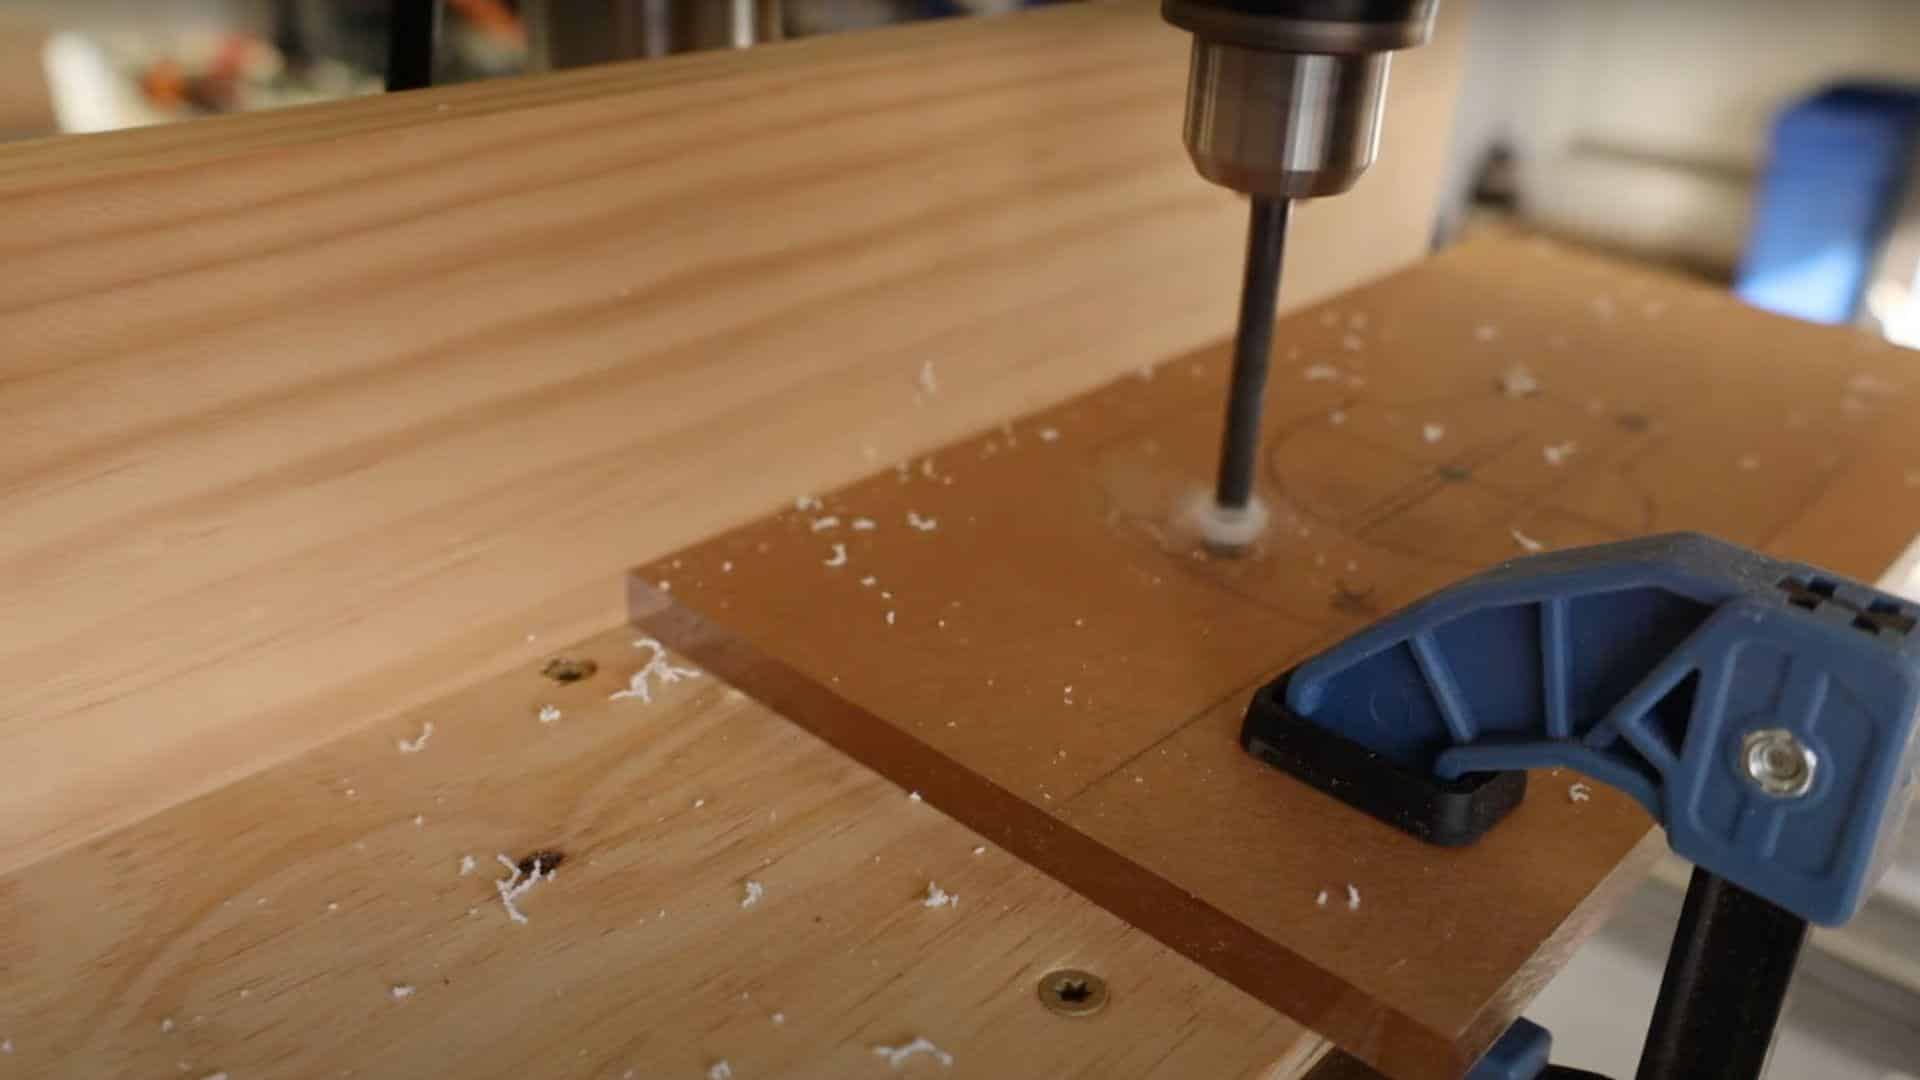
Remove your router base and use it as a template on the acrylic. Mark all screw holes and the center point where the router bit will go through. Use a drill press for clean, straight holes.
Create a 2.5-inch center hole using a hole saw, drilling halfway from each side to prevent chipping. Add countersinks for the mounting screws so they sit flush with the acrylic surface.
Safety Tip: Clamp the acrylic firmly when drilling. Let the drill bit do the work – don’t force it, as this can crack the material.
Step 4: Install Grommets and Attach Router Base
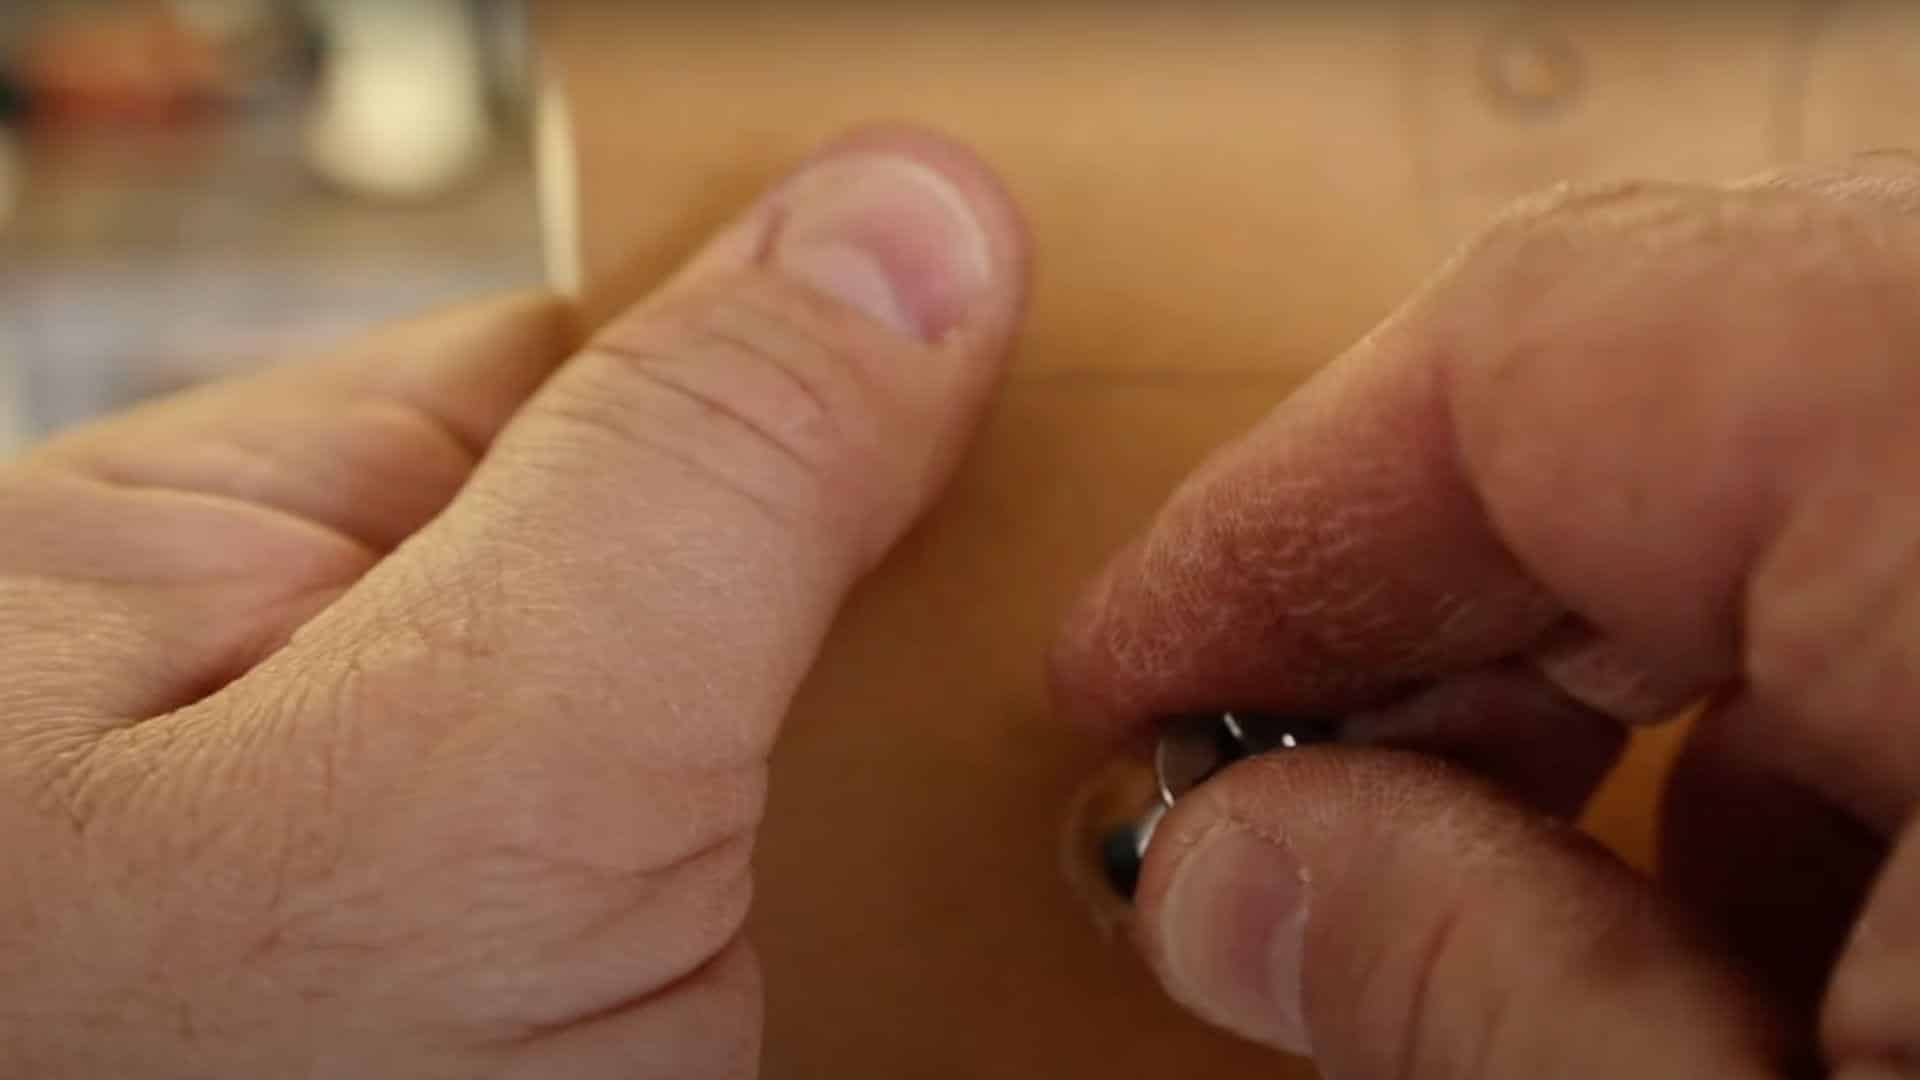
Insert quarter-inch grommets into the bracket holes to create smooth mounting points. These grommets protect the acrylic and provide secure attachment points.
Bend back any teeth on the grommets since they’re not needed for acrylic. Attach the acrylic base to your brackets using stainless steel screws. Then mount your router to the acrylic base, making sure everything is tight and secure.
Safety Tip: Don’t overtighten screws when working with acrylic. Snug is sufficient – overtightening can cause stress cracks in the material.
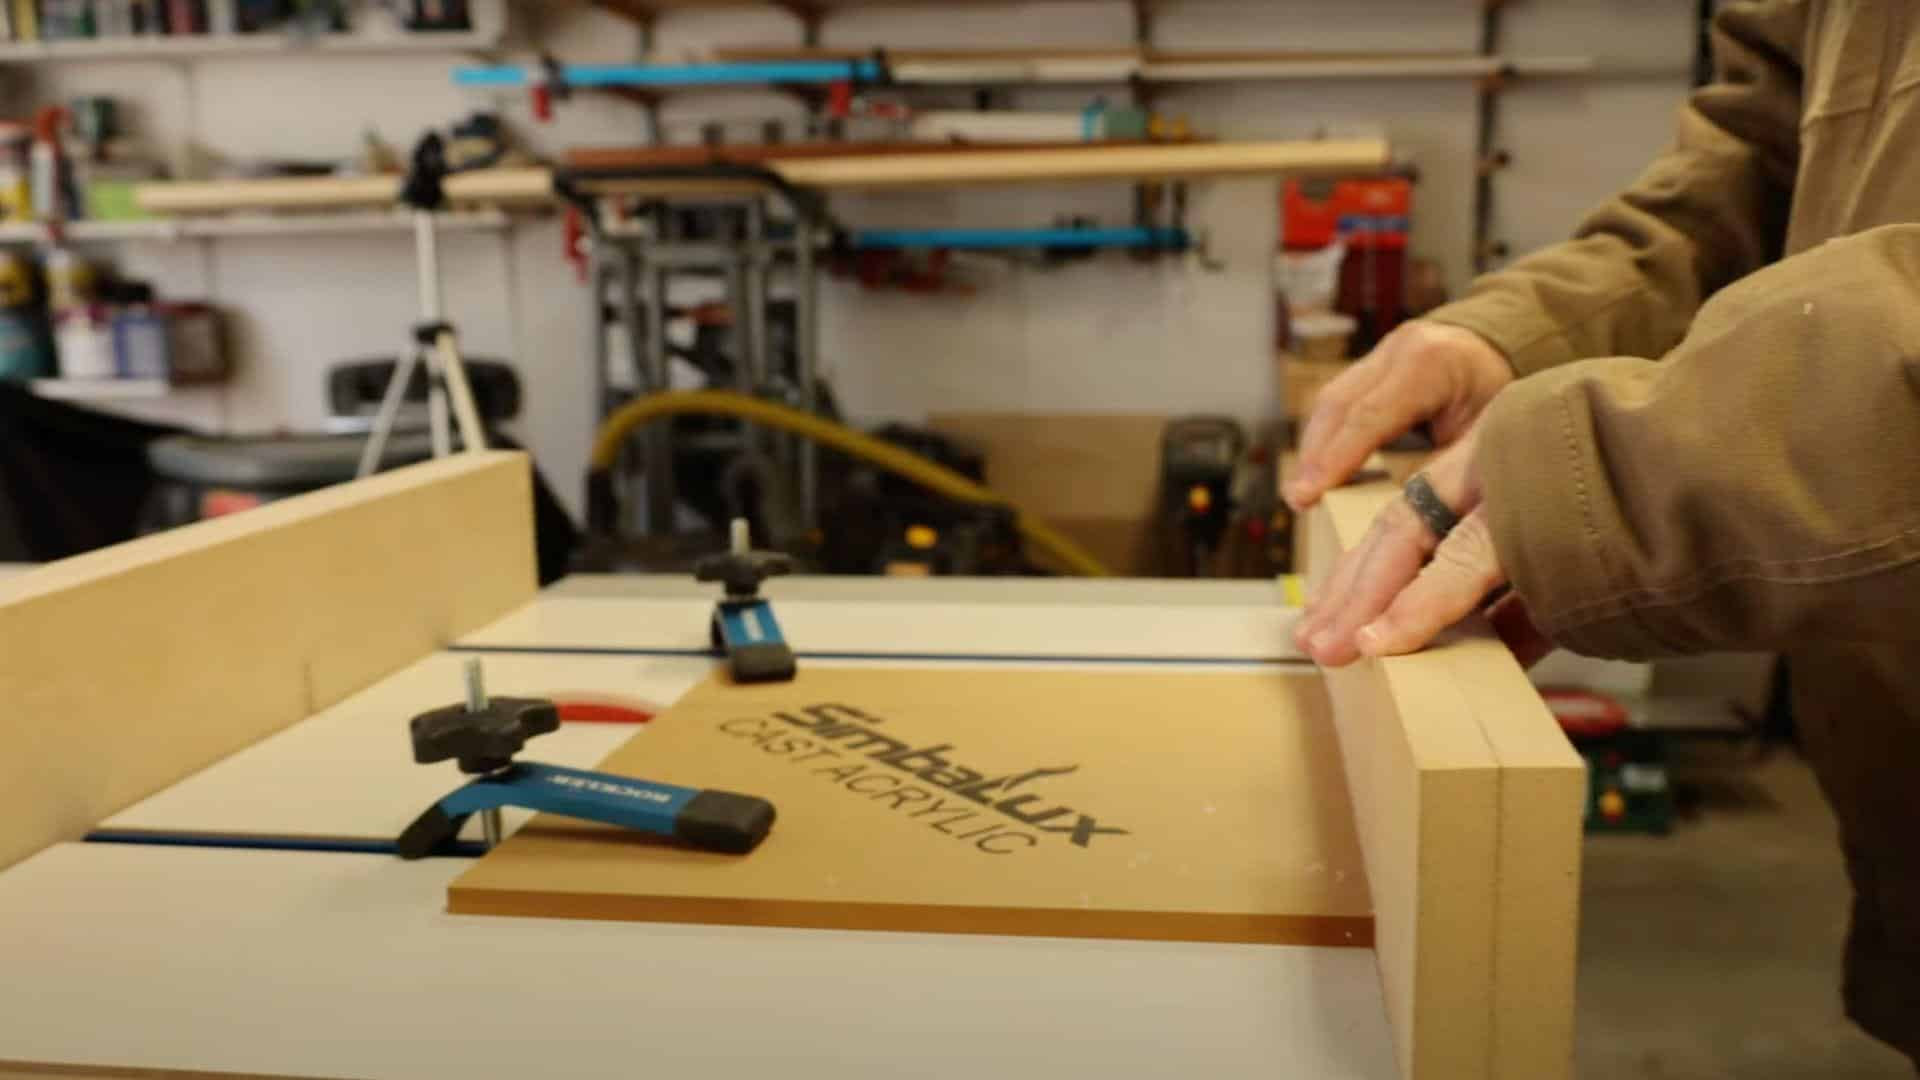
Step 5: Set Up the Rail System
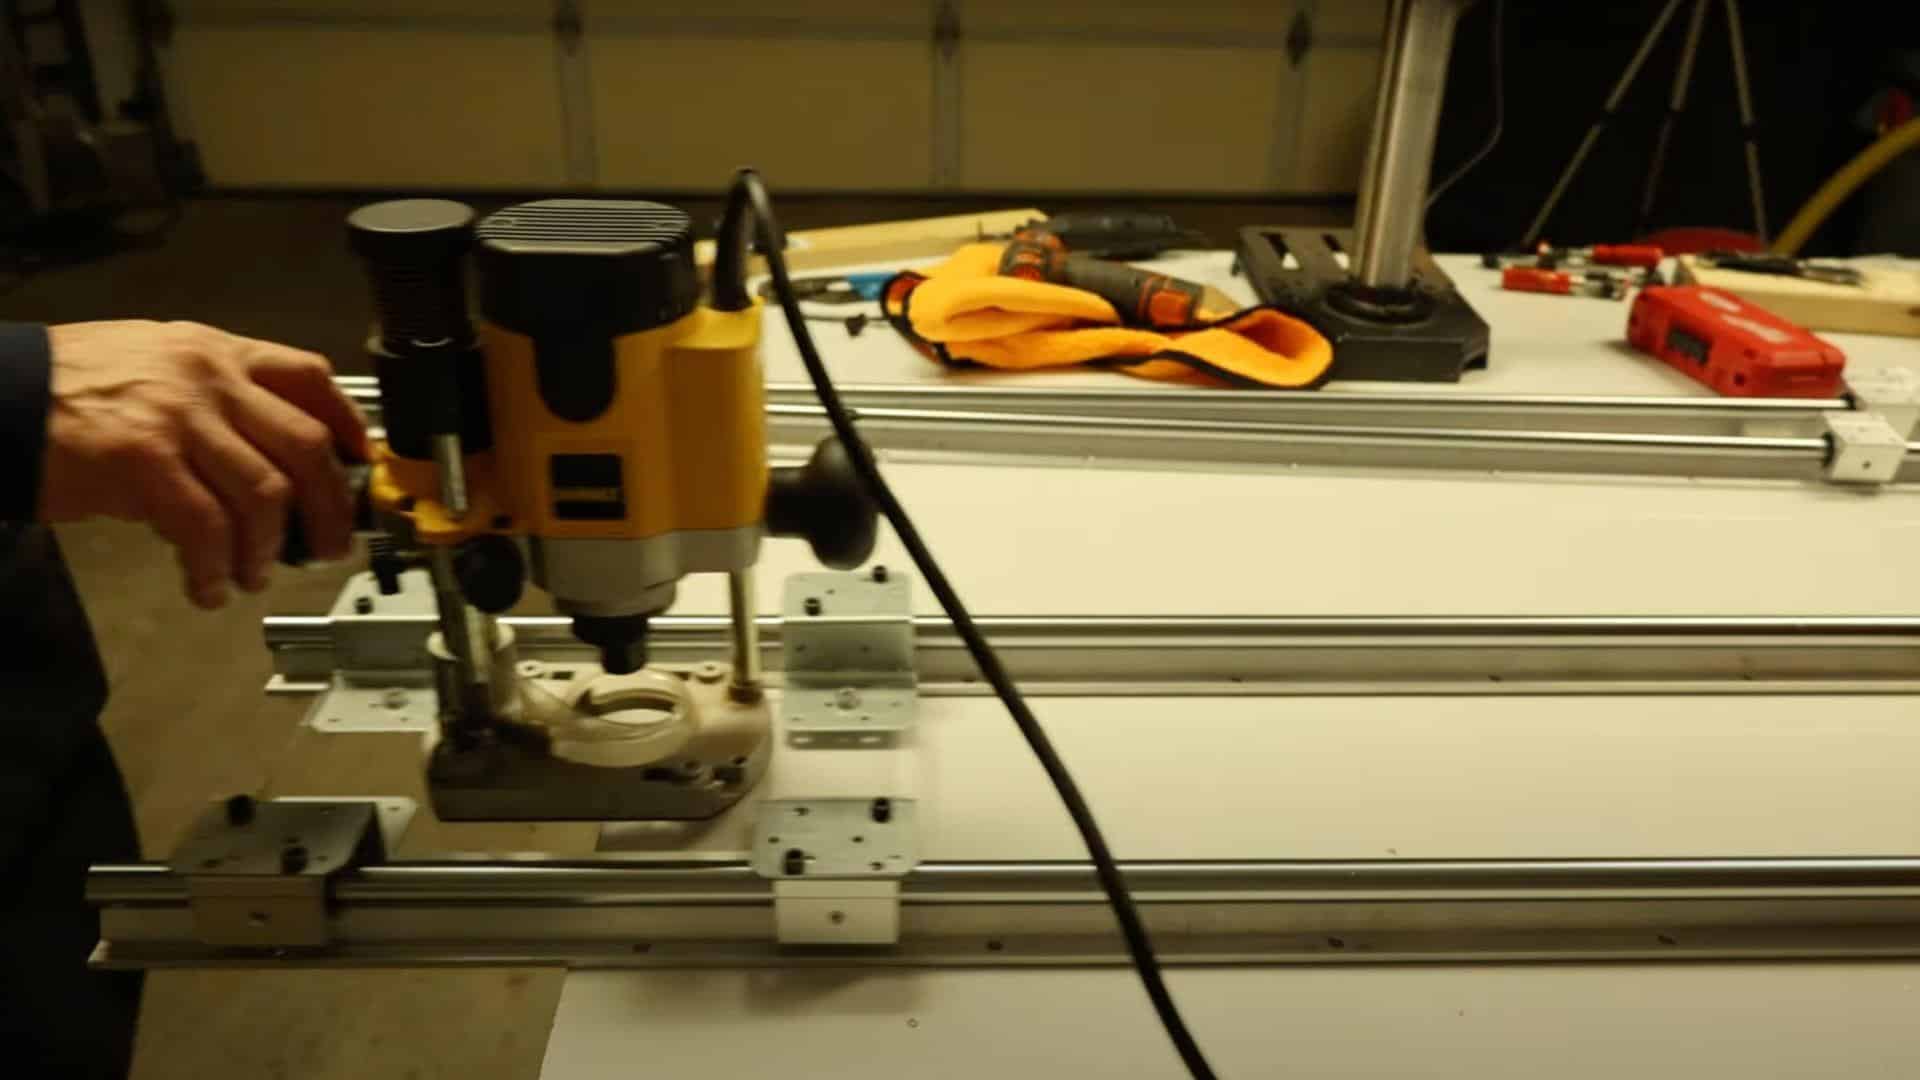
Install bearing blocks on your brackets that will ride on the rails. Test the movement to ensure everything slides smoothly without binding. The rails need to stay parallel throughout their length.
Cut additional pieces of acrylic to use as spacers that keep the rails at a consistent width. This prevents binding when the router moves across your workpiece.
Safety Tip: Check that all bearing blocks spin freely before final assembly. Clean any debris from the rails that could cause binding or jerky movement.
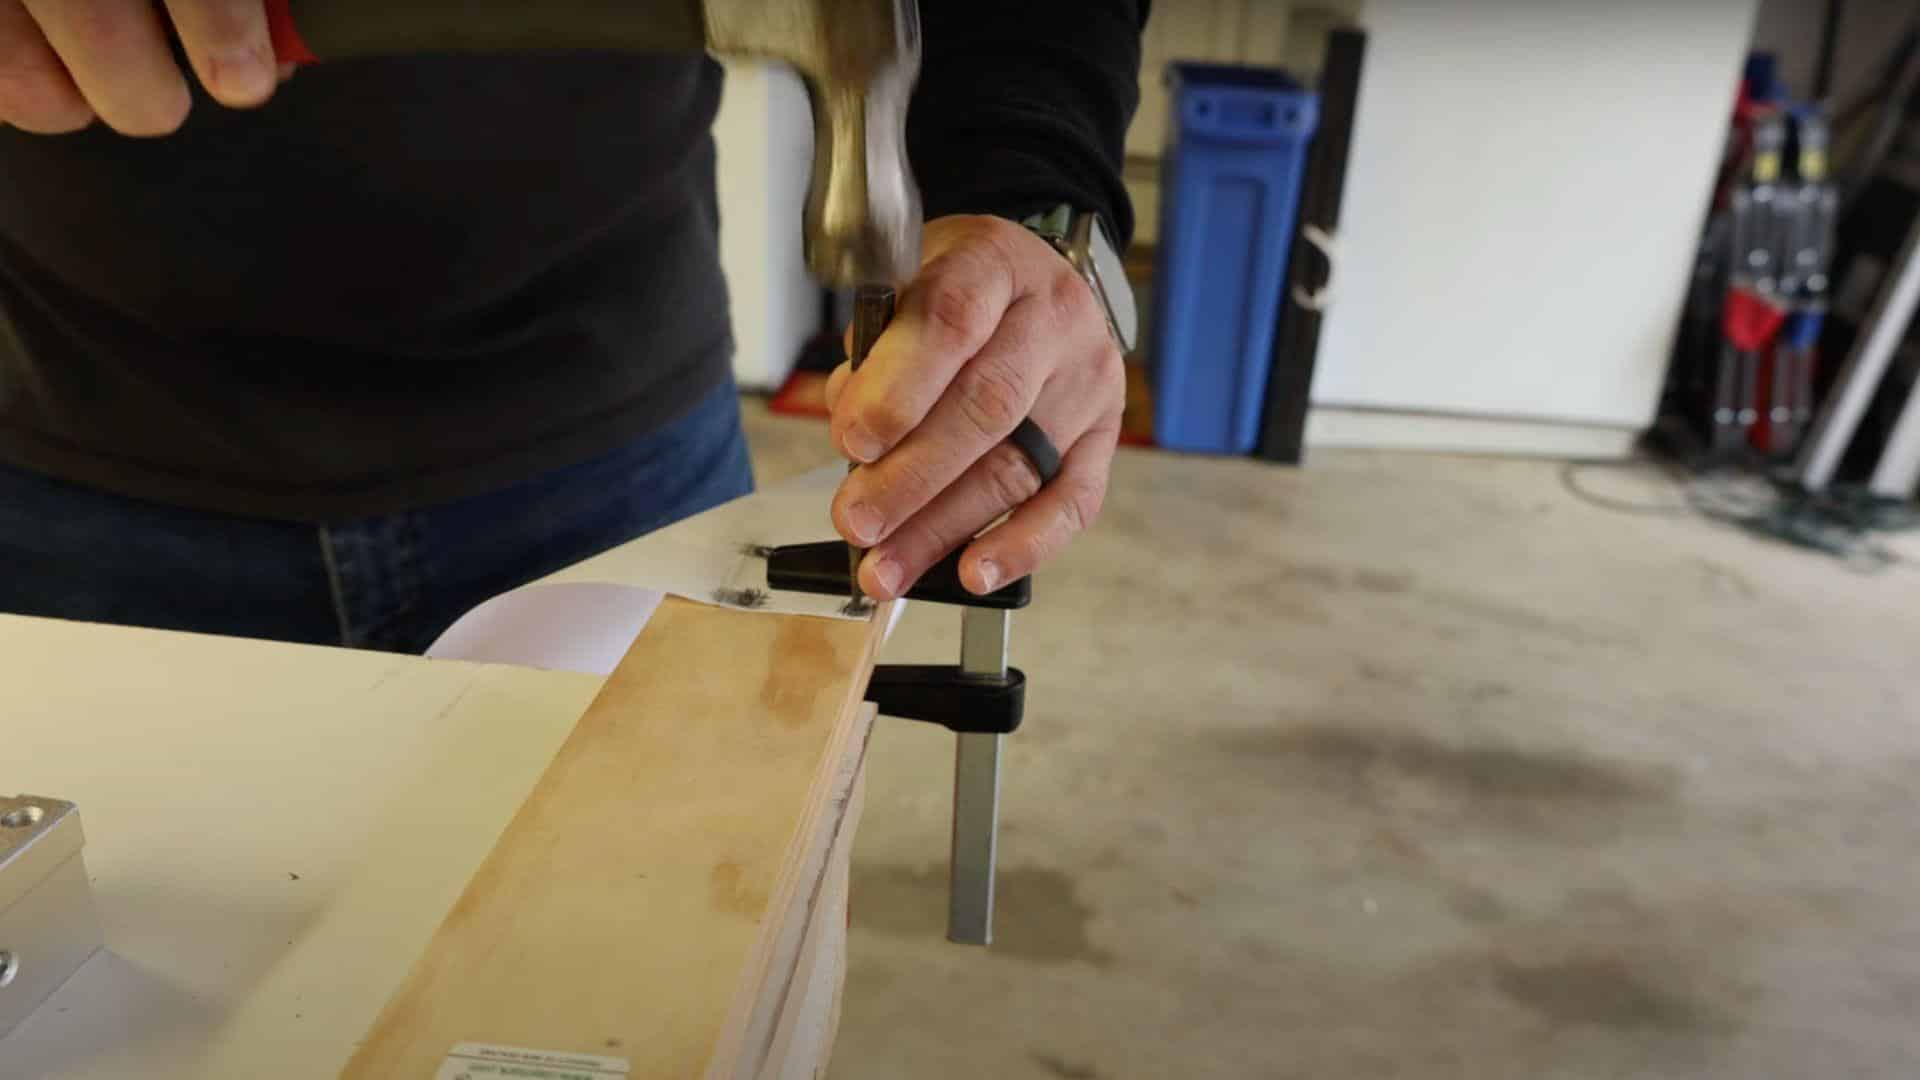
Step 6: Mount Rails to Your Work Surface

Cut 8-inch sections of 2×4 lumber and plane them to exactly the same thickness. Attach these sections to your rails using deck screws through existing holes.
This setup lets you clamp the entire system to any table without permanent modifications. Position the rail sections so they distribute weight evenly across your work surface. The clamping system keeps everything level and stable.
Safety Tip: Use at least four clamps to secure the rail system. Check that all clamps are tight before starting any cutting operations.
Step 7: Final Assembly and Testing

Connect all components and test the router movement across the full range of the rails. Set your router bit height to match the lowest point on your slab.
Secure your workpiece with clamps and additional support blocks to prevent movement. Ensure the router bit does not contact the rails at any point during operation. Do a dry run without power to check clearances.
Safety Tip: Never start the router while it’s in contact with the work piece. Always start cuts from one edge and work systematically across the slab.
Step 8: Operating Your Router Sled Safely
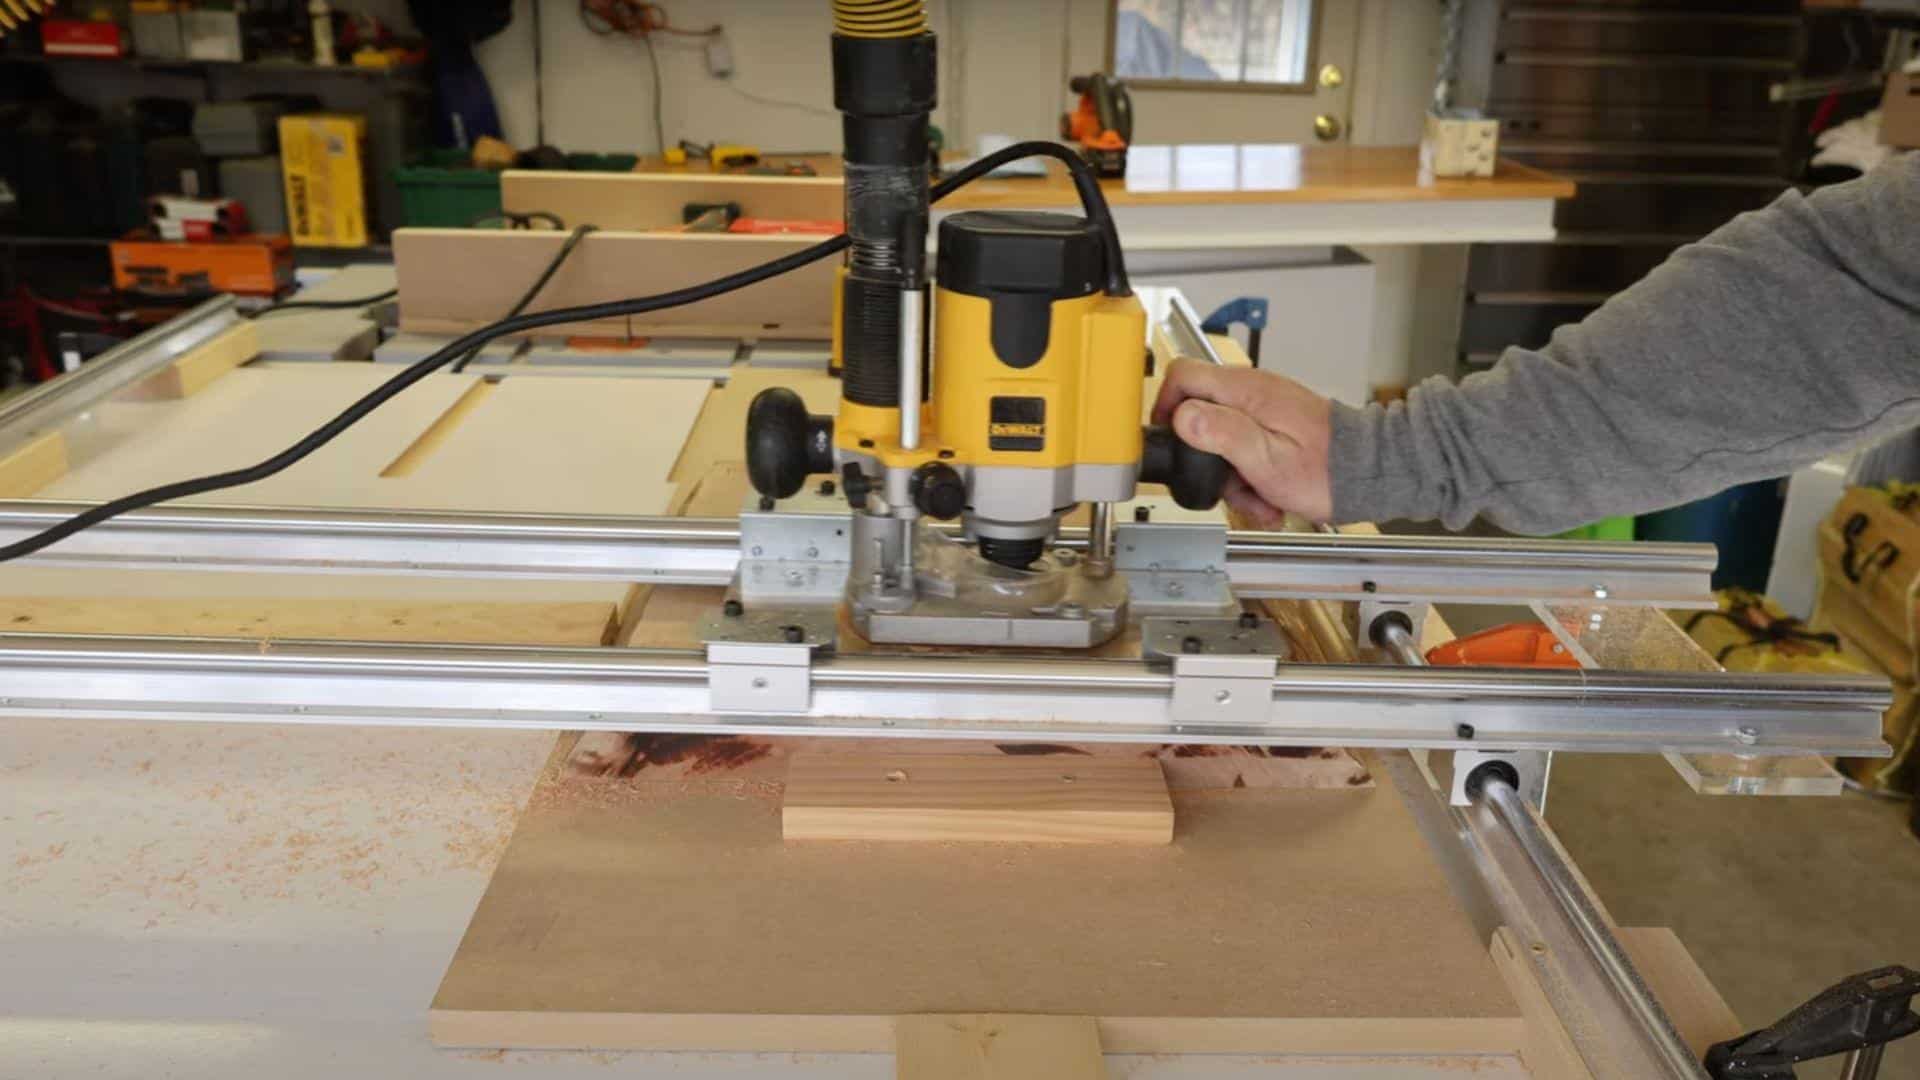
Start with light passes, removing only small amounts of material with each cut. Move the router at a steady pace – too fast causes tear-out, too slow can burn the wood.
Keep the router moving in straight, overlapping passes across the entire slab surface. The lines left by the router bit will sand out easily once flattening is complete. Clean up any dust between passes for better visibility.
Safety Tip: Always wear hearing protection and dust masks when operating the router sled. Keep your hands well away from the bit and maintain firm control of the router at all times.
Video Tutorial
Special thanks to Shark Shed Builds for providing valuable insights in their video, which I referenced while creating this guide.
Common Router Sled Mistakes to Avoid
Building and using a router sled involves many components that must work together seamlessly. Small setup errors can ruin your project or create safety hazards. These common mistakes happen to both beginners and experienced woodworkers, but they’re all preventable with proper preparation.
| Mistake | Solution |
|---|---|
| Rails not parallel | Use spacer blocks to keep the rails a consistent width apart |
| The router bit is too deep | Set the bit height to the lowest point on the slab, and make light passes |
| Acrylic cracking | Don’t overtighten screws, drill pilot holes first |
| Sled binding on rails | Clean rails regularly, check bearing blocks spin freely |
| Uneven work surface | Plane all 2×4 mounting blocks to the same thickness |
| Router bit hitting rails | Test clearance before starting, adjust rail spacing |
| Workpiece moving | Use multiple clamps and support blocks to secure the slab |
| Burn marks on wood | Move the router at a steady pace, don’t linger in one spot |
| Tear-out on edges | Start cuts from one edge, and use a sharp flattening bit |
| Inconsistent depth | Keep the router level, don’t tilt during passes |
| Dust blocking view | Clear sawdust between passes for better visibility |
| Loose connections | Check all screws and clamps before each use |
Take time to double-check your setup before each use. A few minutes of preparation can prevent hours of fixing mistakes and keep your projects looking professional.
Conclusion
Building a router sled eliminates the need for expensive professional services and creates a tool that pays for itself after just one or two projects. This simple jig handles rough lumber that regular shop tools can’t touch.
The real advantage? Size limitations disappear completely. That beautiful live-edge slab can finally become the dining table it was meant to be. Router sleds handle anything a planer can’t reach.
This tool design has proven reliable for years of consistent use.
The time invested in building this jig saves countless hours and hundreds of dollars on future projects.
Router sleds open up new possibilities for woodworking projects. With materials readily available at any hardware store, there’s no reason to keep sending slabs out for professional milling.
Start building today and convert any workshop into a professional-grade operation.
Frequently Asked Questions
How Much Does It Cost to Flatten a Wood Slab?
Professional slab flattening costs $ 50- 200+, depending on size and thickness. Building your own router sled costs under $100 and handles unlimited projects.
What Are the Disadvantages of A Plunge Router?
Plunge routers are heavier, harder to control, and more complex to set up than fixed routers. They cost more and require extra skill.
What Can You Do with A Router Sled?
Router sleds flatten large wood slabs, smooth reclaimed lumber, prepare thick boards for furniture, and handle pieces too wide for regular planers.