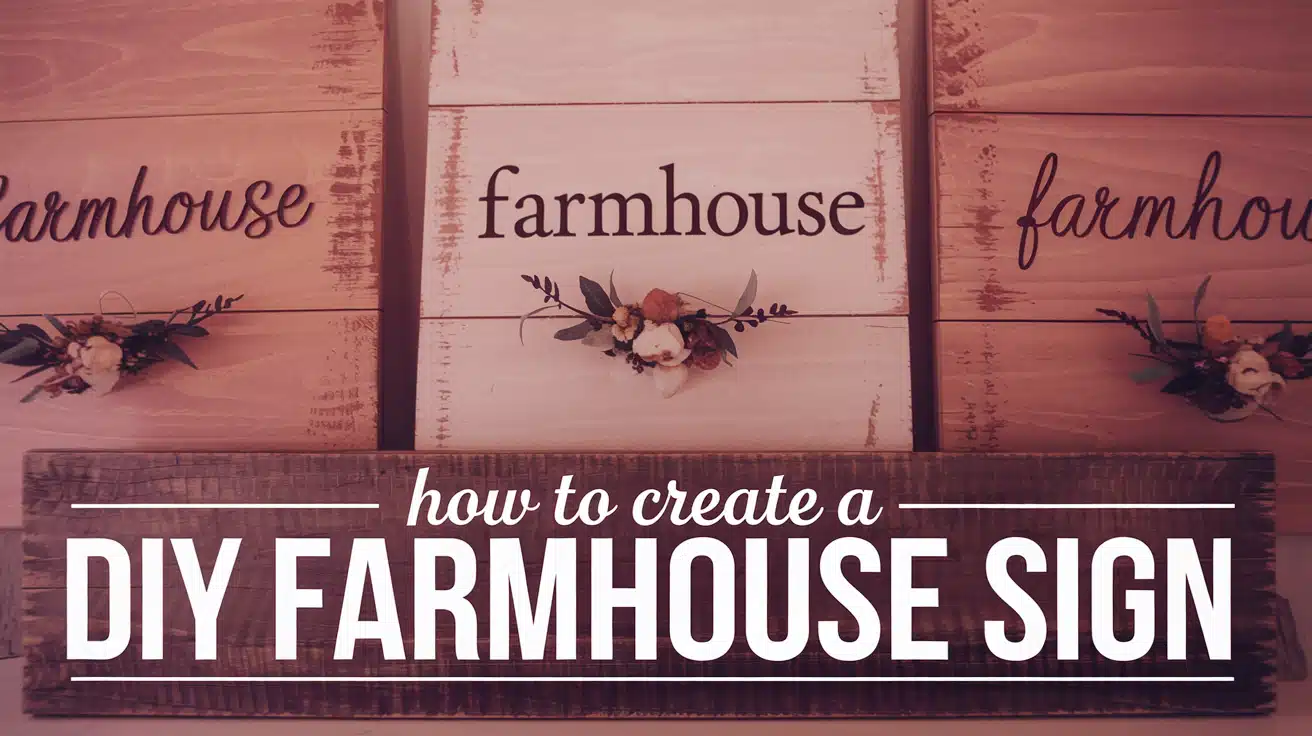

Making signs at home has become more popular than ever.
Every day, people spend lots of money buying ready-made signs for their walls when they could easily make their own.
Want to know a secret?
You can create beautiful wooden signs that look like they cost hundreds of dollars. With just a few basic tools and supplies from your local store, you’ll have everything you need.
Think about how good it will feel to point at your wall and say, “I made that!”
Your friends won’t believe you created it yourself. Plus, you’ll save money and have fun doing it.
Ready to start making your own wooden sign?
Let’s walk through the simple steps to create something special for your home.
Materials You Will Need
| S. No. | Materials | Description |
|---|---|---|
| 1 | Wood board (8.5 x 28 inches or preferred size) | Choose the desired size for your sign. |
| 2 | White and black chalk paint | Use chalk paint for a rustic finish. |
| 3 | Paint brushes of different sizes | Use large brushes for coverage and small ones for details. |
| 4 | Wood glue | Secure framing pieces with strong glue. |
| 5 | Framing pieces | Add framing to finish the sign’s edges. |
| 6 | Cleaning cloths | Wipe away dust and excess paint. |
| 7 | Sandpaper | Smooth the wood and distress the paint if desired. |
| 8 | Measuring tape | Ensure accurate sizing and spacing. |
| 9 | Design templates or stencils | Trace your design onto the wood. |
| 10 | Pencil for marking | Mark out the design area. |
| 11 | Clamps (optional) | Hold pieces in place while glue dries. |
| 12 | Fan brush for texturing | Add texture to your paint for a rustic look. |
Step-by-Step Guide to Creating Your DIY Farmhouse Sign
Step 1: Prepare Your Wood Surface
Start with a wooden board – local hardware stores often sell and cut them to size.
For a standard wall sign, use an 8.5 x 28-inch board. Get some trim pieces, too – about 7/16 by 5/16 inches works well.
Clean your board with basic cleaning wipes to remove dirt and dust.
Sand the entire surface with medium-grit sandpaper until smooth.
Mark where your frame pieces will sit using a pencil and ruler.
These marks help you paint clean lines later.
Wipe off all sawdust with a clean cloth before starting to paint.
Step 2: Choose Your Design
Make a rough sketch of your sign first. If using lettering, count the characters to ensure they’ll fit nicely.
Leave 2-3 inches of space around all edges for a clean look.
Draw your design on paper at full size to check the spacing.
Think about adding simple decorative touches like small hearts or border designs. If using stencils, make sure they’re the right size for your board.
Test different layouts before committing to one.
Step 3: Transfer the Design
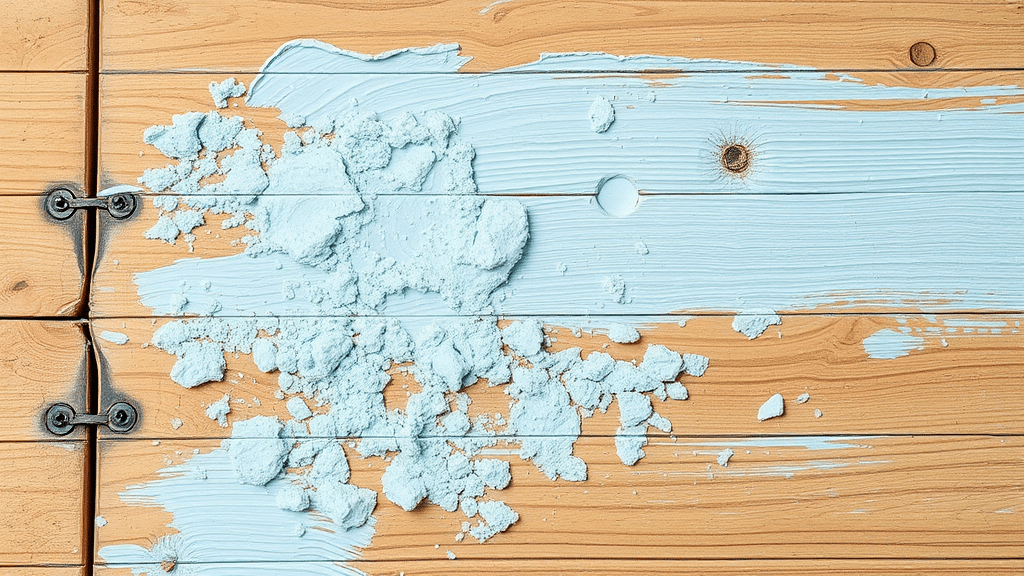
Paint your base color first – white chalk paint works great.
Apply two thin, even coats rather than one thick coat to prevent drips.
Let each coat dry for at least an hour.
Before adding letters, clean the surface well – chalk paint can be dusty.
If using transfer paper, tape it down firmly.
Clean the board with a slightly damp cloth for vinyl letters and let it dry completely. This helps letters stick better.
Mark your design center point to keep everything aligned.
Step 4: Paint the Sign
Mix your paint well before starting. Use a small brush for letters and details.
Work in sections to keep paint from drying too fast. Keep a damp cloth handy to fix any mistakes quickly.
When painting frame pieces, use wood glue first – put glue where raw wood meets raw wood.
Press pieces firmly and hold for about a minute. Use clamps if needed.
Paint the frame after it’s attached. Apply 2-3 coats depending on the color depth you want.
Step 5: Add Finishing Touches
Create a mix of black paint and water for splatters – use more water than paint. Test the splatter effect on paper first.
Hold a fan brush about 6 inches away and gently flick for tiny dots. Focus splatters around edges and corners.
For distressing, use water and gentle rubbing motions rather than heavy sanding. This creates a softer, worn look.
Add a final border design if desired. Let everything dry overnight before hanging.
Video Tutorial
Check out the video below by ‘Linda’s DIY by design’ for a step-by-step guide on how to create your own DIY farmhouse sign:
Tips for Personalizing Your Farmhouse Sign
1. Simple Decorative Elements
Start with basic shapes like circles, squares, or triangles.
Please place them in corners or between words.
Use small dots to create borders or separate text lines.
These simple additions make your sign look finished without being too busy.
2. Color Combinations
Begin with two colors that work well together.
White and black are classic choices. Paint your base in one color and details in another.
You can also water down your paint slightly to create lighter shades for backgrounds.
3. Adding Natural Touches
Try painting simple leaf shapes or small flowers.
Three or four petals are enough for a flower design.
Use dots for flower centers.
Space these designs evenly around your text to create balance.
4. Personal Details
Include special dates, home numbers, or family names.
Keep these details smaller than your main text.
Use basic arrows or dots to separate different pieces of information.
Make sure everything stays readable.
5. Border Designs
Create simple borders using straight lines or dots.
Paint them around the edge of your sign.
Keep borders thin – about half an inch wide works well.
This frames your work without taking attention from your main design.
Common Mistakes to Avoid When Making a DIY Farmhouse Sign
Making your first wooden sign should be an exciting and enjoyable adventure, not a frustrating one.
Here are seven common mistakes that beginners often encounter, along with easy tips to steer clear of them for a smooth and successful project.
1. Skipping Surface Preparation
Many beginners rush to paint without prepping their wood. A smooth base is key to a good-looking sign.
Start by sanding your wood with medium-grit sandpaper, then move to fine-grit for a perfect finish.
Wipe away all dust with a clean cloth before painting.
Good prep work means better paint adhesion and a smoother final look.
2. Using Too Much Paint
Thick paint layers seem like a shortcut but cause problems later.
Heavy coats can drip, bubble, or peel off. Instead, apply 2-3 thin, even coats. Let each layer dry completely before adding the next.
Yes, it takes longer, but your sign will look better and last longer.
3. Poor Text Planning
Starting to paint letters without measuring often leads to cramped or crooked text.
First, plan your layout on paper. Measure your board’s center point. Use light pencil marks to guide letter spacing.
If using stencils, tape them down and double-check alignment before painting.
4. Wrong Brush Techniques
Poor brush control creates messy lines and uneven coverage. Hold your brush at a 45-degree angle for better control.
Use the right brush size – small brushes for letters and larger ones for backgrounds.
Clean your brushes between colors and keep them damp while working.
5. Ignoring Drying Time
Touching paint too soon ruins your work.
Each paint layer needs proper drying time. Most chalk paints need at least an hour between coats.
Work in a well-ventilated area to speed drying. If you’re not sure, wait longer rather than risk smudging.
6. Uneven Distressing
Random sanding creates an unnatural, worn look.
Consider where real wear occurs – edges, corners, and high spots. Use light pressure when distressing.
Step back often to check your progress. You can always distress more but can’t undo too much sanding.
7. Frame Attachment Problems
Weak frame joints make signs look unprofessional.
Use wood glue on all frame pieces. Apply glue where raw wood meets raw wood.
Hold pieces firmly in place while glue sets. Add small nails if needed for extra strength. Clean up any glue that squeezes out right away.
Conclusion
Creating your wooden sign brings something special to your home.
With basic tools, paint, and a bit of patience, you can make signs that look as good as store-bought ones – maybe even better because they tell your story.
Remember to start with good wood prep, plan your design carefully, and take time with your paint layers.
Each step builds on the last to create something you’ll be proud to hang. Don’t worry if your first try isn’t perfect – that’s part of the handmade charm.
The best part?
You can make more signs anytime. Change up colors, try new designs, or make them as gifts. Each piece you create adds your personal style to your space.
So grab your supplies and start creating – your walls are waiting for something special that only you can make.