
Want to turn your garden into a serene oasis without breaking the bank?
A DIY solar fountain could be just the solution you’re looking for! Imagine relaxing to the soothing sound of flowing water, knowing your fountain runs entirely on solar power – no electricity bills, no hassle.
No matter if you’re a seasoned DIY enthusiast or a first-timer, this guide will walk you through every step of creating your own eco-friendly, cost-effective solar-powered fountain.
In just a few hours, you’ll have a beautiful addition to your garden that blends beauty, sustainability, and serenity. Get ready to refresh your outdoor space and add a touch of beauty and tranquility that will leave your guests in awe!
Why a DIY Solar Fountain is Perfect for Your Garden
A solar-powered fountain adds both beauty and function to your garden. The soft water sounds create a peaceful setting that helps block out street noise, allowing you to relax outdoors.
Many garden owners find that these water features become their favorite spots for daily rest.
These fountains work using sunshine instead of household electricity. This means they won’t affect your power bill and don’t harm the environment. Garden enthusiasts who prioritize green options often find solar fountains to be a sensible choice.
Solar fountains need very little care compared to electric models. They have simpler parts, don’t require complicated wiring, and operate without needing nearby outlets.
Most solar pumps require only basic cleaning from time to time, making them ideal for busy individuals who want to enjoy the beauty of their garden with minimal effort.
Materials Required for a DIY Solar Fountain
To create your solar fountain, you’ll need to gather these materials before starting the project:
| Material | Description | Quantity |
|---|---|---|
| Resin Planter (15×21 inches) | Large planter for the main structure of the fountain | 1 |
| Black Round Hanging Planter | Acts as the water reservoir | 1 |
| Gorilla Glue Silicone Caulk | To seal holes and prevent water leakage in the reservoir | 1 tube |
| Glass Mug | Used to elevate the fountain pump inside the reservoir | 1 |
| Solar Fountain Pump | Submersible pump with solar panel (does not require electricity) | 1 |
| Concrete Blocks | Provides stability to prevent the planter from tipping over | 2 |
| Mulch | For covering the concrete blocks and enhancing appearance | Enough for garden bed |
| Flowers | Plants for decorating the garden bed around the fountain | As desired |
| Solar Lights (optional) | For decorative lighting around the fountain | As desired |
| Bricks | To add extra weight inside the planter for stability | As needed |
Tools Required
- Spade Drill Bit: Tool to create a hole in the bottom of the planter
- Serrated Knife: For enlarging the hole in the resin planter
These materials can be found at most home improvement stores, garden centers, or online retailers. The total cost typically ranges from $50-100 depending on the quality of components you select.
Step-by-Step Guide to Creating Your DIY Solar Fountain
Build your eco-friendly solar fountain with basic materials and simple steps that anyone can follow.
Step 1: Prepare the Planter
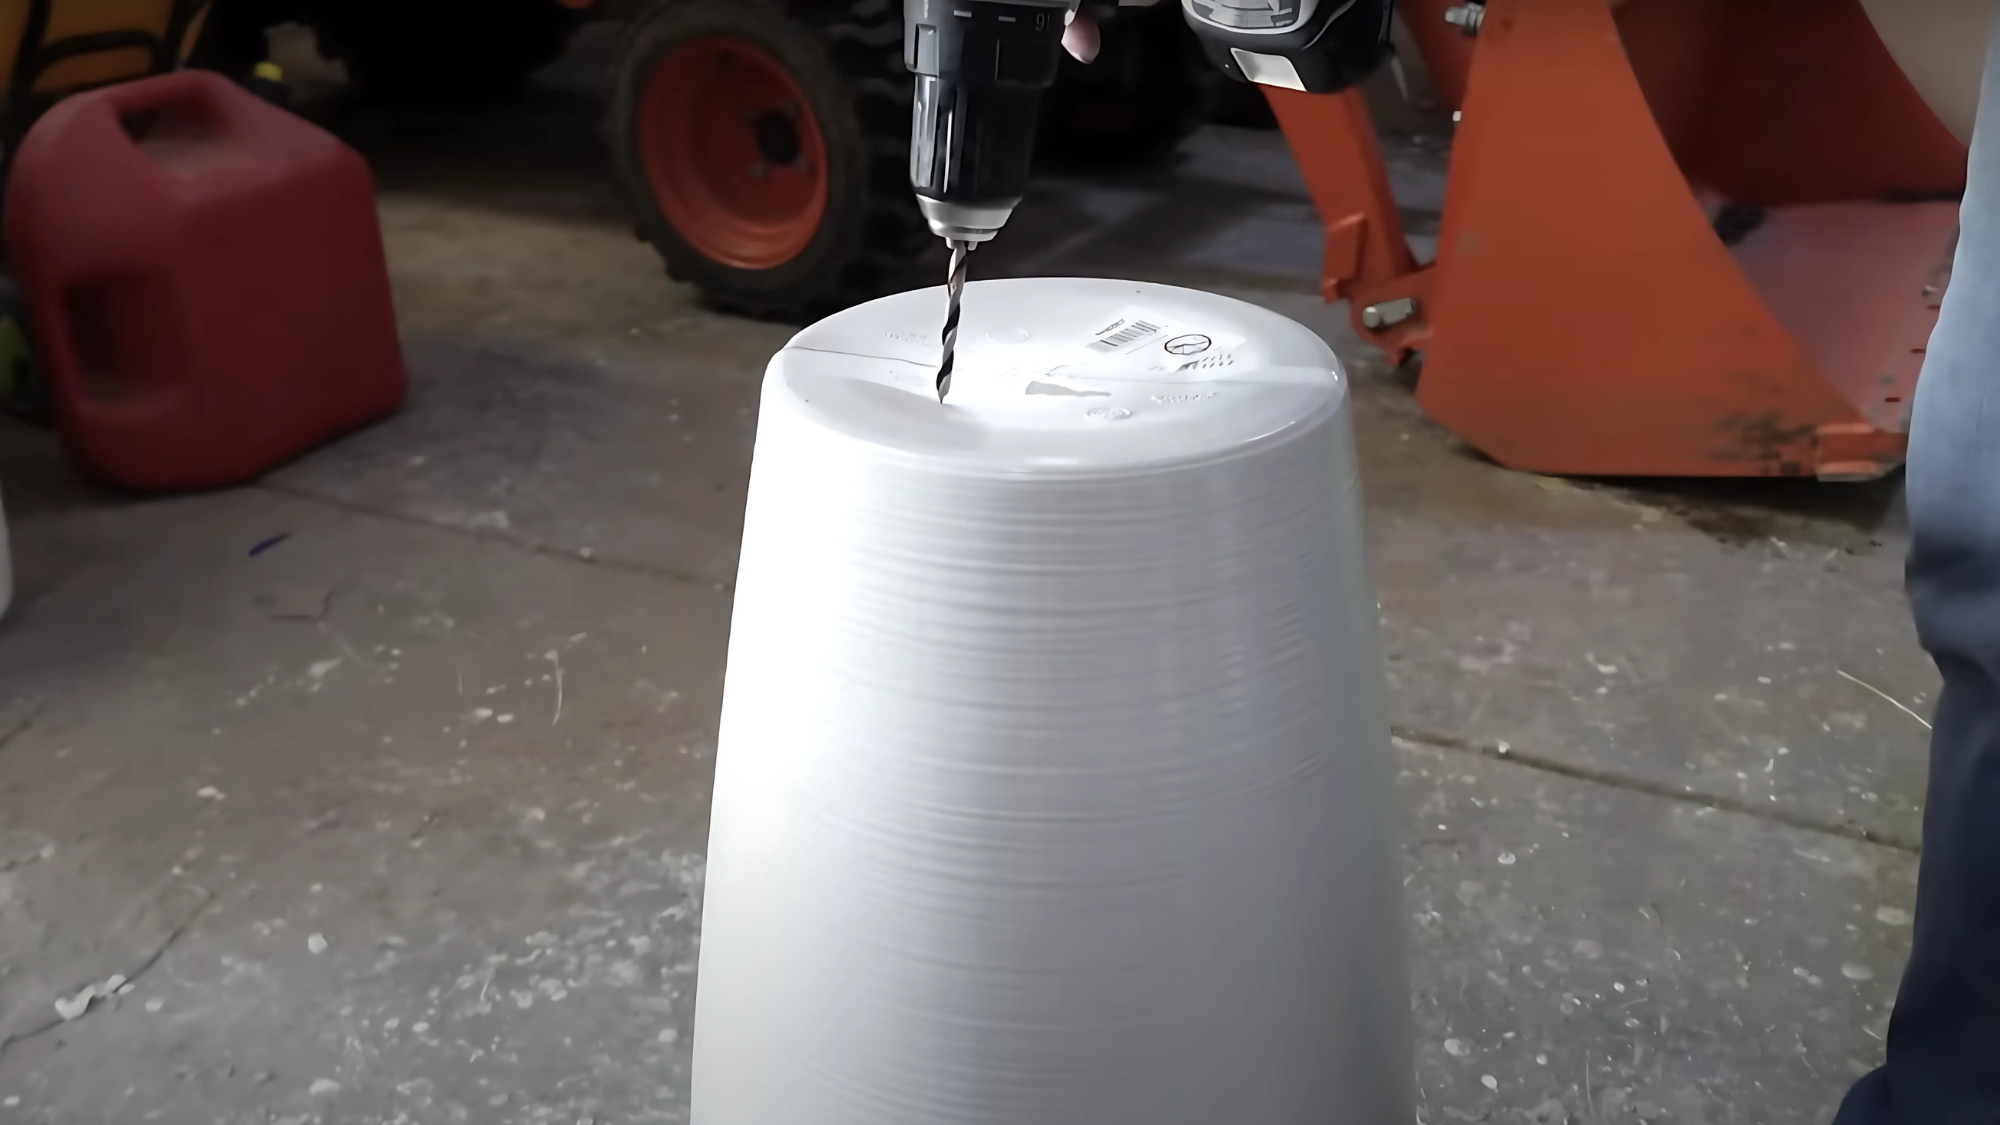
Select a sturdy resin planter, approximately 15×21 inches, that suits your garden style. Turn it upside down and drill a hole in the center using a spade bit. Use a serrated knife to widen the hole just enough for the pump cord to pass through comfortably without damaging it.
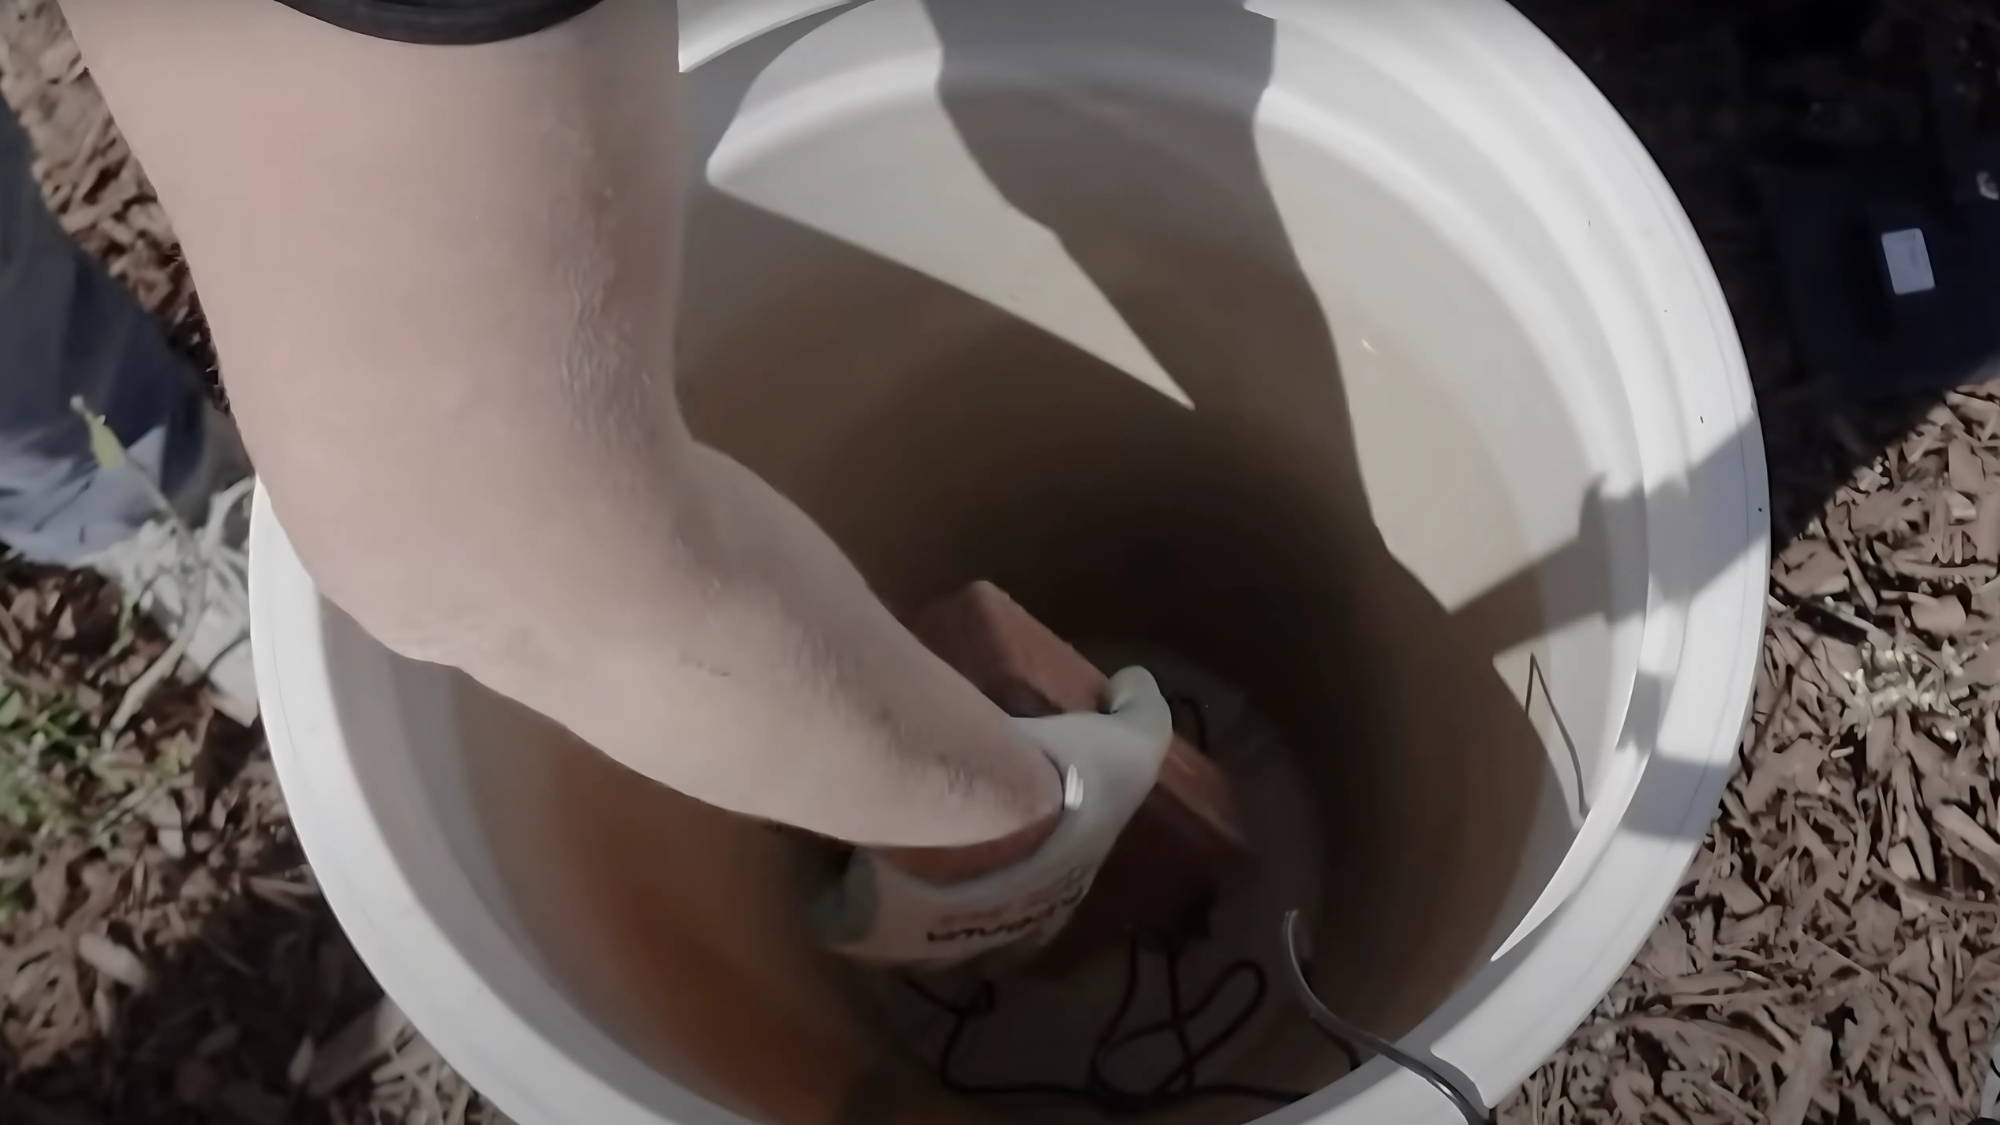
Step 2: Set Up the Water Reservoir
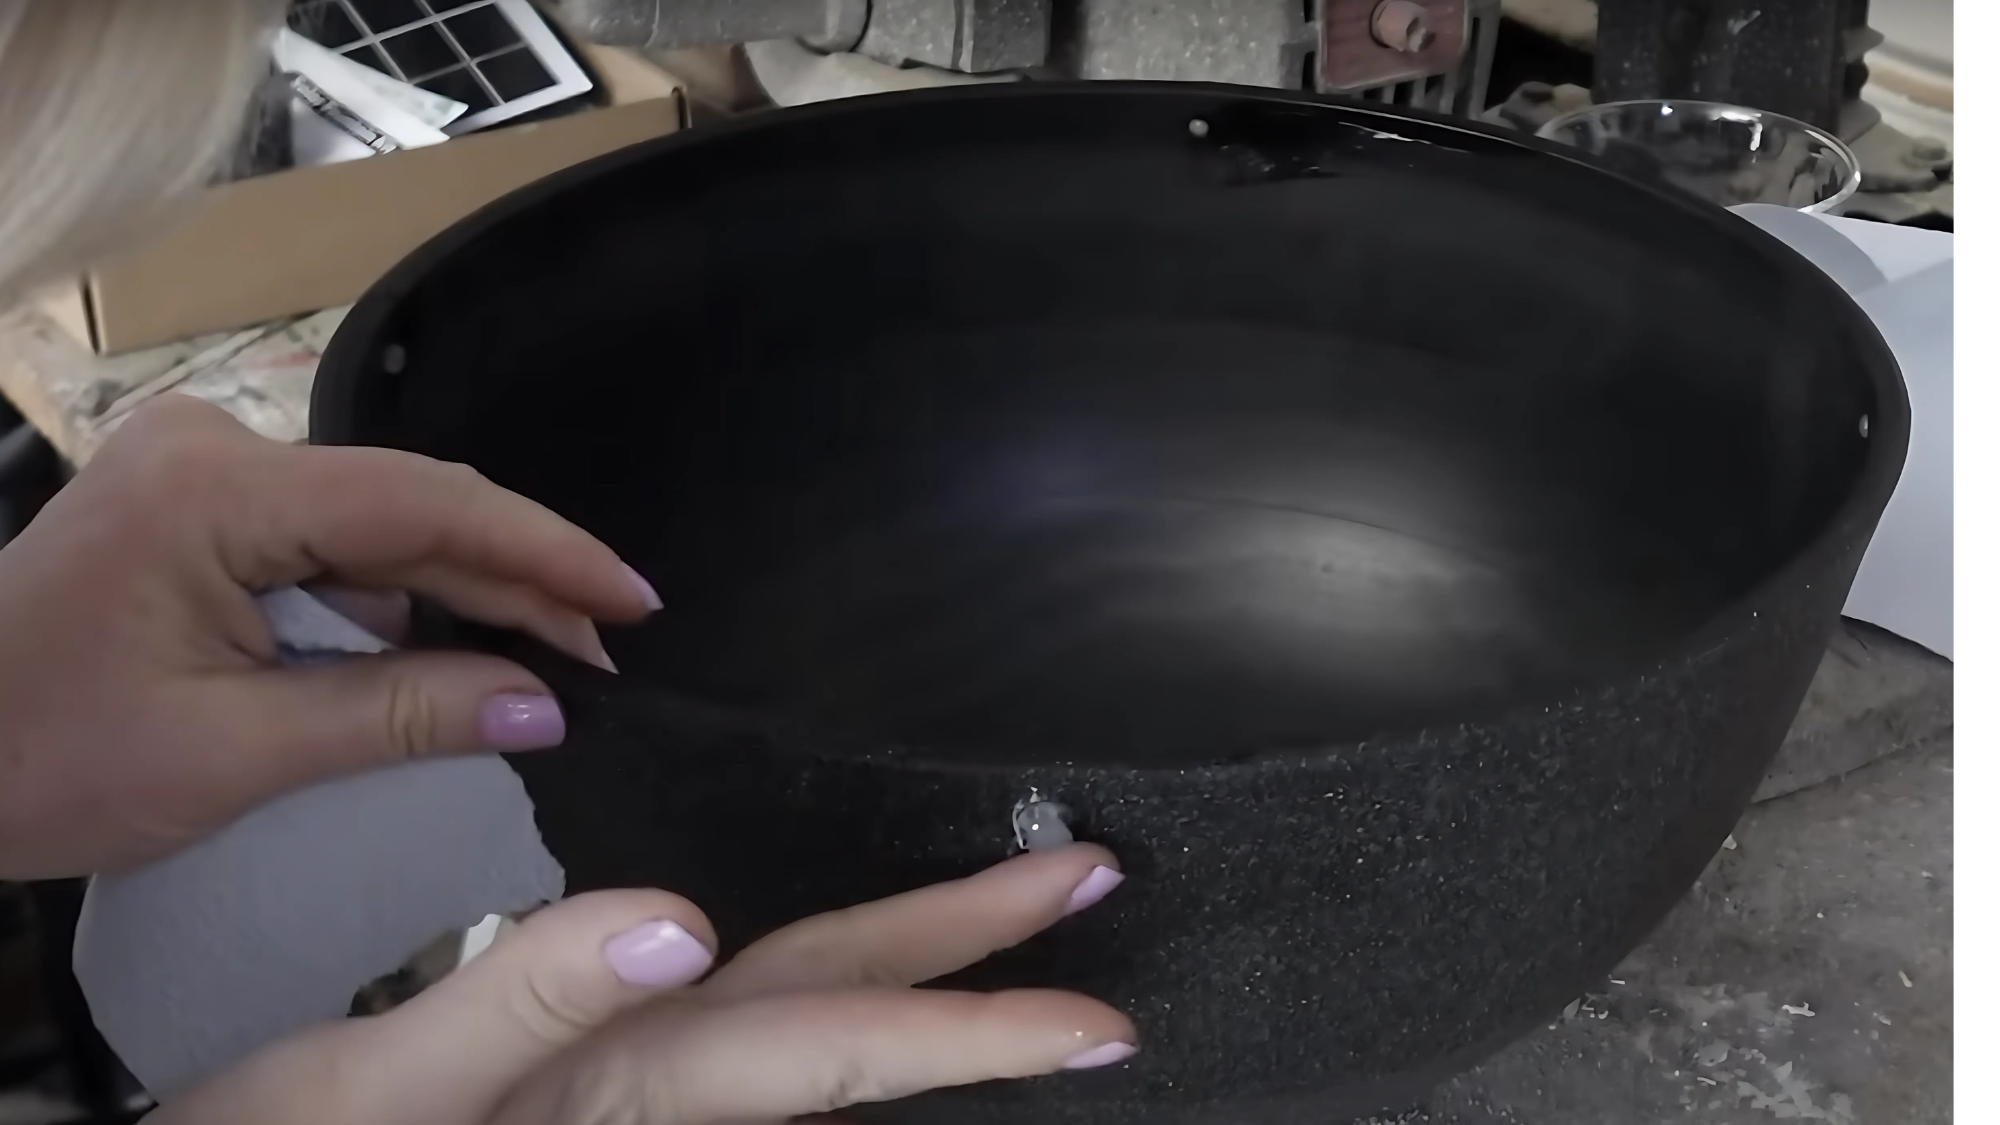
Use the black round hanging planter as your water container. Check for drainage holes and seal them completely with silicone caulk. Let the caulk dry for 24 hours, then test it by filling the area with water to confirm there are no leaks before proceeding to the next step.
Step 3: Elevate the Fountain Pump
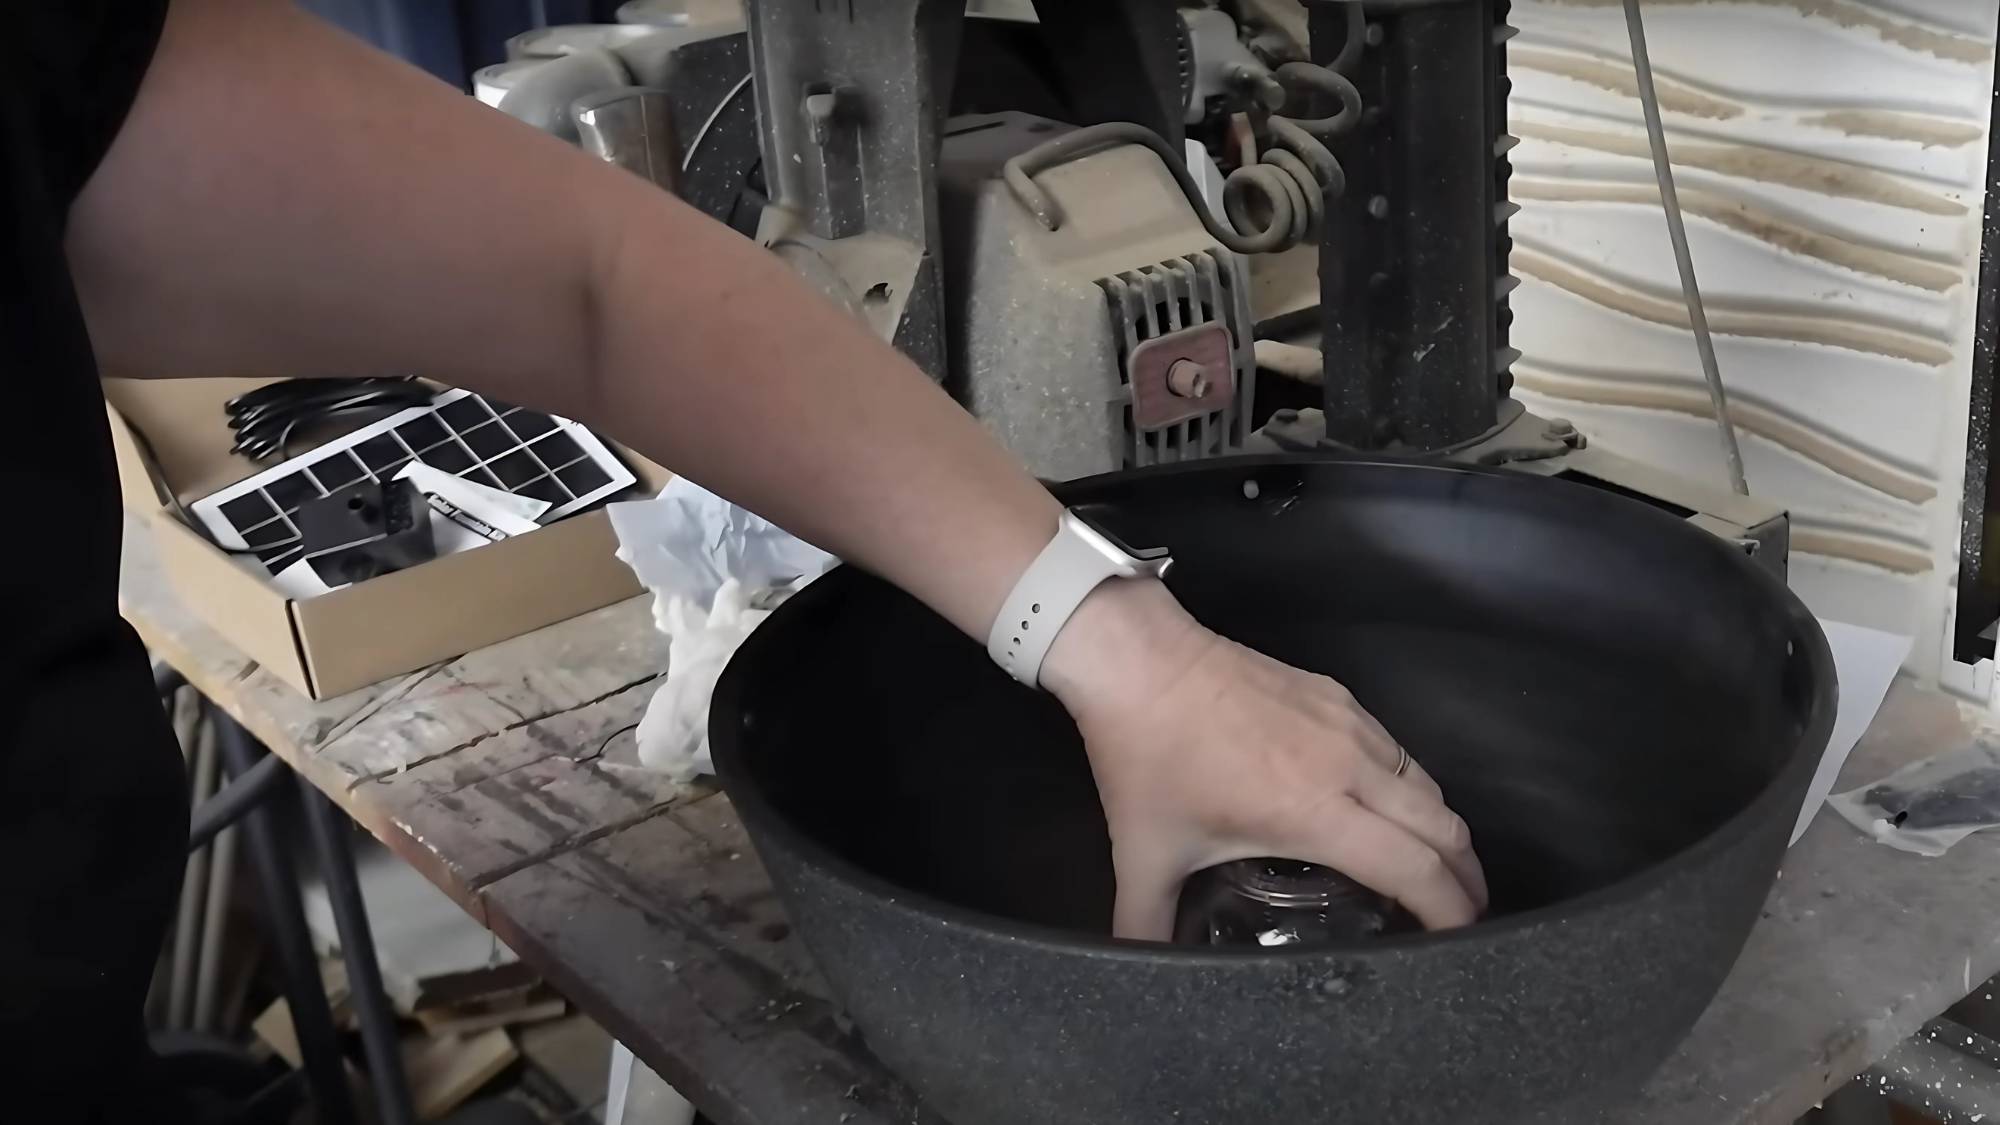
Place a glass mug upside down in the center of your water reservoir. This creates a stable platform that lifts your pump to the proper height. Apply silicone caulk around the base of the mug to secure it to the bottom of the reservoir for extra stability.
Step 4: Adding Stability with Concrete Blocks
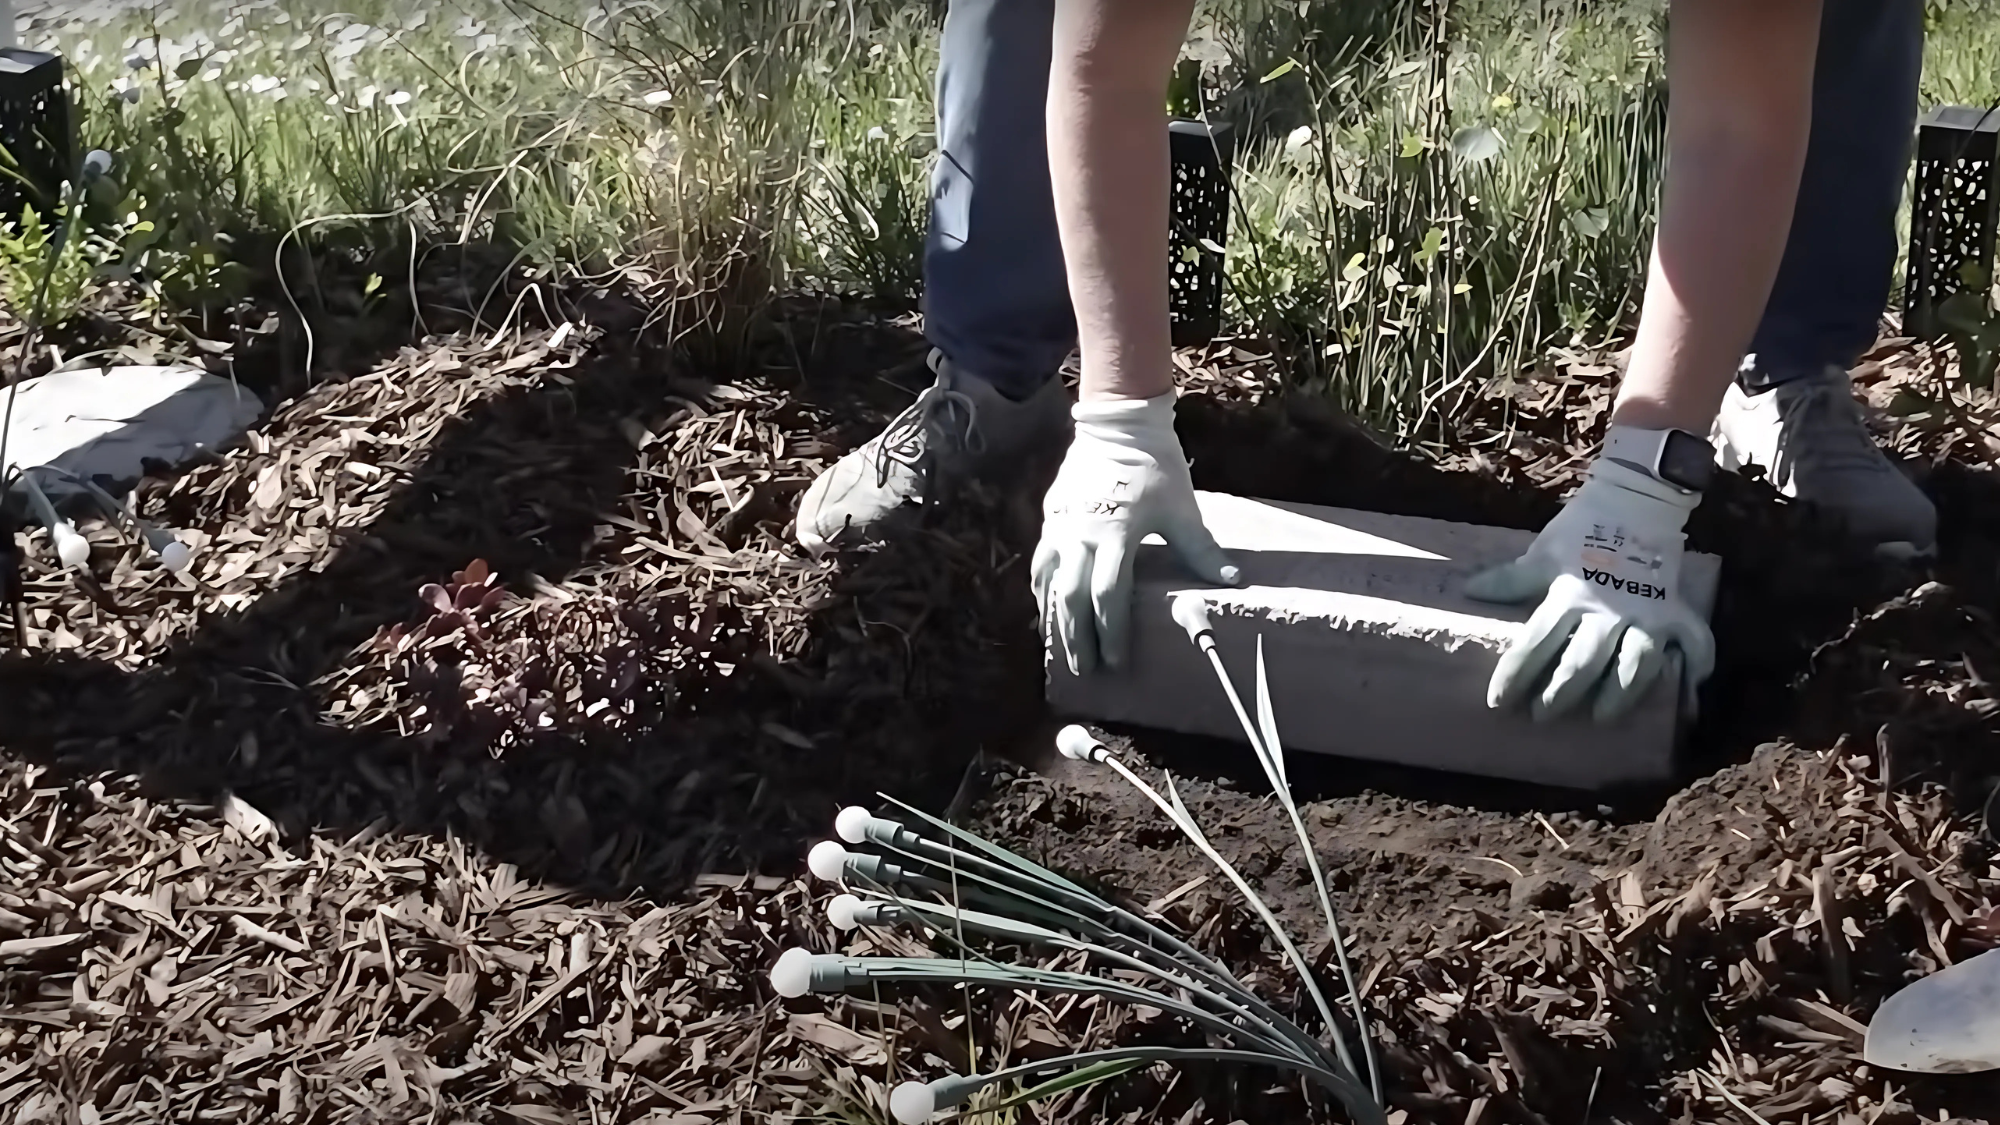
Position the concrete blocks on level ground where you want your fountain to be. Arrange them to evenly support the weight of the filled planter. Cover the blocks with mulch to hide them while maintaining the stability they provide to your water feature.
Step 5: Install the Solar Fountain Pump
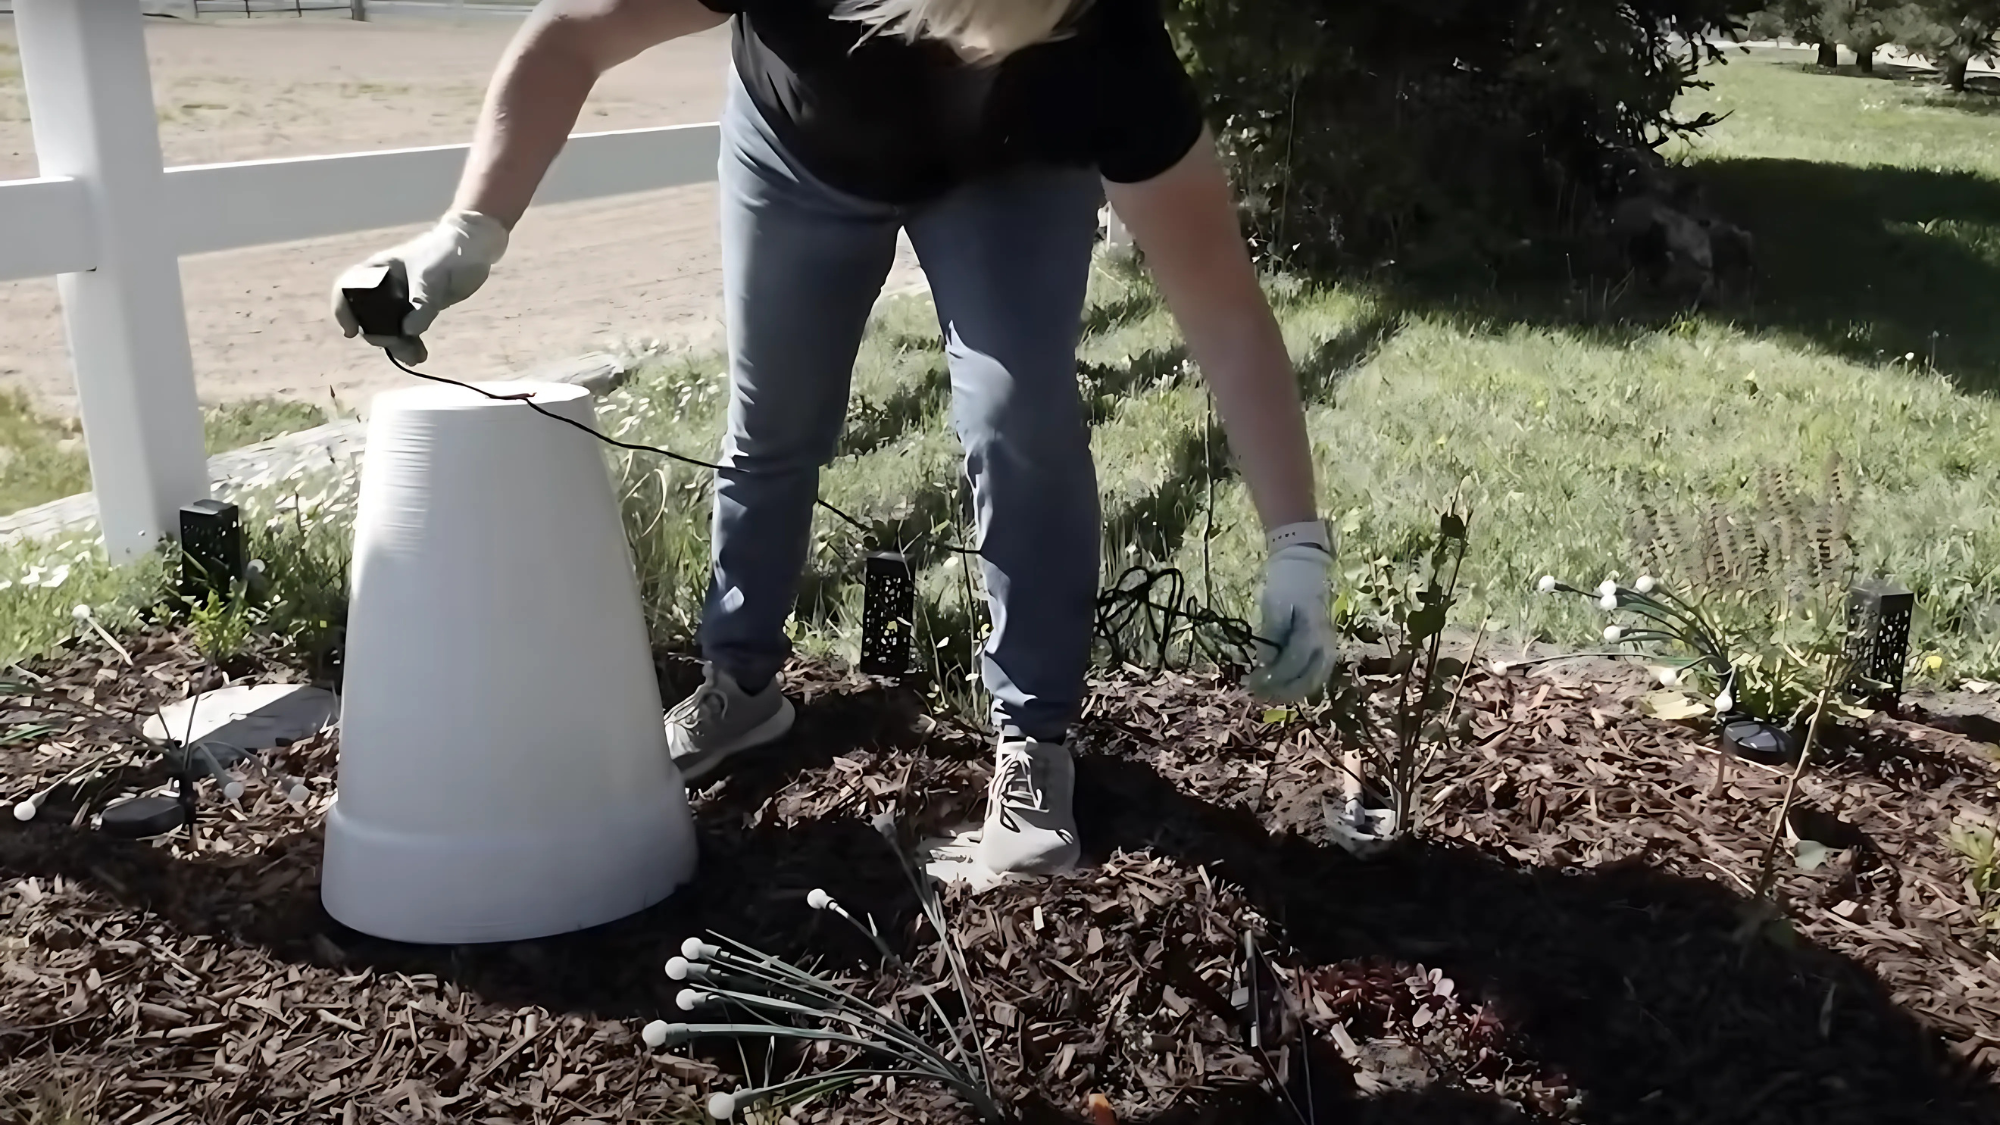
Set the pump on top of the glass mug and thread its cord through the hole in the planter. Place the planter over the water reservoir, making sure the cord exits cleanly. Position the solar panel to receive maximum sunlight throughout the day.
Step 6: Secure the Planter and Add Weight
Place bricks or stones inside the main planter around the edges to add weight and prevent tipping from wind. This added mass helps keep your fountain stable during weather changes while maintaining its visual appeal.
Step 7: Position the Solar Panel for Maximum Sunlight
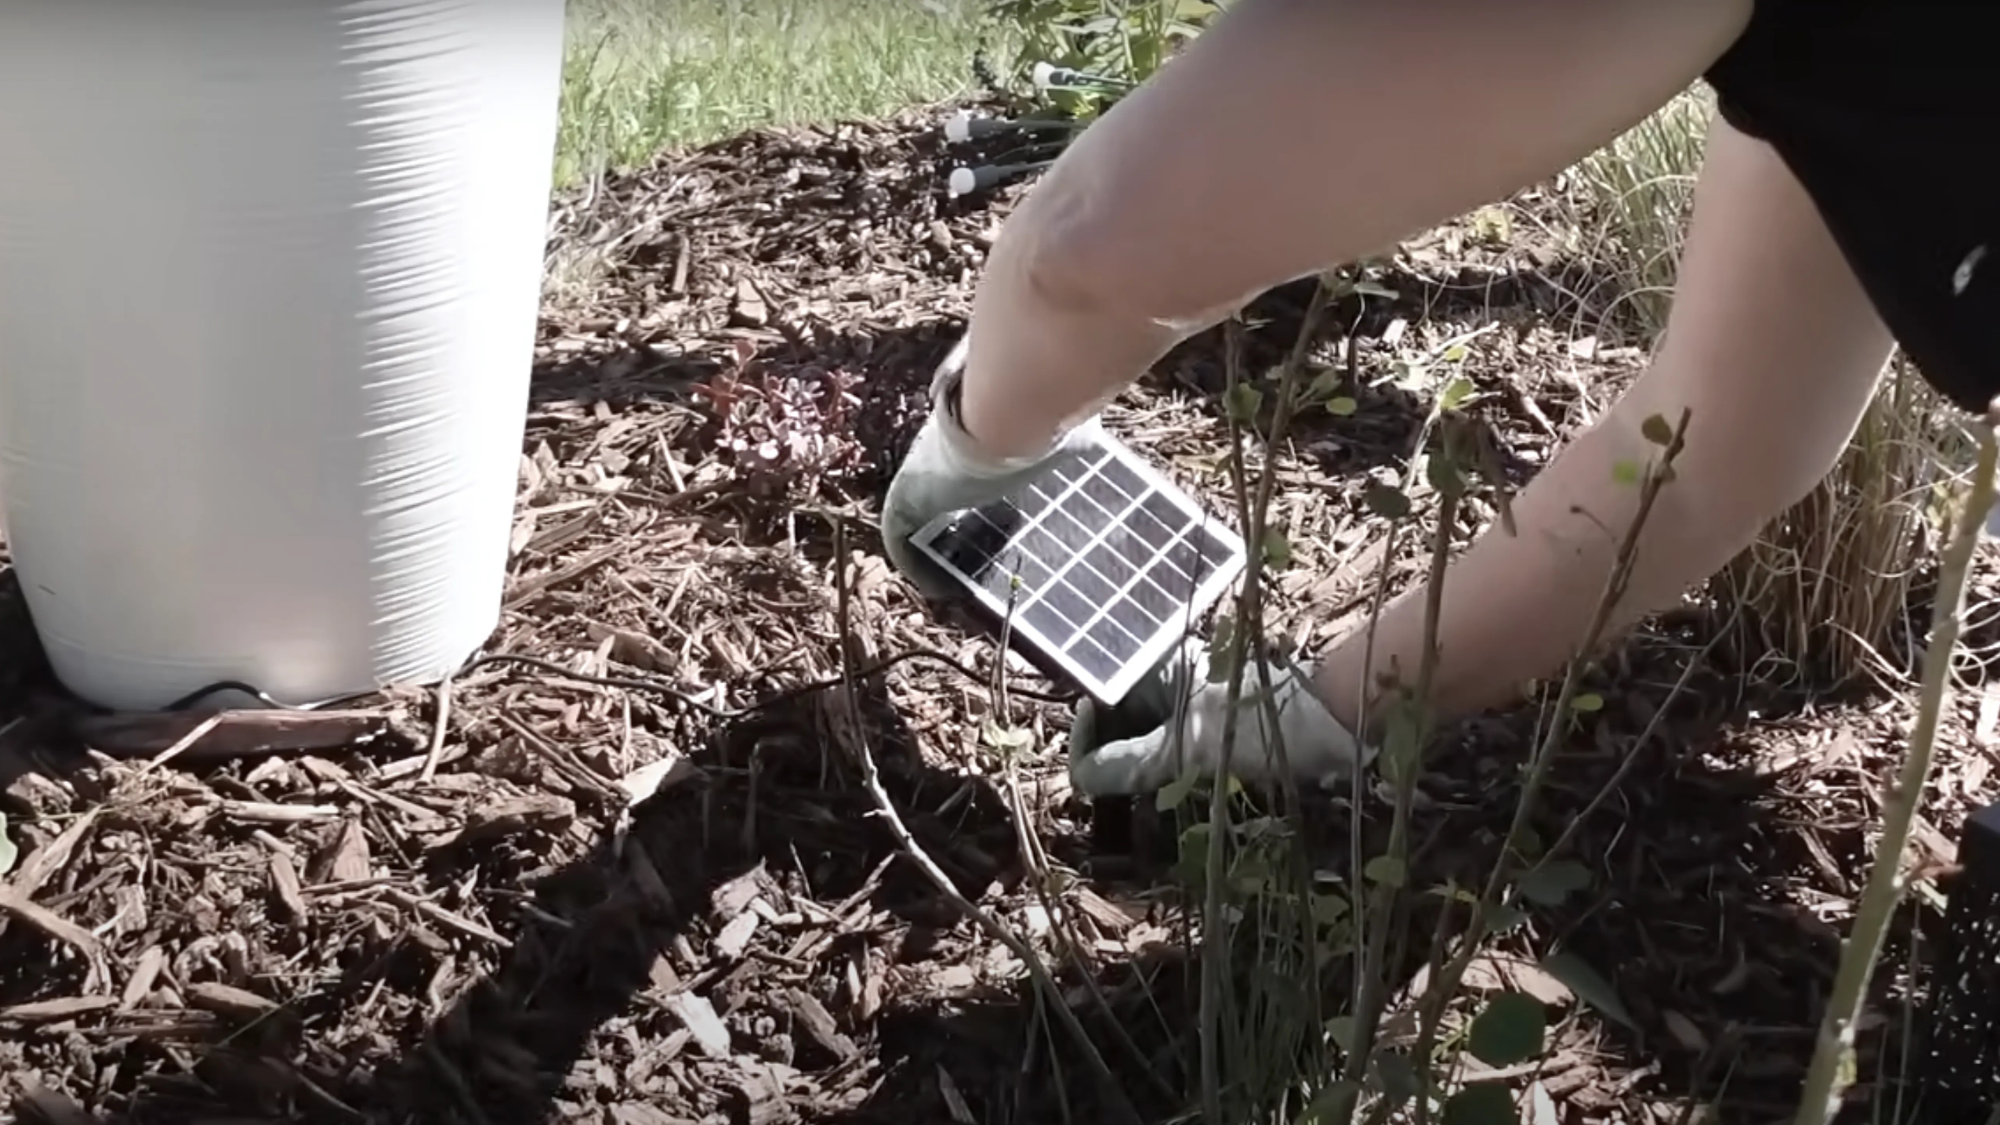
Position the solar panel in a location that receives direct sunlight for most of the day. The panel can be placed up to 10 feet away from the fountain, if needed, to catch more sunlight. Angle it toward the south for best results.
Step 8: Plant Flowers and Add Final Decorative Touches
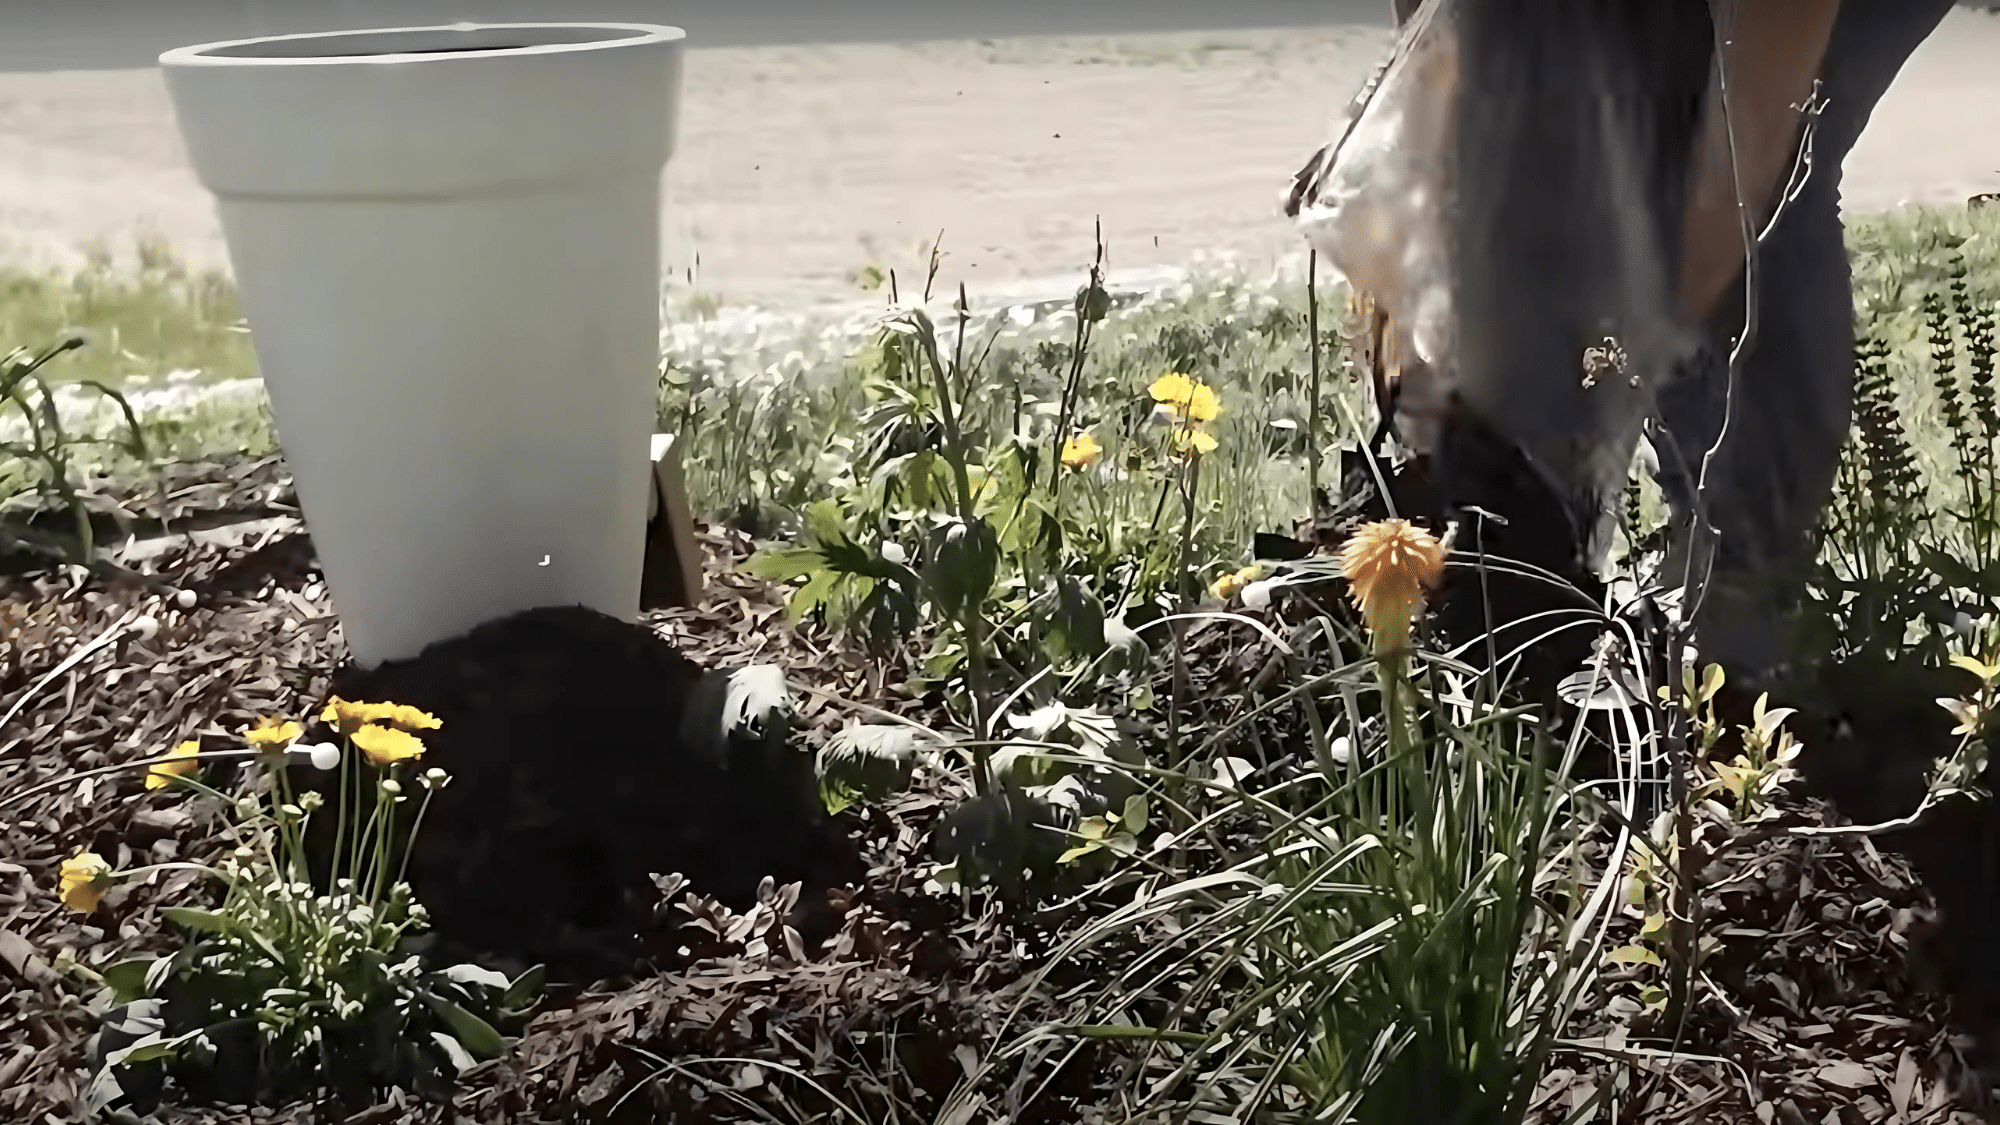
Add soil to the planter and plant flowers around the edges. Choose plants that thrive in moist conditions. Add decorative stones or moss to cover exposed soil. Include solar lights if you want your fountain to have evening visual interest.
Step 9: Test Your Fountain and Adjust Settings

Fill the reservoir with water until it’s about an inch below the rim. Turn on the pump and test different nozzles to find your preferred water pattern. Make final adjustments to water flow and solar panel position for optimal performance.
Video Tutorial
For more information, check out this video tutorial by DIY Diva.
3 Creative Ideas for Your DIY Solar Fountain
Turn your outdoor space into a water feature showcase with these practical and budget-friendly solar fountain projects you can build yourself.
1. Create a Multi-Tiered Fountain
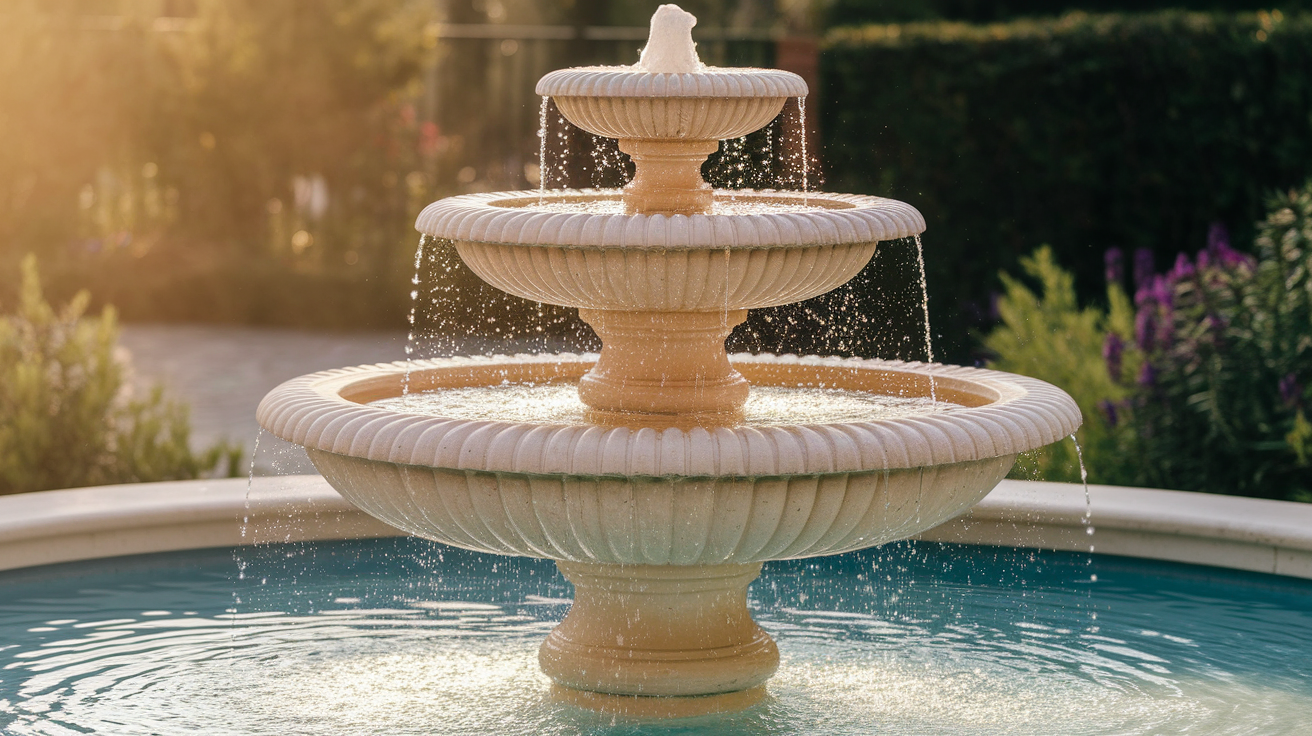
Create a more elaborate, tiered fountain by using different-sized planters or bowls to achieve a cascading effect. The varying heights will add more visual interest and create soothing water sounds as the water flows from one level to the next. To construct this:
- Stack containers of gradually decreasing sizes
- Use sturdy supports between each tier
- Ensure proper water flow between levels with small tubes or channels
- Add river rocks or glass beads for additional texture and visual appeal
2. Add LED Lights for Evening Ambiance
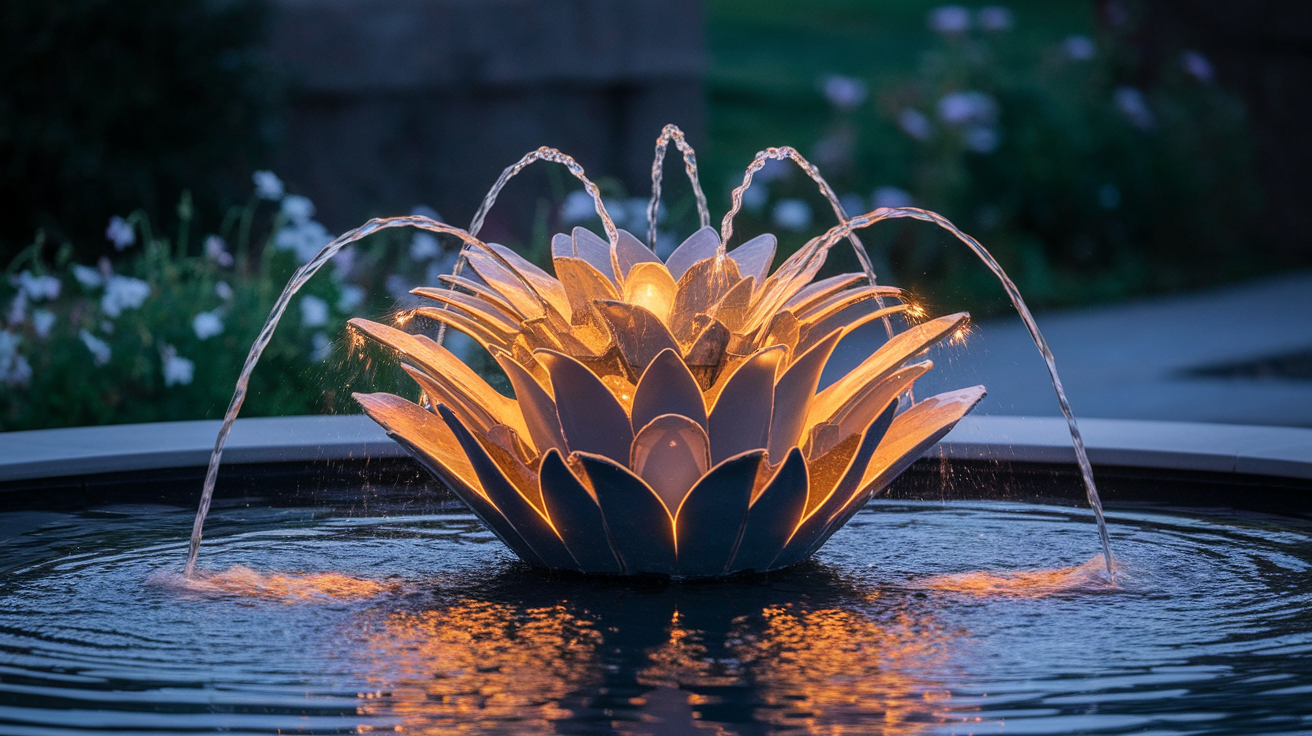
Enhance your solar fountain by adding solar-powered LED lights around the base or beneath the water. The gentle glow in the evening will create a magical atmosphere and highlight the flowing water feature, perfect for nighttime relaxation. Consider:
- Submersible waterproof lights placed directly in the water
- String lights wrapped around the base or nearby plants
- Color-changing options for different moods
- Positioning lights to create interesting shadow patterns
3. Use a Recycled Container for an Eco-Friendly Fountain
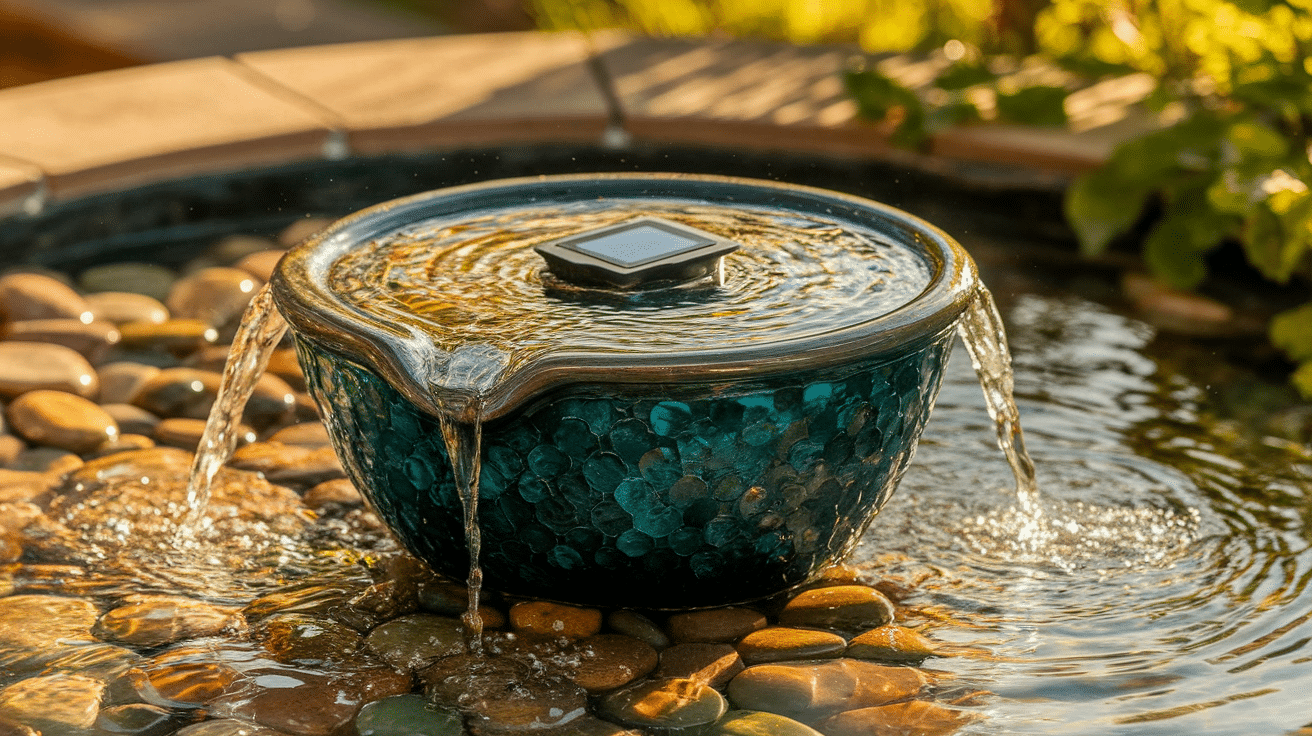
Repurpose an old container, such as a rustic watering can, a vintage bucket, or an unused vase, to create a unique and eco-friendly solar fountain. This upcycled approach adds character to your garden while reducing waste. Some ideas include:
- Old ceramic pots with interesting patterns
- Metal watering cans for a country garden feel
- Vintage teapots or coffee pots for whimsical charm
- Worn wooden barrels cut to size for a rustic look
Conclusion
Congratulations on creating your very own solar-powered fountain! This project not only enhances the beauty of your garden but also offers a sustainable, low-maintenance solution that can be enjoyed for years to come.
From carefully selecting materials to adding your decorative touches, you now have the freedom to make this fountain truly your own.
Plus, the satisfaction of completing a DIY project that’s both eco-friendly and visually stunning is unmatched.
Share your DIY fountain creations with us and inspire fellow garden enthusiasts to embark on their projects.
Frequently Asked Questions
How Much Maintenance is Required for a Solar Fountain?
Clean the pump monthly to prevent clogging. Check water levels weekly and refill as needed.
Can I Use a Solar Fountain Indoors?
Yes, if placed near a sunny window, but performance will be limited compared to outdoor placement.
What Happens if There Isn’t Enough Sunlight for My Solar Fountain to Work?
The pump will run slower or stop. Consider moving the solar panel or adding a battery backup.
