

Ever opened a drawer and watched everything slide around like a mini earthquake hit? That tangled mess of pens, hair ties, and mystery items is all too familiar.
Messy drawers waste time. They create stress. They make simple tasks feel impossible. But drawer dividers can change everything. These simple tools turn chaos into order. They give every item its perfect spot.
Store-bought dividers often don’t fit right. They’re expensive too. Additionally, they rarely meet your needs. Custom dividers solve all these problems.
They fit your drawer perfectly. They create the exact compartments you want. Best of all, they cost almost nothing to make.
All it takes is some cardboard, a few basic tools, and about 30 minutes. With materials you probably already have at home, anyone can create professional-looking drawer dividers.
Why Make Your DIY Drawer Dividers?
Making drawer dividers yourself is a smart move. Store-bought options cost $15 to $50 and rarely fit right. DIY dividers cost almost nothing. That cardboard box from your last delivery works perfectly.
Custom dividers fit your exact drawer size, eliminating gaps and wasted space. You create compartments that match your storage needs. Need a spot for tiny screws? Make it. Want a long section for rulers? Easy.
Plus, repurposing cardboard helps the environment. Those shipping boxes get a second life instead of heading to the landfill. When they eventually wear out, they decompose naturally.
It’s organizing that saves money, reduces waste, and feels good too.
Tools and Materials Needed for DIY Drawer Divider
The foundation of any successful drawer divider project begins with proper preparation and having the right tools at your disposal.
Having the right tools makes the difference between a frustrating project and a smooth, enjoyable experience.
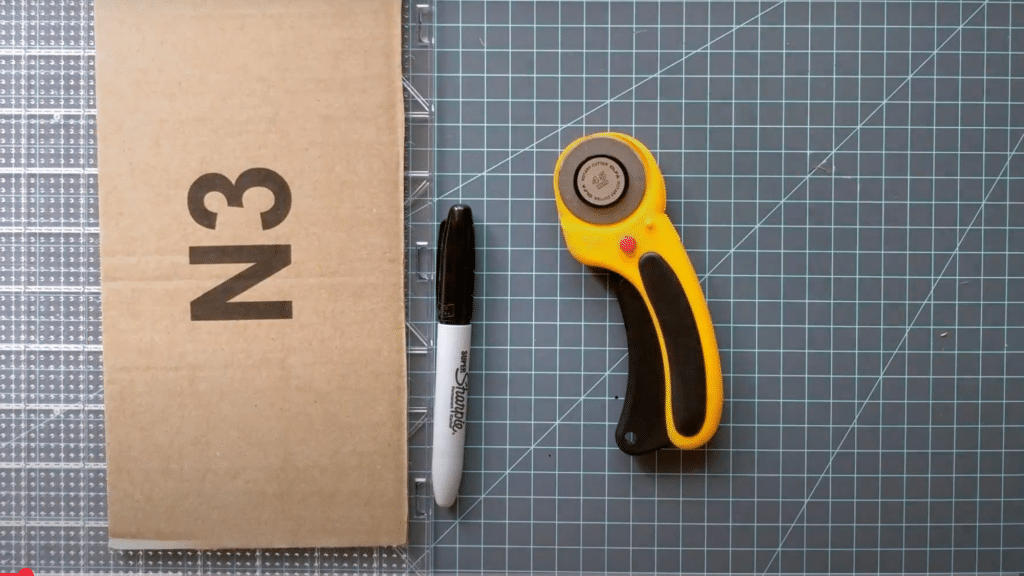
| Tool | Description |
|---|---|
| Rotary Cutter (or Xacto knife) | Used to make precise cuts on the cardboard. Ideal for clean edges. |
| Sharpie | For marking measurements and reference lines on the cardboard. |
| Straight Edge (Ruler or PE Bead Board) | Helps to create straight lines and measure out exact dimensions. |
| Cardboard | Used as the material for creating the divider pieces, often repurposed from packaging (e.g., Amazon box). |
This initial step is crucial because it sets the stage for precise measurements and clean cuts that will determine the final quality of your divider system.
Step-by-Step Tutorial for Crafting DIY Drawer Dividers
This budget-friendly solution uses basic materials you probably already have at home and takes less than an hour to complete.
Step 1: Measure the Drawer
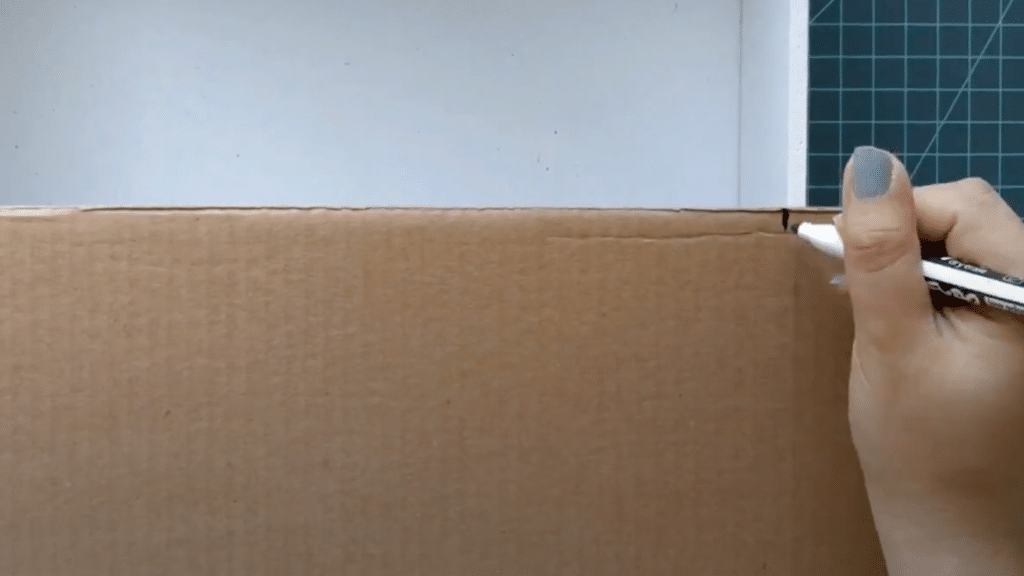
Measure the height and width of the drawer to ensure the divider fits properly. Use the straight edge to create a reference line and mark the dimensions on your cardboard.
Accurate measurement is the cornerstone of a well-fitting drawer divider, so take your time during this crucial phase.
Remove all contents from the drawer and measure the interior dimensions carefully. Double-check all measurements before proceeding to cut.
Step 2: Create First Template

Creating an accurate first template is essential because this piece will serve as the master pattern for all subsequent pieces in your divider system.
The template ensures consistency across all components and helps maintain the precise measurements needed for proper interlocking functionality.
Using your rotary cutter, cut out the first template based on the measurements you’ve taken. This template will serve as the reference for the other pieces you’ll make.
Work slowly and steadily, maintaining consistent pressure to ensure clean edges that will fit together precisely during assembly. Once completed, this template becomes your master pattern.
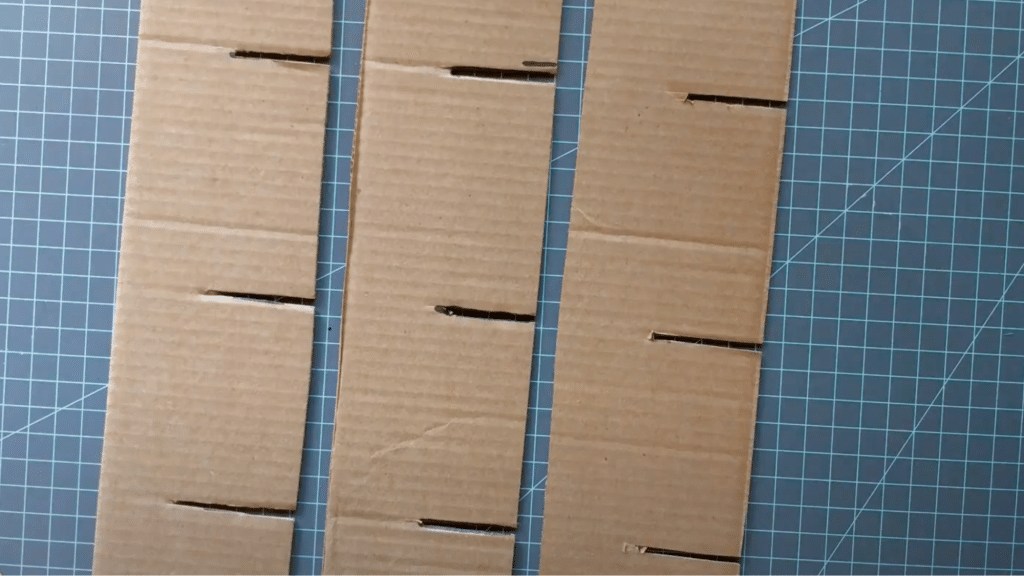
Step 3: Cut Slots

The interlocking system is what changes individual cardboard pieces into a stable, functional divider grid that can support the weight of your stored items.
This step requires precision and patience, as the slits must be cut to exact specifications to ensure the pieces fit together snugly without being too tight or too loose.
The intersecting design distributes weight evenly across the entire structure, creating a surprisingly strong and durable storage solution.
After creating the first template, measure and mark where the slits need to be cut on the cardboard pieces that will interlock. Cut the slits just wide enough to fit the other pieces in.
Step 4: Create Intersections
Repeat the process for the second set of pieces, ensuring each piece fits snugly within the slits of the other.
The perpendicular pieces that will intersect with your first set require the same careful attention to measurement and cutting precision.
Mark the slit locations on these pieces so they align perfectly with the slits on your first set, creating a grid pattern that locks together securely.
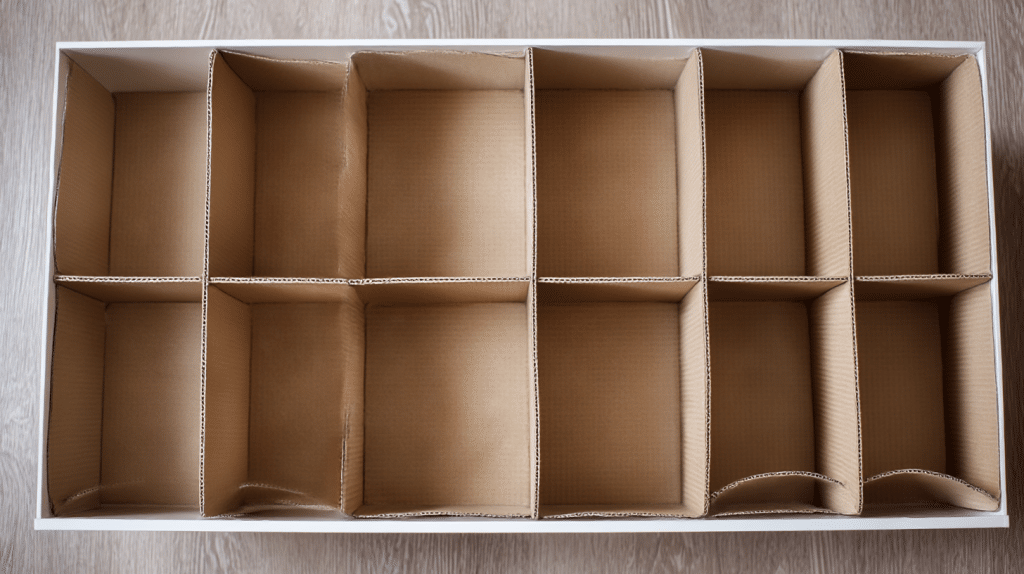
Step 5: Interlocking the Pieces

Interlock the pieces by placing one on top of the other like a puzzle. Ensure the pieces are aligned correctly and fit snugly. Check that all intersections create perfect right angles and that the pieces are flush with each other at the joint points.
If any pieces seem too tight, carefully trim the slit width with your rotary cutter rather than forcing the assembly, which could tear the cardboard or create weak joints.
Step 6: Final Fitting

Place the divider into the drawer. Make any necessary adjustments to ensure it fits well. You can add fabric or a stiffer material for a more polished look.
Test the drawer’s full range of motion to ensure your divider doesn’t prevent smooth opening and closing, and verify that the compartments are the right size for your intended storage items.
Drawer Divider DIY: Video Tutorial
Check out the video below by @Periodic Lab for a step-by-step guide on DIY Drawer Divider.
Budget-Friendly Drawer Divider Hacks
Creating practical drawer dividers doesn’t require expensive materials or fancy tools when you know the right tricks. Everyday household items can be changed into perfectly functional organizers with just a little creativity and effort.
These budget-friendly hacks prove that innovative organization solutions come from resourcefulness rather than spending lots of money at specialty stores.
Cost Effective
When creating DIY drawer dividers, there are several material options to consider. Cardboard is an affordable choice, costing $1 to $5 per sheet, is easy to cut but less durable.
Plastic ranges from $5 to $20 per sheet, offering a lightweight, easy-to-clean option, though it may not be as durable as wood.
For a more durable option, wood (plywood or MDF) costs $10 to $30 per sheet, offering long-lasting sturdiness. Each material provides a different balance of cost, durability, and customization for your project.
Custom Fit and Design
DIY dividers can be sized and shaped to fit your exact drawer dimensions and storage needs, ideally without any wasted space.
You choose the number of compartments, their sizes, heights, and the materials that match your home’s beauty and style preferences.
This personalized approach ensures every item has its designated place while accommodating oddly shaped items that standard organizers can’t handle. You can create angled sections, varying depths, or specialized slots that work specifically for your unique collection of belongings.
Eco-Friendly Upcycling
Creating dividers from household materials like cereal boxes, shoe boxes, toilet paper tubes, or leftover wood reduces waste significantly while saving money.
This environmentally conscious approach gives new life to items that would otherwise end up in landfills or recycling centers.
Repurposing materials also teaches valuable sustainability habits while solving your organization’s challenges creatively and responsibly. Old magazines, fabric scraps, and even plastic containers can be changed into functional dividers that serve your specific needs perfectly.
Tips and Tricks for a Better DIY Drawer Organizer
Creating great drawer dividers goes beyond just cutting cardboard pieces. Small tweaks and smart choices make a huge difference in the final result.
These helpful tips turn a basic project into something that looks professional and lasts longer.
| Tip/Trick | Description |
|---|---|
| Repurposed Materials | Use old cardboard or packaging to create eco-friendly, cost-effective dividers. |
| Adjusting the Design for Drawer Size | Measure drawer height and depth to customize dividers for a perfect fit. |
| Maximizing Compartment Use | Plan compartments based on item size—use smaller sections for tiny items and larger sections for larger ones. |
These simple trickschangeordinary cardboard into surprisingly durable drawer organizers. The best part? Most improvements cost nothing extra and take just minutes to implement.
Conclusion
Your messy drawer days are officially over. With just some cardboard and basic tools, you’ve learned how to create custom dividers that work.
No more digging through tangled messes. No more items sliding around every time you open a drawer.
The best part? This project costs almost nothing. Those shipping boxes finally have a purpose beyond sitting in the recycling bin. Your drawers get organized. The planet gets a break from unnecessary waste.
What materials did you use for your DIY drawer dividers? Drop a comment below and share your creative solutions.
Did you try fabric covering? Use cereal boxes? Found an unexpected material that worked perfectly? Your tips might inspire someone else’s organizing breakthrough!
Frequently Asked Questions
What Materials Are Best for Making Diy Drawer Dividers?
If you’re looking for durability, wood is a great option, while foam board or cardboard is perfect for lighter, more flexible dividers.
How Do I Measure My Drawers for Custom Dividers?
To measure for custom dividers, first measure the length, width, and height of your drawer. Then, decide how many compartments you want to create.
What Tools and Supplies Do I Need to Make My Drawer Dividers?
You’ll need a measuring tape, a utility knife or scissors (depending on the material), glue or screws (for wood), and optional materials like fabric or paint for customization.