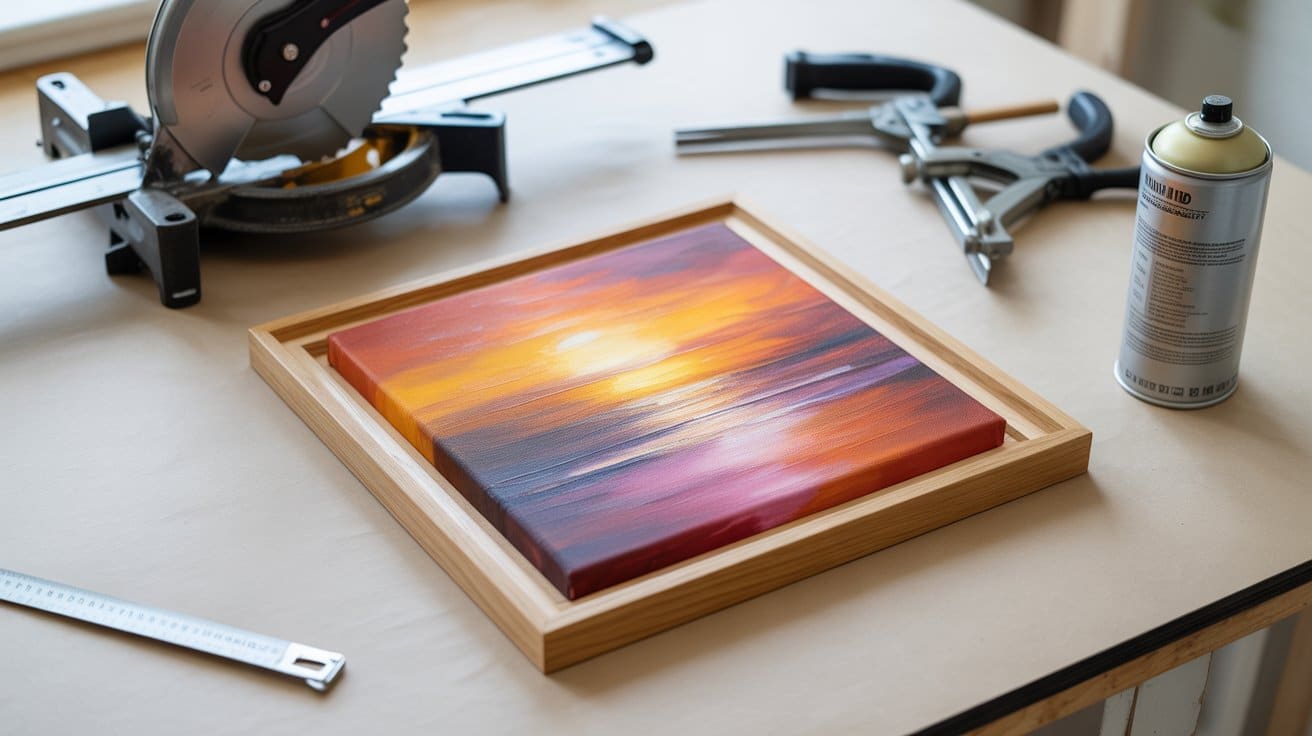

Have you ever wondered why some canvas paintings look professional while others seem unfinished? The secret often lies in proper framing.
Many artists create beautiful work but struggle with presentation decisions. They’re unsure whether their canvas needs a frame or how to choose the right style for their piece.
A well-chosen frame protects your artwork while adding significant visual impact. It creates that polished, gallery-ready look that separates amateur displays from professional presentations.
I’ll show you exactly how to frame your canvas step by step today.
You’ll learn when framing makes sense, what materials work best, and how to achieve stunning, gallery-quality results right at home without breaking your budget.
What Does It Mean to Frame a Canvas?
Framing a canvas means creating a border structure around your artwork. This process involves building or selecting a frame that complements the painting. Framing provides structure and ensures the piece is properly supported for long-term display.
Canvas framing differs from traditional picture framing in several ways. The canvas has depth and texture that requires special consideration. Many canvas frames are designed to showcase the edges by keeping the artwork raised slightly within the frame.
Here are the key aspects of canvas framing:
- Protection – Shields artwork from environmental damage
- Presentation – Improves the visual impact of the piece
- Spacing – Creates distance between the canvas and the glass (if used)
- Support – Provides structural stability for the artwork
- Style – Adds design elements that complement the painting
Should You Frame Your Canvas Painting?
The decision to frame depends on several factors. Gallery-wrapped canvases often look complete without frames. However, framing offers benefits that many artists and collectors value.
Pros vs. Cons of Framing Canvas
| Pros of Framing Canvas | Cons of Framing Canvas |
|---|---|
| Adds protection from dust and moisture | Increases overall cost significantly |
| Creates a more formal, finished appearance | May hide the natural canvas edges |
| Increases the perceived value of the artwork | Can overpower smaller artworks |
| Allows for better color coordination with room decor | Requires more wall space for display |
| Provides additional structural support | Makes artwork heavier and harder to hang |
Consider your budget, display environment, and artistic vision. Unframed canvases work well in casual settings. Framed pieces suit formal galleries and professional displays better.
Choosing the Right Frame Style for Your Artwork
Frame selection impacts how viewers perceive your artwork. The wrong choice can distract from the painting itself. Consider these popular canvas frame styles:
- Traditional Frames: These classic options feature ornate details and rich finishes. Gold and silver leaf frames suit classical paintings. Carved wooden frames work well with landscapes and portraits.
- Modern Frames: The Clean lines and minimal decoration define modern styles. Black or white frames offer a neutral presentation. Metal frames provide sleek, contemporary looks.
- Floating Frames: These frames create space around the canvas edges. The artwork appears to “float” within the frame. This style shows off gallery-wrapped edges beautifully.
- Box Frames: Deep frames accommodate thick canvases easily. They provide excellent protection and visual weight. Box frames suit bold, textured artworks particularly well.
Match your frame choice to the painting’s mood and your display space. Consider the room’s existing decor and lighting conditions.
Tools and Materials You’ll Need
Proper tools ensure clean, professional results. Gather these items before starting your framing project:
| Item | Description |
|---|---|
| Measuring Tape | For accurate inner and outer canvas dimensions |
| Wood (for frame) | Typically ¾-inch thick wood strips |
| Miter Box and Saw | For making accurate 45-degree cuts |
| Scrap Wood Pieces | ¾-inch thick, used to elevate the canvas |
| Painted Wood Strips | Used behind the canvas for elevation and hidden from view |
| Wood Glue | For bonding frame corners and support strips |
| Clamps or Vices | To hold glued parts together while drying |
| Sandpaper or Block Plane | For smoothing edges |
| Clear Coat Spray (Enamel) | For sealing and protecting the frame |
| Drill and Screws | To mount the canvas in the frame |
| Cardboard Spacers | For centering the canvas during mounting |
| Hanging Hardware | D-rings, wire, or sawtooth hooks for wall display |
Quality tools produce better results and last longer. Invest in a good miter saw for accurate corner cuts. Sharp blades prevent wood splitting and ensure clean edges.
Step-By-Step Process to Frame a Canvas
Follow these steps carefully for professional results. Take your time with measurements and cuts to avoid costly mistakes.
Step 1: Measure Your Canvas
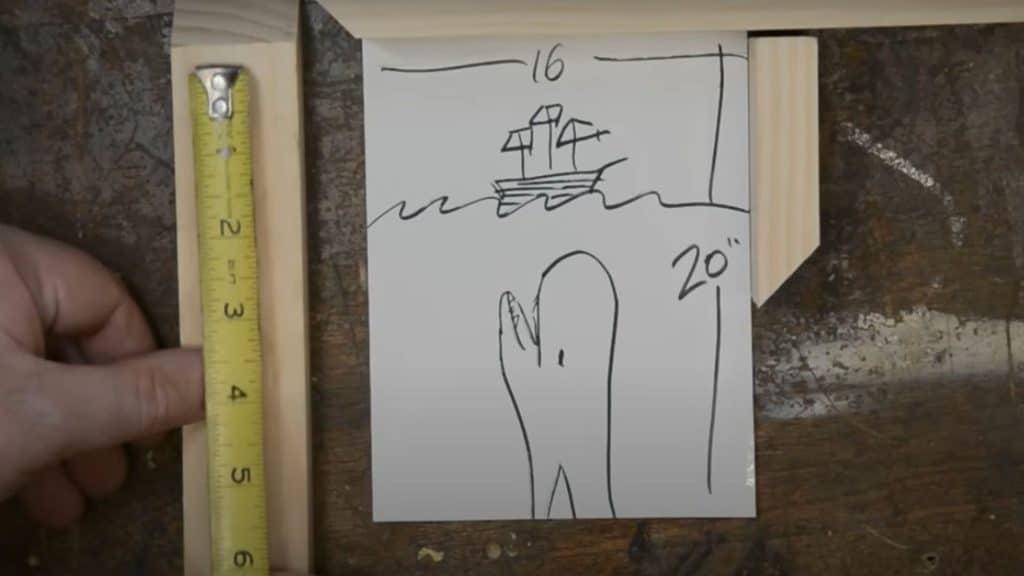
Start by measuring your canvas dimensions accurately. Record the height and width of the painting itself. These inside measurements form the foundation for your frame calculations.
Calculate the outside frame dimensions by adding the wood thickness to both sides. For ¾-inch thick frame material, add 1.5 inches total to each dimension for proper fit.
Step 2: Cut the Frame Pieces
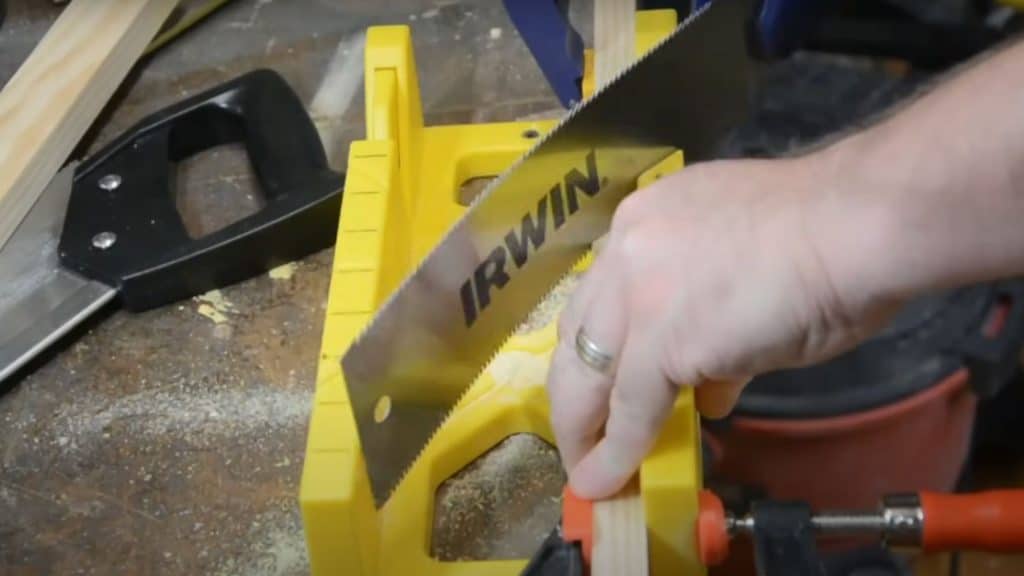
Mark the outside measurements onto your wood strips carefully. Use a miter box and saw to cut four pieces with precise 45-degree angles at each end.
Take time with each cut to ensure accuracy. Clean, precise angles create tight corner joints that look professional when assembled.
Step 3: Dry Fit the Frame
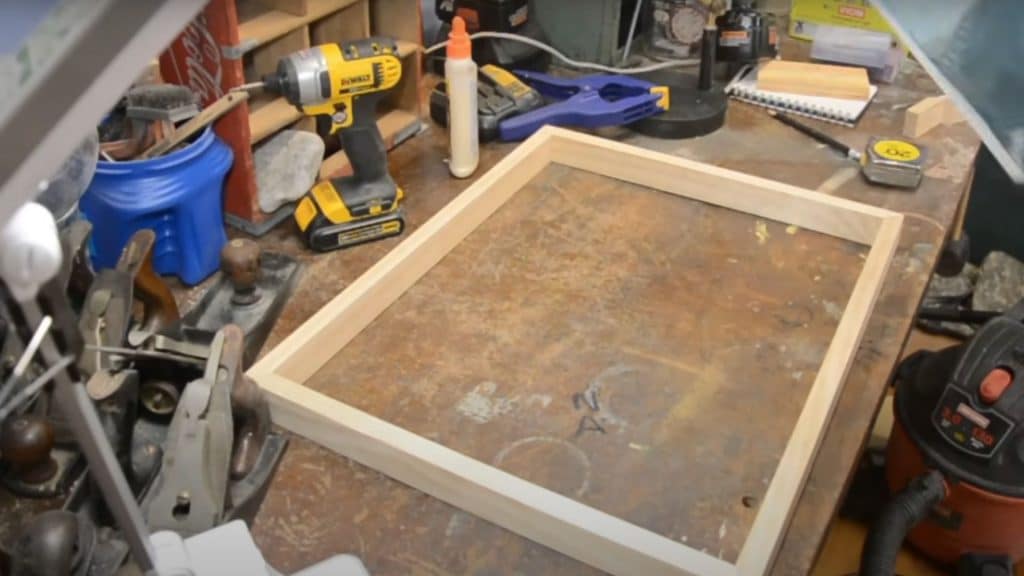
Arrange all four frame pieces together without glue first. Check that corners align perfectly and the frame sits flat on your work surface.
Test the canvas to fit inside the frame opening. There should be small gaps around all edges for the floating effect to work correctly.
Step 4: Prepare Floating Effect Supports
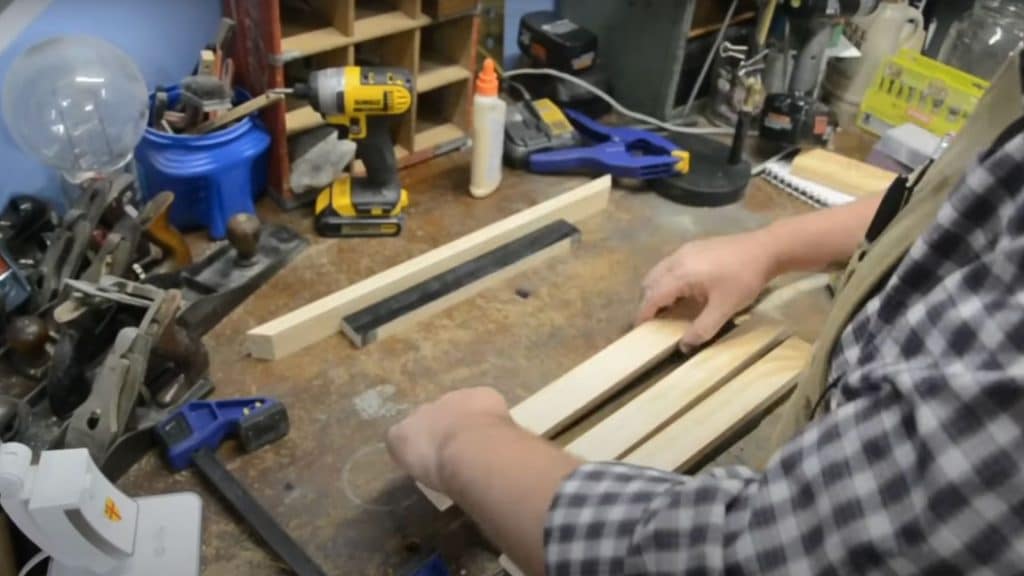
Cut scrap wood pieces into strips that match your frame material thickness. These support strips will elevate the canvas to create a floating appearance.
Paint these support pieces with black spray paint before assembly. The black color makes them invisible in the shadow behind the canvas.
Step 5: Initial Glue-Up
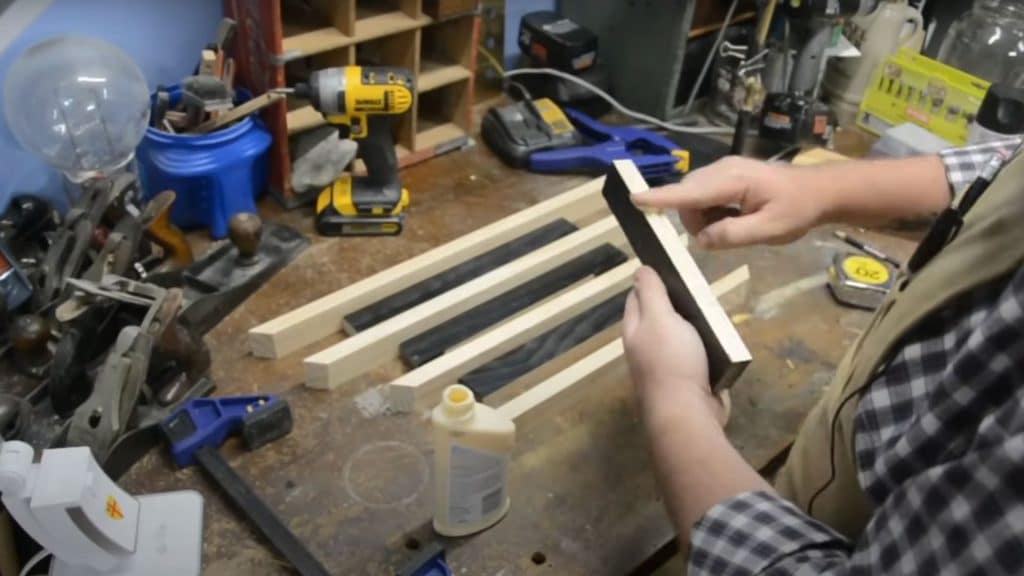
Apply wood glue to attach one support strip to each frame piece. Use clamps or vises to hold everything in place while the adhesive cures.
Add weight on top of the clamped pieces to ensure flat, even bonds. Allow sufficient drying time before moving to the next assembly phase.
Step 6: Assemble the Frame
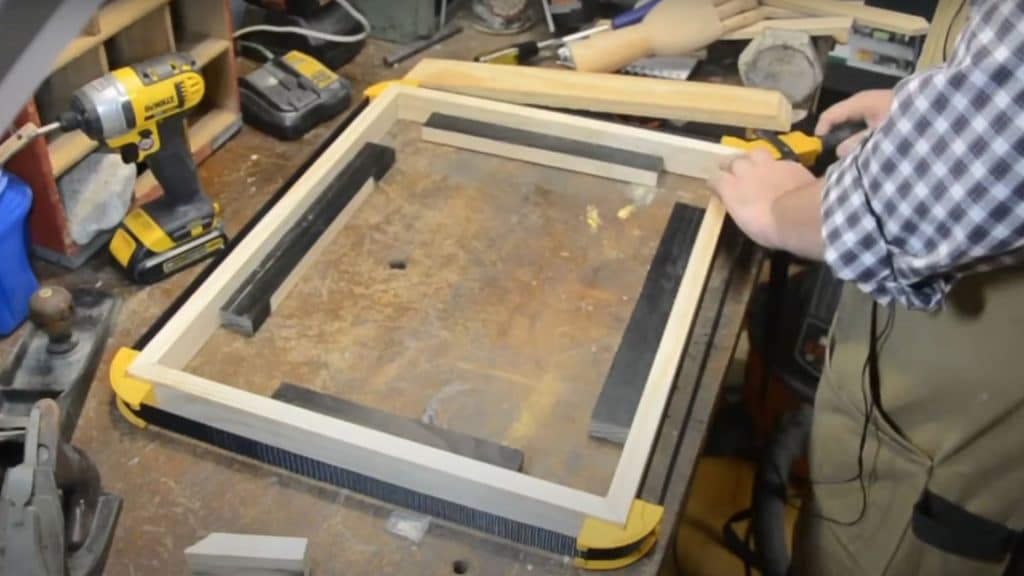
Remove clamps from the dried frame pieces carefully. Apply wood glue to the mitered corners and assemble the complete frame rectangle.
Check that the frame remains square during assembly. Clamp all corners simultaneously and allow the wood glue to cure completely.
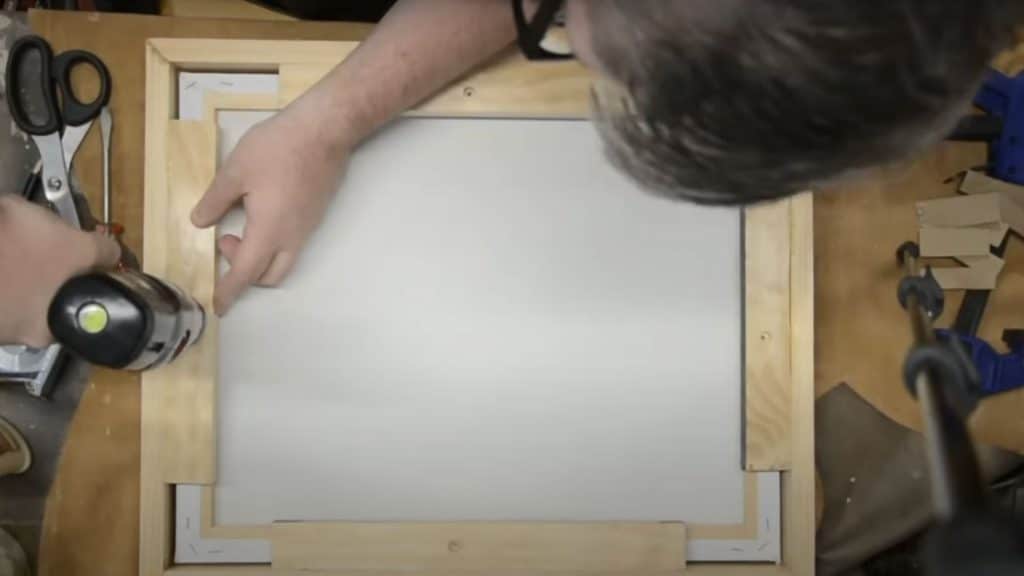
Step 7: Mount the Canvas
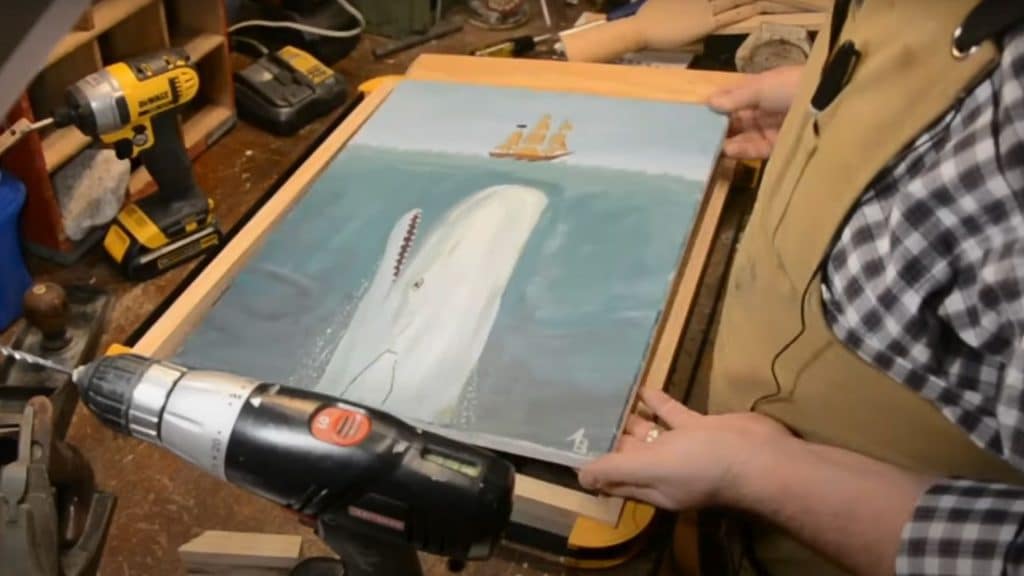
Position the canvas inside the completed frame to check spacing. The support strips should hold the canvas at the correct height for the floating effect.
Use cardboard spacers around the edges to center the canvas perfectly. Mark screw locations and drill pilot holes through the frame into the canvas stretcher bars.
Step 8: Finish the Frame
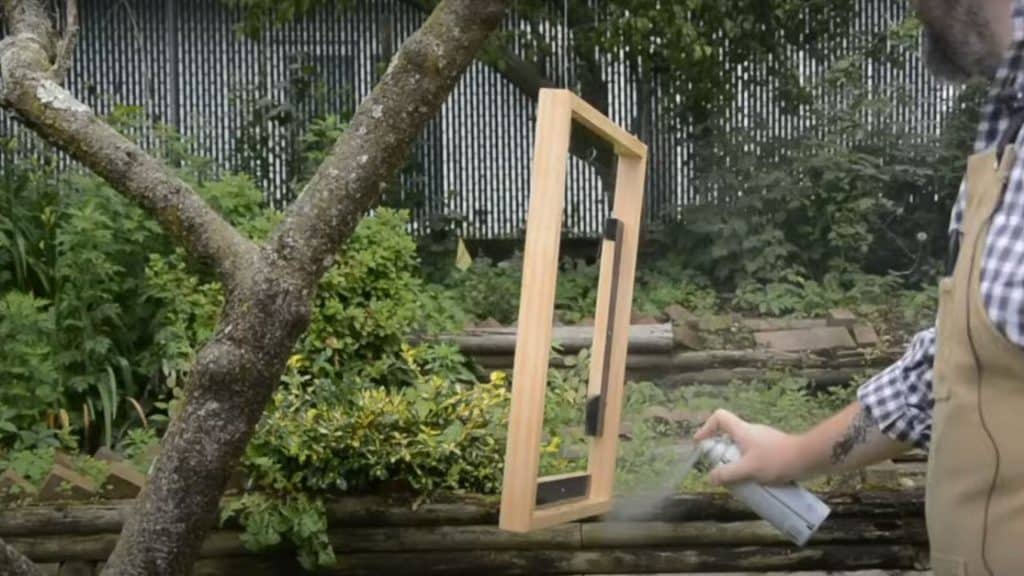
Sand the entire frame lightly to remove sharp edges and smooth rough spots. Focus on corners where glue squeeze-out might have occurred.
Apply three coats of clear enamel spray for protection and appearance. Allow each coat to dry completely before applying the next layer.
Step 9: Add Hanging Hardware
Install appropriate hanging hardware on the frame back once the finish has cured. Position the hardware about one-third down from the top edge.
Choose hardware rated for your frame’s total weight, including the canvas. Test the mounting system before final wall installation.
Step 10: Display on The Wall
Select an appropriate wall location with good lighting conditions. Use wall anchors suitable for your frame’s weight and wall type.
Choose a location with good lighting and appropriate wall support. Mount the frame securely and ensure it hangs evenly. Step back to confirm the placement aligns with your space.
Video Tutorial
Check out the video for more insights! Watch a step-by-step demonstration of how to frame a canvas following a simple process.
By – Burke Makes Stuff
Common Mistakes to Avoid
Learning from others errors saves time and materials. Here are the most frequent framing mistakes:
- Measuring only the canvas face instead of calculating the proper outside frame dimensions.
- Cutting angles incorrectly without using a proper miter box or saw.
- Skipping the dry fit step and discovering problems after gluing.
- Using too much glue, which creates messy squeeze-out at joints.
- Overlooking the color treatment of interior supports.
- Rushing the glue drying time weakens the bond.
- Not checking if the frame is square during final assembly.
- Drilling mounting screws without pilot holes and splitting the wood.
- Installing hanging hardware too close to the frame edges.
Maintenance and Longevity Tips
Proper care keeps framed canvases looking great for years. Follow these maintenance guidelines:
- Dust regularly – Use soft brushes or microfiber cloths only.
- Control humidity – Keep artwork away from moisture sources.
- Avoid direct sunlight – UV rays fade colors over time.
- Check hanging hardware – Inspect wire and hangers annually.
- Handle carefully – Support the frame weight when moving.
- Store properly – Use acid-free materials for long-term storage.
- Professional cleaning – Consult experts for valuable pieces.
Final Thoughts
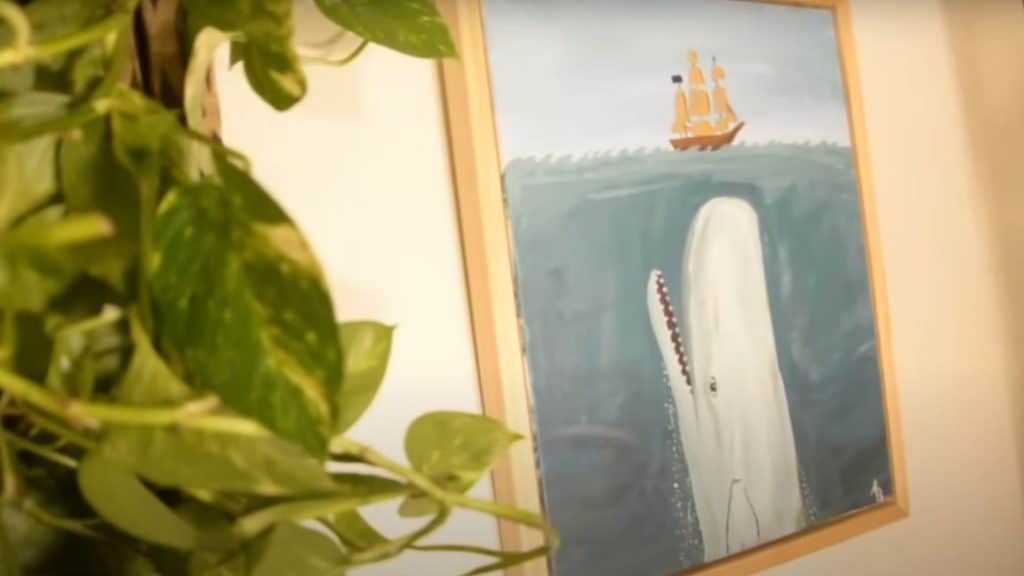
Your canvas deserves a presentation that matches the effort you put into creating it. This framing method works for any size artwork you’ve completed.
The floating effect adds professional appeal without overwhelming your original work. Viewers will notice the quality difference immediately when they see your finished piece.
Don’t let fear of mistakes stop you from trying this project. Every woodworker started somewhere, and frames are forgiving projects for beginners to practice on.
The investment in basic tools pays off when you frame multiple pieces. You’ll save money compared to professional framing services while gaining valuable skills.
Ready to give your artwork the presentation it deserves? Start gathering your materials and try framing your first canvas this weekend.
Frequently Asked Questions
Can an Unstretched Canvas Be Framed?
Yes, use a 3cm deep frame for unstretched canvas. You will lose about 5cm of painting around the edges to secure the canvas properly inside the frame.
What Are the Different Ways to Hang an Unstretched Canvas?
Add wood strips to the top for hanging and bottom strips for weight. This method keeps the loose canvas straight and prevents sagging or curling issues.
Will Command Strips Work on Canvas?
Command strips work for canvas if you meet the weight limits. Use Command Canvas Hangers designed specifically for artwork to avoid damage to walls and paintings.