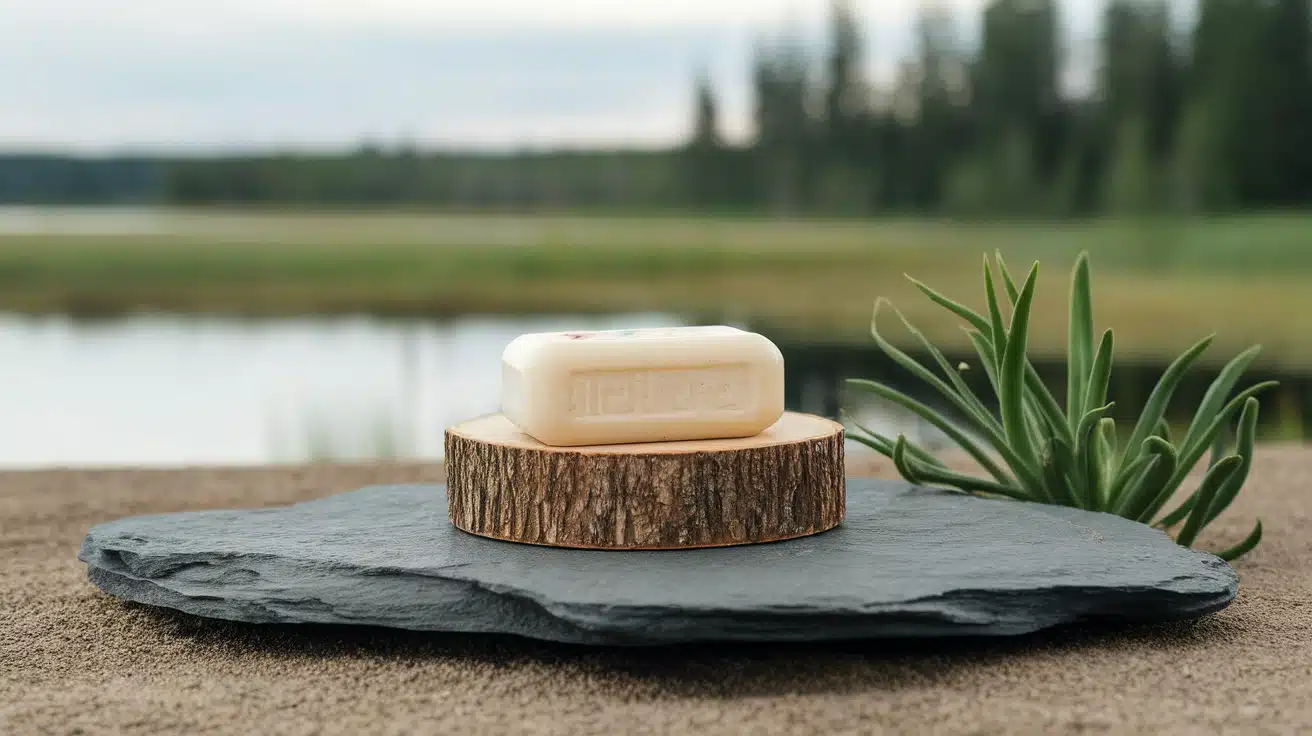

Tired of soggy soap bars that fall apart in your hands? I know that frustration all too well. Store-bought soap dishes never seem to fit your specific needs, and they often cost more than they’re worth.
But here’s something that might interest you: you can build a custom wooden soap dish from leftover wood scraps in just a few hours. This simple project gives you complete control over size, drainage, and style while costing almost nothing to make.
What makes this even better? You’ll learn basic woodworking skills that apply to bigger projects, plus you’ll have a functional bathroom accessory that actually keeps your soap dry and lasts for years.
Ready to turn those wood scraps into something useful? Let me show you exactly how to make your own soap dish in straightforward steps.
Why Choose a DIY Soap Dish?
Making your wooden soap dish offers several benefits that store-bought options simply can’t match. You get complete control over size, design, and finish to suit your specific needs.
Cost-Effective Solution: Building a soap dish from scrap wood costs almost nothing. Most materials are likely already in your workshop, making this an extremely budget-friendly project.
Environmental Benefits: This project helps reduce waste by using leftover wood scraps. Instead of throwing away small pieces, you create something useful and long-lasting.
Skill Building Opportunity: Working on this simple project builds confidence with basic tools. You’ll practice measuring, cutting, and finishing techniques that apply to larger woodworking projects.
Superior Durability: Quality hardwood lasts much longer than plastic alternatives. With proper finishing, your handmade soap dish will serve you for years while developing a beautiful natural patina.
Perfect Custom Fit
- Design the exact size for your soap bars
- Create spacing that matches your bathroom counter
- Choose a wood type that complements your decor
- Add personal touches like engravings or unique finishes
Types of Soap Dishes
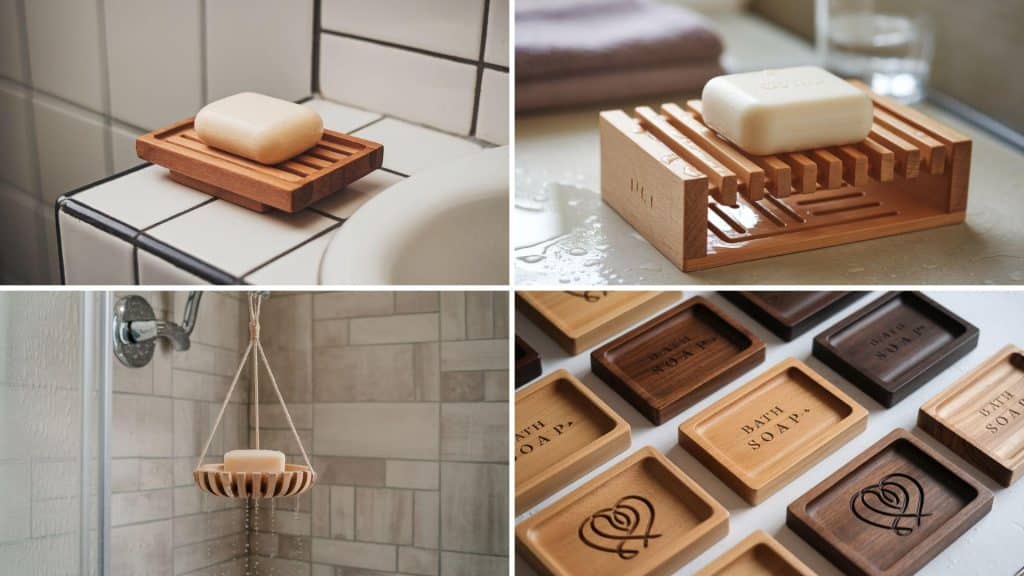
Before starting your DIY project, it’s important to choose the right soap dish style for your needs. Each type offers different benefits depending on your bathroom setup, usage frequency, and personal preferences.
Here are the four main types you can easily build at home.
A. Traditional Flat Soap Dish: A basic rectangular or oval platform that holds soap bars. Simple to make and clean, but soap may sit in water. Best for guest bathrooms or decorative use.
B. Soap Dish with Drainage: Features slats, grooves, or holes that allow water to drain away from soap. Keeps bars dry and extends their life. Perfect for daily use in showers and sinks.
C. Hanging Soap Dish: Mounted on walls or suspended from fixtures to keep soap completely away from wet surfaces. Provides excellent airflow and saves counter space in small bathrooms.
D. Customizable Soap Dish: allows personal touches like engravings, custom sizes, or unique finishes. You can match existing bathroom decor or create special gifts for family and friends.
Step-By-Step Guide to Making a Wooden Soap Dish
Create a functional and stylish wooden soap dish from scrap wood in just 8 simple steps. This beginner-friendly woodworking project takes about 2-3 hours and helps you turn leftover materials into a practical bathroom accessory that keeps your soap dry and organized
Tools Required
| Tool | Purpose |
|---|---|
| Sandpaper | Smooth rough surfaces and edges |
| Table Saw | Cut wood into smaller boards |
| Bandsaw | Cut boards to final height |
| Scroll Saw | Cut curved grooves for soap bars |
| Measuring Tape | Mark precise measurements |
| Pencil | Mark cutting lines and measurements |
| Flathead Screwdriver | Remove excess glue from joints |
| Rags/Cloth | Apply and wipe off oil finish |
Materials Required
| Material | Purpose |
|---|---|
| Scrap Wood | Main material for soap dish construction |
| Plastic Lid | Template for drawing smooth curves |
| Waterproof Glue | Bond pieces together permanently |
| Wood Oil/Finish | Protect wood from water damage |
Step 1: Prepare Your Wood Material
Start with a scrap piece of wood and sand it smooth. Measure and cut one piece to match the size of your longest board needed. This initial piece will be your master template. Clean off any dust or debris before moving to the next step.
Pro Tip: Choose hardwood scraps like oak or maple for better water resistance and durability.
Step 2: Cut Boards to Size
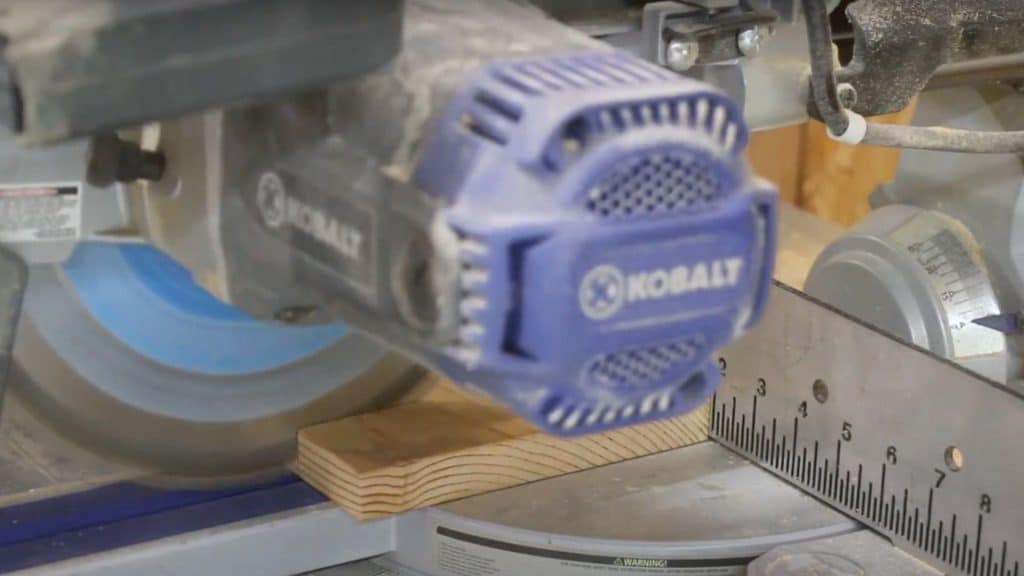
Use a table saw to cut your prepared wood into 10 smaller boards. Make sure all cuts are straight and even. Keep two boards longer than the rest – these will become your base pieces.
Pro Tip: Mark each board with light pencil numbers to keep track of your pieces during assembly.
Step 3: Shape the Boards
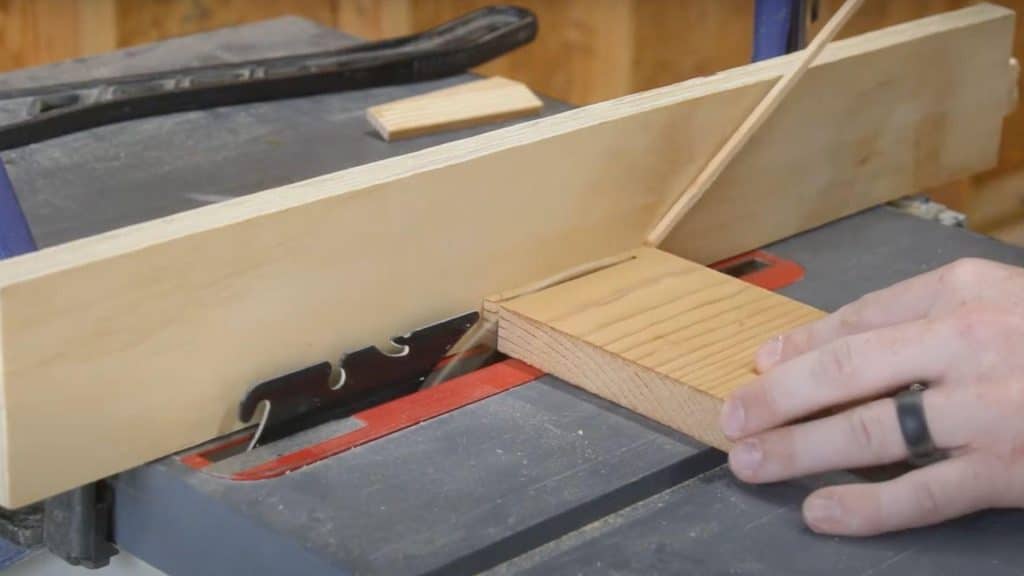
Cut 8 boards to the final height using a bandsaw. Then cut 6 of these 8 boards to their final length. Leave 2 boards longer for the bottom base of your soap dish.
Pro Tip: Test fit all pieces before moving forward to ensure proper alignment and spacing.
Step 4: Create Soap Grooves
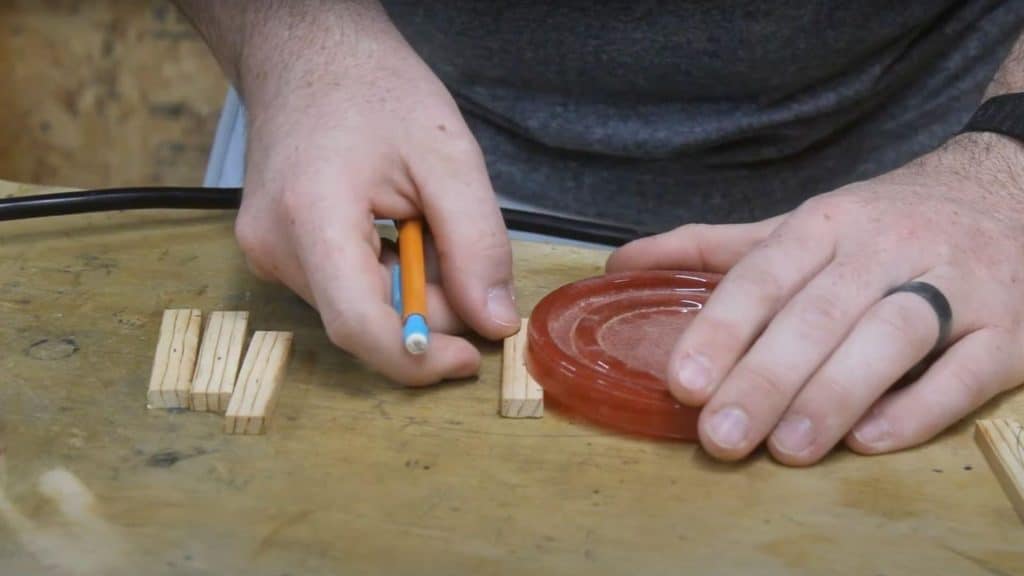
Mark a quarter inch on each side of 6 boards. Use a plastic lid to draw smooth curves between your marks. These curves will hold your soap bars securely in place.
Pro Tip: Use the same soap bar you plan to use as a template for the perfect curve size.
Step 5: Cut the Curves
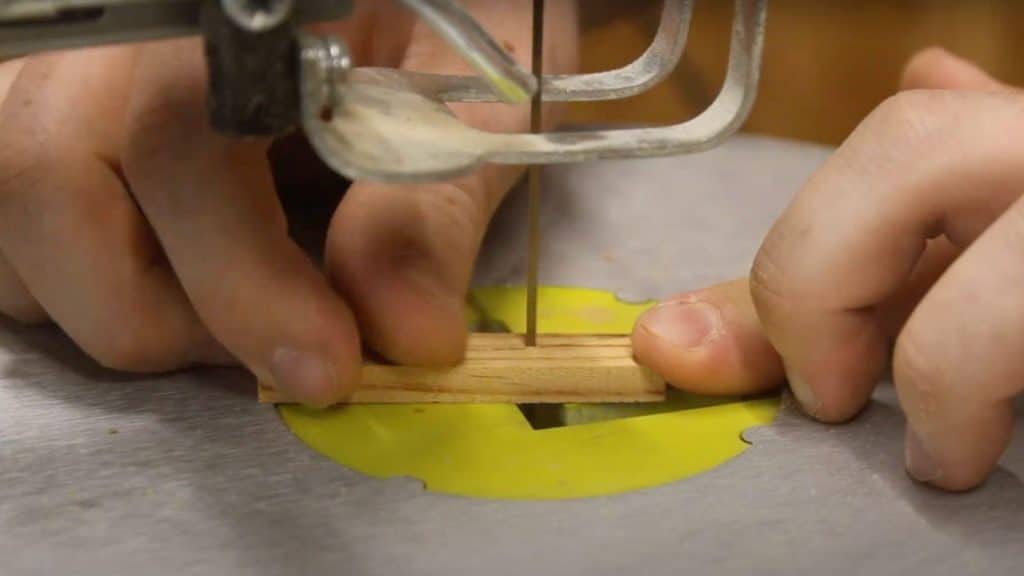
Cut out the marked curves using a scroll saw. Take your time with each cut to ensure smooth, clean lines. The curves should be gentle and even across all 6 boards.
Pro Tip: Sand the curved cuts immediately after cutting while they’re still easy to access and shape.
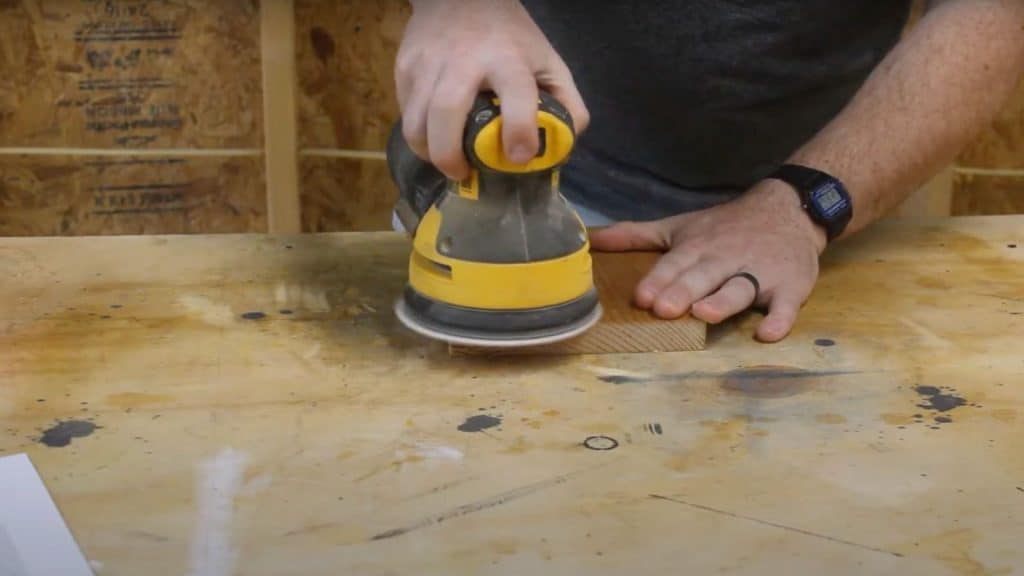
Step 6: Final Sanding and Smoothing

Hand sand all pieces to remove any rough spots. Round off all sharp edges for a comfortable feel. Pay special attention to the curved cuts and any visible tool marks.
Pro Tip: Use 220-grit sandpaper for the final pass to achieve a smooth, professional finish.
Step 7: Assemble the Soap Dish
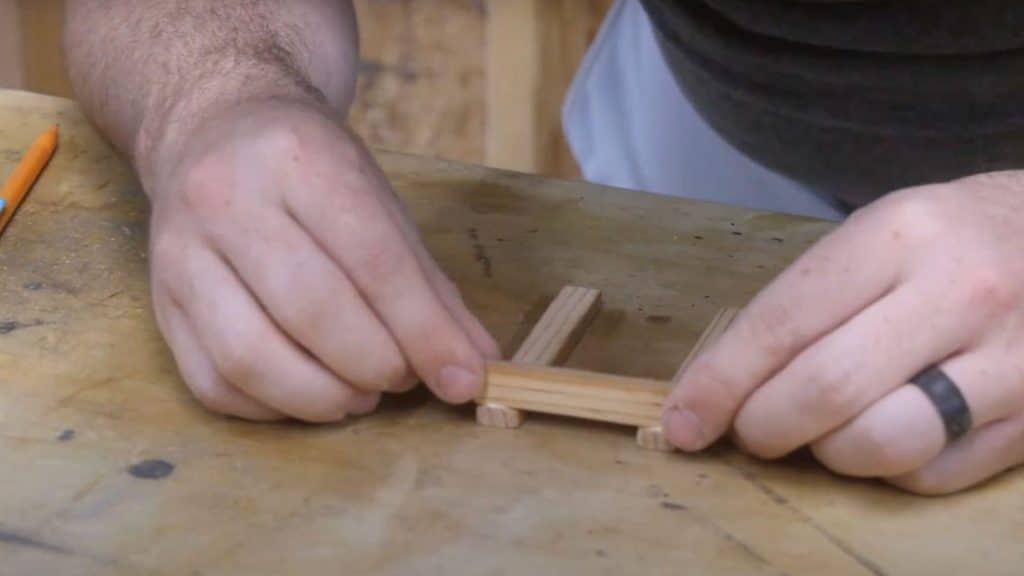
Place your two longest boards flat as the base. Apply waterproof glue to attach the two side pieces without grooves first. Then glue the remaining 6 grooved pieces, keeping equal gaps between each board.
Pro Tip: Use clamps lightly to hold pieces while glue sets, but don’t over-tighten and squeeze out too much glue.
Step 8: Finish and Seal
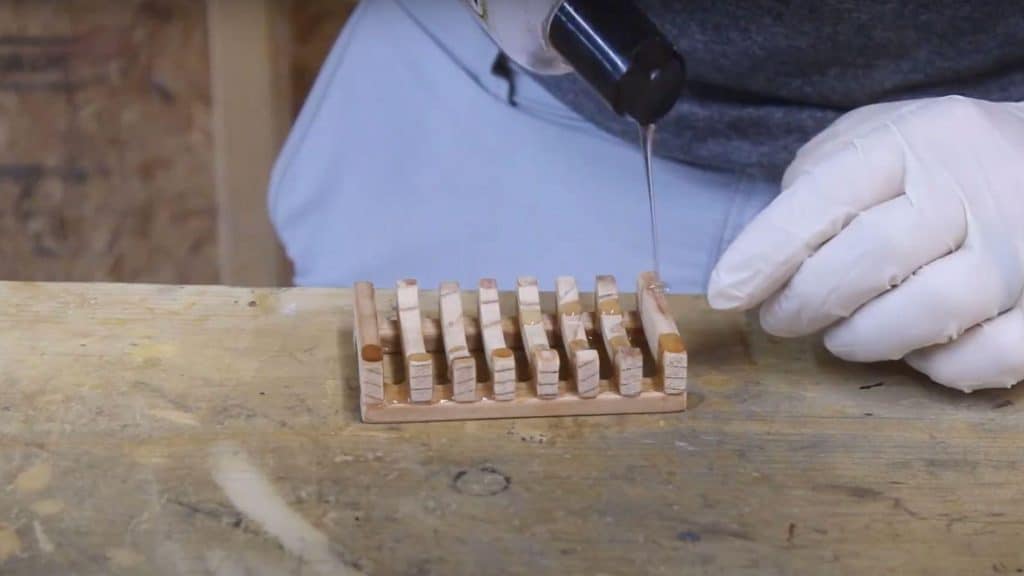
Scrape off excess glue with a flathead screwdriver after a few minutes. Apply oil finish by pouring, rubbing in, and letting it sit. Wipe off excess and apply a second coat for protection.
Pro Tip: Use food-safe mineral oil or tung oil for the best water resistance in bathroom environments.
Video Tutorial
I’d like to acknowledge The Will To Make for the insightful video, which was a key reference in putting this guide together.
Host a Fun DIY Soap Dish Workshop with Friends
Turn your soap dish project into a social event by inviting friends over for a DIY workshop. Set up multiple workstations with shared tools and let everyone bring their own wood scraps or soap preferences.
Workshop Setup Tips
- Prepare wood pieces in advance to save time
- Create templates for consistent curve cutting
- Set up sanding stations with different grits
- Provide various oil finishes for different looks
This group activity works great for birthday parties, team building, or weekend gatherings. Everyone leaves with a personalized soap dish and new woodworking skills.
Plus, you can share tool costs and learn from each other’s techniques.
Safety First: Ensure proper supervision around power tools and provide safety glasses for all participants. Keep first aid supplies handy and designate experienced helpers for beginners.
Conclusion
Building your own DIY soap dish proves that small woodworking projects can make a big difference in your daily routine.
With just a few hours and some scrap wood, you’ve created a custom bathroom accessory that actually works better than store-bought alternatives.
This project goes beyond just making a soap dish. You’ve gained hands-on experience with essential woodworking tools and techniques that you can apply to future projects. Plus, you’ve turned waste materials into something genuinely useful.
Your handmade soap dish will keep your soap bars dry for years to come, saving you money and reducing waste. Most importantly, you now have the confidence to tackle other DIY projects around your home.
What will you build next with those remaining wood scraps?
Frequently Asked Questions
What Can I Use as A Soap Container?
You can use glass jars, ceramic bowls, plastic containers, small wooden boxes, repurposed tin cans, or even carved coconut shells as soap containers.
What Material Is Best for a Soap Dispenser?
Stainless steel, glass, and ceramic are best for soap dispensers. They resist corrosion, clean easily, and don’t absorb soap residue like plastic materials.
How Do You Make Your Own Dishwashing?
Mix 1 cup castile soap, 1/4 cup white vinegar, 1 tablespoon baking soda, and 10 drops essential oil for homemade dishwashing liquid.