
Nothing strikes fear into a DIY homeowner’s heart quite like the thought of a heavy cabinet crashing down from the wall.
But here’s what most people don’t realize hanging cabinets isn’t about having superhuman strength or years of carpentry experience. It’s actually about knowing a few critical techniques that professionals use to ensure every cabinet stays put for decades.
I’m about to walk you through the exact step-by-step process I’ve used countless times to mount cabinets safely and securely.
You’ll realize the common mistakes that lead to sagging or falling cabinets, learn which tools actually matter (and which ones you can skip), and gain the confidence to tackle this project without calling in expensive help.
Ready to convert your space with perfectly mounted cabinets that’ll make you proud every time you walk into the room?
What You Need to Know Before Hanging Cabinets?
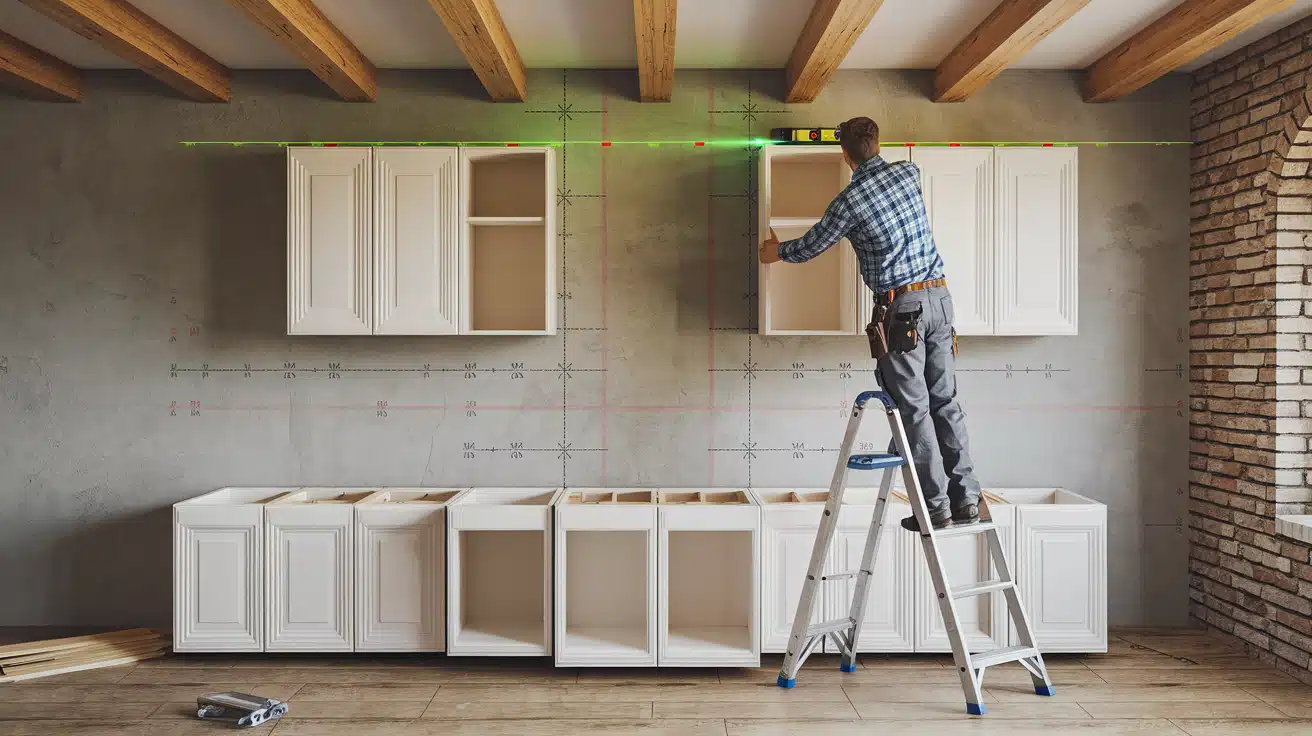
Installing kitchen cabinets is a crucial home improvement project that requires careful planning and meticulous attention to detail. Proper installation ensures your cabinets remain secure, functional, and aesthetically pleasing for years to come.
Taking time to measure accurately, locate wall studs, and use appropriate tools prevents costly mistakes and delivers professional results that enhance your kitchen’s value.
Key Considerations
- Find wall studs – Use a stud finder to locate and mark all studs, as cabinets must be anchored into solid framing, not just drywall.
- Check wall condition – Ensure walls are plumb and level; uneven walls may require shimming or adjustment.
- Plan the layout – Start with upper cabinets first, then install base cabinets to avoid awkward positioning.
- Gather proper tools – You’ll need a drill, level, clamps, screws, and potentially a helper for heavier units.
- Account for utilities – Mark locations of electrical outlets, plumbing, and gas lines before drilling.
- Consider weight capacity – Standard wall studs can typically support 50-75 pounds per linear foot.
- Maintain proper spacing – Leave 18 inches between the countertop and upper cabinets for workspace.
Taking time to prepare and measure properly will prevent costly mistakes and ensure a professional-looking installation that enhances your kitchen’s functionality and value.
How to Install a Hang Wall Cabinet?
This step-by-step guide shows beginners how to securely mount a wall cabinet in just a few hours using basic tools.
Tools required
| Tool | Purpose |
|---|---|
| Tape Measure | Measure wall dimensions, cabinet size, stud spacing, and height placement accurately |
| Pencil | Mark stud locations, height lines, and screw hole positions on wall and cabinet |
| Stud Finder | Locate wooden studs behind drywall to ensure strong mounting points |
| Level | Create straight horizontal lines and ensure the cabinet is properly aligned. |
| Drill | Create pilot holes in cabinet back and drive screws into wall studs |
| Drill Bits | Make precise holes that match screw size for proper fit and grip |
| Safety Glasses | Protect eyes from wood chips and debris during drilling |
| Clamps (Optional) | Hold the temporary support board in place while working |
| Screwdriver (Optional) | Manual backup for driving screws if drill battery dies |
| Sandpaper (Optional) | Smooth any rough edges on the cabinet or support board |
Materials Required
| Material | Purpose |
|---|---|
| Cabinet Screws | Secure the cabinet to the wall studs for permanent mounting and weight support |
| Wall Cabinet | The main item being installed on the wall |
| Piece of Wood | Create a temporary support ledge to hold the cabinet’s weight during installation |
| Drop Cloth (Optional) | Protect the floor from dust and debris during installation |
Step 1: Choose Cabinet Height and Mark Reference Line
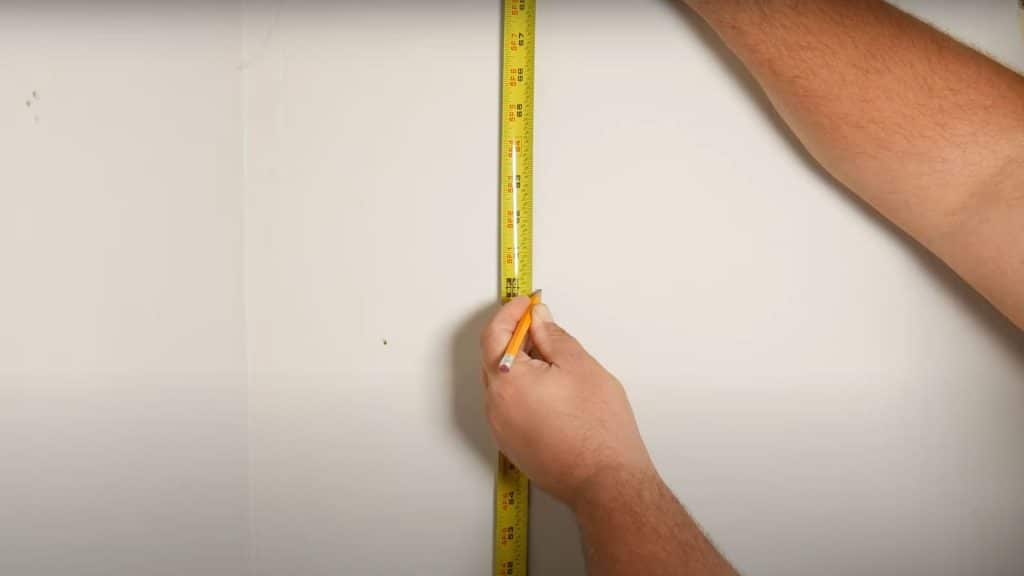
Decide on your cabinet height based on your household needs. Standard heights range from 50 to 60 inches, with 54 inches being most common.
Measure from the floor to where the bottom of your cabinet will sit. Consider the height of people using the cabinet daily. Mark this measurement at two or three points across your wall. Use a long level to connect these marks with a straight horizontal line.
Pro Tip: If you have existing cabinets nearby, match their height for a consistent, professional look throughout the room.
Step 2: Locate and Mark Wall Studs
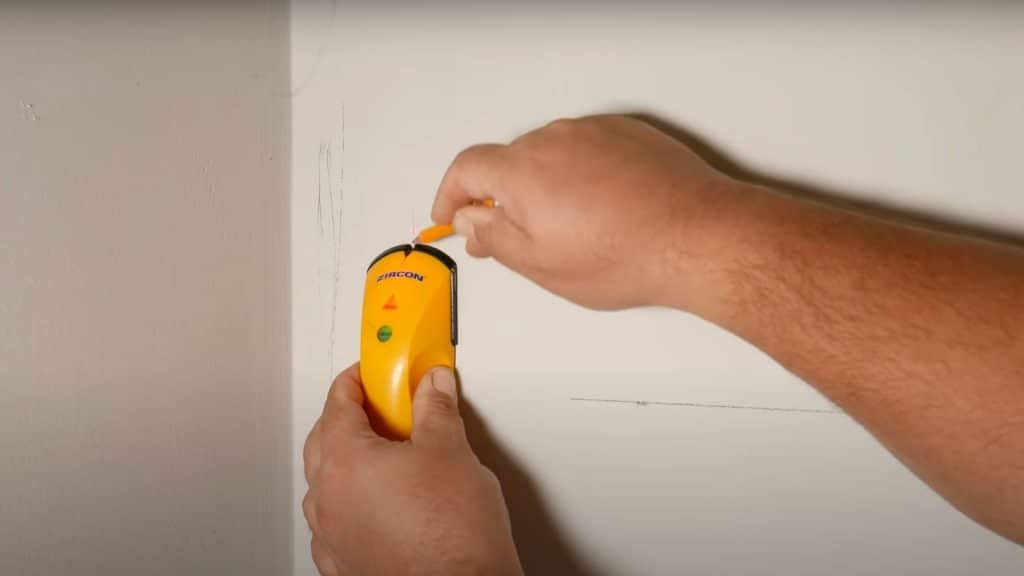
Use your stud finder to locate all wall studs in your installation area. Start away from corners and work inward until you hear the finder beep.
Mark both edges of each stud to find the center. Most studs are spaced 16 inches apart from center to center. Draw vertical lines from the floor to your height line to clearly mark each stud location. Check near electrical outlets, as studs are typically located beside them.
Pro Tip: Corners almost always have studs, so start your measurements from these known locations to speed up the process.
Step 3: Measure the Cabinet and Choose Placement
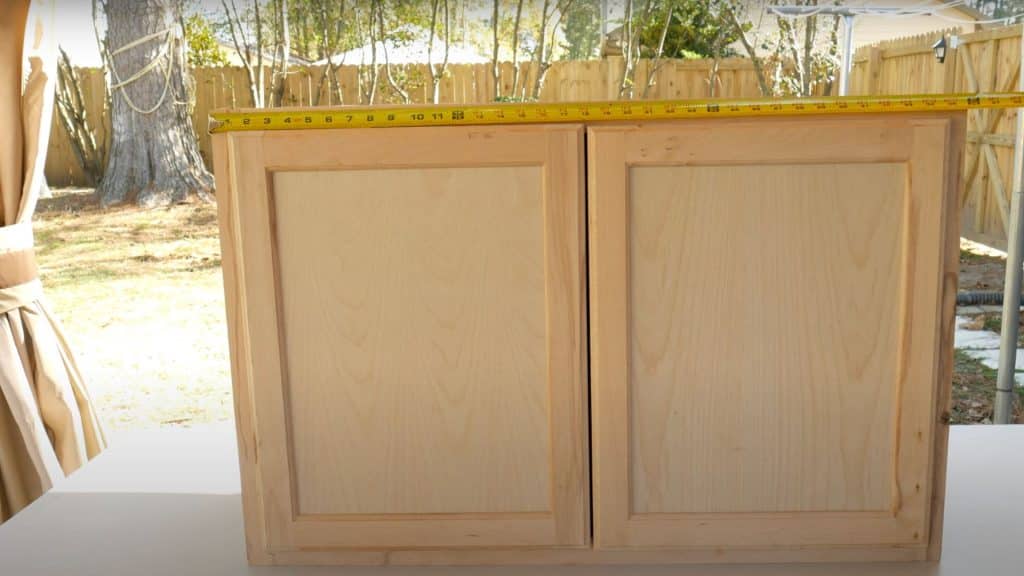
Measure the width of your cabinet and determine its exact placement on the wall. Choose whether you want it centered, in a corner, or at a specific location.
Ensure at least two studs fall within the cabinet’s width for secure mounting. Mark the cabinet’s left and right boundaries on your wall. Consider nearby plumbing, electrical outlets, or other obstructions when selecting a placement. Your cabinet requires strong stud support to safely hold its weight.
Pro Tip: Place your cabinet so that three studs fall within its width if possible – this provides maximum security and weight distribution.
Step 4: Transfer Wall Measurements to Cabinet
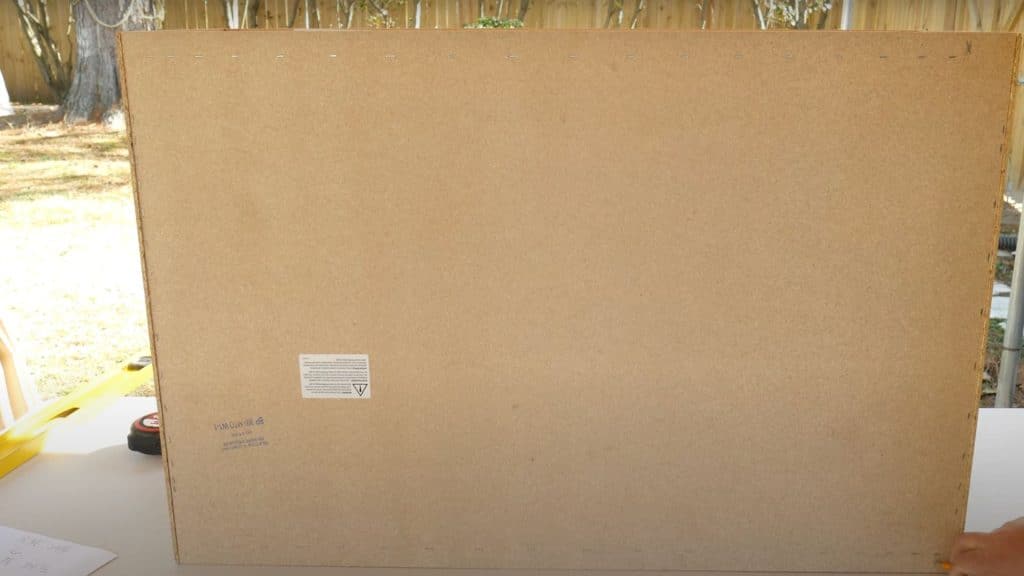
Measure the exact distance from your wall’s reference point to each stud center. Note that cabinet backs are slightly narrower than their fronts due to side lips.
Mark which side of the cabinet goes where to avoid confusion later. Transfer each stud measurement to the cabinet’s back panel. Draw vertical lines at each stud location from top to bottom. Double-check all measurements before proceeding to avoid costly mistakes.
Pro Tip: Mark “LEFT” and “RIGHT” clearly on your cabinet to prevent mounting it backward – this mistake is more common than you think.
Step 5: Mark and Drill Screw Holes
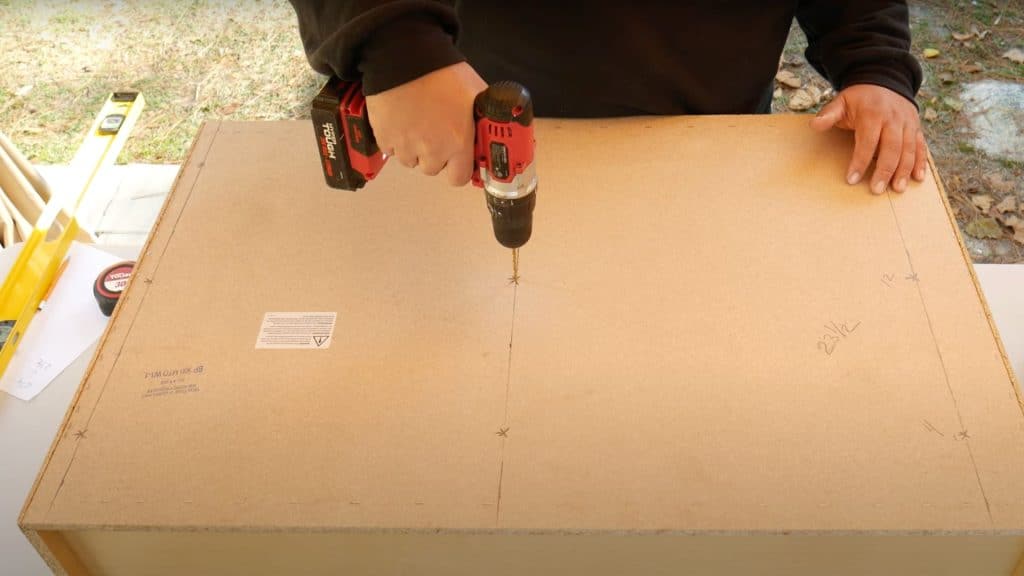
Choose screw locations based on your cabinet height, typically placing 2-3 screws per stud. Avoid shelf locations and stay away from cabinet edges.
For a 23-inch tall cabinet, good positions are 4 inches, 12 inches, and 20 inches from the bottom. Use a drill bit slightly smaller than your screw diameter. Drill straight through the cabinet back at each marked intersection. Test-fit one screw in the first hole before drilling the rest.
Pro Tip: Drill a test hole in scrap wood first to ensure your drill bit size allows screws to grip properly without splitting.
Step 6: Create Temporary Support and Test Fit
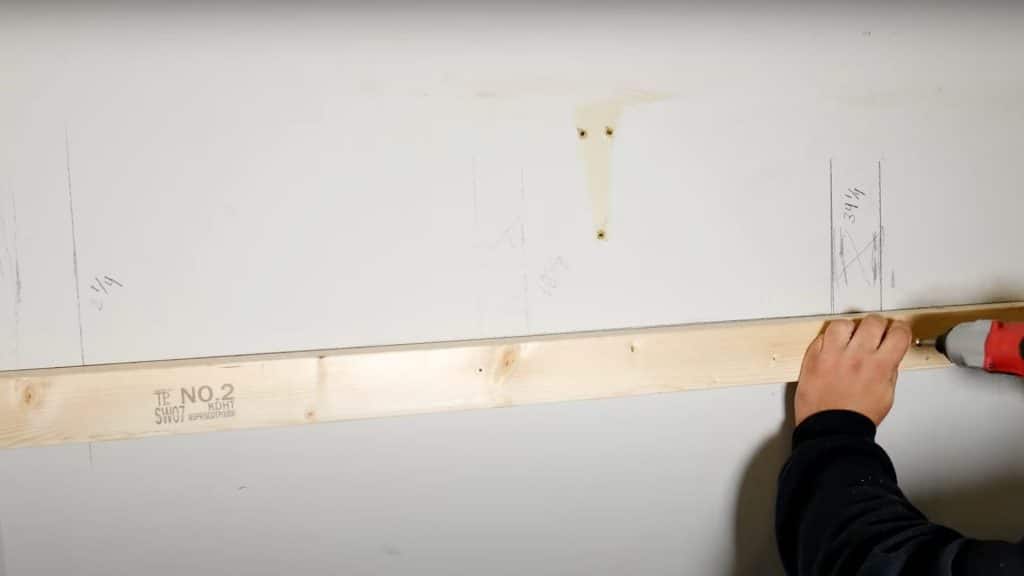
Screw a piece of wood along your height line to support the cabinet during installation. This temporary ledge holds the cabinet’s weight while you work.
Test this support by placing some weight on it and checking that screws hit stud centers correctly. The support board makes solo installation possible and reduces helper strain. It also confirms your stud locations are accurate before final installation.
Pro Tip: Leave the support board in place until all cabinet screws are installed – it prevents accidents and makes the job much easier.
Step 7: Install Cabinet and Secure with Screws
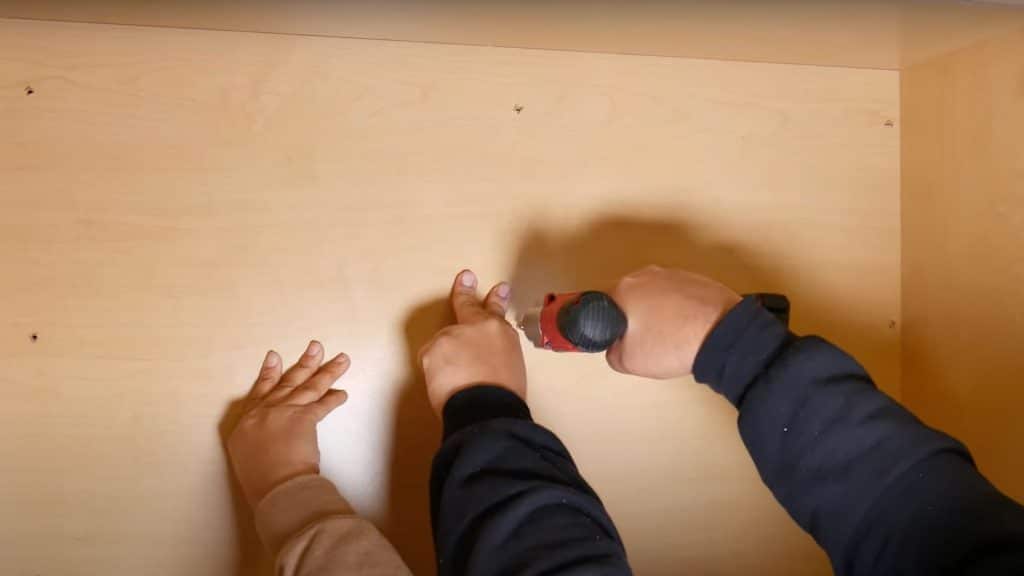
Place the cabinet on your temporary support with the correct side orientation. Start with the middle screw on each stud to center the cabinet properly.
Drive screws through the cabinet back into stud centers. Work systematically from center outward, ensuring each screw is tight and secure. Once all screws are installed, remove the temporary support board. Check that the cabinet is level and secure before loading it with items.
Pro Tip: Don’t fully tighten the first few screws until all holes are started – this allows for minor adjustments if needed.
Video Tutorial
I’d like to give credit to StatUpBox for their informative video, which served as a reference for this guide.
Common Mistakes to Avoid When Installing Wall Cabinets
Avoid these common errors that can turn your cabinet installation into a costly repair job. Learning from these mistakes before you start will save you time, money, and frustration.
| Common Mistake | Solution |
|---|---|
| Not locating studs properly | Use a quality stud finder and mark both edges of each stud to find the center. Test the finder on a known stud first to ensure it works correctly. |
| Mounting the cabinet backwards | Clearly mark “LEFT” and “RIGHT” on your cabinet before starting. Double-check orientation before drilling any holes in the wall. |
| Using the wrong drill bit size | Choose a drill bit slightly smaller than your screw diameter. Test fit the screw in a practice hole before drilling all mounting holes. |
| Skipping the temporary support board | Always install a temporary wood ledge at your height line. This prevents accidents and makes installation much easier, especially when working alone. |
| Not measuring the cabinet back properly | Remember that cabinet backs are narrower than the front due to side lips. Measure the actual back panel, not the cabinet face. |
| Placing screws too close to edges | Keep screws at least 2-3 inches from cabinet edges and avoid drilling into internal shelves or hardware. Plan screw locations carefully. |
| Rushing the stud-finding process | Take time to locate all studs accurately. Use the 16-inch spacing rule as a guide, but always verify with your stud finder. |
Conclusion
There you have it the complete roadmap to hanging cabinets like a seasoned pro. By following these seven steps and avoiding those common pitfalls, you’ve just saved yourself hundreds in installation costs while gaining skills that’ll serve you for life.
The beauty of this process isn’t just in the money saved, but in the confidence you’ll feel every time you look at those perfectly mounted cabinets. You did that with your own hands and some basic tools.
Now that you’ve mastered wall cabinet installation, why stop here? Your kitchen makeover journey is just getting started. Now that you’ve conquered the art of hanging cabinets, be sure to check out our other home improvement guides for your next project.
What’s your next DIY conquest going to be?