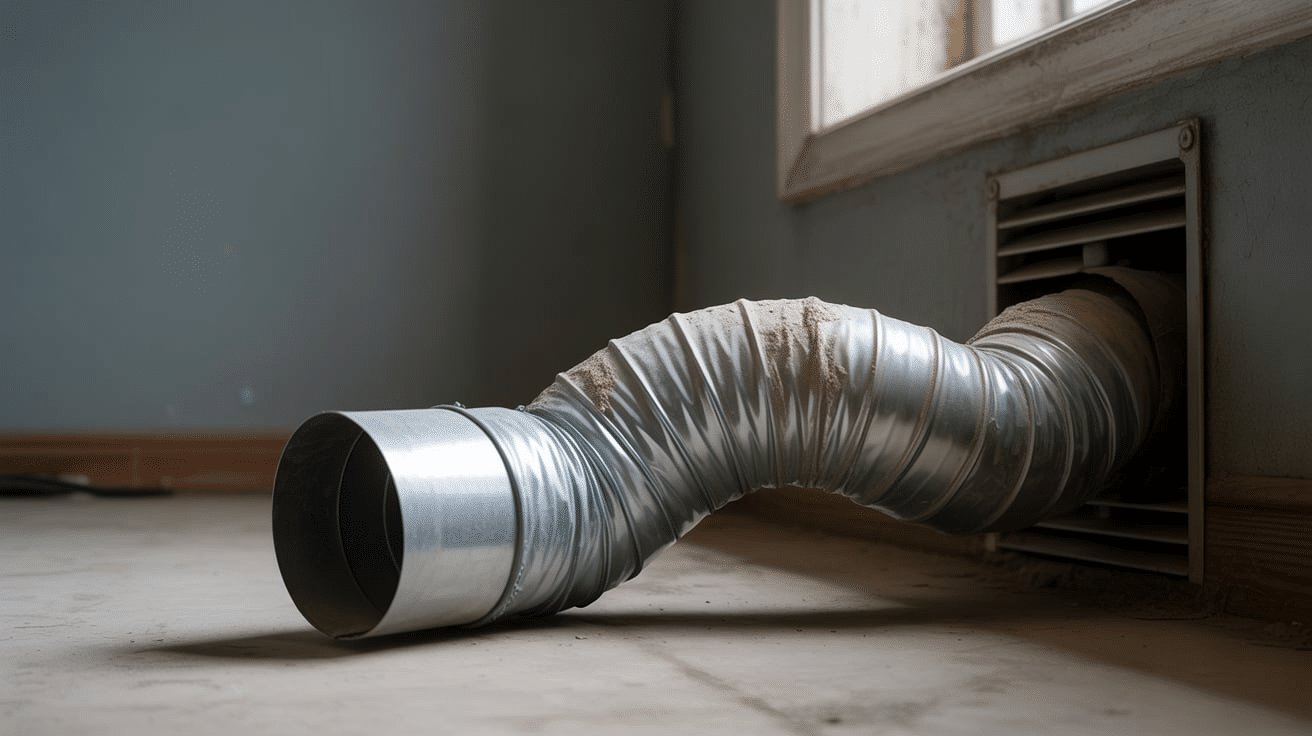

Have you ever noticed your clothes taking forever to dry? That lint-filled dryer vent on your roof might be the culprit. A clogged vent isn’t just annoying; it can be dangerous and lead to house fires.
Most homeowners don’t think about roof vents until there’s a problem. However, regular cleaning keeps your dryer running efficiently and helps prevent serious safety hazards that could put your family at risk.
Getting up on your roof to clean a vent can seem intimidating. But with the right approach, proper tools, and safety steps, you can handle this important home maintenance task without calling in expensive professionals.
This guide walks you through the process of safely cleaning your roof dryer vent, saving you money while keeping your home safer.
Let’s examine everything, from safety preparations to cleaning techniques, that ensures proper ventilation.
What is a Dryer Vent?
A dryer vent is a duct or tube that carries hot, moist air from your clothes dryer to the outside of your home. It connects the dryer to the exterior, allowing the heat and humidity produced during the drying cycle to escape.
Without a properly functioning vent, this moisture can accumulate in the vent system, leading to potential issues like fire hazards, mold growth, and reduced dryer efficiency.
-
Function: A dryer vent channels hot, moist air from your dryer to the outside of your home, preventing moisture buildup indoors.
-
Prevents Fire Hazards: It helps remove lint and moisture, preventing flammable lint buildup that can cause fires.
-
Improves Dryer Efficiency: A clean vent ensures the dryer works efficiently, reducing drying times and saving energy.
-
Extends Appliance Life: Regular vent maintenance helps your dryer run smoothly, reducing wear and tear and prolonging its lifespan.
-
Prevents Mold Growth: Proper venting reduces moisture accumulation, preventing mold and mildew growth in your home.
Why Cleaning Your Dryer Vent is Important
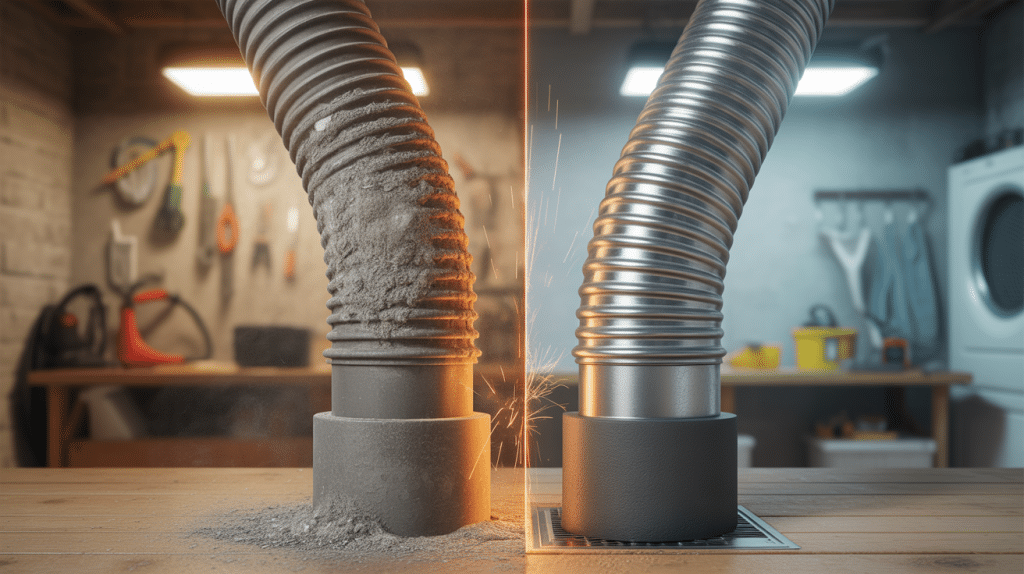
Cleaning your dryer vent is essential for safety, efficiency, and longevity. Regular maintenance can prevent potential hazards and improve the overall performance of your appliance.
1. Fire Safety
Lint buildup in dryer vents is highly flammable and can easily ignite, leading to dangerous fires. Cleaning your vent reduces this risk and ensures the safety of your home and loved ones.
2. Improved Efficiency
A clogged vent forces your dryer to work harder, increasing energy consumption and drying times. Regular vent cleaning allows your dryer to operate more efficiently, saving both time and money on energy bills.
3. Longer Dryer Lifespan
A clean vent helps your dryer run smoothly, preventing overheating and wear. This extends the lifespan of your appliance and helps avoid costly repairs or premature replacement.
What You’ll Need to Clean a Dryer Vent on the Roof
Cleaning your dryer vent on the roof requires some essential tools and safety measures. Here’s a list of what you’ll need to make the job easier and safer.
| Category | Item | Purpose |
|---|---|---|
| Safety Equipment | Gloves | To protect your hands from debris and sharp edges. |
| Sturdy Ladder | To safely reach the vent on the roof. | |
| Non-Slip Shoes | To ensure stability while on the ladder or roof. | |
| Protective Eyewear | To shield your eyes from dust and debris. | |
| Cleaning Tools | Vent Cleaning Brush | To scrub away lint and blockages in the vent. |
| Vacuum with Hose Attachment | To remove loosened lint and debris from the vent. | |
| Flashlight | To inspect the vent and ensure it’s clear of obstructions. | |
| Dryer Vent Cleaning Kit | A complete kit to assist with cleaning, often including various brushes and extensions. | |
| Helper (Optional) | Assistant | Having someone assist can be helpful, especially when using a ladder, to ensure safety and support during the process. |
Step-by-Step Guide to Cleaning a Dryer Vent on the Roof
Follow this detailed step-by-step guide to ensure you clean your dryer vent thoroughly and safely. Each step is designed to help you avoid common mistakes while performing this essential task.
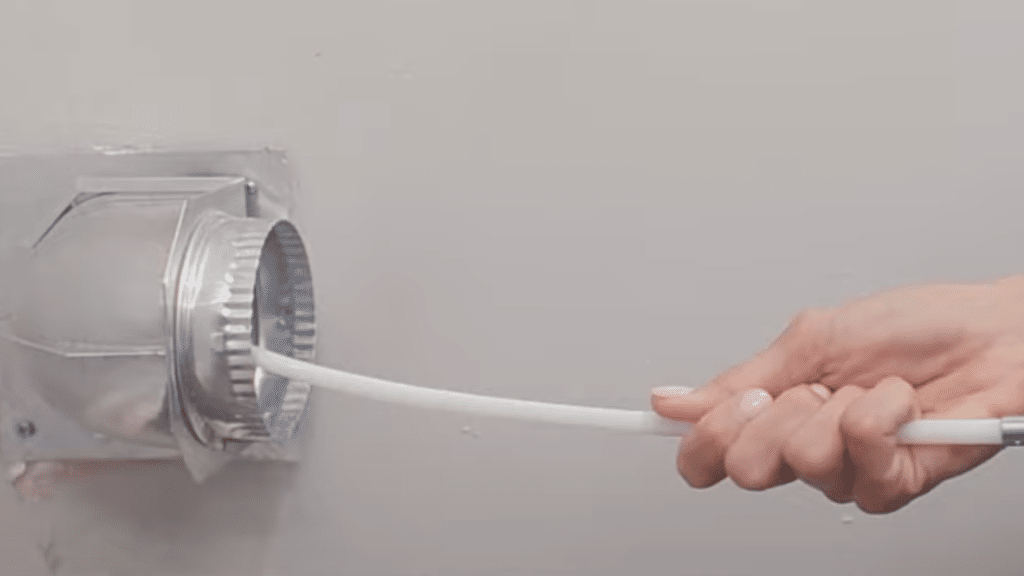
Step 1: Unplug the Dryer and Disconnect the Vent
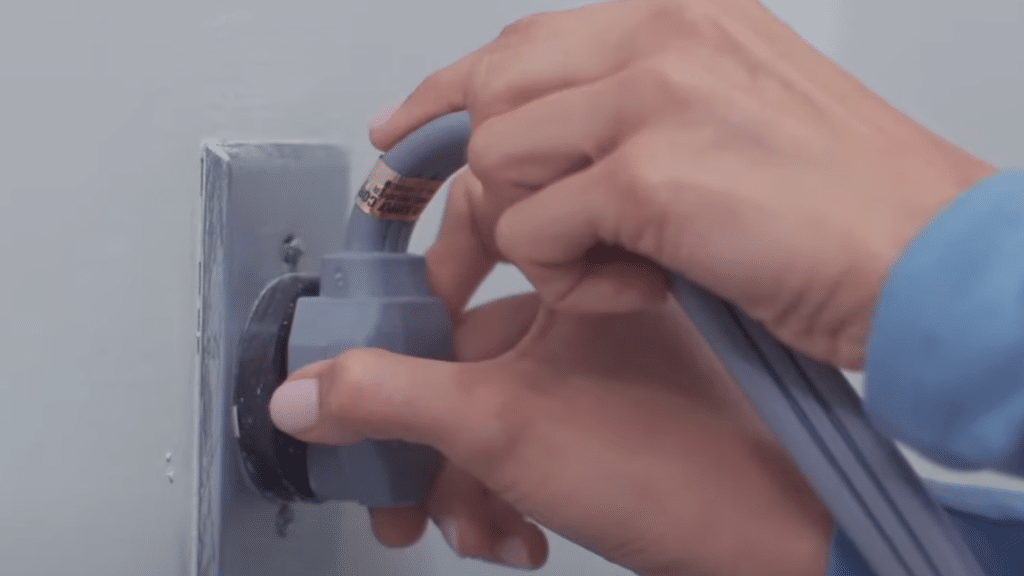
Begin by pulling the dryer away from the wall to create enough space for cleaning. Unplug the dryer to ensure safety during the process. Then, locate and disconnect the vent, which may require removing the vent clamp with a screwdriver.
Step 2: Vacuum the Vent and Duct
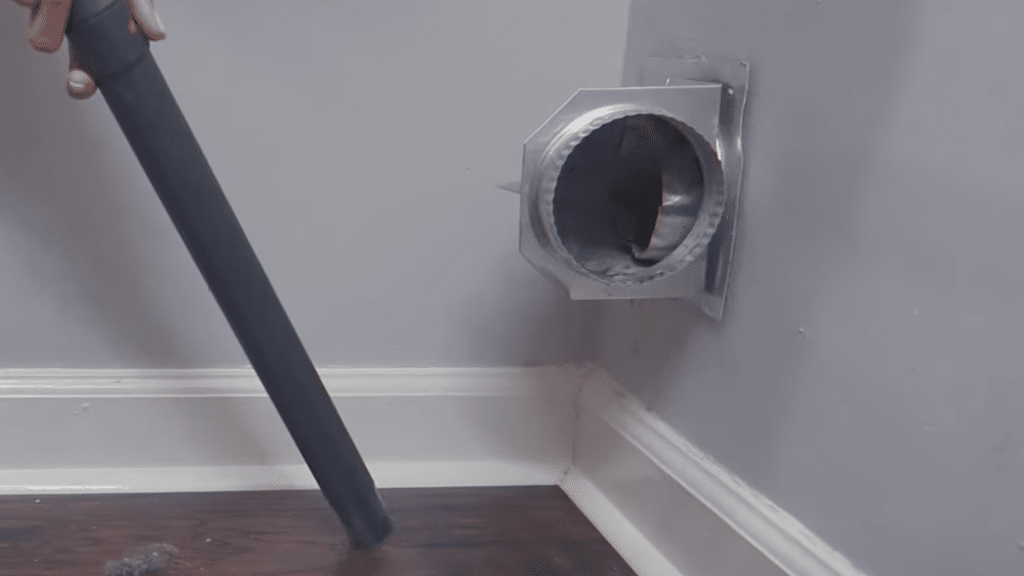
Use a vacuum with a hose attachment to clean the hole around where the duct meets the wall. To make the process easier, detach the duct from the wall if needed. Be sure to remove as much lint as possible, both by hand and using the vacuum inside the hose.
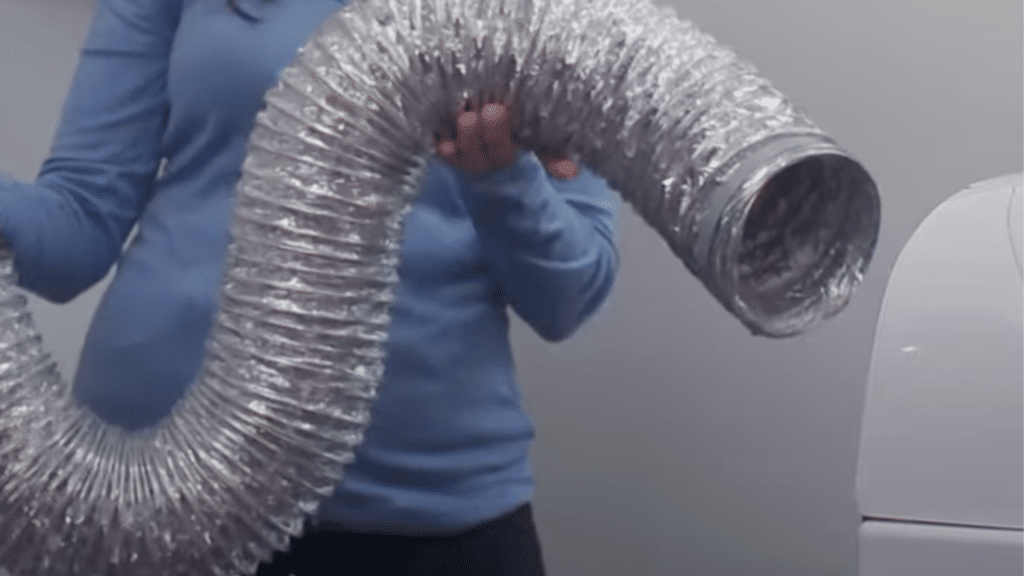
Step 3: Clean the Vent with a Brush
Feed a brush into the duct, starting from the higher side of the vent and moving it back and forth. Rotate the brush slightly as you move it through to ensure all lint is dislodged. Extend the brush as needed to reach deeper into the duct.
Step 4: Inspect and Reattach the Ductwork
Inspect the ductwork for any signs of damage and replace any damaged sections. Once the duct is clear and undamaged, reattach the ductwork and secure the vent cover in place. Ensure everything is tightly connected to prevent future issues.
Step 5: Clean the Lint Screen and Filter Housing
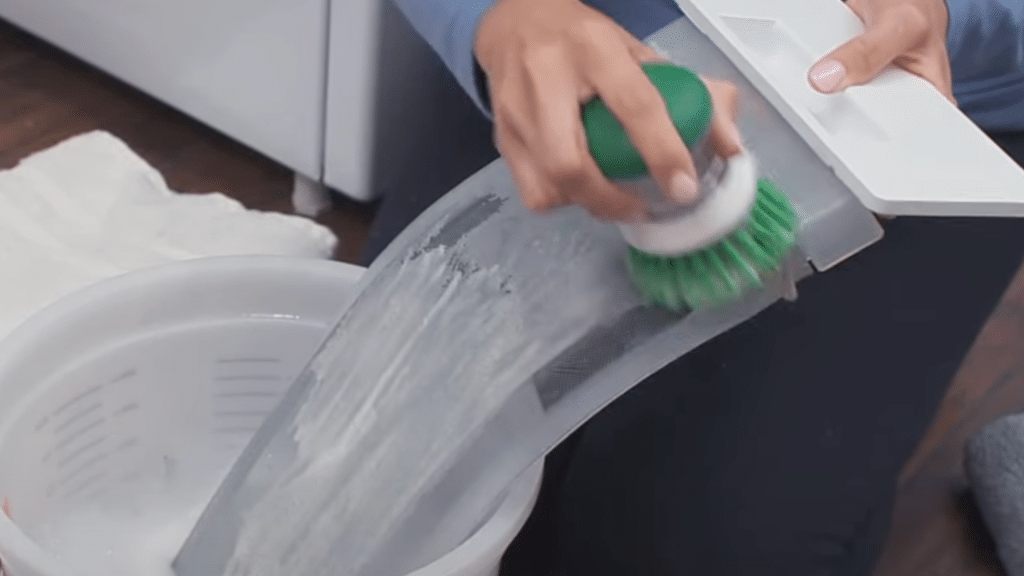
Remove the lint screen and vacuum around the filter housing to clear any lint that may have accumulated. Use a scrub brush with soapy water to clean any residue from the lint filter. After cleaning, rinse the filter and dry it with a towel.
Video Tutorial
Special thanks to The Home Depot for providing the detailed steps for cleaning a dryer vent. Please visit their channel for additional guidance and helpful tips.
Tips for Maintaining a Clean Dryer Vent
Maintaining a clean dryer vent is essential for the safety, efficiency, and longevity of your dryer. Here are some simple tips to keep your vent in top condition.
-
Clean Every 6-12 Months: To maintain safety and efficiency, it’s recommended to clean your dryer vent at least once or twice a year. Regular cleaning helps reduce the risk of fires and ensures optimal dryer performance.
-
Avoid Debris and Obstacles: Make sure the area surrounding your dryer vent is free from clutter and debris. Keeping the area clear allows for better airflow and prevents blockages that could hinder the vent’s function.
-
Catch Lint Before It Reaches the Vent: Install a lint trap inside the dryer to catch as much lint as possible before it enters the vent system. This can reduce lint buildup and improve airflow, enhancing both safety and efficiency.
When to Call a Professional
Knowing when to call a professional for dryer vent cleaning can prevent further issues and ensure your dryer operates safely and efficiently.
-
Longer Drying Times: If your clothes take longer to dry than usual, it could be a sign of a clogged vent. A buildup of lint or debris restricts airflow, making the drying process less efficient.
-
Burning Smells: A burning odor during drying cycles could indicate that lint has caught fire or is overheating within the vent system, signaling a severe clog.
-
When It’s Too Difficult or Dangerous: If cleaning the vent feels overwhelming or unsafe, or if you can’t reach it easily, it’s time to call a professional. A technician can thoroughly clean the vent and ensure it’s free from blockages, reducing the risk of fire and improving your dryer’s efficiency.
Conclusion
Cleaning your roof dryer vent doesn’t have to be a headache. With the right tools, safety gear, and these simple steps, you can keep your home safe and your dryer running smoothly.
Remember the basics: cut the power, use a sturdy ladder, wear non-slip shoes, and bring a buddy. Clear away debris, brush out lint, and test your work when finished.
Regular cleaning prevents fires, saves energy, and extends the life of your dryer. Mark your calendar for a seasonal check, and your future self will thank you!
Are you having trouble reaching your roof vent? Don’t risk it, call a pro who handles these jobs daily.
What’s your experience with dryer vent cleaning? Please share your tips in the comments below or check out our guide on indoor vent maintenance for more home safety advice.