
Those beautiful hardwood floors in your home? They need proper protection to stay that way.
Sealing hardwood floors isn’t just about making them shine – it’s about defending them against daily life. Coffee spills, pet claws, heavy furniture, and everyday foot traffic can all take a toll over time.
The good news is that sealing your floors is something many homeowners can handle themselves with the right tools and a little patience.
In this guide, we’ll walk through the entire process of sealing hardwood floors – from picking the right product to applying the final coat.
If you’re freshening up existing floors or even if finishing newly installed wood, these steps will help you get professional-looking results that protect your investment for years to come.
Ready to give your floors the care they deserve? Let’s get started with everything you need to know.
Why is it Important to Seal Hardwood Floors?
Sealing hardwood floors creates a crucial protective barrier against everyday threats. Without this shield, wood readily absorbs moisture from spills and humidity, leading to warping, swelling, and even rotting over time.
The sealant also prevents stains from penetrating the wood when accidents happen, giving you precious time to clean up before permanent damage occurs.
Beyond moisture protection, seals defend against scratches from furniture, pets, and foot traffic while making routine cleaning significantly easier.
Perhaps most importantly, proper sealing dramatically extends the lifespan of hardwood floors, protecting your investment for decades rather than years. For the relatively small effort required, sealing delivers tremendous long-term value.
Materials Required for Floor Refinishing
This table outlines the necessary materials and their respective purposes during the floor refinishing process.
| Material | Purpose |
|---|---|
| Liquid Nails | Used to secure larger floorboards in place, preventing squeaks. |
| Nail Gun | To drive nails into the floorboards for added security. |
| Pre-drilled Nails | Hand-nailing certain areas to avoid cracking the boards. |
| Shop Vac | Used for cleaning dust and debris from the floor before sealing. |
| Wet Rag | Wiping the surface down after vacuuming to remove any remaining dust. |
| Water-based Polyurethane | Provides a protective and durable finish, without yellowing, ensuring long-lasting results. |
| Lamb’s Wool Applicator | Used to apply the polyurethane evenly for a professional finish. |
| Hood and Protective Clothing | Prevents hair or dirt from contaminating the finish while applying the polyurethane. |
Step-by-Step Guide to Seal Hardwood Floor
This guide outlines six essential steps for preparing and sealing floorboards, from preparation to finishing. Follow each step carefully to achieve a durable, professional-looking floor with a long-lasting finish.
Step 1: Prepare and Secure the Floorboards
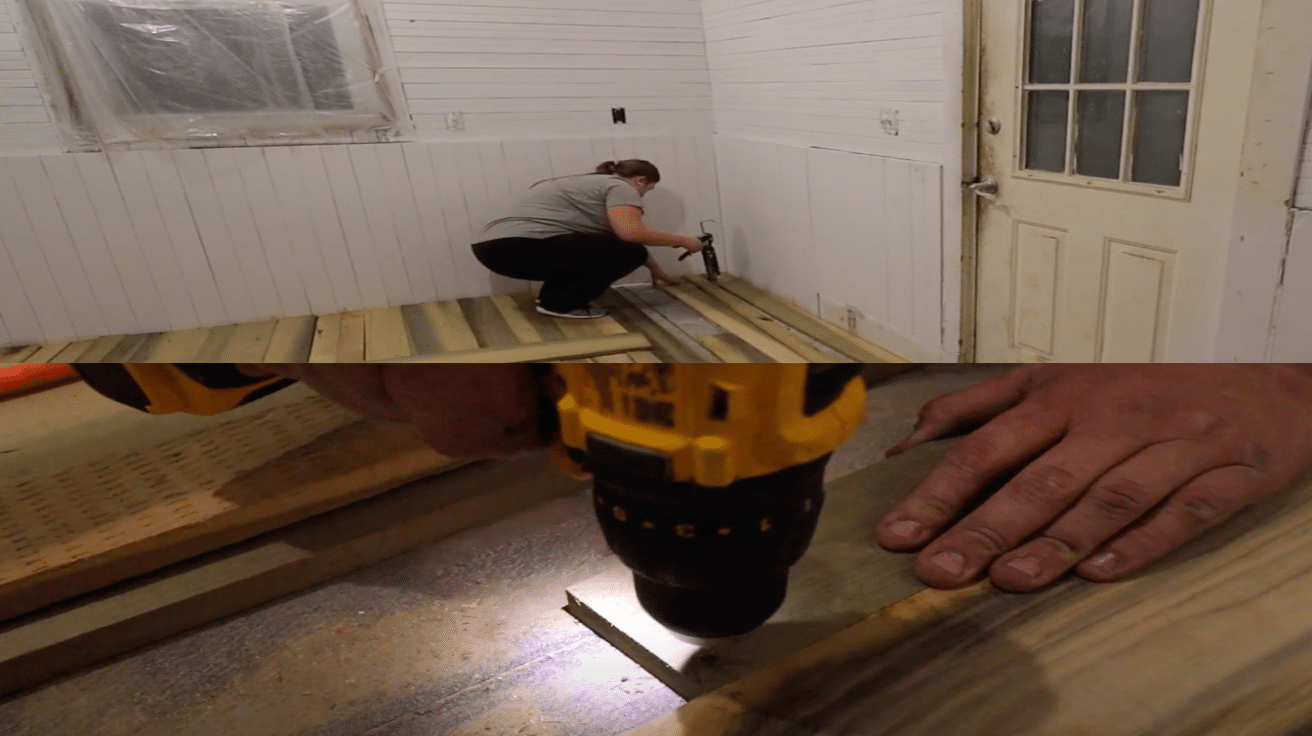
Begin by laying out your floorboards to ensure they fit properly and that you’re happy with the layout. Take your time to check for any necessary adjustments before securing them.
Once you’re satisfied, it’s time to secure the boards. Use liquid nails to bond the larger floorboards to the subfloor. The liquid nails will prevent squeaking when walking on the floor.
After that, use a nail gun to fasten the boards further. For some areas, you may need to pre-drill and hand-nail the boards to prevent cracking.
Step 2: Nail the Floorboards
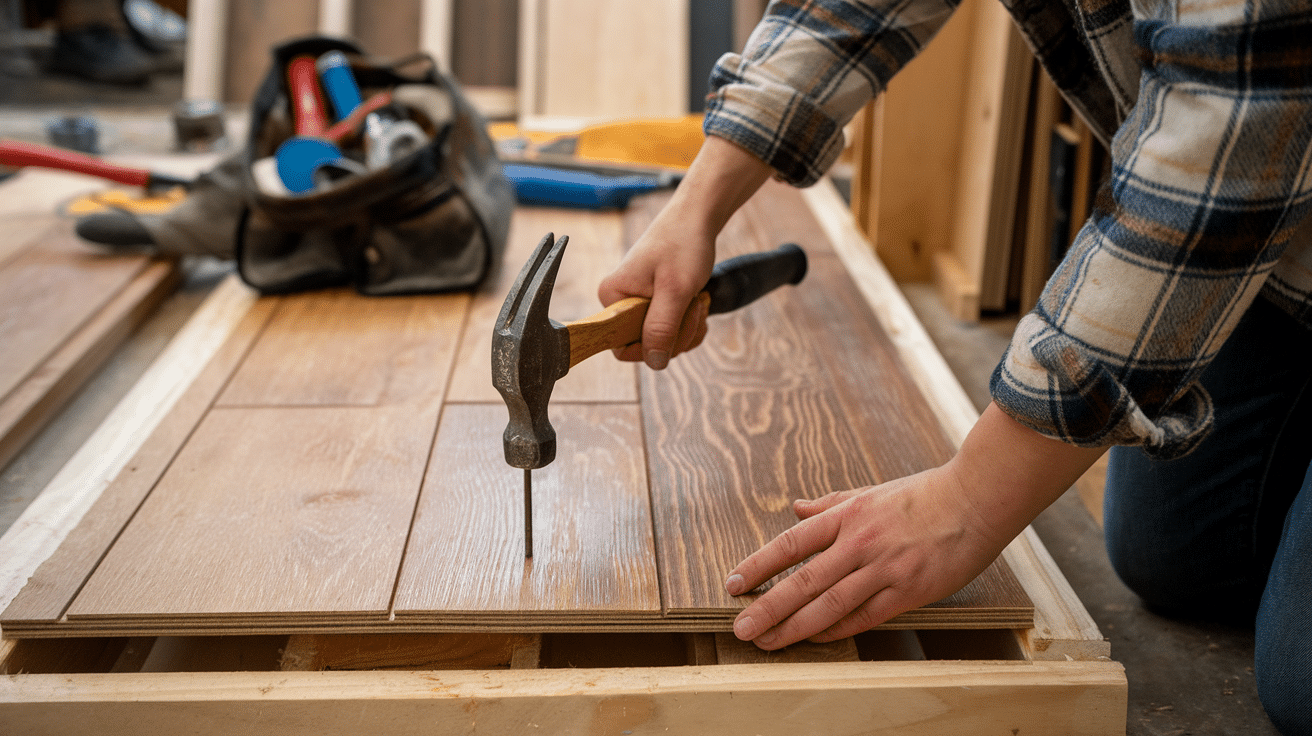
After securing the floor with liquid nails, move on to nailing the boards down with a nail gun. Since the boards are not traditional flooring, you will need to nail through the top.
Try to use old nail holes for a seamless look. This method helps avoid visible marks and ensures a clean, consistent finish. This is where your floorboards will start to feel more secure and stable.
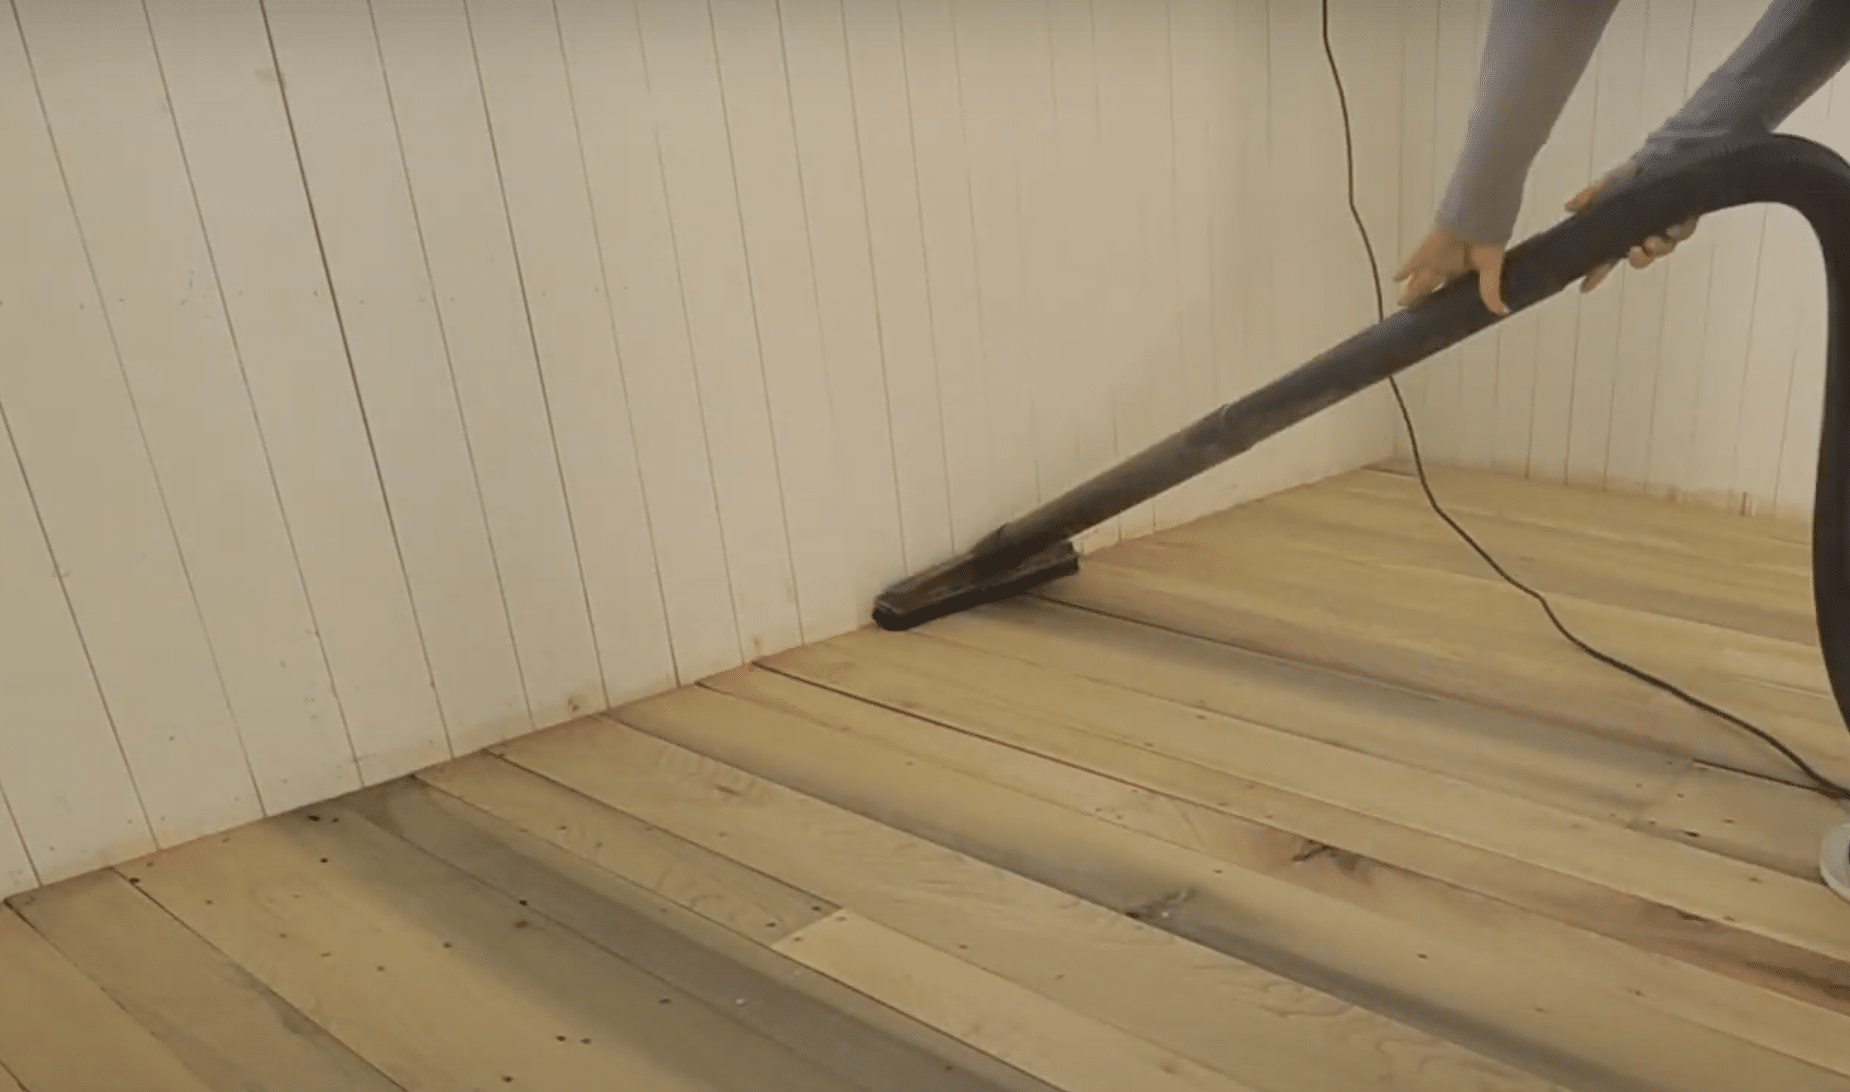
Step 3: Sweep and Clean the Floor
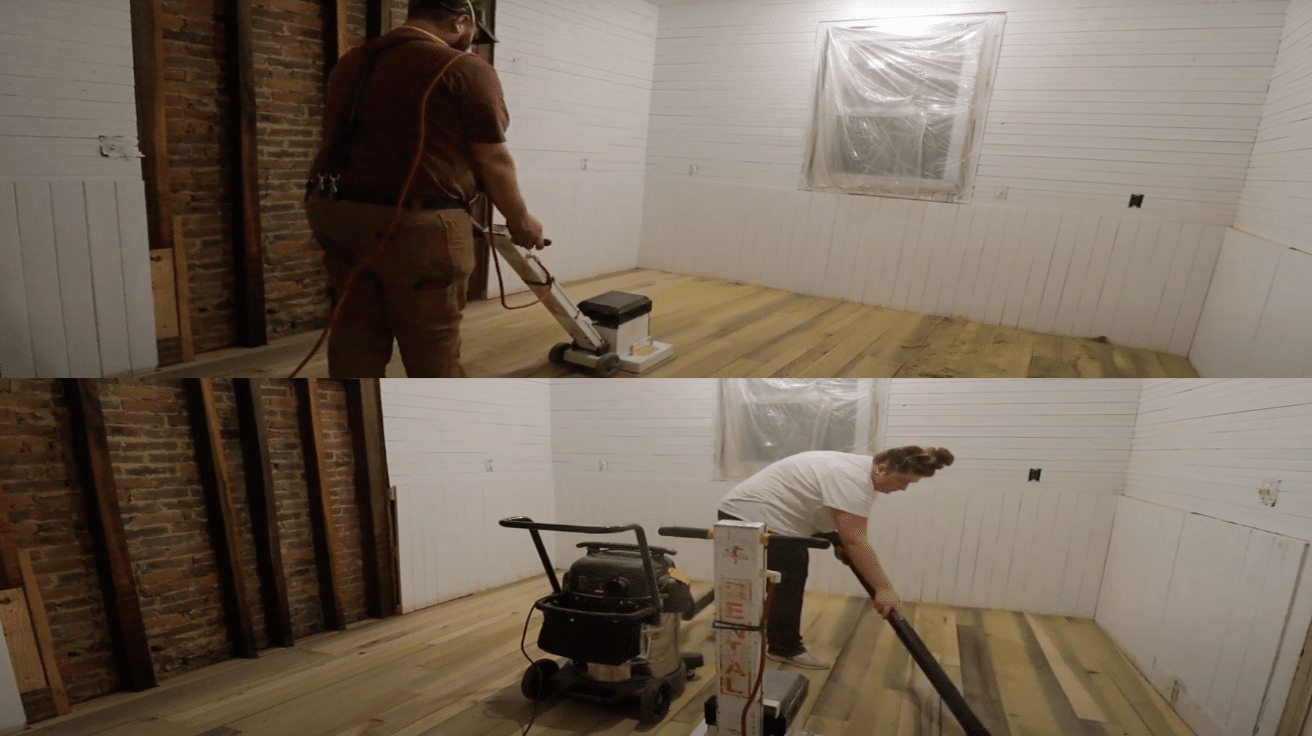
Before applying any finish, it’s crucial to clean the floor thoroughly. Use a shop vac to remove all the dust and debris from the surface. Sweep multiple times to ensure the floor is as clean as possible.
Once you’ve vacuumed, go over the floor with a wet rag to remove any remaining dust. The cleaner your floor is, the better your sealer will adhere, resulting in a smoother and more professional finish. .
Step 4: Prepare and Choose the Sealer
Now it’s time to decide on the type of sealer you’ll be using. A water-based polyurethane is an excellent choice as it will protect the floor without yellowing, which can occur with oils like linseed.
Water-based polyurethane keeps the natural look of the wood, offering durability while maintaining a clean, neutral appearance. For application, use a lamb’s wool applicator specifically designed for water-based finishes to ensure an even spread of the sealer.
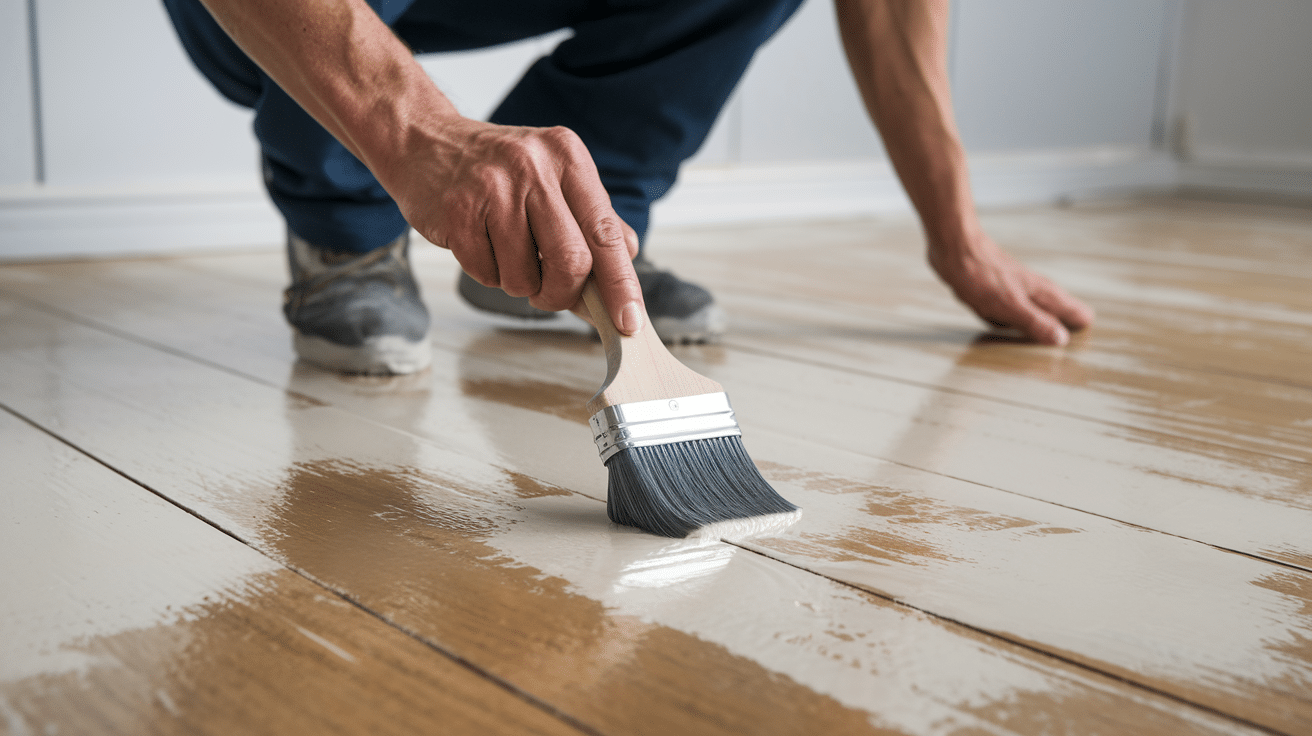
Step 5: Apply the Coat of Sealer
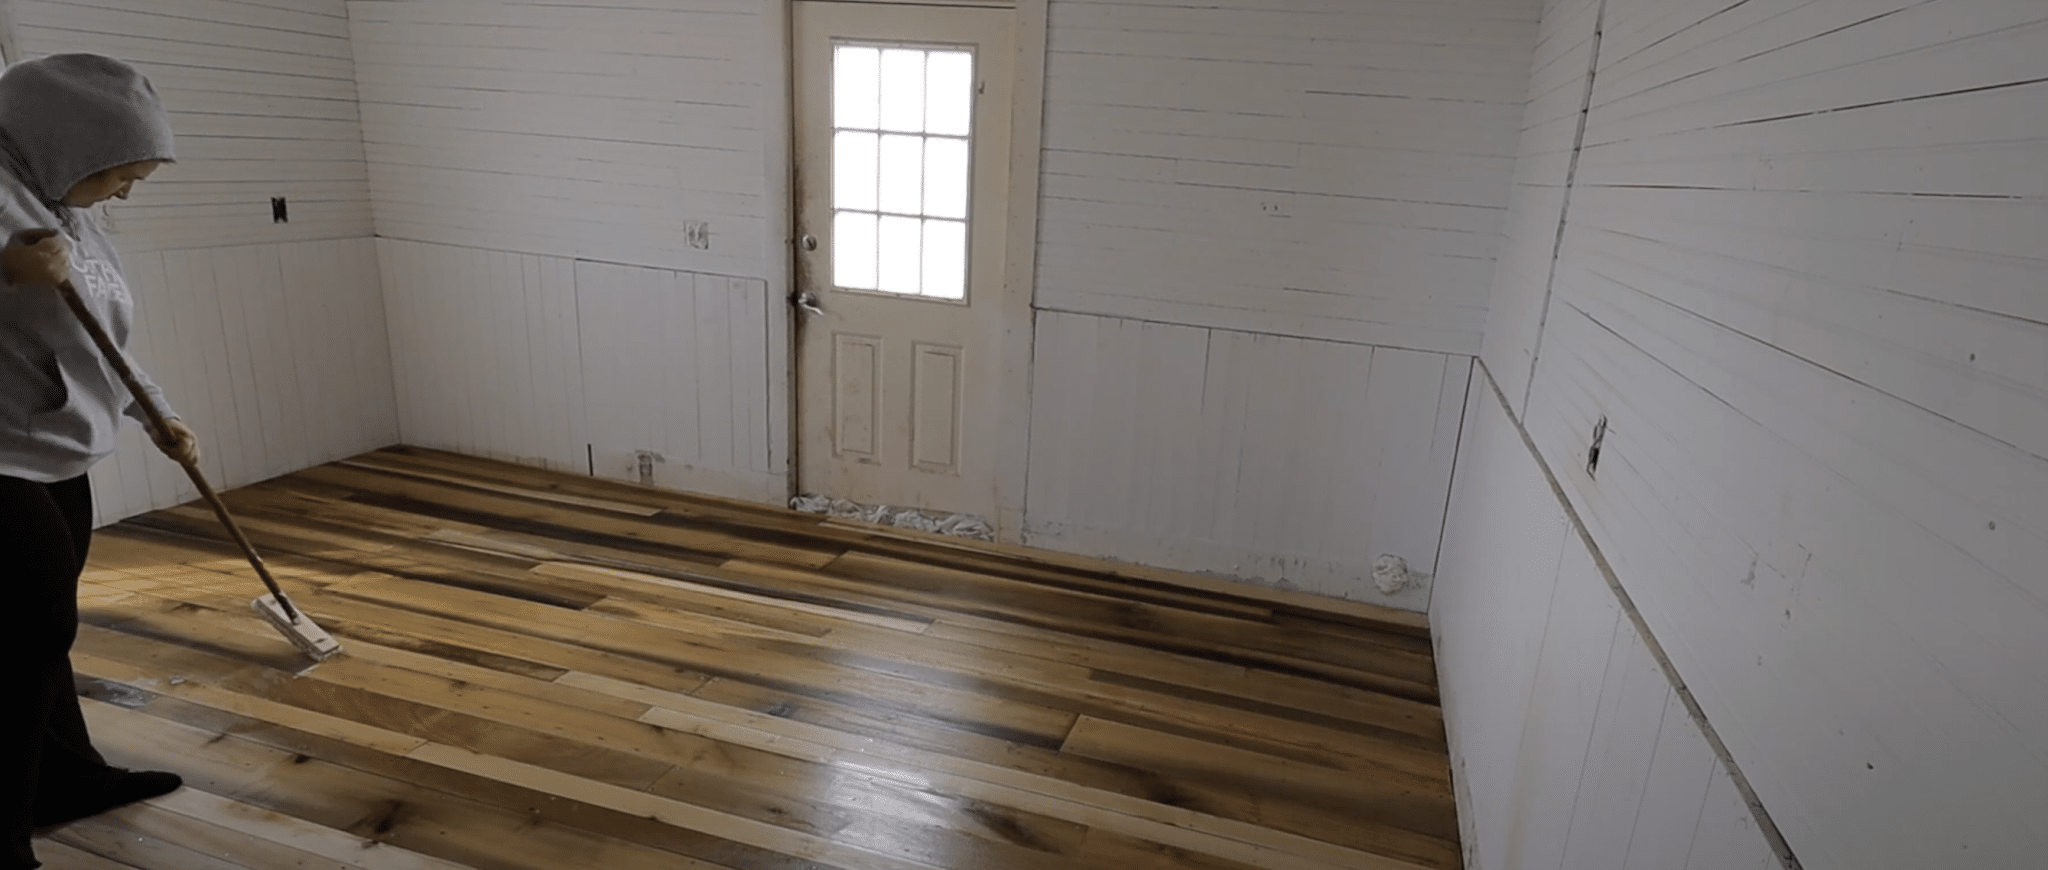
Carefully apply the first coat of polyurethane, making sure to work slowly and evenly. As you apply, pay attention to avoid getting hair, dirt, or other contaminants on the wet surface.
You can wear a hood and clean clothing to minimize the risk of contamination. The first coat will leave a slight shine but should still maintain the wood’s natural muted tones.
After applying the first coat, let it dry for a few hours.
Step 6: Apply Additional Coats and Let the Floor Cure

Once the first coat has dried, it’s time for the second coat. Follow the manufacturer’s instructions and apply the second coat within the recommended time window, which is typically between two to eight hours after the first coat.
Let the coats cure for at least a few hours before applying another. Allow the floor to cure fully for seven to nine days before moving furniture back onto the floor. This curing time will ensure that the polyurethane hardens completely.
Video Tutorial
For more information, check out this video tutorial by LewisAcresHomestead
Tips for Maintaining Your Sealed Hardwood Floors
Your newly sealed hardwood floors will need ongoing care to maintain their beauty and extend their lifespan. These simple maintenance tips will help keep them looking their best for years to come.
- Regular dust removal is essential for preserving your sealed hardwood floors. Use a microfiber dust mop or vacuum with a soft floor attachment at least twice weekly to remove abrasive particles.
- Develop a strategic cleaning routine that includes weekly damp mopping with a cleaner specifically formulated for your type of wood floor finish.
- Create a protective barrier in high-traffic zones by strategically placing area rugs and runners in entryways, hallways, and in front of sinks. Ensure these rugs have proper non-slip padding that won’t trap moisture.
- Implement a strict spill management policy in your household, addressing all liquid accidents immediately with an absorbent cloth. Even water can damage sealed floors if left standing, while acidic liquids like wine require especially prompt attention.
- Maintain optimal indoor humidity levels between 35-55% throughout all seasons to prevent the wood from expanding or contracting. Consider using a humidifier during dry winter months during humid summers for a stable environment.
Sealed and Protected: The Final Word
Sealing your hardwood floors takes time and effort, but the results are worth it.
A properly sealed floor not only looks better but will stand up to years of daily life – from kids and pets to spills and furniture scratches.
Remember that maintenance matters just as much as the initial sealing. Regular cleaning with the right products and touching up worn spots before they become problems will extend the life of your sealing job significantly.
Don’t rush the process. Each step – from thorough preparation to allowing proper drying time – plays a crucial role in getting results that last.
With your newly sealed floors complete, you can enjoy both their beauty and durability for years to come. The pride of having done it yourself makes those gleaming floors even more satisfying.
What room will you tackle next?